
Did you know that you can edit videos in Lightroom? Lightroom allows you to use some of the tools in the program to make the same edits to videos that you can make to still images.
Hello! I’m Cara and I’m a pictures gal. I don’t work much with video, so it’s handy to be able to use a program that I already know how to use to make basic video edits.
The same can be true for you, let me show you how to edit videos in Lightroom!
Table of Contents
Limitations of Editing in Lightroom
Before we jump in, let’s look at the scope of editing videos in Lightroom. The program is not primarily designed as a video editing tool so there are some limitations.
You can’t use Lightroom to edit together multiple clips, add visual effects, or create scene transitions. If you want to make these or other large-scale changes, you’ll need a professional video editing program like Adobe Premiere Pro.
However, you can use all the tools in Lightroom to apply the same edits to videos that you can apply to still images. This includes white balance, color grading, the tone curve – almost everything that you can do with still images.
You can even use your favorite Lightroom presets on videos!
This is very handy for creating consistency across your work. You can use the same presets on still images and videos to create a similar look.
Let’s look at how it works!
Note: the screenshots below are taken from the Windows version of Lightroom Classic. If you are using the Mac version, they will look slightly different.
Importing Your Video into Lightroom
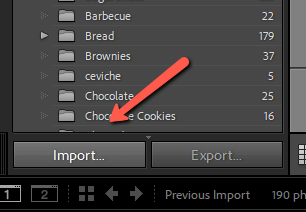
You’ll need to import your video into Lightroom just as you would import an image. Open the Library module in Lightroom and click Import in the lower left-hand corner.
Navigate to wherever your video is located. Make sure there is a checkmark in the upper right corner.
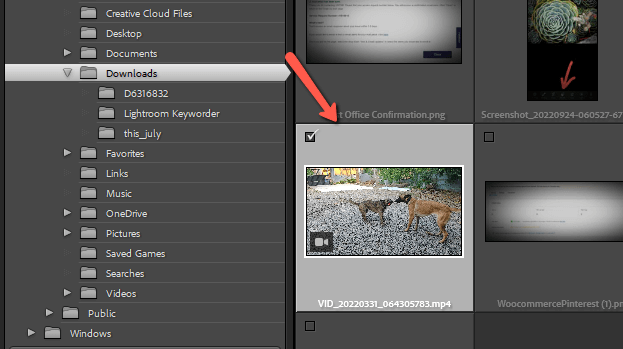
Click Import on the lower right side of the screen. Lightroom will bring the video into the program just as it would an image.
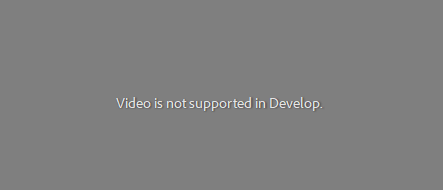
Here’s where the major difference lies between editing photos and videos in Lightroom. Whereas you would normally use the Develop module to edit images, editing videos is not supported in that module.
If you switch to the Develop module, you’ll get this warning.
This is where most people usually give up and assume that you can’t edit videos in Lightroom. However, did you know that you can apply edits in the Library module as well?
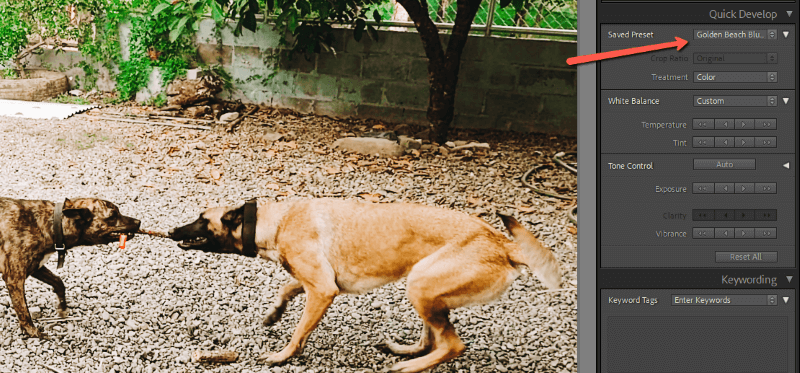
On the right side of your workspace, under the Quick Develop tab, you can make adjustments to the image.
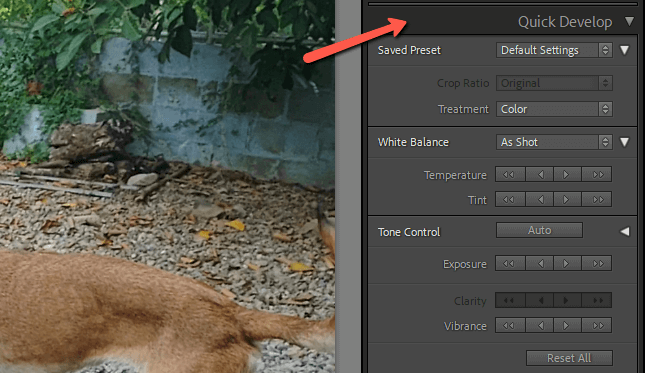
You can adjust the White Balance and there are a few Tone Control settings to adjust the exposure as well as the vibrance and clarity.
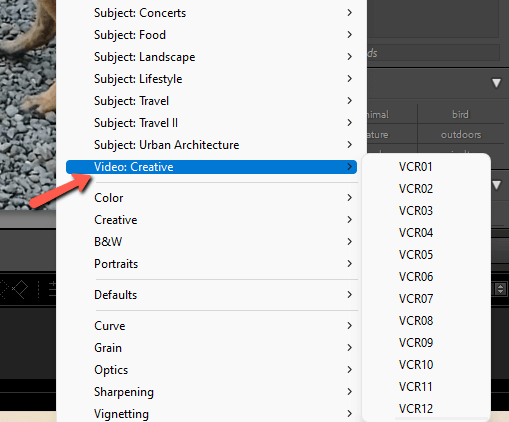
You can also add presets by clicking the dropdown menu next to Saved Preset. Your list of presets appears, including some presets specifically for video editing that comes with Lightroom.
Apply presets and edits as desired. They affect the video frame by frame all the way from start to finish.
How to Edit a Video in Lightroom
However, you’ll quickly notice that this is a much-abbreviated version of the Lightroom editing options available in the Develop module. Photo editors will quickly feel limited by the editing options available in the Library module.
But, we can apply presets, which means there is an easy way to get around this. All you have to do is apply your favorite preset to your video to get a look consistent with the rest of your work. Adjust the white balance and tone control for this specific video and you’re good to go!
But one more problem crops up. As you know, presets don’t always work 100% for each image. You may have to adjust a few settings unique to the individual image you’re working with.
The same thing happens with video, but now you don’t have access to all the Develop module settings.
Or do you?
To get around this, you can capture a still image from the video. You can take this image into the Develop module where you can apply edits to your heart’s content. Save your edits as a preset and then apply them to your video. Boom-bam, shazam!
Note: not every setting that you can apply to still images can be applied to a video. Settings that can be applied include:
- Auto settings
- White balance
- Basic tone: includes Exposure, Blacks, Brightness, Contrast, Saturation, and Vibrance
- Tone Curve
- Treatment (Color or Black and White)
- Color Grading
- Process Version
- Calibration
Any settings not on this list (Transform, Noise Reduction, Post-Crop Vignetting, etc.) will not be applied to the image even if they are included in the preset.
So let’s break this down.
Step 1: Capture a Still Image
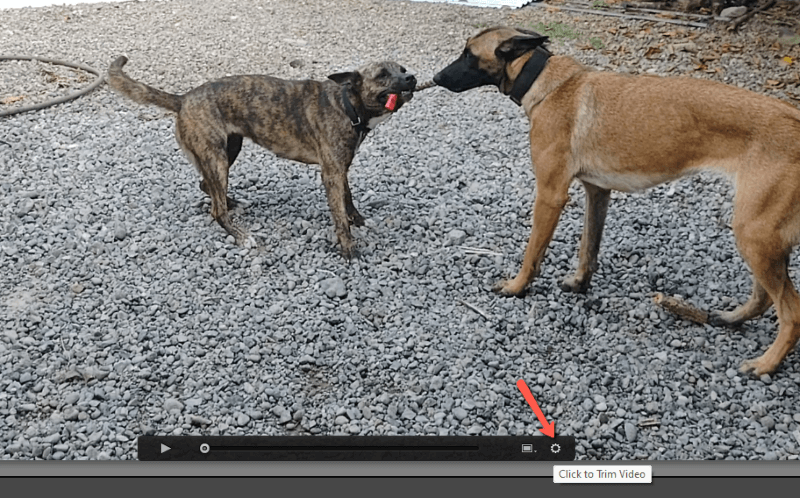
At the bottom of your video, you’ll notice a play bar. Click the gear icon on the right side to open up a frame-by-frame view of your video.
Drag the little bar along the frame-by-frame view to see each frame of your video. Choose a spot where you want to capture a still image. Remember, you might be doing this for editing purposes, but you can also use this technique to pull some awesome stills out of a video.
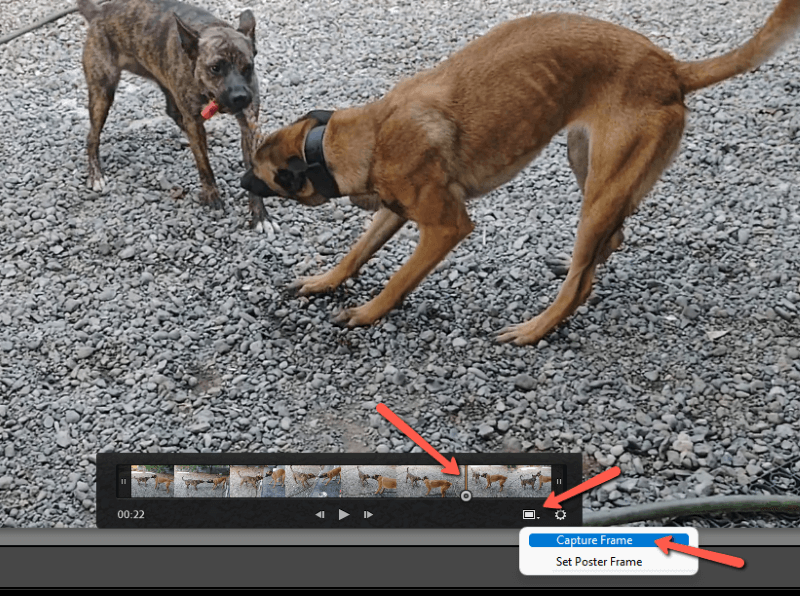
Click the little rectangle next to the gear icon on the bottom right of the frame view. Select Capture Frame from the menu.
Step 2: Find the Still Frame
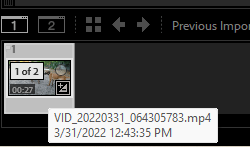
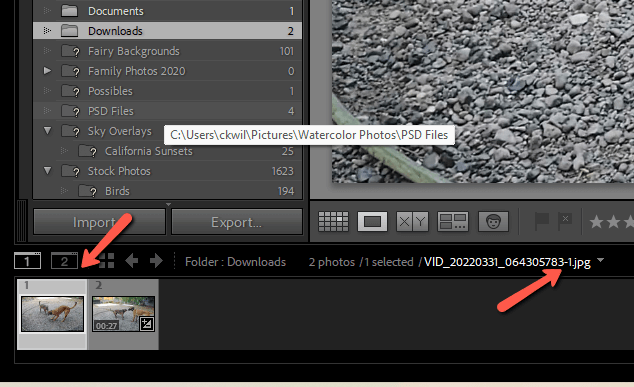
At first, it will seem like nothing happened. The still frame is added as a stack to the video. The only difference you’ll notice is that a little 2 flag will show up on the preview down in the film strip. (Or 1 of 2 when you hover over it).
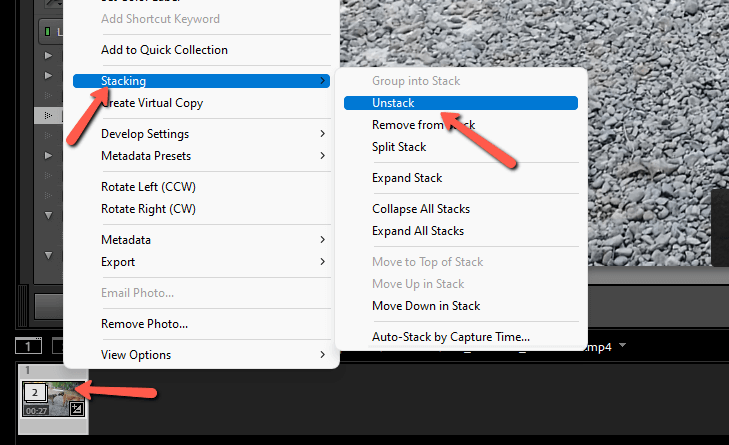
To access the image, you need to navigate back to the folder where the video is stored. (Yes, it seems like you’re already there, but the image won’t show up for you unless you re-enter the folder).
Once you’ve done this, right-click on the video. Hover over Stacking in the menu and click on Unstack.
Now you’ll see the still image appear next to the video. Notice that the file type is now .jpg.
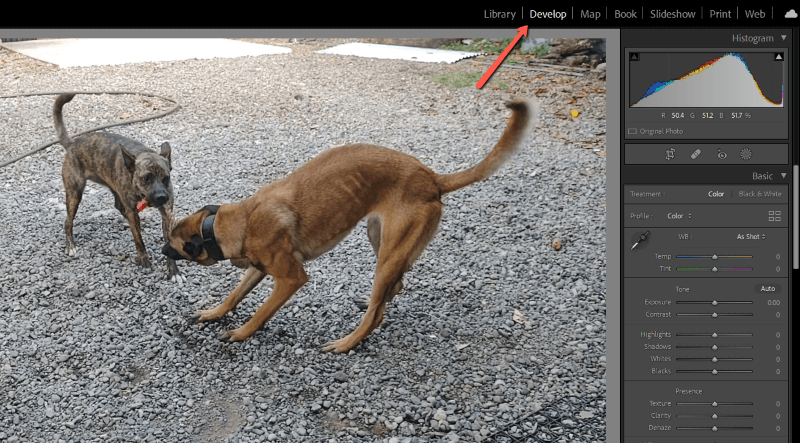
With the image selected, click the Develop module. Now, you’ll have access to all the editing tools.
Step 3: Edit the Image and Create a Preset
Edit the image as you normally would until you get the desired look. When you’re done, click on the plus sign in the top right corner of the presets panel.
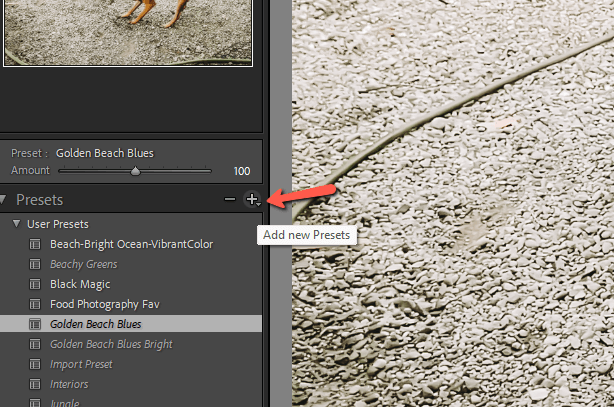
Save your edits as a new preset. Check out this tutorial for an in-depth explanation of creating presets. Name your preset something that you’ll remember and make a note of where you save it.
Now go back to the Library module and apply your preset to the video.
Step 4: Export Your Video
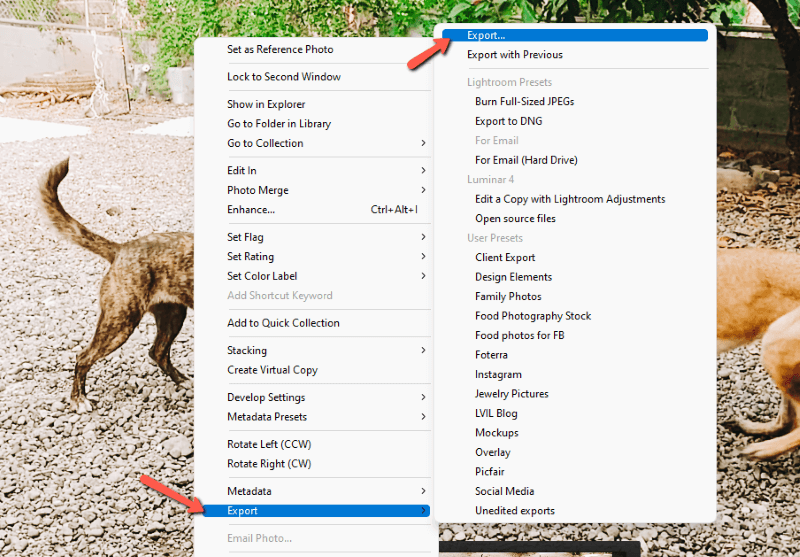
You have to export your video from Lightroom when you’re done just as you have to export images.
Exporting your video is the same as exporting images. Right-click on the video, hover over Export and choose Export from the menu.
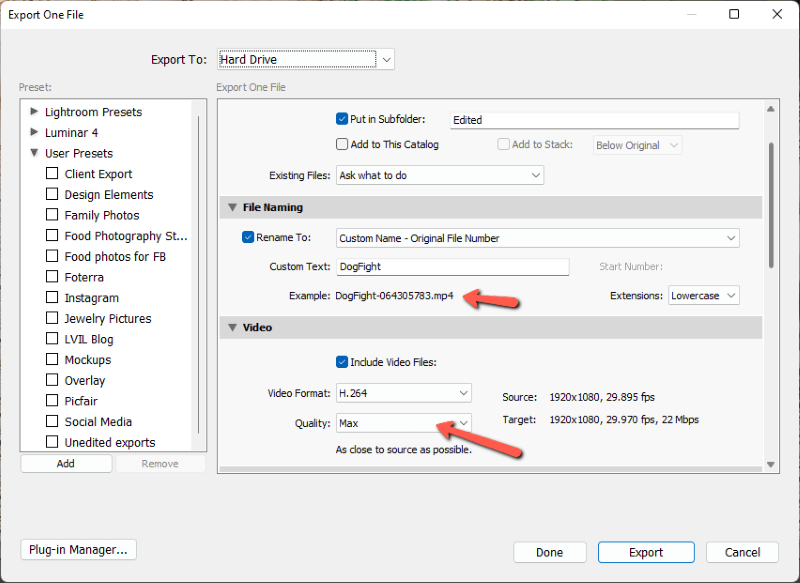
The same export box will pop up that you see for images. But notice this time that instead of exporting to a .jpg, the file is exporting to a .mp4. In the Video section, make sure the Quality is set to Max for the best results. Click Export.
And there you have it! Now you can intermix videos with your still images while maintaining a consistent look between the two types of content.
Curious about how to fix overexposed photos (or videos) in Lightroom? Check out how to do it here!