
Do you ever feel like your workspace in Lightroom is just too cluttered? I get it. When you’re working with a few hundred images at a time, it can get overwhelming.
I’m Cara and I’ll be the first to admit that the number of photos I take adds up quickly. I suppose that is one of the downfalls of digital. Photographers aren’t as limited as we once were by the abilities of our equipment.
However, Lightroom has a simple organizational answer for us when dealing with lots of similar images. It allows us to group images into stacks to tidy up the workspace and make things easier to find.
Curious how this works? Let’s look at how to stack photos in Lightroom.
Table of Contents
Why Stack Photos in Lightroom?
Creating stacks is purely an organizational feature. Edits you apply to an individual image in a stack only apply to that image but it won’t affect the others. And if you put a stacked image into a collection, only that individual image will go to the collection.
However, this is a handy feature when you would like to group similar images together and clean up your film strip a little.
For example, say you have 6 images of the same pose during a portrait session. You don’t want to delete the other 5 just yet, but you also don’t need them cluttering up your filmstrip. You can put those in a stack.
It’s also really helpful when shooting in burst mode. You can even automatically stack images like this by telling Lightroom to stack images that were taken within 15 seconds etc.
Now, let’s look at the nuts and bolts of how this works.
Note: the screenshots below are taken from the Windows version of Lightroom Classic. If you are using the Mac version, they will look slightly different.
How to Stack Images in Lightroom
You can stack images in both the Library and Develop modules. Check out the detailed steps below.
Note: You can’t stack images in collections and the feature only works in the folder view.
Step 1: Select the photos you would like to group together. The first photo you select will be the top image, regardless of the photo’s actual order.
To select multiple photos in Lightroom, hold Shift while clicking the first and last photos in a series. Or hold Ctrl or Command while clicking individual photos to group nonconsecutive images.
Photos do not have to be consecutive to be placed into a stack.
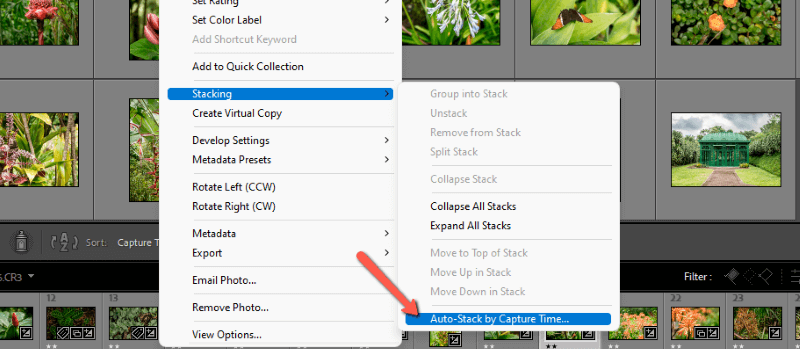
Step 2: With the photos selected, right-click to access the menu. You can do this either in the Grid view in the Library module or in the filmstrip at the bottom of the workspace. Hover over Stacking and choose Group into Stack.
Or you can use the Lightroom stacking shortcut Ctrl + G or Command + G.
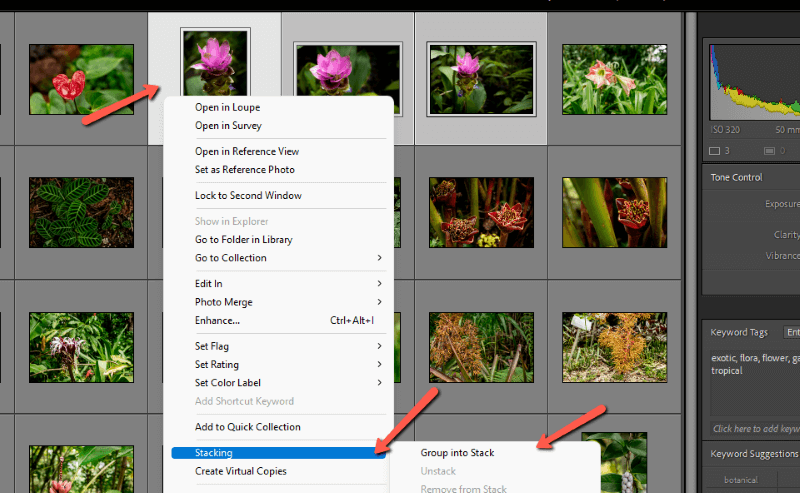
In this example, I selected these three purple flowers. The first image on the left is the one I clicked first and will show up on the top of the stack. This is denoted by the lighter gray color.
If you want one of the other images to be on top, you can click on it to move the light gray box. Make sure to click within the actual photo. If you click the gray space around it, the program will deselect all the images.
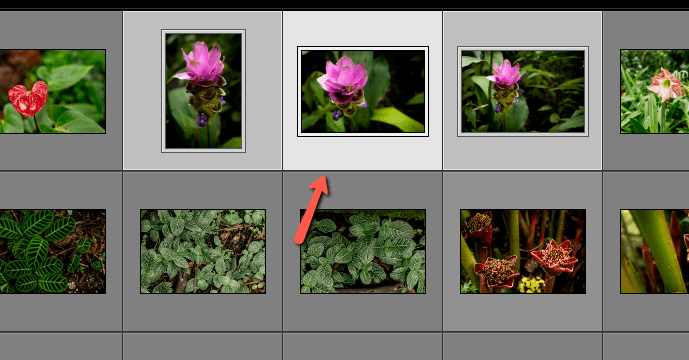
In this example, the middle image will appear on top of the stack.
Once the images are stacked, they will collapse together. In the filmstrip (but not in the Grid view) a number will appear on the image to indicate how many images are in the stack.
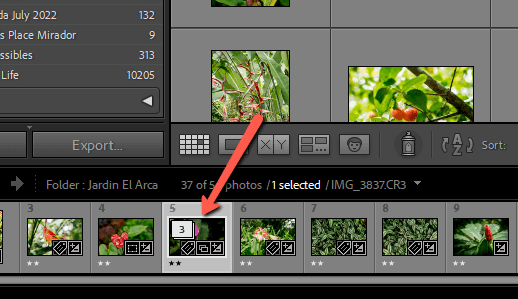
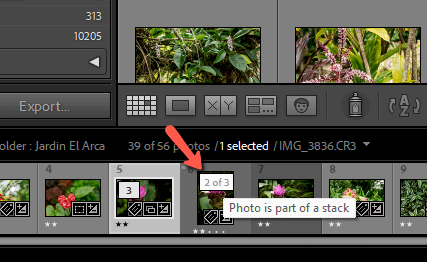
Click on the number to expand the stack and view all the images. Each one will appear with two numbers indicating the total number of stacked images and the individual image’s position in the stack. Click again to collapse the images back into the stack.
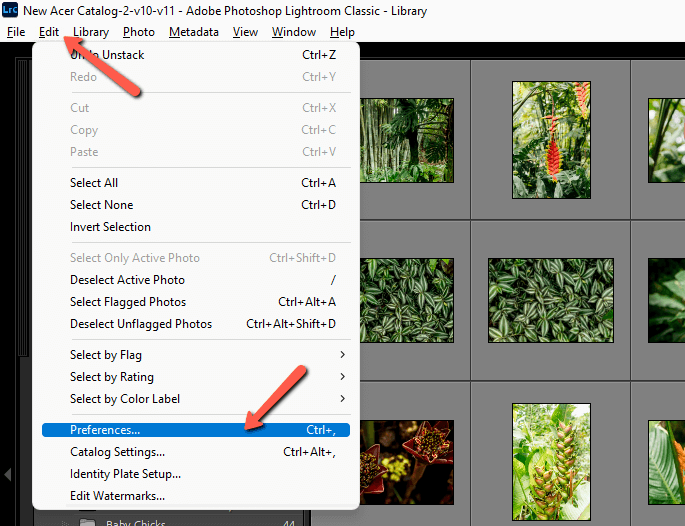
Note: if this number does not appear, go to Lightroom’s Edit menu and choose Preferences.
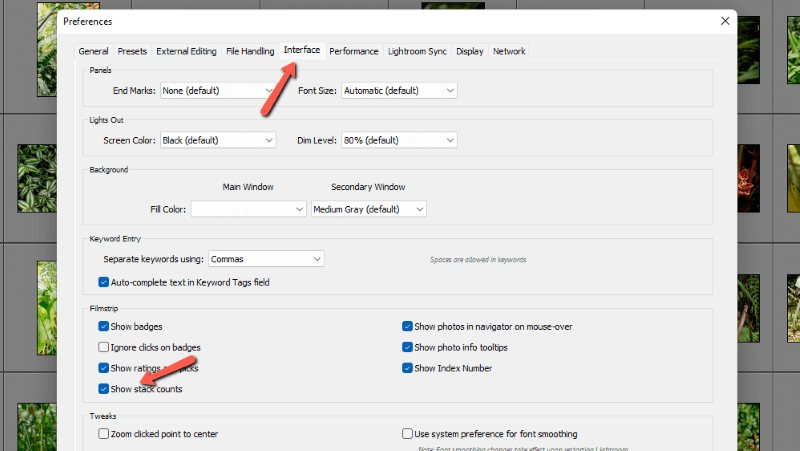
Click the Interface tab and check the box Show Stack counts. Press OK.
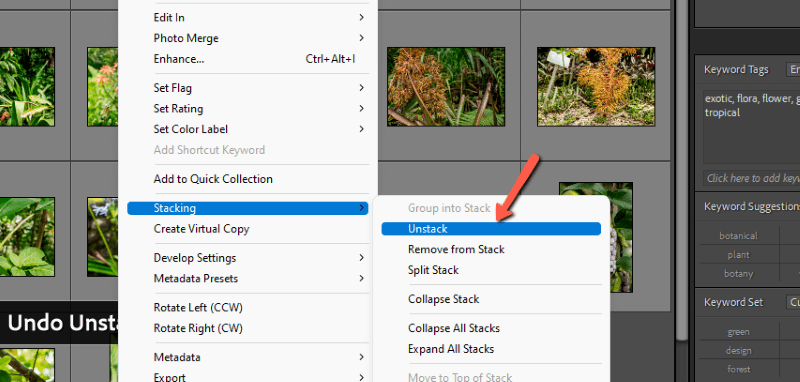
If you want to unstack the images, right-click and go back to that Stacking option. Choose Unstack. Or hit Ctrl +Shift + G or Command + Shift + G to unstack.
Remove Individual Photos from a Stack
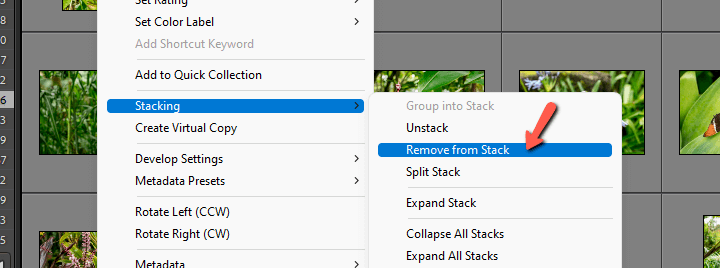
If you want to remove an image from the stack, select the image you want to remove. Then head back into that same menu by right-clicking. Choose Remove from Stack.
Split the Stack
You also have the option of splitting a stack in two. Expand the stack and select the photo where you would like to split. Right-click and choose Split Stack from the Stacking menu.
Every image to the left of the selected image will be put into its own stack. The selected image will now become the top image for the new stack, which includes every image to the right.
Auto-Stack Images
Lightroom speeds up even this process by offering an automated option based on capture time. This is helpful for grouping panoramic or bracketed images, or images shot in burst mode.
With no images in the folder selected, go into that Stacking menu we’ve been working with. Choose Auto-Stack by Capture Time…
You can choose a capture time from 0 seconds to 1 hour. In the bottom left corner, Lightroom will tell you how many stacks you’ll end up with. Plus, it’ll show you how many images don’t fit within the parameters and will be left unstacked.
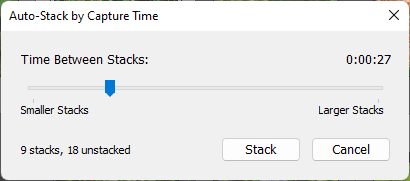
Click Stack when you’re happy and Lightroom will set to work.
There you have it, a super handy organizing feature! What’s not to love about that? Learn more about organizing photos in other ways in Lightroom here.