
As photographers, we look for light. Sometimes, we struggle to find it. And sometimes we end up with way too much light in the image.
Hey there, I’m Cara! I tend to err on the side of underexposure when taking my images. It is generally more possible to get details back in a dark part of the image than one that is overexposed.
However, there are a couple of things you can do to fix overexposed photos or blown highlights in Lightroom. Let me show you how!
Table of Contents
A Note About Limitations
Before we dive in, it’s important to understand a couple of concepts.
First, if an area of the image is too blown out, you won’t be able to fix it. Blown out means that so much light entered the camera it couldn’t capture the details. Since no information was captured, there are no details to bring back and you won’t be able to fix it.
Secondly, always shoot in RAW if you want maximum editing capability. JPEG images capture a smaller dynamic range, meaning you have less flexibility when editing. RAW images capture a robust dynamic range that allows you to tinker considerably with the final look of the image.
All right, now let’s see Lightroom in action!
Note: the screenshots below are taken from the Windows version of Lightroom Classic. If you are using the Mac version, they will look slightly different.
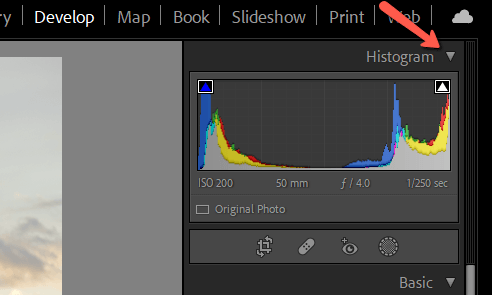
How to See the Overexposed Areas in Lightroom
When you’re still developing your eye, you might not notice all the overexposed areas of an image. Lightroom gives you a handy tool to help.
In the Develop Module, make sure that the Histogram is active. If it’s not, click the arrow to the right to open the panel.
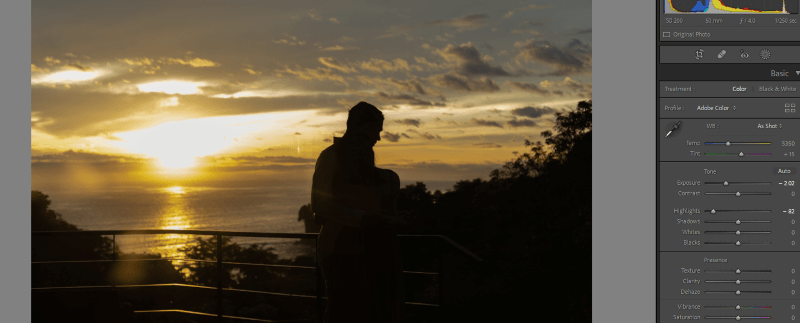
Press J on the keyboard to activate the Clipping Indicators. Red shows the blown-out parts of the images, and blue shows the parts that are too dark.
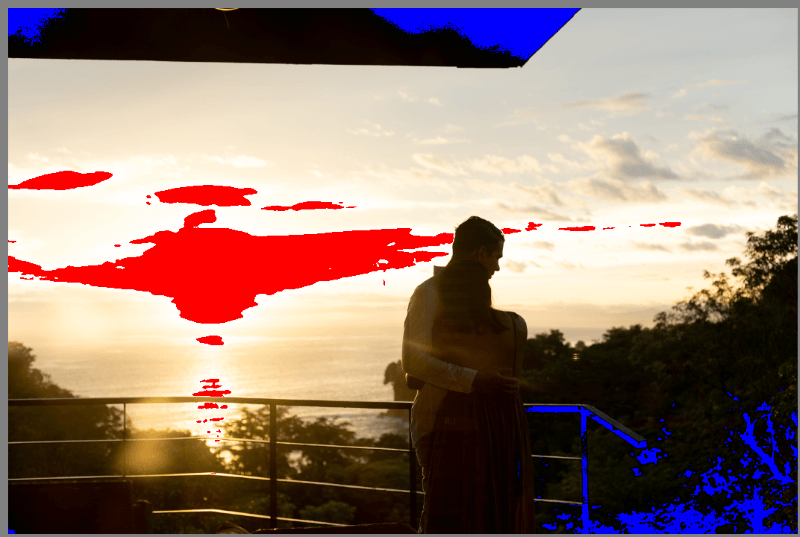
Now, if this image were taken in JPEG, you would be out of luck. However, it is a RAW image, which means we have greater flexibility in editing and may be able to bring those details back.
How to Fix Overexposed Areas of a Photo in Lightroom
All right, let’s work some magic here.
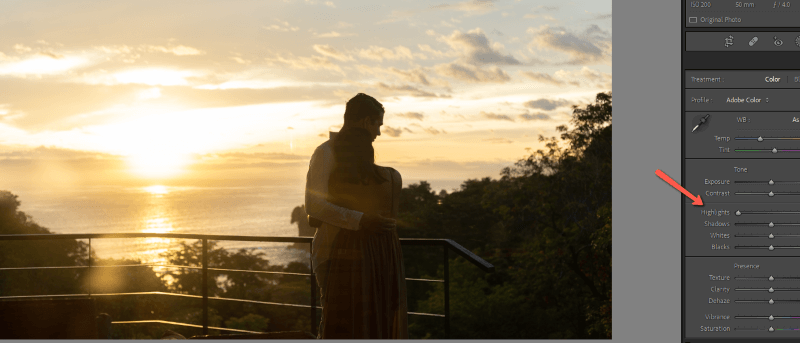
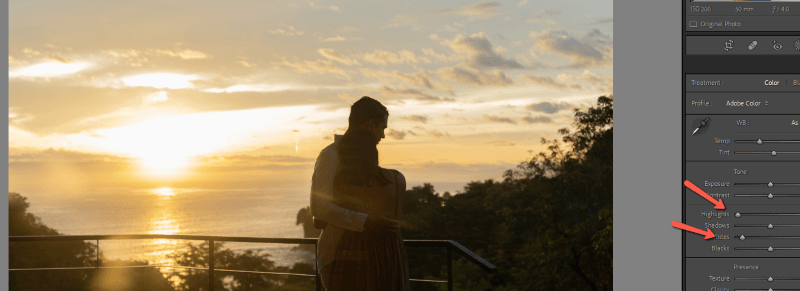
Step 1: Bring Down the Highlights
If you bring down the exposure, this will affect all parts of the image. We already have some parts that are too dark, so at this point, we don’t want to do that.
Instead, let’s bring down the Highlights slider. This concentrates on bringing down the exposure in the brightest parts of the image, without affecting the dark parts. This tool is highly effective and one of the best in Lightroom’s arsenal for fixing overexposed images.
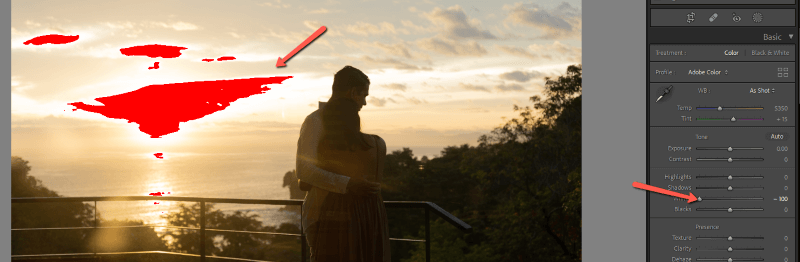
Look how just bringing down the highlights to -100 got rid of all the red in my image.
This is due in part to the recovery algorithm this tool employs. One of the three color channels (red, blue, or green) may have no detailed information because it was blown out. However, this tool will rebuild that channel based on information from the other two. It’s pretty cool!
For many images, you can stop here.
Step 2: Bring Down the Whites
If you need to go a step further, move on to the Whites slider. This tool affects the brightest areas of the image but cannot rebuild color information.
Notice how there are still some blown-out areas when I bring down the Whites slider without touching the Highlights.
Here is the result when they work together.
Step 3: Bring Down the Exposure
If your image is still too bright, you’ve got one option left. Try bringing down the exposure. This will affect your entire image.
In some images, this isn’t ideal because you already have parts that are too dark, such as the example image. In that case, you can try bringing up the shadows, then lower the exposure.
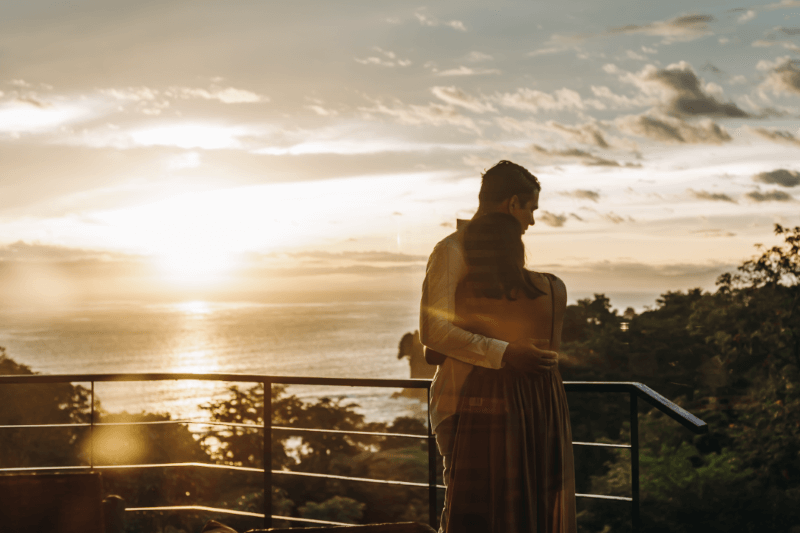
Here is my final edit of this image.
If after playing with all three of these sliders, the image is still blown-out, you’re out of luck. Images that are overexposed by too many stops simply can’t be fixed. There isn’t enough information in the photograph for the software to recover it.
Curious what else Lightroom can help you fix? Learn how to fix grainy photos in Lightroom here!