
Drawing a straight line in Procreate is very simple. All you have to do is draw your line and hold your finger or stylus down on the canvas for two seconds. The line will automatically correct itself. When you are happy with your line, release your hold.
I’m Carolyn and I’ve been using Procreate to run my digital illustration business for over three years so this particular tool comes in handy for me on a daily basis. I find myself using it a lot with professional graphic design projects, repetitive patterns, and perspective drawings.
This feature is very similar to the shape creator on Procreate. Holding down on the line, just like holding down on your shape, activates a corrector tool that automatically fixes your line to make it straight. This can be a tedious and slow process but once you get the hang of it, it becomes second nature.
Table of Contents
Key Takeaways
- Draw and hold to activate the QuickShape tool that will correct your line.
- This tool can be useful for perspective and architectural drawings.
- You can edit the settings of this tool in your Procreate Preferences.
How to Draw a Straight Line in Procreate (2 Quick Steps)
This is a very straightforward method but it does have to be done after every line you draw so it can get slightly tedious. But once you have gotten used to it, it will become second nature. Here’s how:
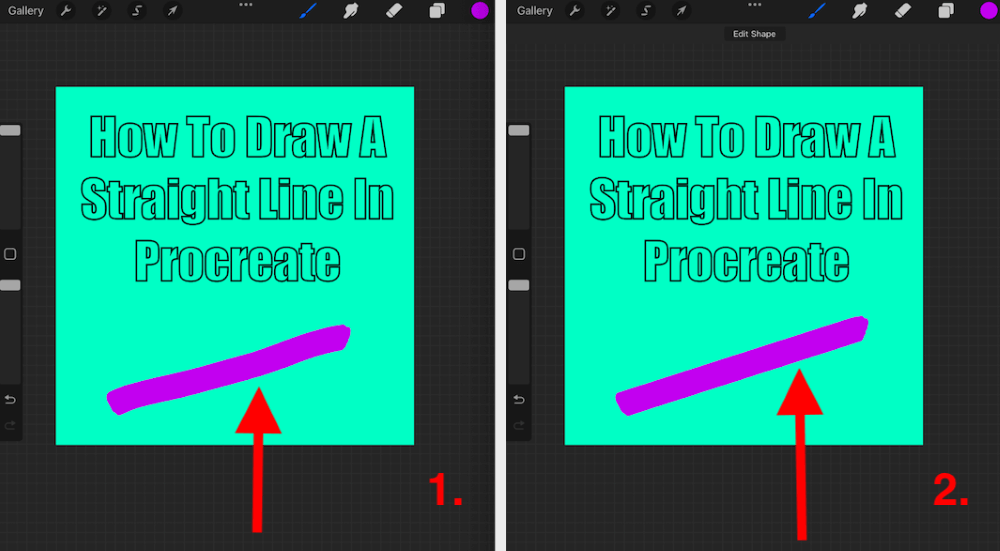
Step 1: Using your finger or stylus, draw the line you want to straighten. Keep holding down on your line.
Step 2: Keeping your finger or stylus held down on the end point of your line, wait a couple of seconds. This activates the QuickShape tool. The line will automatically correct itself and will now be straight. Once you are happy with your line, release your hold.
Editing, Moving, and Manipulating Your Line
Once you are happy with your line, you can rotate and change the length of your line before releasing the hold. Or you can release the hold and then use the Move tool (arrow icon). I have attached some examples below:
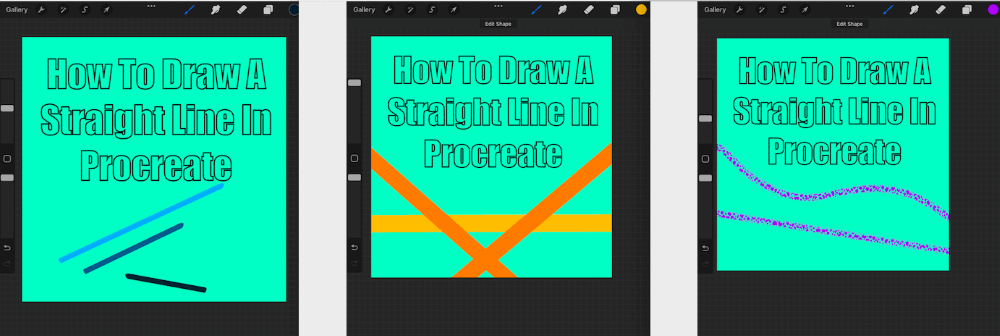
Pro Tip: Remember you can use this tool with any of the Procreate brushes including the Eraser brushes.
How to Undo Your Straight Line
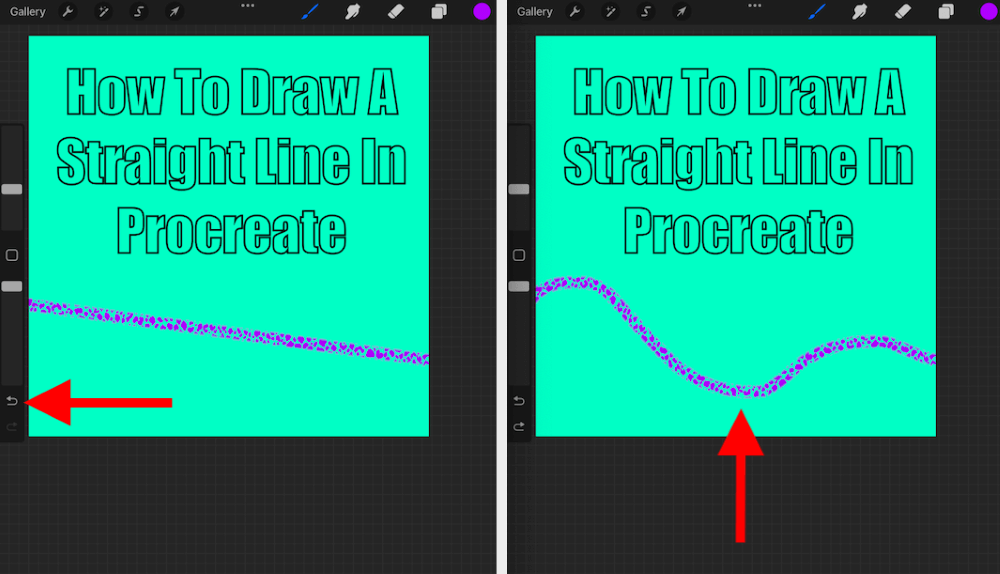
Like most other Procreate actions, this feature can be undone using a double-finger tap or by clicking the undo arrow on the bottom of your sidebar. Doing this once will revert your line to your original drawing and doing this twice will completely erase your line.
Adjusting the Quick Shape Tool in Procreate
If this method isn’t working for you you may not have it activated in your Preferences. Or you may want to change the length of time you need to hold down in order to straighten your line. You can make all of these adjustments in your Procreate settings. Here’s how:
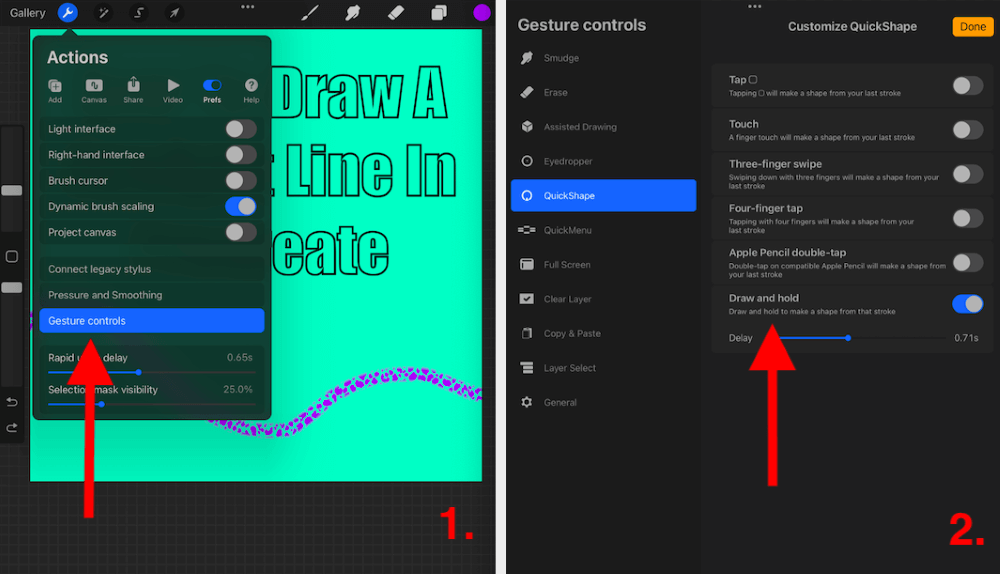
Step 1: In the top left-hand corner of your canvas, tap on the Actions tool (wrench icon). Then scroll down the dropdown list and select Gesture Controls.
Step 2: In Gesture controls, scroll down to QuickShape. In this menu, you can scroll down to the Draw and hold option. Here you can make sure your toggle is on or off and change the delay time.
Ensuring Your Straight Line is Balanced or Equal – Drawing Guide
I often get asked if Procreate has a ruler setting. And unfortunately, it does not. But I do have another method I use as a substitute to have access to a ruler within the app.
I use the Drawing Guide to add a grid to my canvas so I have a reference to ensure my lines are technically sound.
Here’s how:
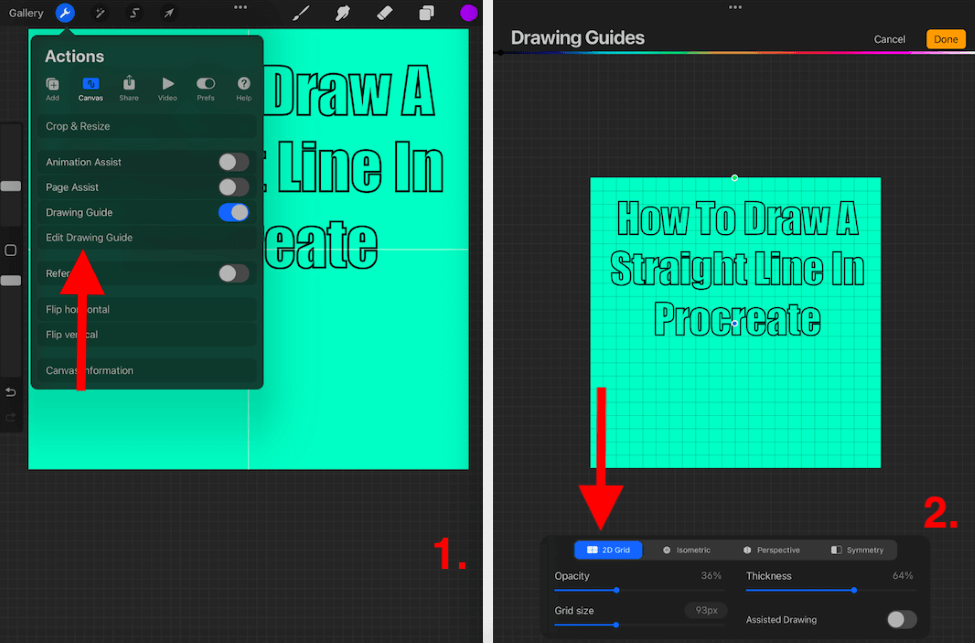
Step 1: Select the Actions tool (wrench icon) in the top left-hand corner of our canvas. In Actions, tap on the Canvas option. Scroll down and ensure your Drawing Guide is on. Then select Edit Drawing Guide.
Step 2: In your Drawing Guide, in the bottom toolbox select 2D Grid. Then you can adjust the size of the grid depending on where you need to place your straightened lines. Once you are happy with your grid, tap Done and these faint lines will stay on your canvas but will not be visible in your final saved project.
Example of This Tool in Action
This tool is particularly useful with architectural style drawings. Have a look at this video on YouTube from iPad For Architects to see some awesome things you can create with this setting:
Rendering With Procreate: Seattle U Gets Hand-Rendering-Over-Rhino Treatment
FAQs
Below I have briefly answered some of your frequently asked questions about this topic.
How to get clean lines in Procreate?
Using the method outlined above, you can achieve clean, technical lines in Procreate. Simply draw your line and hold to straighten your line.
Does Procreate have a Ruler Tool?
No. Procreate does not have a ruler tool. See the method listed above that I use to work around this issue.
How to turn off the straight line in Procreate?
This can be done in your Gesture Controls under the Actions tab of your canvas in Procreate.
How to draw a straight line in Procreate Pocket?
The method for creating straight lines in Procreate Pocket is the exact same as the method listed above.
How to use a line stabilizer in Procreate?
This setting can be accessed under your Actions tool. Scroll down under Preferences and you will have the option to adjust the Stabilization, Motion Filtering and Motion Filtering Expression.
Conclusion
This tool, once you have figured out its quirks, is incredibly useful. Especially if you’re creating artwork with perspective or architectural aspects. It can be used for a variety of purposes and if it is used right, it can create some really unique effects.
I recommend spending some time getting familiar with this tool and seeing if it can benefit you. And try to open your mind and experiment with it, you never know how it might turn out and it may even up your drawing game.
Do you use the straight line tool? Share your own expertise in the comments below so we can all learn from each other.