
There are three ways to do calligraphy on Procreate. You can add text to your canvas using the Zarfino font, you can trace an image that you have saved from the internet or you can use the calligraphy brush to draw calligraphy freehand using a grid.
I’m Carolyn and I’ve been using the Procreate app to run my digital illustration business for over three years. Adding text to a project is a common occurrence for me so I always need to be on my toes ready for the next request from a client and calligraphy is a common one.
Today I’m going to show you the three methods that I find are the best ways to do calligraphy on Procreate. Whichever one you choose will be dependent on exactly what you need and how much time you have to dedicate to the process as some can be quite time-consuming.
Table of Contents
Key Takeaways
- There are three ways to create calligraphy on Procreate.
- This skill is great for adding special lettering to wedding invitations or posters.
- Freehand drawing calligraphy is very time-consuming.
3 Ways to Do Calligraphy on Procreate
Below I have outlined the three methods that I suggest using to add calligraphy to your canvas. The difficulty level increases as they progress so it’s up to you to determine which method will work best for you.
Note: Screenshots are taken from Procreate on iPadOS 15.5
Method 1: Adding Calligraphy as Text
This method is less authentic but more clean-cut and professional looking. This method would be ideal for someone who is not great with hand-drawn calligraphy or is short on time.
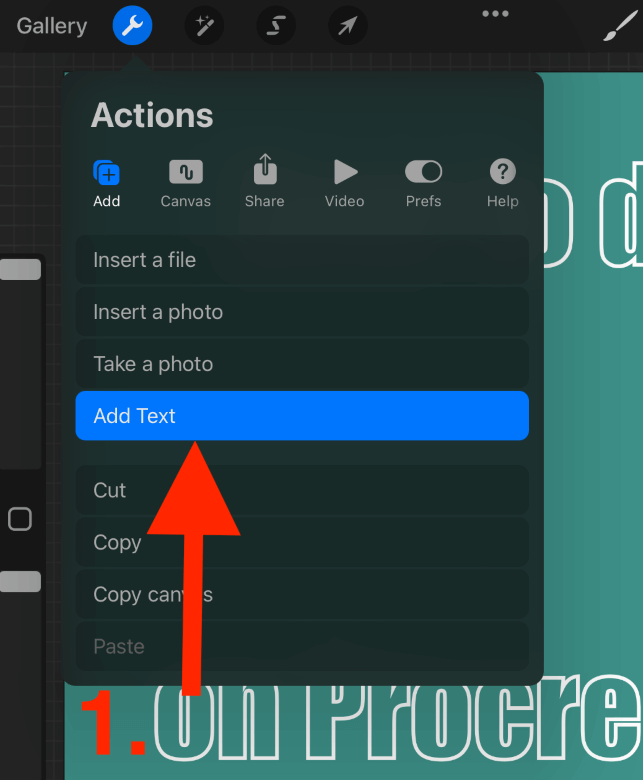
Step 1: In the Actions tool (wrench icon) select the Add Text option.
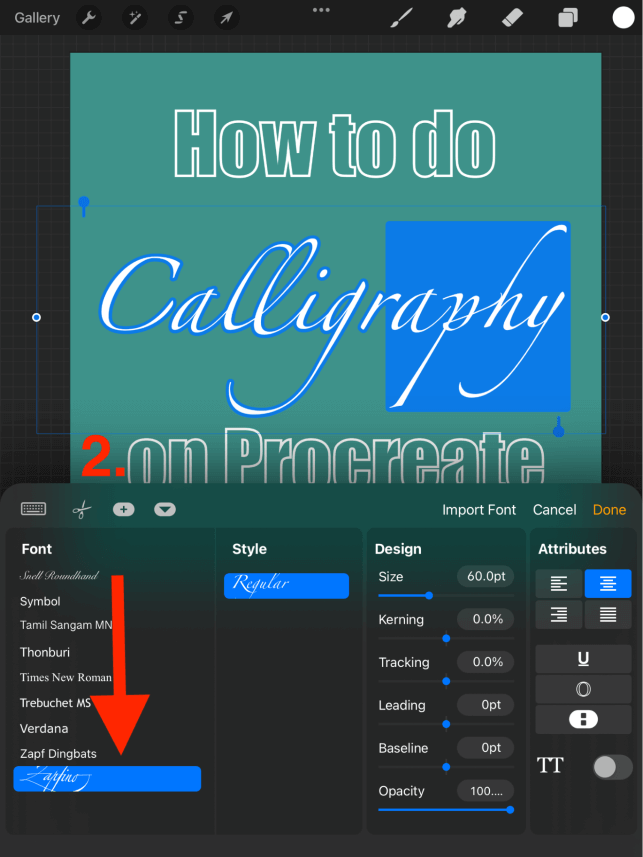
Step 2: Type the words you need and highlight them by double-clicking on the text. Scroll to the bottom of your Font selection and use the Zarfino font, this is the closest font style to calligraphy.
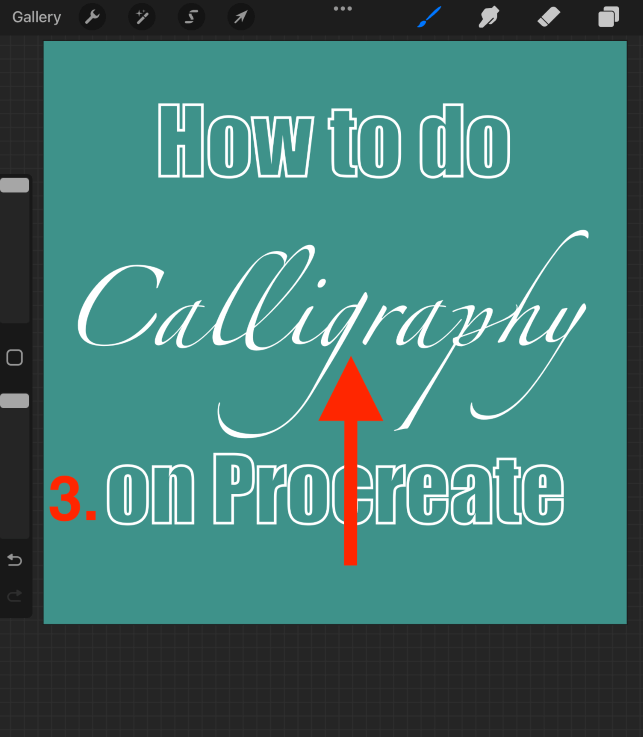
Step 3: Once you have adjusted the size settings of your font and centered it in its desired location on the canvas, tap Done. Your calligraphy text is now its own layer on your canvas.
Method 2: Tracing
This method is ideal for you if you want a more hand-drawn effect, are learning how to do calligraphy or if there is a specific font of calligraphy that you need.
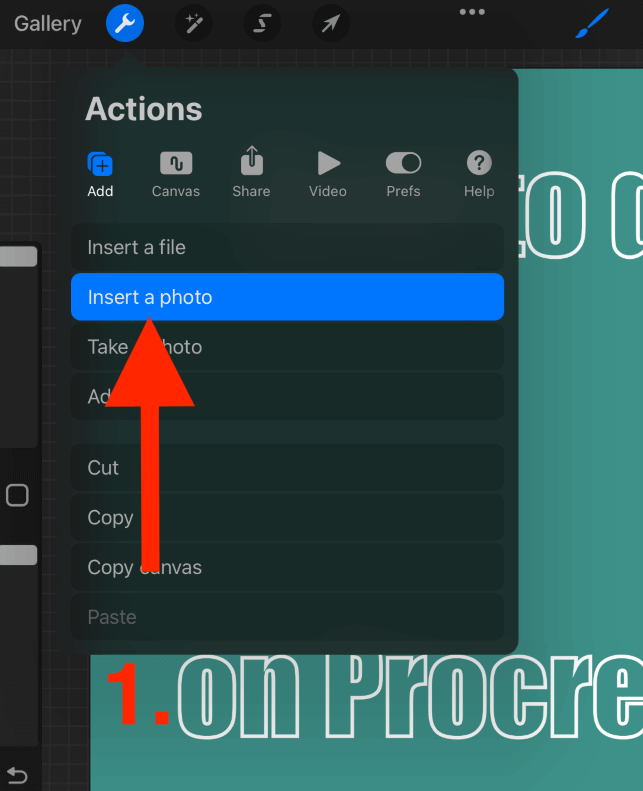
Step 1: Using a font generator, download the text image you want to trace onto your device previous to beginning this method. In the Actions tool (wrench icon) select the Insert a Photo option.
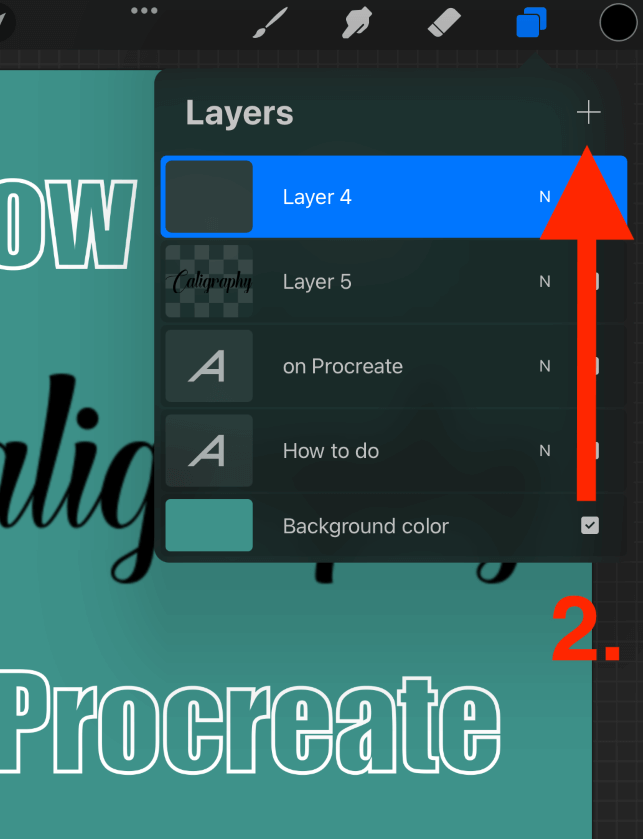
Step 2: After you insert your image and place it where you want it, add a new layer on top of it. You can do this by opening your Layer menu and tapping the + symbol.
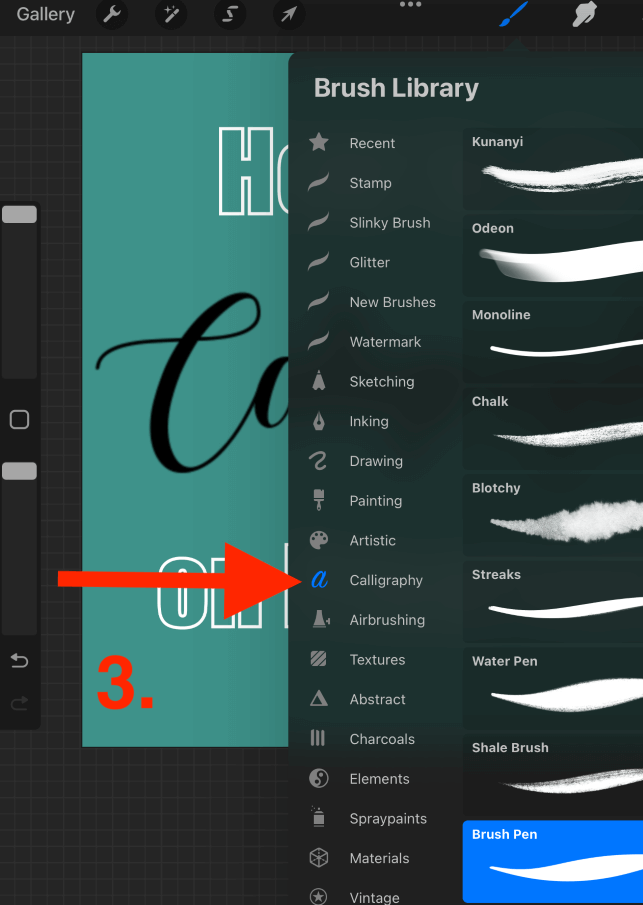
Step 3: Open your Brush Library by tapping on the paintbrush icon. Scroll down and open the Calligraphy palette. Select your desired brush by tapping on it.
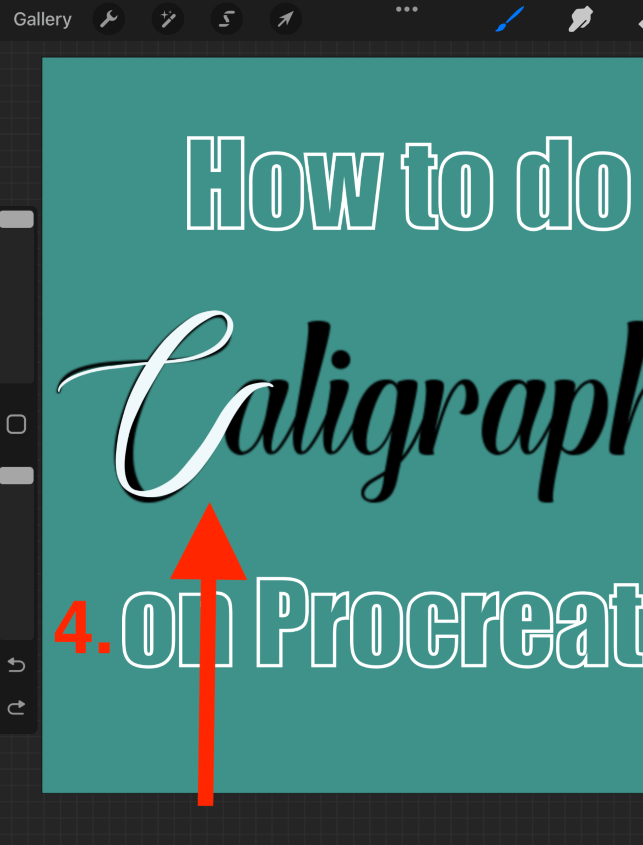
Step 4: Using your calligraphy brush, trace over the image copying its brush strokes until you are happy with the result. When you are finished, delete the first image layer to remove it from your canvas.
Method 3: Freehand Using a Grid
This is by far the most challenging of the three methods. If you are unfamiliar with calligraphy, this requires quite a bit of practice and patience until you will be happy with the results. I recommend this method to experienced calligraphy artists.
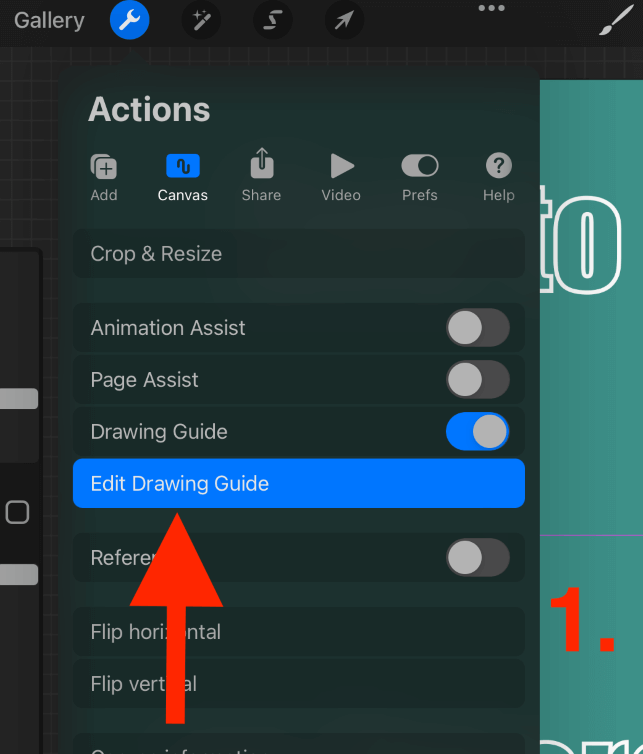
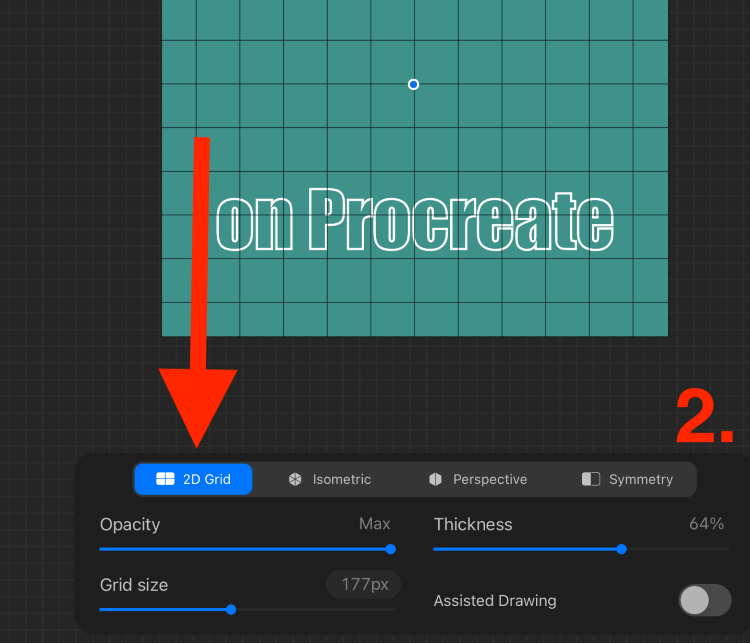
Step 1: In the Actions tool (wrench icon) select the Canvas menu and activate your Drawing Guide. Tap on Edit Drawing Guide.
Step 2: Select 2D Grid and adjust the Grid Size as desired. I like to use 2-3 squares to measure my calligraphy letters. When you are happy with the grid, tap Done.
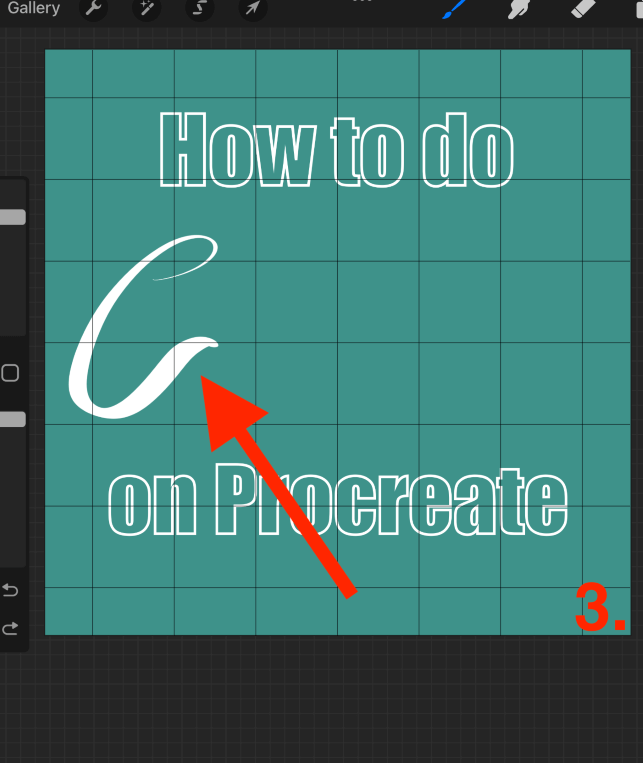
Step 3: Select the calligraphy brush you want to use and begin drawing whilst using your grid for reference. This way you can easily navigate straight lines and ensure consistency throughout your lettering while focusing on getting the strokes right.
Editing Your Calligraphy Brush
There are a few settings that you can adjust to achieve your desired calligraphy effect on any brush you choose. You can make these changes by accessing the Brush Studio. You can do this by tapping twice on your chosen brush in the Brush drop-down menu.
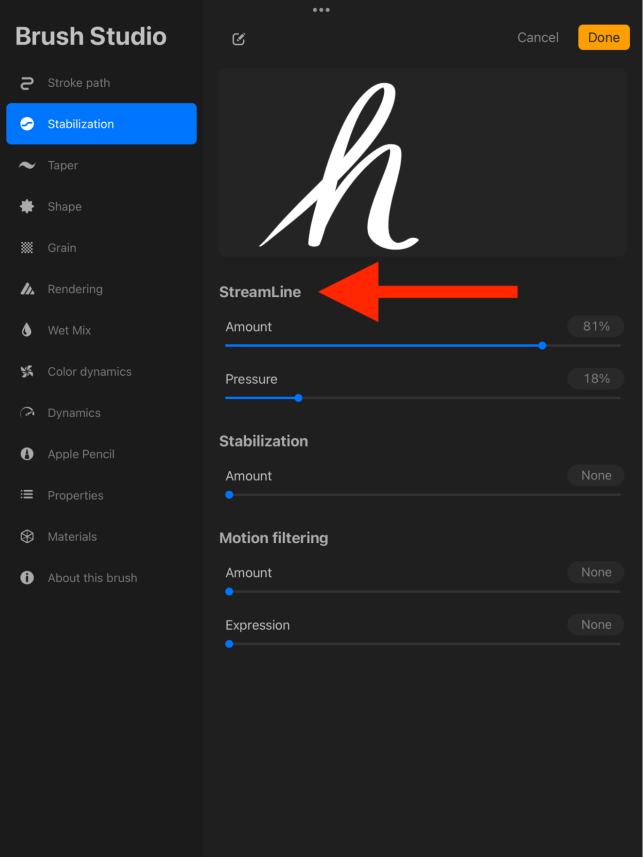
Stabilization
In the Stabilization menu, adjusting the Streamline settings will have a major impact on your brush strokes. Adjusting the levels of Amount and Pressure will change the appearance of your brush and how it interacts with the canvas.
The higher the Amount, the less wobbly your stroke will be and the smoother stroke you will get. The higher Pressure you select, the thicker your stroke will be the heavier you lean on your canvas using your stylus or finger.
Properties
Under the Properties menu, you can adjust the Brush Behavior. This is particularly useful for editing the style of your brush and how it interacts with the canvas. I like to adjust the Maximum and Minimum Size percentages depending on what effect I am looking for.

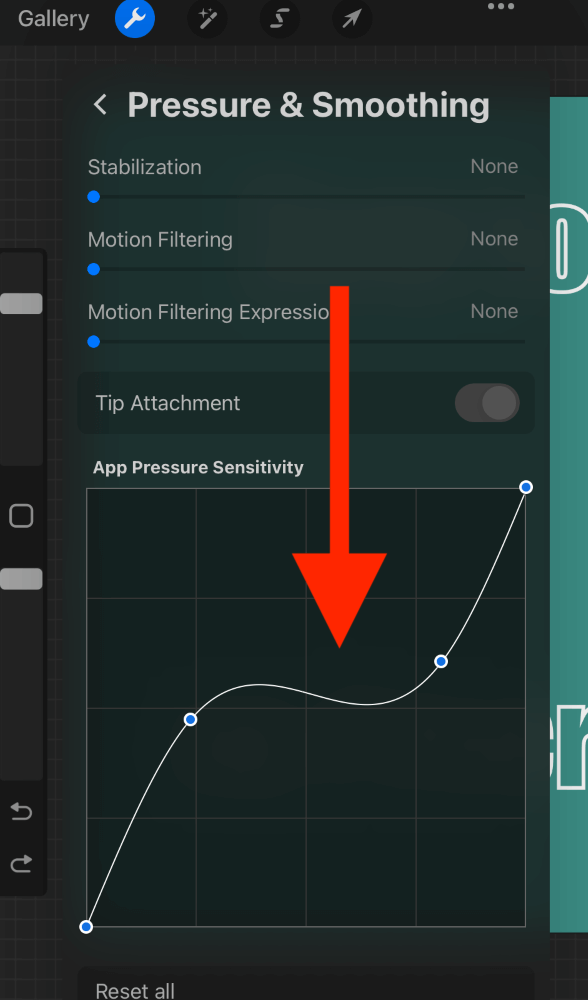
Pressure Curve
You can adjust and personalize the Pressure Curve of your canvas by tapping on the Actions tool and scrolling over to Prefs. Then tap on the Pressure and Smoothing menu to open up your Pressure Sensitivity Grid.
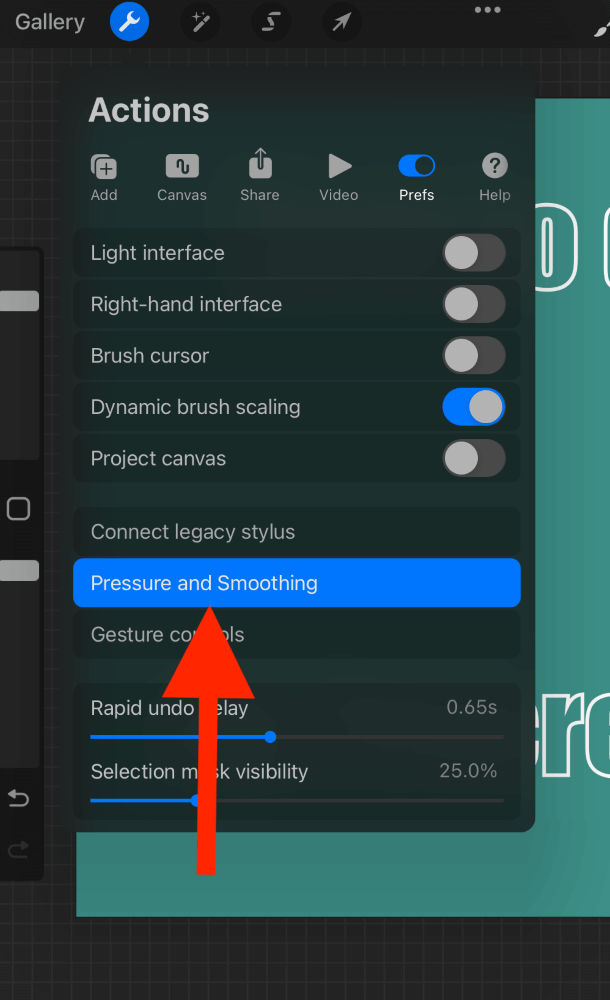
Adjusting your points from left to right will change the pressure used. Adjusting the points from top to bottom will change your stylus’ output. You can edit these points in order to suit your drawing style.
Things to Note
There are some smaller details to be aware of when drawing calligraphy that can have an impact on your results. Below are my top three facts that may come in useful when learning how to use calligraphy on Procreate.
Capitalizing Letters
This will have a huge impact on the style of your calligraphy. Calligraphy text is particularly sensitive to case letters so I always recommend trying both before deciding on a font.
Importing Fonts/Brushes
If you’re not happy with the brushes available or you don’t want to make the changes yourself, you can purchase, download, and import your desired calligraphy brushes or fonts online. You can do this by adding text to your canvas and then selecting Import Font.
Brush Studio Sample Window
When editing a brush in your Brush Studio, there is a window above your setting where you can draw using your finger or stylus to display the changes you have made to your brush. Tap on Drawing Pad on top of it to clear these samples and start again.
FAQs
Below I have briefly answered some of your frequently asked questions about creating calligraphy on Procreate:
How to do calligraphy on Procreate without an Apple Pencil?
I recommend using Method 1 above and adding calligraphy text to your canvas. Without an Apple Pencil or stylus, it will be very difficult to get uniform lettering on your canvas.
How to use Procreate calligraphy practice sheets?
You can find and download lined practice sheets online to practice your digital calligraphy. Simply save the image to your device and insert it into a layer before tracing over it.
Are Procreate calligraphy brushes free?
Procreate comes with a preloaded calligraphy palette already so you can get started immediately. Otherwise, you can download a new brush and import it into your Brush Library.
How to do calligraphy on Procreate Pocket?
You can use the same three methods above to do calligraphy on Procreate Pocket but I am warning you. It’s incredibly difficult to do professional calligraphy writing on a screen as small as an iPhone. Therefore I recommend using Method 1 on Procreate Pocket.
Conclusion
Learning how to create calligraphy on Procreate is, in my opinion, one of the most challenging skills to teach yourself. That being said, I was a complete beginner when I began the learning process so it may be easier for you if you have experience writing calligraphy already.
However, this is a unique and awesome skill to have. Particularly if you’re creating wedding invitations or scrolls on Procreate. Having the ability to add some calligraphy lettering can really bring a project to the next level. That’s why I reckon you should start learning this today.
Do you do calligraphy on Procreate? If so, which method do you use? Leave your answers in the comments section below.