
Do you need to cut out an image in Adobe Illustrator fast? You’re in the right place. You can easily cut out an image in minutes using a Clipping Mask in Adobe Illustrator.
My name is Elianna. I have a Bachelor of Fine Arts in Illustration and have been using Adobe Illustrator for over six years. I use clipping masks on a daily basis to create interesting design elements, including cutting images to fit in shapes.
In this post, I will show you how to cut out images in Adobe Illustrator for desktop and iPad using different tools in Adobe Illustrator.
Let’s get into it!
Table of Contents
Key Takeaways
- When you make a clipping mask, you must have both the shape (closed path) and the image selected.
- You can use the Crop tool to cut out unwanted areas of an image but it won’t remove the image background.
- The Knife and Eraser tools only work on vector shapes.
Method 1: Pen Tool and Clipping Mask
The easiest way to cut out an image in Adobe Illustrator is using the Pen tool. Here’s how to do it:
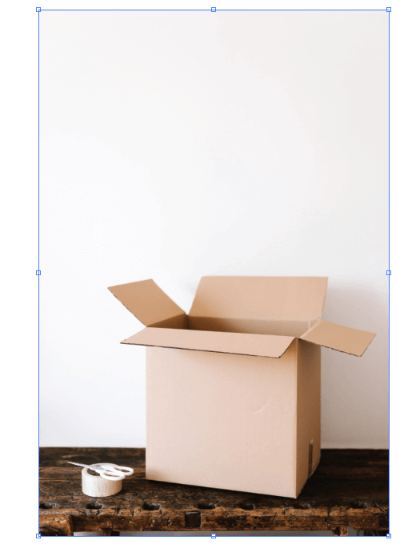
Step 1: Open your Illustrator file with the image you would like to cut out, paste or embed it into your canvas. You can add your image using File > Place, or Paste.

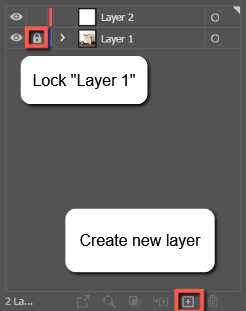
Step 2: Go to your Layers panel and add a new layer by clicking the Create a new layer icon. Lock your reference photo layer by clicking on the Lock checkbox.
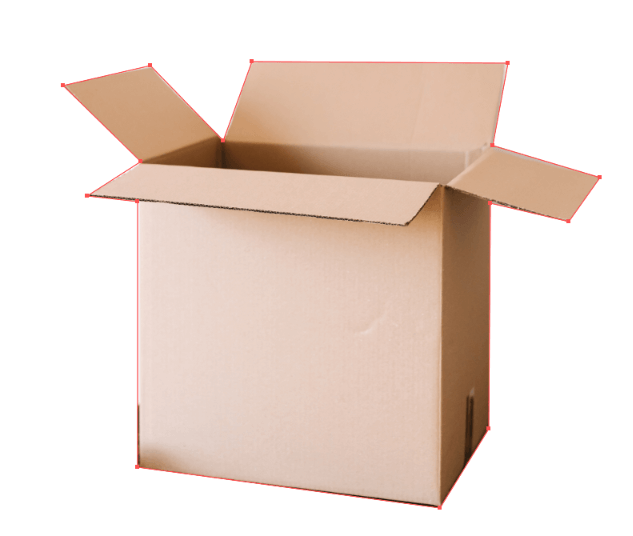
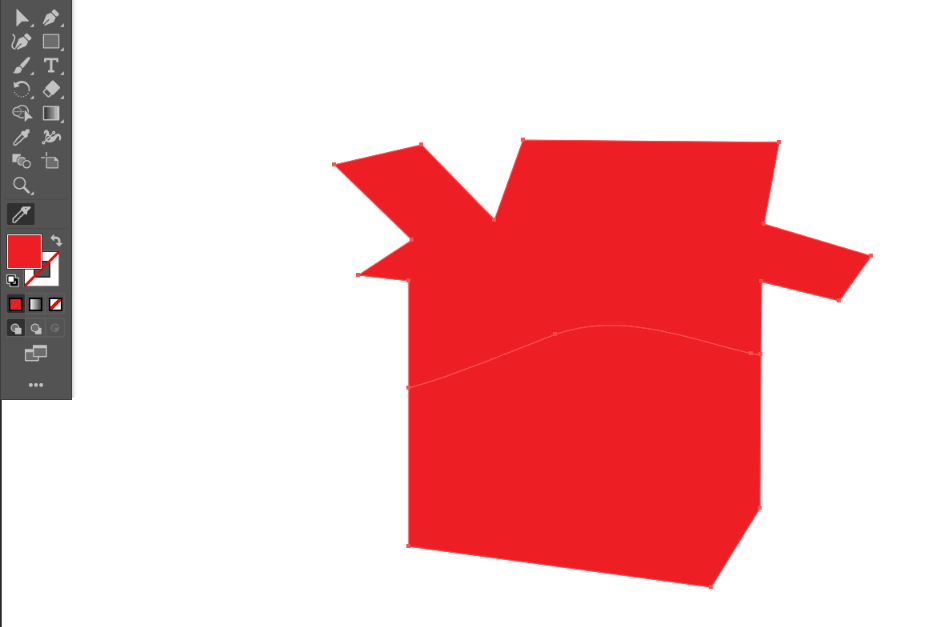
Step 3: Click on the Pen tool, or use the keyboard shortcut P. Remove the fill, and begin to click and drag to outline your image object with the pen tool.
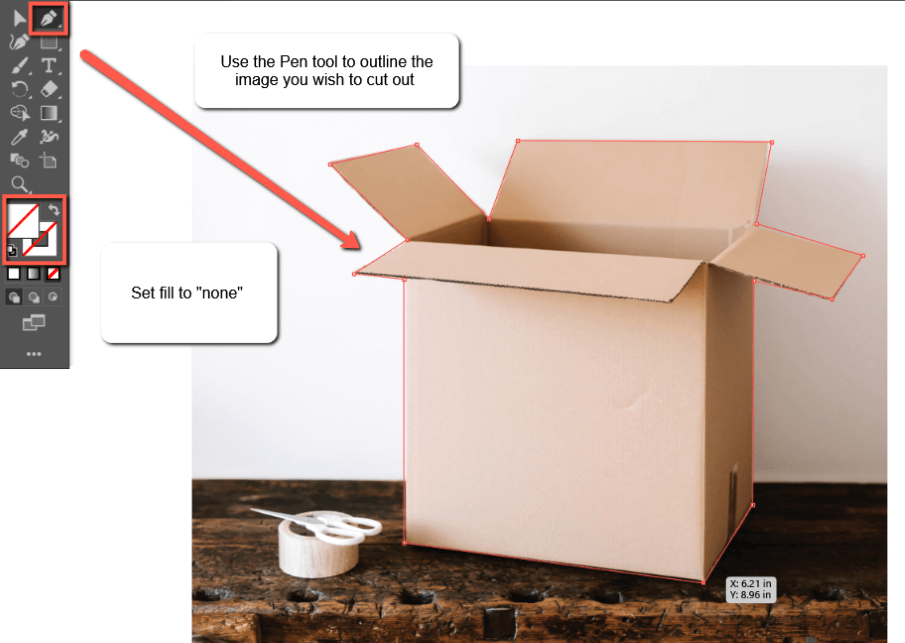
Make sure to close your shape by connecting the last anchor point to the first.
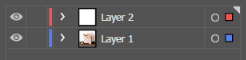
Step 4: Once you are done with your pen tool outline unlock Layer 1 and use Select All in the top toolbar with Select > All, or with the keyboard shortcut Ctrl/Command + A.

Step 5: Go to Object > Clipping Mask > Make or use the keyboard shortcut Ctrl/Command + 7 to make a clipping mask.
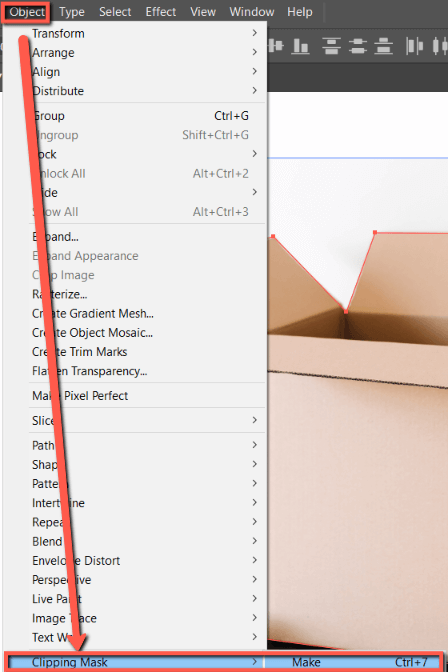
Alternatively, you can right-click and select Make Clipping Mask.
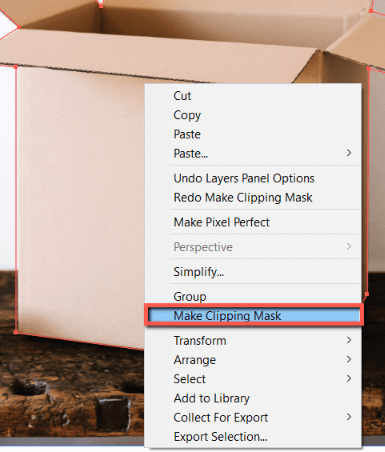
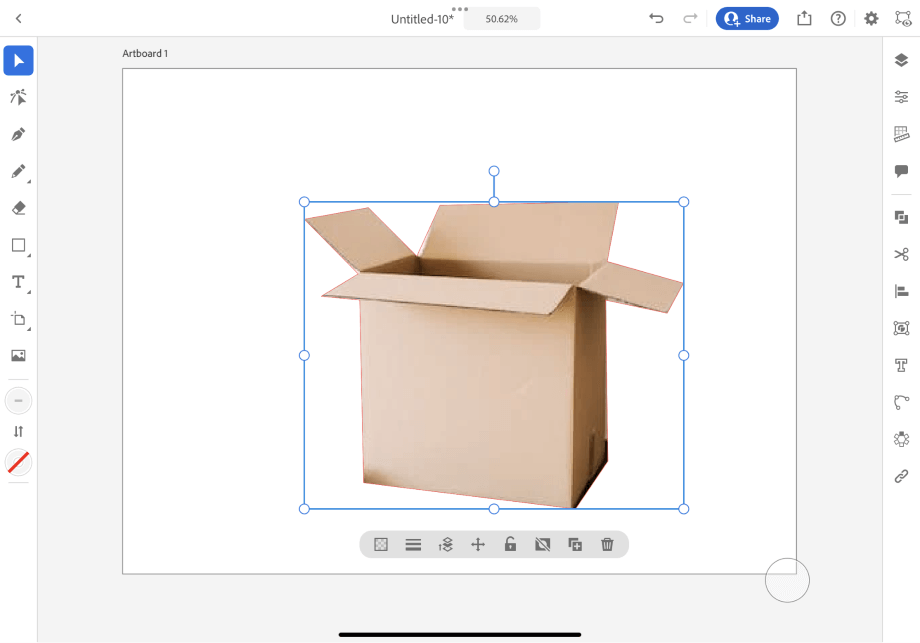
Your image will now be cut out to the silhouette of your shape.
If you wish to cut out part of an image in Adobe Illustrator without using a clipping mask, you can do so with the Crop, Knife, and Eraser tools.
Method 2: Crop Tool
Using the Crop Image is an easy way to cut out parts of a photo you don’t like. This option is best for cutting quadrilateral areas of an image.
Here is how to do it:
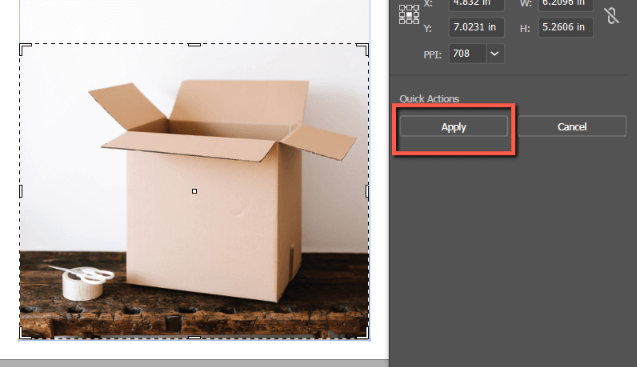
Step 1: Select the image by clicking on the image.
Step 2: Select Crop Image in the Properties Panel under Quick Actions.
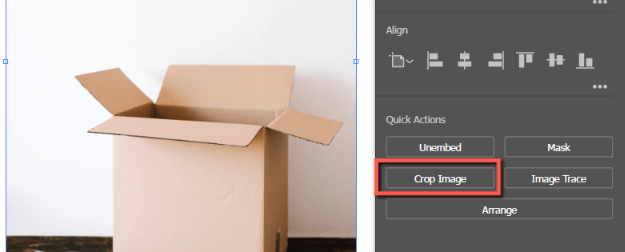
Step 3: Modify the crop frame as you desire by resizing or repositioning it.
Step 4: Click Apply or hit Enter on your keyboard when you are satisfied with your crop frame. This will crop the parts of your image outside of the frame.

Method 3: Knife
The Knife tool can also be used to cut out parts of images. However, note that this tool only applies to vector images.
Simply select the Knife tool and draw through the part of your image that you wish to cut.
Your image will split into separate parts that can be individually modified.

Method 4: Eraser
Same as the Knife tool, the Eraser only works on vector images. If you have a raster image, make sure you vectorize it first and then select the Erase (keyboard shortcut Shift + E) and draw through the part(s) of your image that you wish to cut.

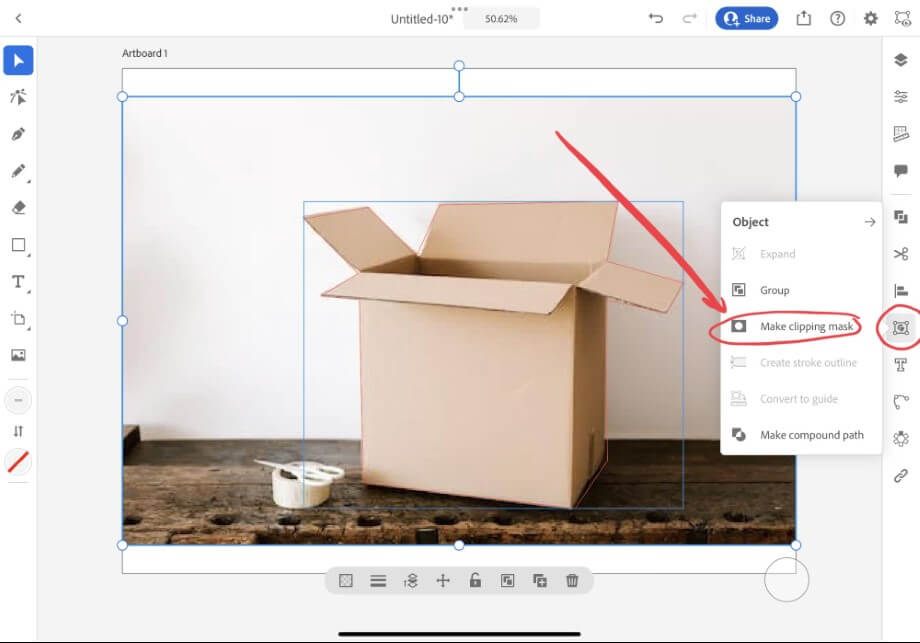
How to Cut Out an Image with a Clipping Mask in Adobe Illustrator for iPad
You can also cut out images in the Adobe Illustrator for iPad app using clipping masks. While the steps are similar to the desktop method explained above, the interface and icons look different.
Here’s how to do it:
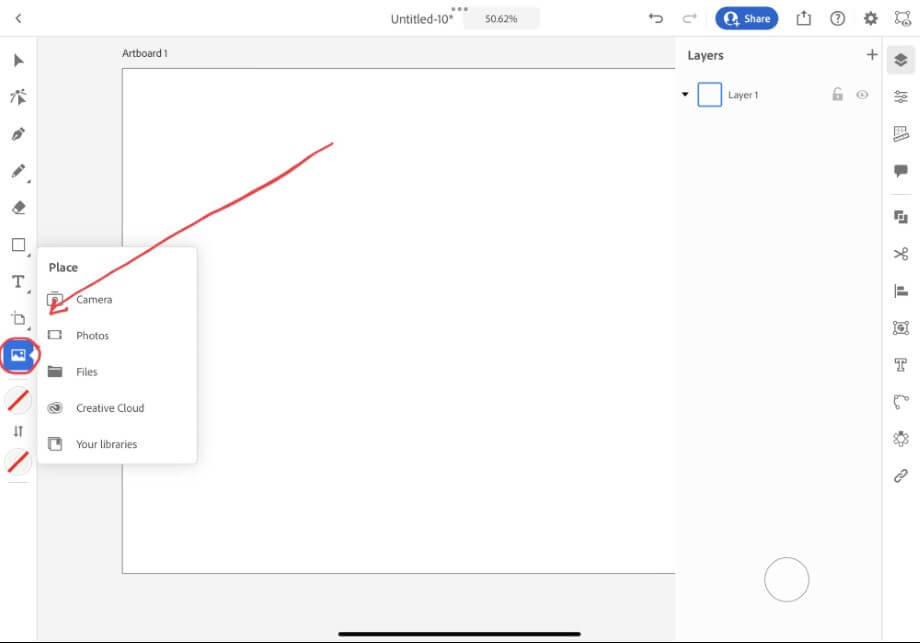
Step 1: Select the Place icon to import a photo from your Camera, Photos, Files, the Creative Cloud, or Your Libraries. (You may need to allow Illustrator to access your photos).
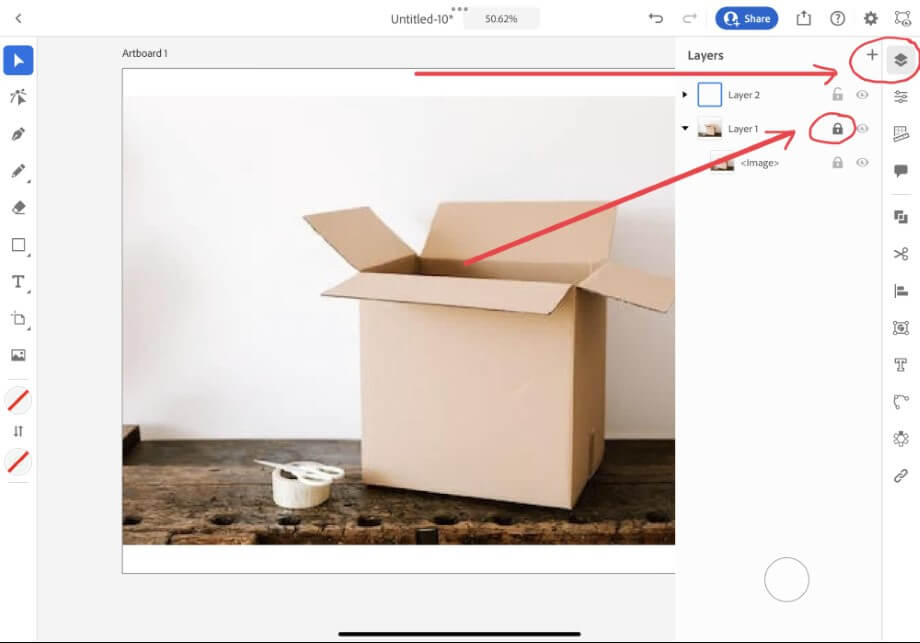
Step 2: Click on the Layers icon and create a new layer with the + button. Click on the lock icon to lock the image layer.
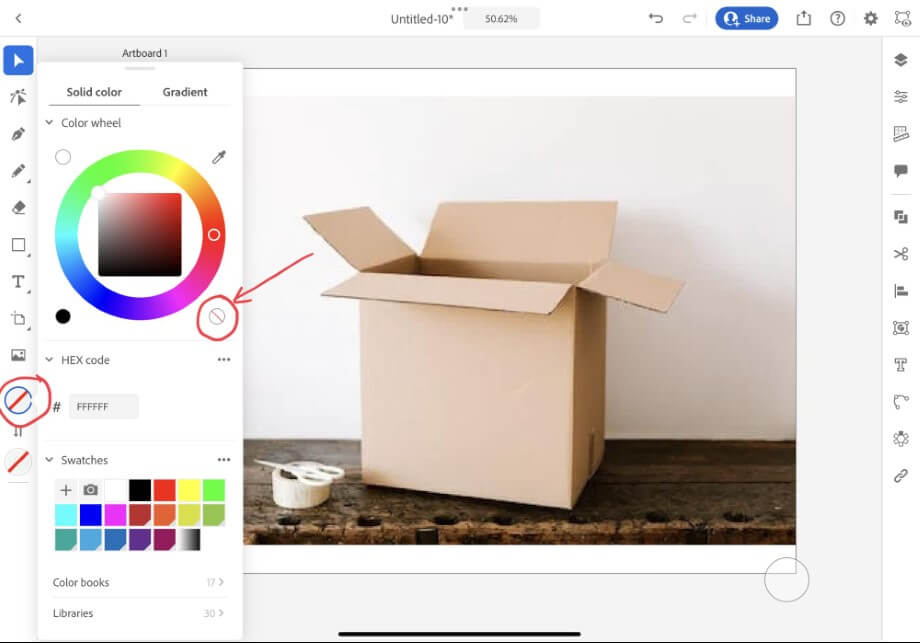
Step 3: Click on the Fill icon and set the fill to Transparent by clicking on the icon in the lower right corner of the color wheel.
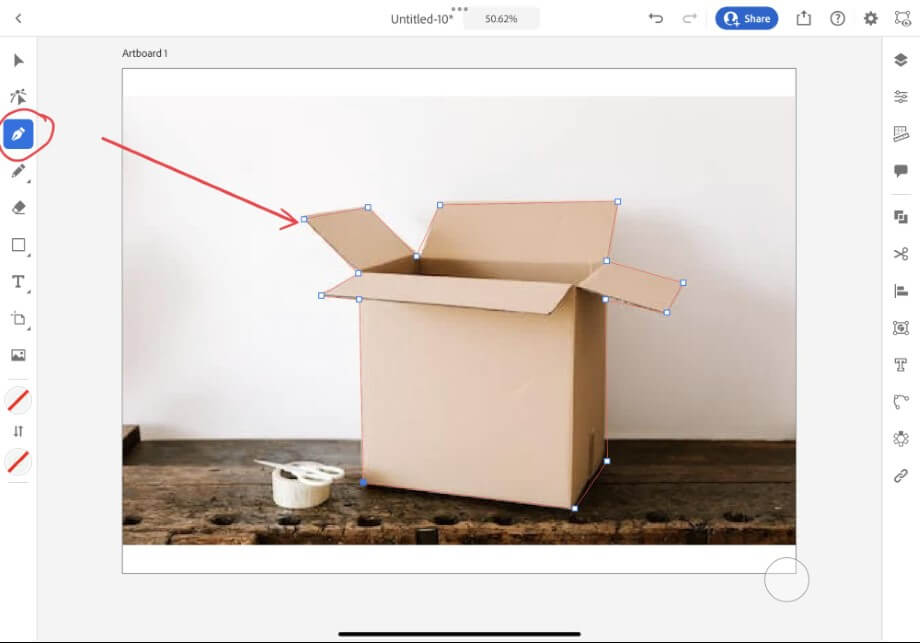
Step 4: Click on the Pen tool icon (if using your iPad with a keyboard, you can also use the shortcut P), and begin to trace the silhouette of the object you wish to cut out. Keep outlining until your first anchor point connects to the last one, creating a transparent vector shape.
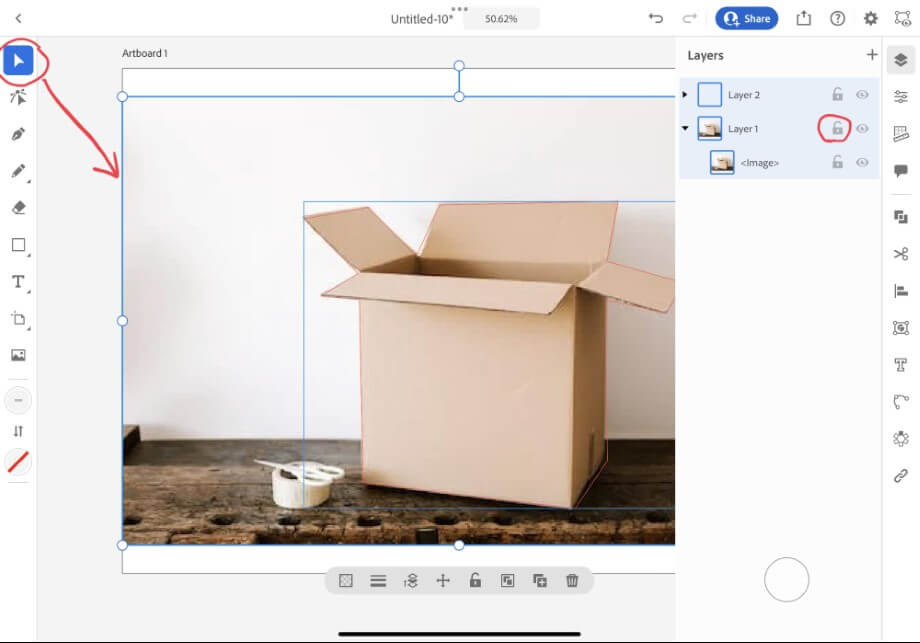
Step 5: Open the Layers menu again and unlock the image layer. Then, click on the Direct Selection tool and click and drag to select both your transparent shape and the image.
Step 6: Click on the Object icon and select Make Clipping Mask.
Final Thoughts
Cutting out images in Adobe Illustrator is easy using the Pen tool and Clipping Masks. You can also cut out parts of images with Crop Image, the Knife, and Eraser. Knowing how to accomplish this task can make designing your project fast and easy.
Remember that you can also cut out images in the Adobe Illustrator for iPad app using the same methods. You can also use keyboard shortcuts to further optimize your workflow. Commit the most useful shortcuts that you use often to memory to further simplify your design process.
What method do you use to cut out images in Adobe Illustrator? Tell me in the comments below!