
Embedding images is a best practice for your Adobe Illustrator workflow and can be achieved with two simple methods: Quick Actions and through the Links panel.
When you embed an image into Adobe Illustrator, the image is saved within the Illustrator document. Embedding images makes it possible to open your AI document on a different device and still view your images.
My name is Elianna. I have a Bachelor of Fine Arts in Illustration and have been using Adobe Illustrator for over six years. In my position as an Art Director, I always embed my image links to ensure smooth collaboration between myself and my coworkers.
In this post, I will explain why embedding your images is important, two methods to do so, and also how you can modify the resolution of an embedded image in your Illustrator document.
Table of Contents
- Key Takeaways
- The Difference Between Linking and Embedding Images
- Advantages of Linking Objects Instead of Embedding the Object
- How to Tell if My Images Are Linked or Embedded?
- Method 1: Embed an Image with Properties
- Method 2: Embed Images in the Links Panel
- How to Reduce the Resolution of an Embedded Image
- Final Thoughts
Key Takeaways
- Embedded images are saved in your AI document.
- A Linked image will have crosshairs through it when clicked. An embedded image will only show the bounding box.
- The keyboard shortcut for File > Place is Shift + Ctrl + P.
The Difference Between Linking and Embedding Images
If you do not embed your images in your AI document, they will be considered links. Links are images that are linked to a file on your computer but are not saved within Illustrator itself. If you try to open an AI document with links on a different device you will receive an error that Illustrator is unable to find your image(s).
The only way to fix a broken or missing image link is to relink it, which can be a challenge if you do not have access to the original image files, or if the original image files were deleted. If you are working on a team, broken/missing image links can cause frustration and waste time. Therefore, always practice embedding your images to ensure a smooth workflow.
Advantages of Linking Objects Instead of Embedding the Object
After the last two points, you might be thinking to yourself “why do image links exist at all?” The simple answer is that embedding images in Illustrator can increase your document file size. For that reason, some people prefer to use image links when they are working on a design on their own devices or to place reference images that are not necessary for the final print.
That being said, unless you are working on an incredibly big document, the best practice is to still embed your images. Exercise your own judgment on which images are necessary to embed in your design, and which better serve as links.
How to Tell if My Images Are Linked or Embedded?
A linked image will show crosshairs over the image when you click on it in Illustrator. When an image is embedded, the crosshairs disappear and only the bounding box is visible.
In the Links panel, you can tell if an image is embedded if it has an embed icon next to it.
| Linked (Not embedded) | Embedded |
 |  |
Method 1: Embed an Image with Properties
The easiest way to embed an image in Illustrator is by placing your image and using the embed function in Quick Actions under the Properties panel. Here’s how to do it:
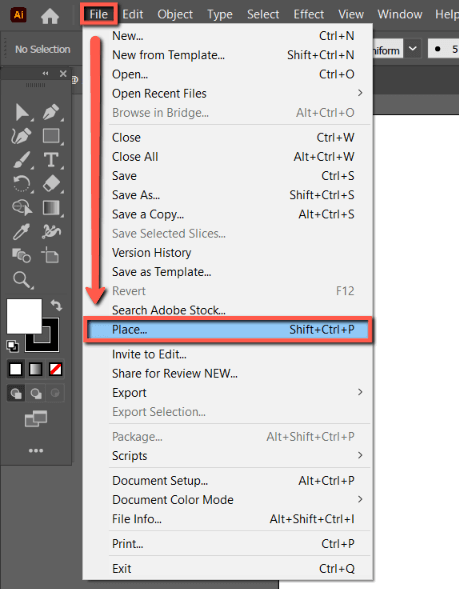
Step 1: Open your Illustrator document and use File > Place, or use the keyboard shortcut Shift + Command + P to select an image on your computer that you would like to embed in your document.
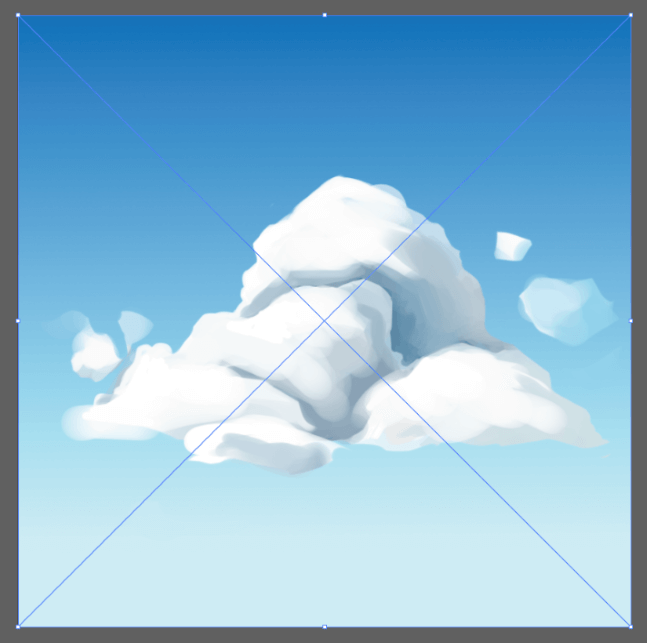
Your image will appear in Illustrator as a linked image. (Note the crosshairs)
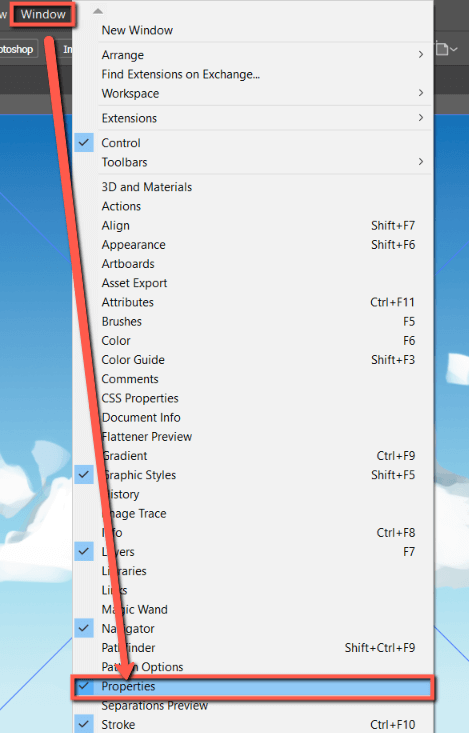
Step 2: Open the Properties panel by clicking Window > Properties.
Step 3: Select your image, click on Embed under Quick Actions in Properties.
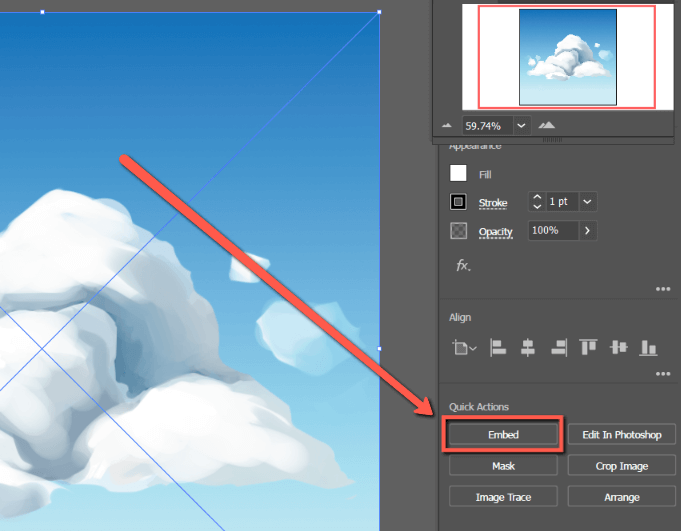
The cross lines will disappear on your image as it is embedded.
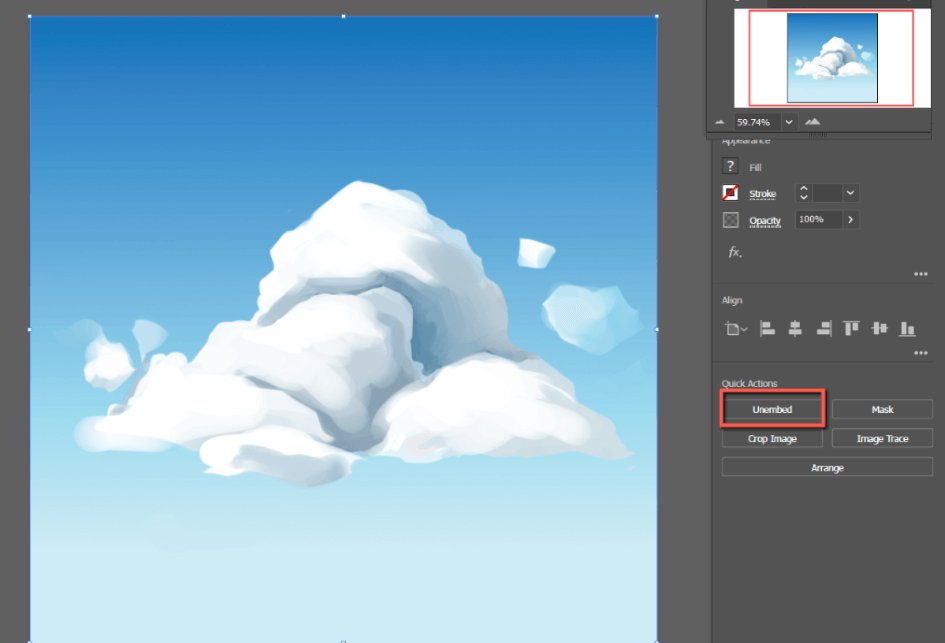
If you want to unembed the image, click Unembed.
Method 2: Embed Images in the Links Panel
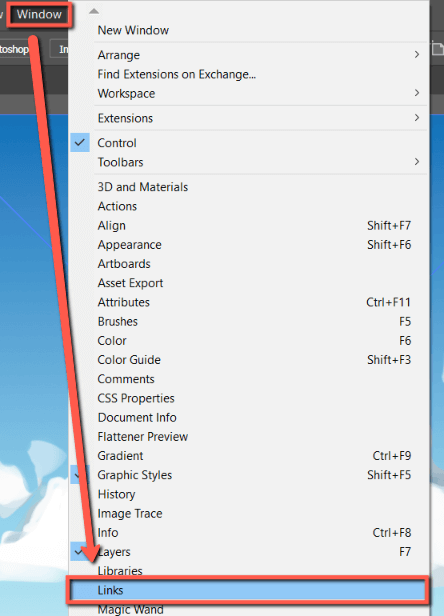
Another way to embed images in Adobe Illustrator is by using the Links panel. Here’s how:
Step 1: Open your illustrator document with the image you would like to embed or place the image in your document using Step 1 from the method above.

Step 2: Open the links panel from the overhead menu Window > Links.
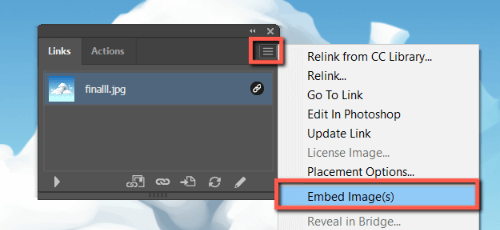
Step 3: In the Links panel click on your image. Click on the hidden options menu and select Embed Image(s).
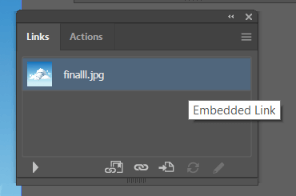
Your image will be embedded. When you hover over the image in the links panel, it will show Embedded Link.
How to Reduce the Resolution of an Embedded Image
If you are working with an embedded image with a high resolution and would like to reduce it, you can do so with Effects > Rasterize. Here’s how:
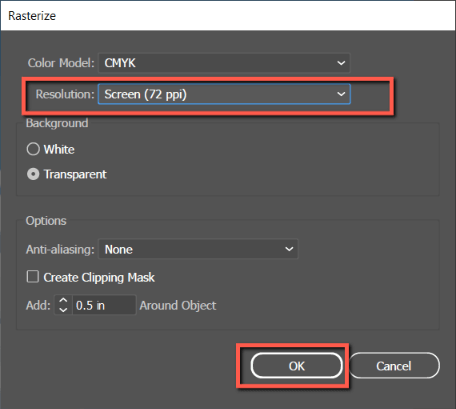
Step 1: Click on your embedded image and select Effect > Rasterize.
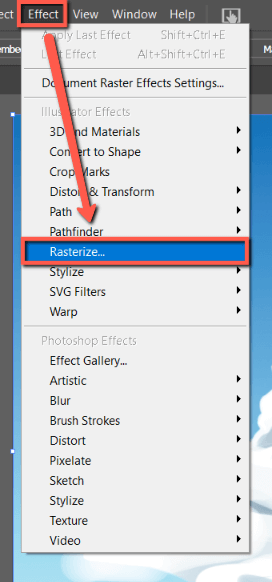
Step 2: Modify the resolution of your image under Resolution. When you are finished, click OK.
Should you embed images in Illustrator for print?
Yes. It is best practice to ALWAYS embed your images for files that are going to print for quality control, especially if you are sending your files to a print shop.
While some print shops may relink images for you, most likely they will just send your files back and ask for the document to be fixed. If the error is not caught your printables will not come out correctly.
Final Thoughts
Embedding images is simple and can save you future time by saving everything within your AI document. You can embed images using Embed under Quick Actions in the Properties, panel, or by using Links. Remember that a linked image will show crosshairs when clicked, while an embedded image will only show the bounding box.
While embedding images can increase your file size, you should always do so, especially when sharing documents in collaboration with coworkers, or when sending files to print. Exercise your best judgment to select which images are necessary to embed, and which can stay as linked images.
Which method to embed images did you like best? Tell me in the comments below!