
If you are looking to create a personalized frame to be used for your profile picture on Facebook, you can either search for a Facebook frame template in the Canva library or search for a circular frame element and edit it to meet your vision.
Hello there! My name is Kerry, and I am an artist who really enjoys dabbling in all design platforms to find the best ones for various types of projects. In doing this, I search for features and learn techniques that can elevate projects and be applied to other platforms, especially social media.
In this post, I’ll explain how you can create your own personalized Facebook frame to be used in your profile on the social media platform. As people want to customize further how they appear on these websites, this can be a good technique to learn so that you can have your profile match your vision.
Are you ready to learn how to create Facebook frames using the graphic design platform, Canva? Fantastic. Let’s get to it.
Table of Contents
Key Takeaways
- A simple way to find a Facebook frame to edit and design is to search for a “Facebook frame” template in the main search bar on the home screen.
- You can also use the frames that are found in the Elements tab (found in the main toolbar next to your canvas) to build a Facebook frame.
Why Create a Facebook Frame on Canva?
At this point, it is no surprise that one of the most popular project categories that people like to create is anything that is connected to social media. With platforms such as TikTok, Facebook, Instagram, LinkedIn, and so many more available to connect to one another, people want to make sure that their profiles emulate a specific vibe or persona.
On Canva, you have the ability to design for these types of projects, and you can do so with ease thanks to the wide variety of accessible features that allow even beginners to be successful in these endeavors.
There are two main techniques that are used to create Facebook frames on the Canva platform. The first is to search for and use one of the premade templates that are on the website. The other is to build your own template by using the frame element that is found in the main toolbox.
Don’t worry. Both are simple and easy to learn!
Method 1: Use Premade Templates to Create a Facebook Frame
As I stated earlier, one of the easiest ways to create a Facebook Frame is to use one of the premade templates that are already uploaded on the Canva platform. If you are looking for super-stylized options, this is the route for you.
Follow these steps to learn how to edit a premade Facebook frame template on Canva:
Step 1: Your first step will be to log into Canva. Once you are in and on the home screen, go to the search bar and type in “Facebook frames” and click search.

Step 2: This will bring you to a page where there will be lots of different premade templates for you to choose from. Scroll through the options and when you find one that suits your vision, click on it to open the template in a new window on your canvas.

Remember that any template or element on Canva with a little crown attached to it means you can only get access to that piece if you have a paid subscription account, such as Canva Pro or Canva for Teams.
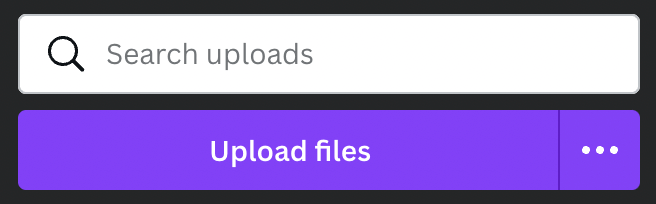
Step 3: On your canvas, navigate to the left side of the screen to where the main toolbox is located. Upload the photo that you want to use in your frame by clicking on the Upload files tab to add a file from your device to the Canva library.
Step 4: Once it is uploaded, drag and drop it into the frame to replace the template image. You can click on this photo or other elements to rearrange them, change the size, or color options.

Method 2: Use the Frame Element to Make a Facebook Frame
Follow these steps to learn how to use the frame element to create a Facebook frame:
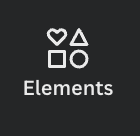
Step 1: Just as you would with adding other design elements to your project, navigate to the left side of the screen to the main toolbox and click on the Elements tab.
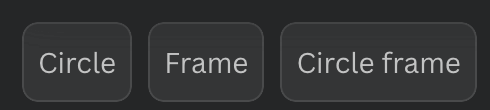
Step 2: To find frames that are available in the library, you can either scroll down in the Elements folder until you find the label Frames or you can search for them in the search bar by typing in that keyword to see all of the options. Decide which frame you will want to use in your project!
Step 3: Once you have chosen the frame shape you want to use in your design, click on it or drag and drop it onto your canvas. You can then adjust the size, placement on the canvas, and orientation of the frame at any time.

Step 4: To fill the frame with a profile picture, navigate back to the left side of the screen to the main toolbox and search for the graphic that you want to use. If you want to include a photo of yourself for your profile or another personal graphic, go to the Uploads tab in the main toolbar and upload the media that you want to include.

You can also add different filters and effects to what you have included in your frame including adjusting the transparency and settings of an image!
Step 5: Click on whatever graphic you choose and drag and drop it onto the frame on the canvas. By clicking on the picture again, you will be able to adjust what portion of the visual you want to be seen as it snaps right back into the frame.

You can show different portions of the image in the frame by double-clicking on it and repositioning the image by dragging it within the frame. If you click only once on the frame, it will highlight the frame and visuals in it so that you will be editing the group.

Final Thoughts
Whether you are creating a simple frame where you just want to snap a photo into a specific shape or use a premade template that is a bit more stylized, Canva is one of the simplest tools that you can use to design Facebook frames!
Have you ever wanted to create a Facebook frame on Canva? We would love to hear about your experience and any tips that you might have on the topic. Also, if you have used this design platform for any other social media projects, please share your ideas down below in the comment section!