
There are many tools you can use to color hair in PaintTool SAI. Whether you want to finish a new character design, portrait, or a new piece of concept art, PaintTool SAI offers multiple tools to get the job done.
In this article, I will teach you how to shade realistic and anime hair using a variety of tools and blending techniques.
My name is Elianna. I have a Bachelor of Fine Arts in Illustration and have been using PaintTool SAI for over seven years. As a freelance character designer, I use PaintTool SAI to create my drawings and have explored various techniques to bring them to life, including their hair.
In this post, I will show you a few methods to color hair in PaintTool SAI in styles such as realistic and anime, using the Pencil, PaintBrush, Select Pen, Airbrush, and more.
Let’s get into it!
Table of Contents
Key Takeaways
- Style is the main factor that will affect your hair-coloring strategy.
- Collecting reference images can be useful as a visual aid to use while designing
- Using various brushes and custom brush textures can aid in coloring realistic hair.
- Cel-shading is a rendering technique often used in anime, manga, and western cartoons in which flat colors and shadows create the illusion of depth in an image instead of a shading gradient and are often composed of a base, shadow, and highlight layers.
Considerations Before you Color Hair
Before you begin coloring the hair on your character, there are a few things you should take into consideration.
Style
Style is the main factor that will determine the coloring strategy that you use. The most popular styles include photorealistic and anime.
While photorealistic styles utilize a variety of colors and blending techniques such as sfumato and airbrushing, traditional anime styles use limited color palettes and cell-shading. Research which style you would like to use before proceeding.
There are many styles outside of photorealistic and anime. Gather references to determine how you will proceed with your drawing.
Reference Images
Consider collecting a few reference images before coloring. These reference images can be useful to help you figure out how a certain color of hair looks under lighting, and be a visual aid throughout your design process. I find collected 3-5 reference images a great help.
Furthermore, if you struggle with color, you can use your reference images and the color picker to create a color palette for your piece. This is a method that I use occasionally for coloring anime hair, as there are many accessible character sheets from various popular shows available online.
Custom Brushes and BrushTextures
There are a variety of brush textures available in PaintTool SAI, and even more custom user-created textures online. If you intend to use a custom brush or brush texture, make sure to download it before you begin coloring.
Experimenting with these textures can speed up your work process, but are not necessary. You can still achieve realistic hair rendering using just one or two simple paint brushes in PaintTool SAI, as many painters in history did before the advent of digital art. Do not feel pressured into using custom textures unless you want to.
To learn how to install custom brushes and brush textures in PaintTool SAI read my post How to Make Custom Brushes in PaintTool SAI.
Now that we’ve gone over the considerations, let’s get into it!
How to Color Realistic Hair in PaintTool SAI
There are many ways to color realistic hair in PaintTool SAI. You can use a pencil, brush, airbrush, and more. However, before we start, I will define the different color regions of the hair. I am using a reference image to aid in this process.
Root: The root hair color is found near the hair part. This color can be the same as the base hair color or different if the character has dyed hair. The character’s natural hair color will show here.
Base Color: The base color of the hair will define the rest of the hair colors. This base color can be any shade of brown, blonde, red, black, or other hair colors.
Shadow: Shadows are dependent on the type and direction of light that interacts with the character’s hair. Usually found at the bottom of the hair and near the neck, the hue of these shadows can also depend on the time of day and type of light cast on the hair.
Highlight: Highlights can be found on the top of the head and throughout the hair. Depending on the color of a character’s hair and the lighting conditions, these highlights can take on many different appearances.
It is often helpful to create a color palette before beginning your coloring process. Before we color the hair I will show you how I create a custom color palette using a reference image.
Step 1: Assemble various reference images for your character’s hair.
Step 2: Using the color picker, extract colors for your custom color palette.
Step 3: Save this palette in another layer or add the swatches to your swatch library for easy access.
To learn how to add custom swatches to your swatch library read my post How to Create Custom Color Swatches in PaintTool SAI.
Once you have your custom color palette you can begin coloring your character’s hair. You can also skip this step and begin coloring right away if you feel confident in your color sensibility or would just like to experiment.
Choose whatever method is more intuitive for you.
Follow the steps below to color realistic hair in PaintTool SAI.
Step 1: Click on your sketch layer.

Step 2: Using the Selection Pen and/or Magic Wand click on/define the area where your hair will be colored. Your selection will show blue.

Step 3: Create a new layer and name it Hair.

Step 4: Fill in this layer with your hair Base Color. For this example, my base color will be a brown/brunette color.

Step 5: Create a new layer above Hair and name it Highlights. Check the Clipping Group box.
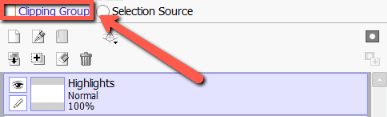
Step 6: Select a lighter color on the color wheel from your Base Color. Then, using the Brush, Airbrush, or PaintBrush draw multiple strands of hair around the skull, emanating from the roots.

Step 7: Create a new layer above Highlights and name it Shadow. Check the Clipping Group box.
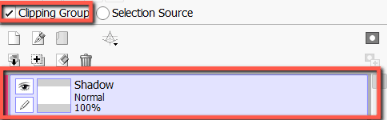
Step 8: Select Multiply under Blending Modes.

Step 9: Using the same color as your Base Color and the Airbrush, render the shadows in the hair.

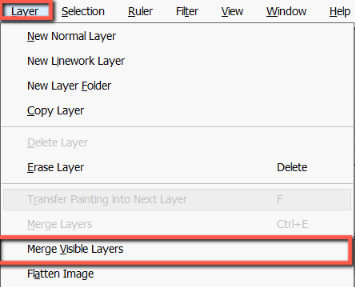
Step 10: Merge all your layers together.
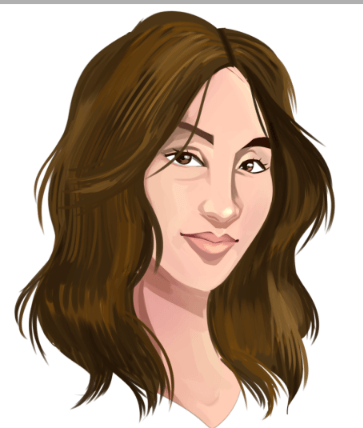
Step 11: Using the Brush or Pencil tools clean up the hair and add flyaway strands or other embellishments to make it look more realistic. You can also add a different root color with your brush in this step.
If you are still confused, watch this video and follow along.
How to Color Anime Hair in PaintTool SAI
Coloring anime hair is easy in PaintTool SAI. Using the Selection Pen, Paint Bucket, and cel-shading technique you can color your character’s hair efficiently.
Cel-shading is a rendering technique often used in anime, manga, and western cartoons in which flat colors and shadows create the illusion of depth in an image instead of a shading gradient. This technique most often includes the following color regions:
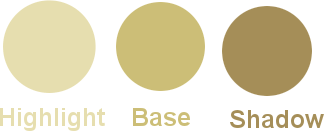
Base Color: The base color of a color region.
Shadow: Darker than the base color, the shade/ shadow is used to indicate depth.
Highlight: Lighter than the base color, highlights are used to represent reflections of light on a character or object.
If it is your first time cel-shading using just a Base Color and Shadow can be plenty sufficient to create a good design. However, I find that highlights can really make an image pop!
As previously mentioned, reference images can provide guidance in picking colors for these regions. You can also experiment with color and shading while drawing if you prefer.
Follow the instructions below to color anime hair in PaintTool SAI using cell shading.
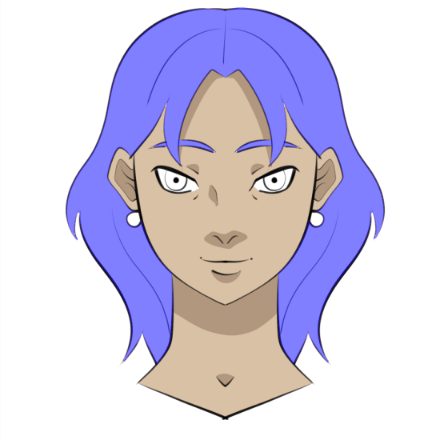
Step 1: Locate and click on your lineart layer.
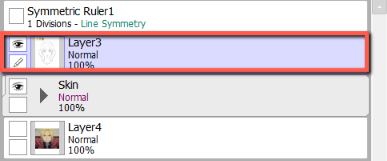
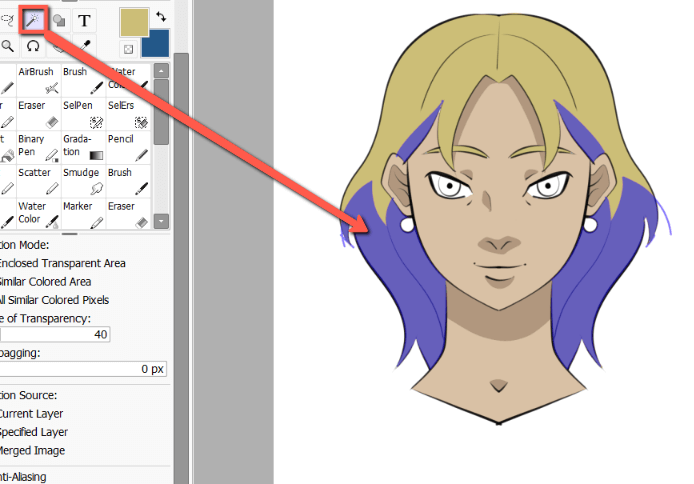
Step 2: Using the Magic Wand select the area in which you will be coloring your character’s hair.
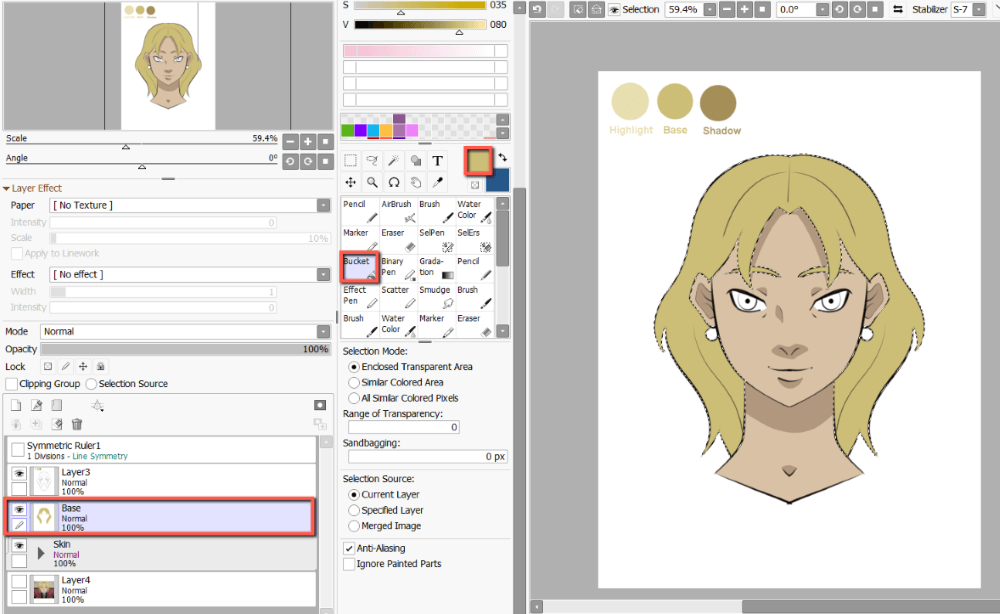
Step 3: Create a New Layer and move it under your linework layer. Name this layer Base Color.
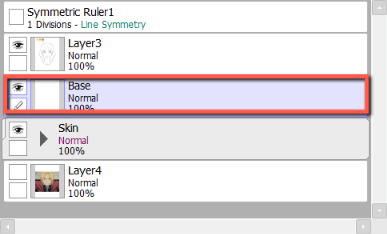
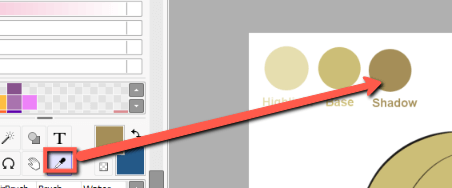
Step 4: Using the color picker, select a color for your Base Color layer and fill it in with the Paint Bucket tool.
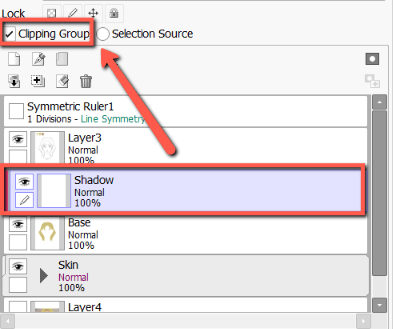
Step 5: Create a New Layer above your Base Color layer and name it Shadow. Check the Clipping Group box.
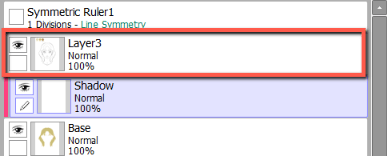
Step 6: Click on the Selection Pen and your Linework Layer.
Step 7: Using the Selection Pen, draw the outline of your shadows.
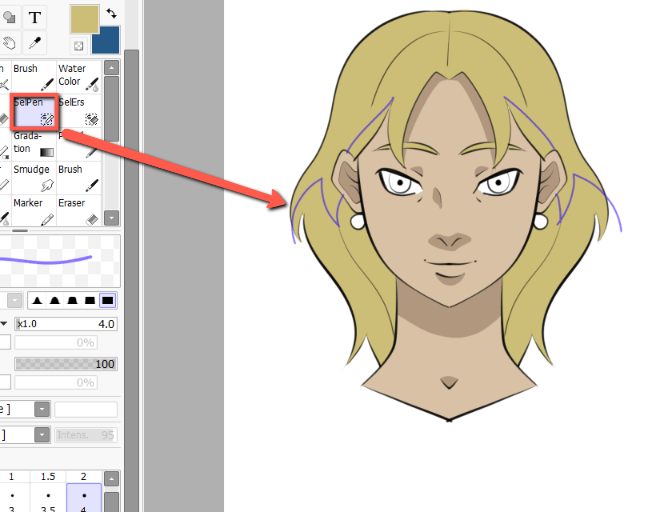
Step 8: Using the Magic Wand, select the area within your shadow outlines.
Step 9: Using the Color Picker or Color Wheel, select a color for your shadow.
Step 10: Click on your Shadow Layer
Step 11: Using the Paint Bucket fill in your shadow area.

Step 12: Create a new layer above the Shadow Layer and name it Highlight. Check the Clipping Group box.
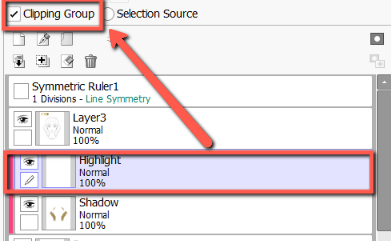
Step 13: Use the same methods above for outlining your shadow areas with the Select Pen, and Magic Wand draw where you would like to place your highlights.
Step 14: Select your highlight color with the Color Picker and fill it in with the Paint Bucket.
Tips:
- If you want to recolor your layer with ease, select the Lock Opacity Icon and then use the Paint Bucket to change the color of any layer (Base Layer, Shadow, or Highlight).
- You can also use Blending Modes to edit the appearance of your Shadow and Highlight layers. The modes I use most often which shading are Multiply, Shade, and Shade/Shine but feel free to experiment to find your own workflow.
Final Thoughts
PaintTool SAI offers a variety of tools to color hair, and there are endless combinations to do so. Common styles such as realistic and anime can be achieved through blending and cel-shading techniques.
Before you begin coloring, consider which coloring style you will use in your piece, collect reference images, and download any custom brushes or brush textures if desired.
Experimenting with various tools and rendering/blending techniques can help you solidify your unique artistic approach. Clipping groups, blending modes, brushes, selection tools, textures, and more can be used to efficiently create a visually appealing piece.
Do you prefer to color realistically or in an anime style? How did your character’s hair turn out? Let me know in the comments below!