
InDesign is one of the most popular page layout programs in the world, and it can do just about anything you can dream of to text.
But that complexity also means that some simple tasks can be surprisingly difficult to accomplish, and changing bullet colors in InDesign is the perfect example. It should only take a second, but the reality is much more complex.
Don’t worry, I’ll explain exactly how to do it – I just can’t explain why Adobe would make the process so difficult. Let’s take a closer look!
Table of Contents
Change Bullet Colors in InDesign
Note: for this tutorial, I’m going to assume that you’ve already created your bulleted list in InDesign. If not, that’s the first place to start!
If you want your bullet color to be exactly the same color as the text in your bulleted list, then you’re in luck: all you have to do is change your text color, and the bullet points will change color to match.
To make your bullets a different color from your text, you need to create a new Character Style and a new Paragraph Style. This can be a bit confusing if you’ve never used styles before, but it’s simple once you understand how it all works.
Styles are reusable templates that control the way your text looks. Within each style, you can customize the font, size, color, spacing, or any other property, and then you can apply that style to different sections of text in your document.
If you want to change the way those different sections look, you can just edit the style template, and all the sections using that style update immediately.
If you’re working on a long document, this can save a huge amount of time! You can have as many styles as you want in a document, so you can have multiple different list styles, each with different bullet colors.
Step 1: Create a Character Style
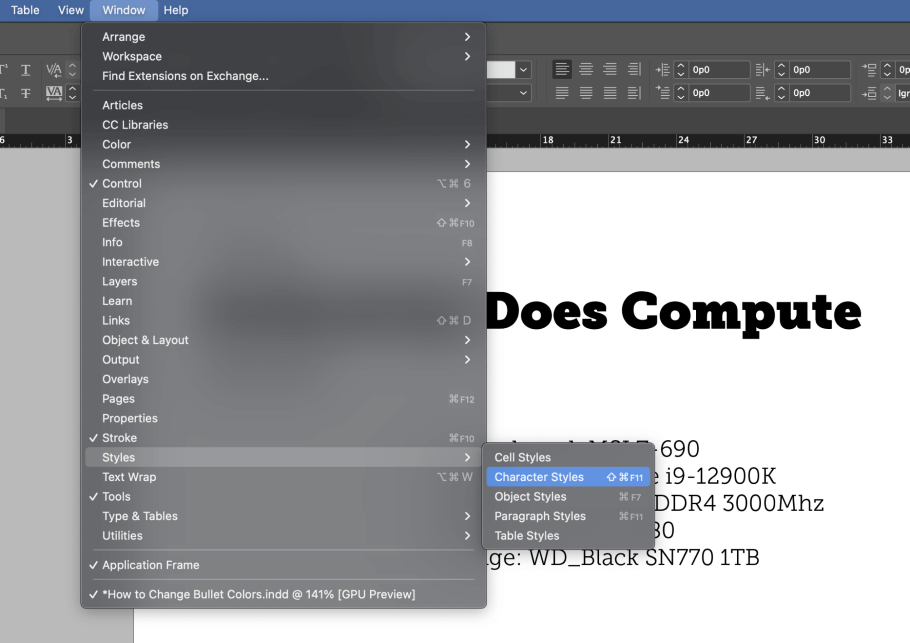
To get started, open the Character Styles panel. If it’s not already visible in your workspace, you can launch it by opening the Window menu, selecting the Styles submenu, and clicking Character Styles. You can also use the keyboard shortcut Command + Shift + F11 (use Shift + F11 if you’re on a PC).
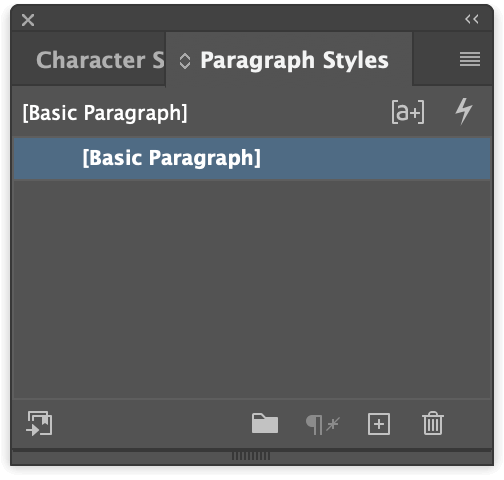
The Character Styles panel is nested beside the Paragraph Styles panel in the same window, so they should both open at the same time. This is helpful because you’ll need both of them!
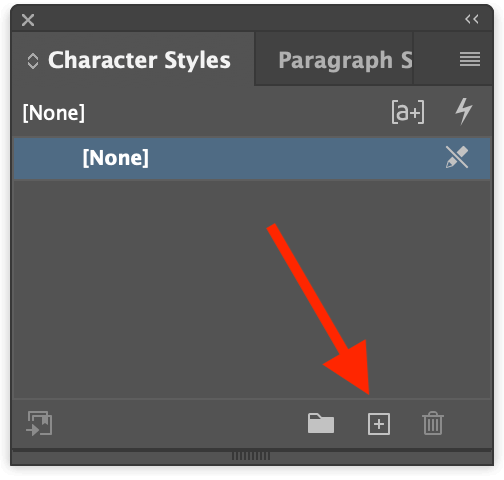
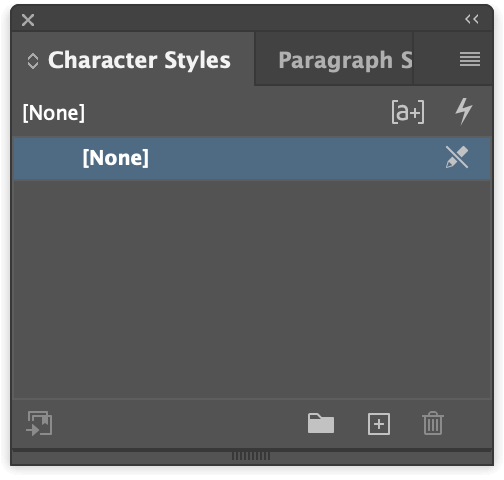
In the Character Styles panel, click the Create New Style button at the bottom of the panel, and a new entry named Character Style 1 will appear in the list above.
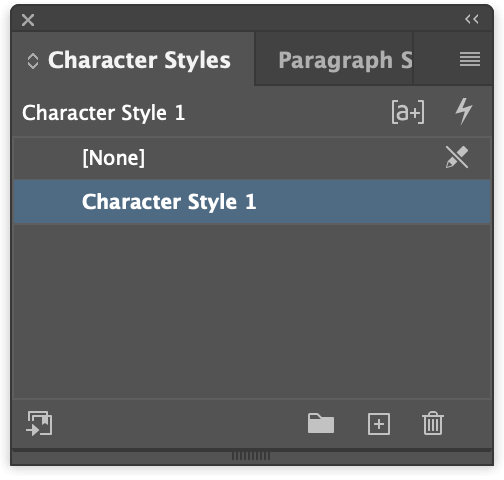
Double-click the new entry in the list to begin editing it. InDesign will open the Character Style Options dialog window.
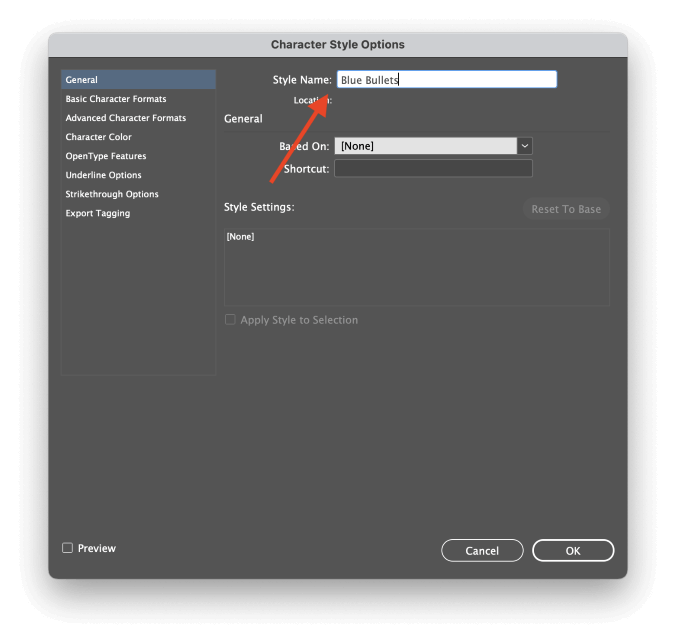
Be sure to give your new style a descriptive name, because you’re going to need that name for the next stage of the process.
Next, select the Character Color tab from the sections on the left. This is where you’ll set your bullet color!
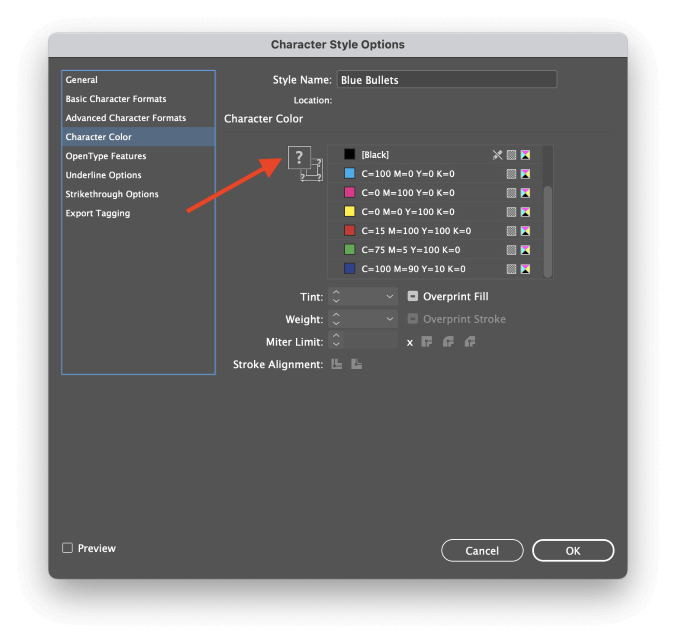
If you’ve already got a color swatch ready, you can select it from the swatch list. If not, double-click the empty Fill color swatch (as highlighted above by the red arrow), and InDesign will launch the New Color Swatch dialog.
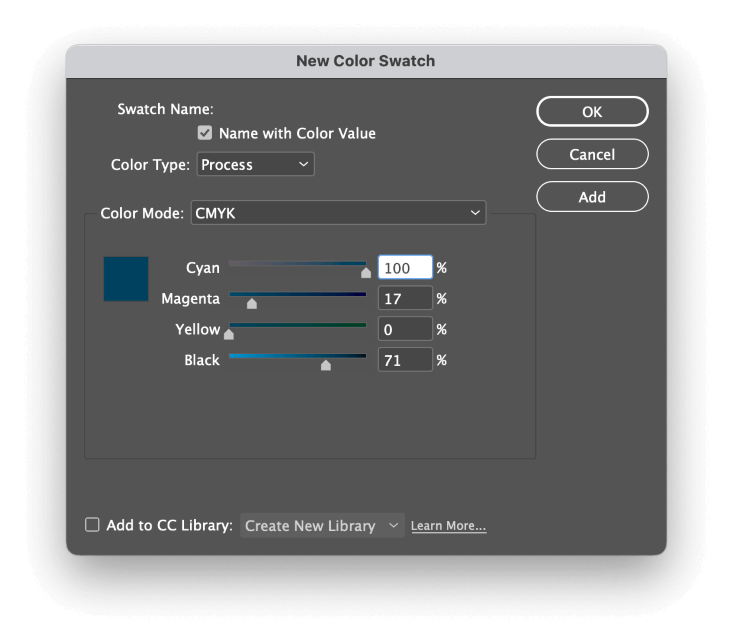
Create your new color by adjusting the sliders until you’re happy, and then click OK.
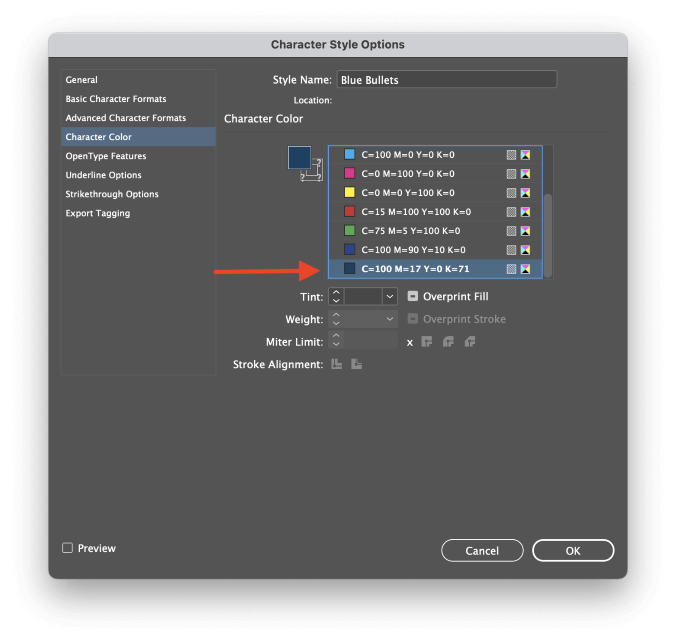
The new color swatch you just created will appear at the bottom of the swatches list. Click on it to select it, and you’ll see the larger Fill color swatch update to match.
Click the OK button, and you’re done with this step – you’ve just created your first Character Style!
Step 2: Create a Paragraph Style
Creating a paragraph style follows almost the same steps as creating a character style.
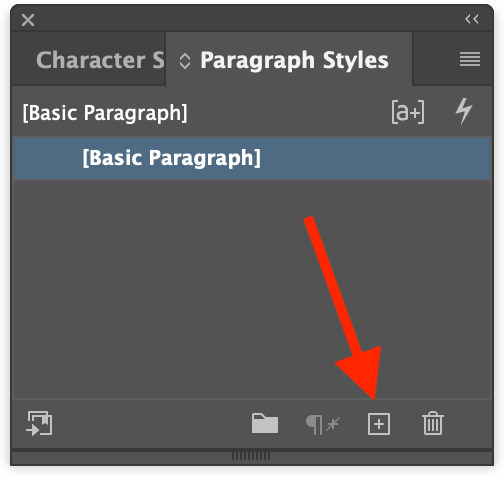
Switch to the Paragraph Styles panel by clicking the tab name next to Character Styles. At the bottom of the panel, click the Create New Style button.
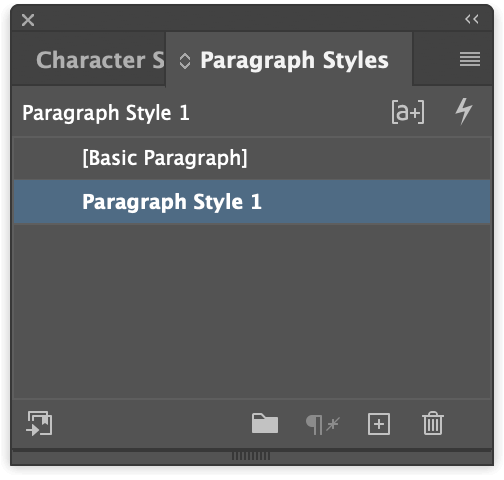
Just like you saw earlier in the Character Styles panel, a new style named Paragraph Style 1 will be created.
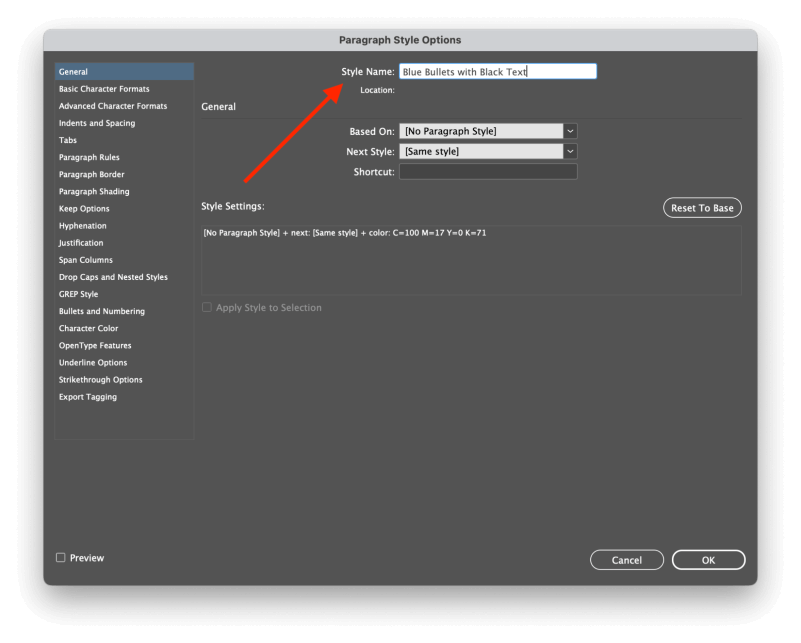
Double-click the entry in the list to begin editing the style. As you can see below, the Paragraph Style Options window is much more complex than the Character Style Options window, but don’t get overwhelmed! We will only need to use three of the available sections.
Before you go any further, give your new paragraph style a descriptive name.
Next, switch to the Basic Character Formats section and set your text in your chosen font, style, and point size. If you skip this step, you’ll wind up resetting the text in your bulleted list to the default InDesign font!
When you’re happy with your font settings, click the Bullets and Numbering section in the left pane of the window.

Open the List Type dropdown menu and select Bullets, and then you’ll be able to edit the settings for bulleted lists. You can customize these options however you like, but the important one for changing bullet color is the Character Style option.
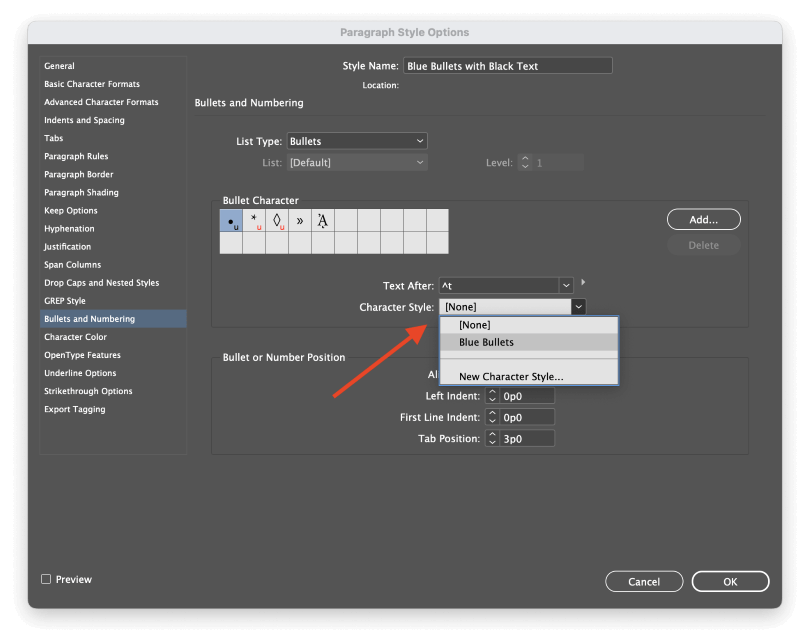
Open the Character Style dropdown menu, and select the Character Style that you created earlier. This is why it’s important to always name your styles clearly!
If you leave the settings like this, all you’ll wind up with text and bullets that are the same color, which isn’t what we wanted! To prevent that, you’ll have to make one more change.
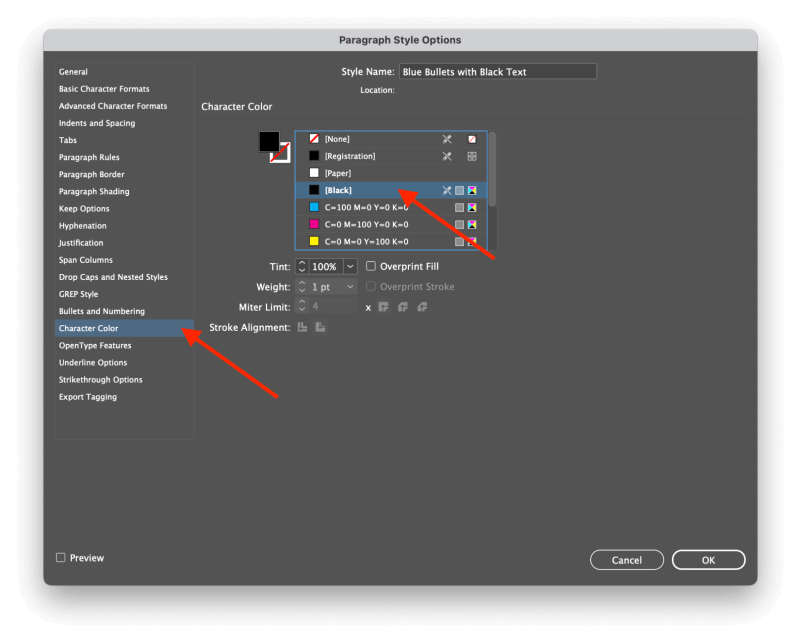
Click the Character Color section in the left pane of the window. For whatever reason, InDesign defaults to using the color you just selected for the bullets, but such are the mysteries of Adobe.
Instead, select Black from the swatches list (or whatever color you want to use for the text in your bulleted list), then click OK.
You’ve now created your first Paragraph Style too, congratulations!
Step 3: Applying Your New Style
To apply your paragraph style to your bulleted list, switch to the Type tool using the Tools panel or the keyboard shortcut T. and then select all the text in your list.
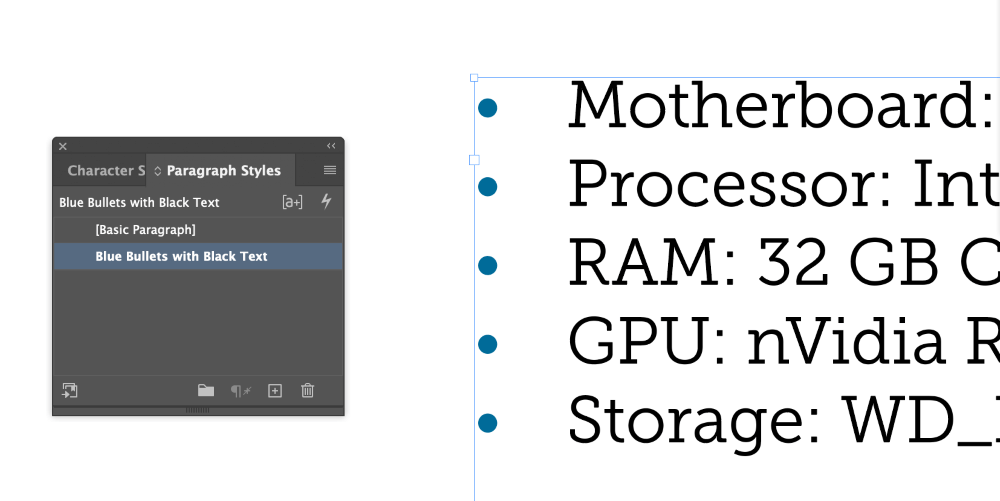
In the Paragraph Styles panel, click the entry for your newly-created paragraph style, and your text will update to match.
Yes, at long last, you’re finally done!
A Final Word
Phew! It’s a long process to change something so simple, but you’ve learned more than just how to change bullet color in InDesign. Styles are an essential part of a productive InDesign workflow, and they can save an incredible amount of time in longer documents. They’re finicky to use at first, but you’ll grow to appreciate them in time.
Happy color-changing!