
Color is one of the most important tools in any designer’s toolkit, but working with color in InDesign can be confusing for new users.
While you’re still getting used to how everything works, InDesign’s color options can seem to work almost at random, which quickly gets frustrating and destroys your productivity. Changing font color can be one of the common frustrations when you’re not familiar with the software.
Even though it doesn’t seem like it, there is a method to InDesign’s madness, and a bit of background on how text color works in InDesign will help you understand and work better with text in InDesign.
Table of Contents
Text Contents vs. Text Frame
The most important thing to know about changing text color in InDesign is that InDesign considers the text frame and the text inside the frame as two different objects.
It’s possible to set different colors for the text frame background and the text itself, which is where most people get confused because if you select the text frame and choose a color, it’ll add a background color to the text frame instead of the text.
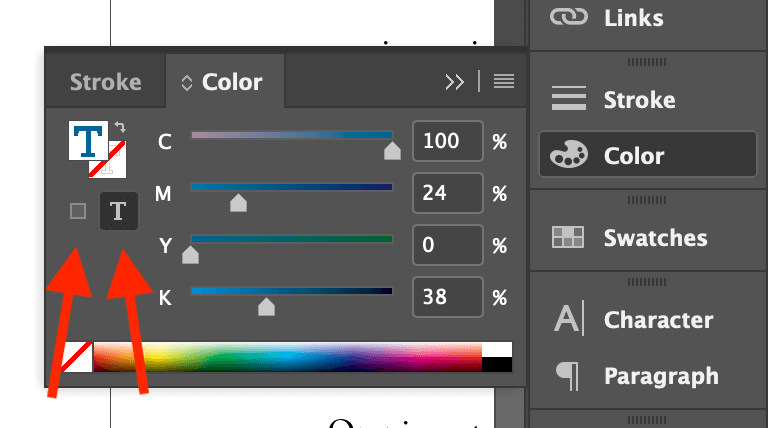
In every situation where you can apply color to a text frame in InDesign, there will be two different options: Formatting affects container (shown by the left arrow above), and Formatting affects text (shown by the right arrow above). Once you understand that difference, it’s much easier to change text color in InDesign, but there’s still one more quirk.
If your text frame is linked to another text frame, you will be forced to use the Type tool to select your text directly within the container. Selecting the frame will not allow you to use the Formatting affects text option.
If you’ve got a lot of text to select in multiple threaded text boxes, you can place the text cursor within the text frame and then press Command + A (use Ctrl + A if you’re using InDesign on a PC) to select all of your connected text.
Changing Color Using the Tools Panel
The simplest method to change text color in InDesign is to use the color swatches at the bottom of the Tools panel.
Start by selecting the text or the text frame you want to colorize, but remember – if your text frame is linked, you’ll need to select the text directly using the Type tool instead of just selecting the text frame.
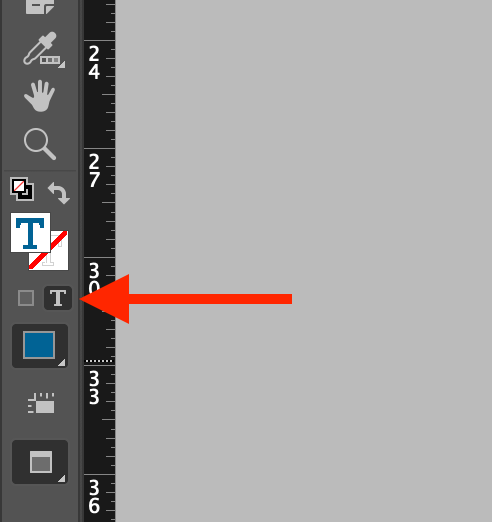
If you have a text frame selected, click the small capital letter T icon below the color swatches to switch to Formatting affects text mode. When you have text directly selected, the Tools panel should automatically switch to Formatting affects text mode, and the color swatches will have a capital letter T in the center, as shown below.
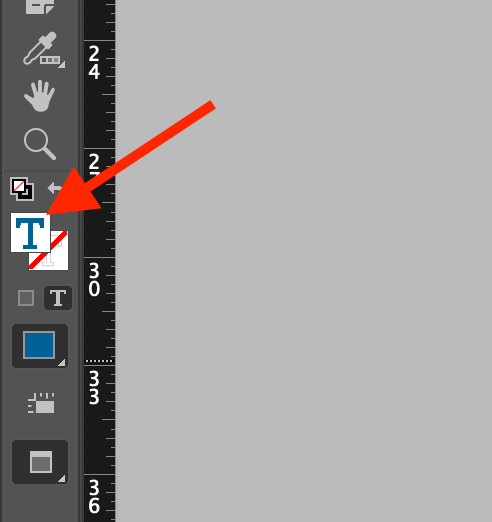
Double-click the Fill swatch (as shown above) to open the standard Color Picker dialog. Select the color you want to use, and click OK. Your selected text will update to display the new color.
Changing Text Color Using the Color Panel
It’s also possible to change text color in InDesign by using the Color panel, although you may need to configure it first, depending on your workspace settings. If the Color panel isn’t visible, you can display it by opening the Window menu and selecting Color.
Select the text you want to colorize using the Type tool, and then open the Color panel.
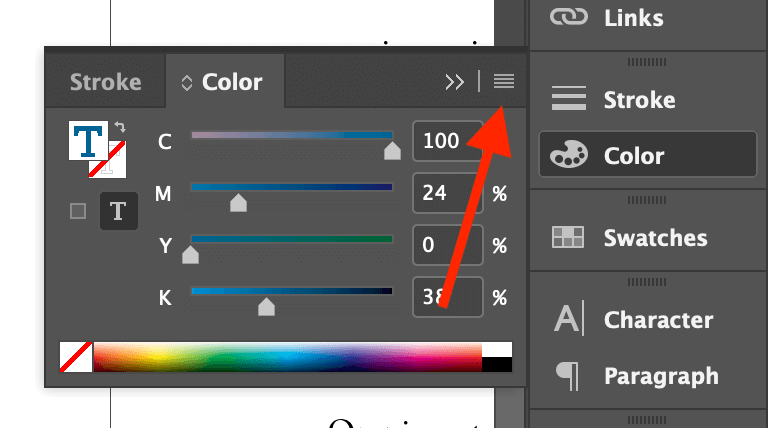
Open the Color panel menu by clicking the panel menu button (shown above), and select the appropriate colorspace for your current project.
Print projects typically use the CMYK colorspace, while screen-based projects use the RGB colorspace, but you can technically use any color mixing method you want since the colors will all be converted to your destination colorspace during the final export process.
Make sure that the Color panel is set to Formatting affects text, if applicable, and then adjust each slider until you reach your desired color. This can be a much faster method for tweaking colors within your layout instead of opening the Color Picker for each minor adjustment.
Using Swatches for Consistent Text Color
If you have to change the text color across a long document or you want to make sure that all your text colors are precisely consistent, it’s a good idea to get comfortable with the Swatches panel.
Swatches allow you to save frequently used colors within a document so that you don’t have to respecify them every time you use them, which can save a lot of time.
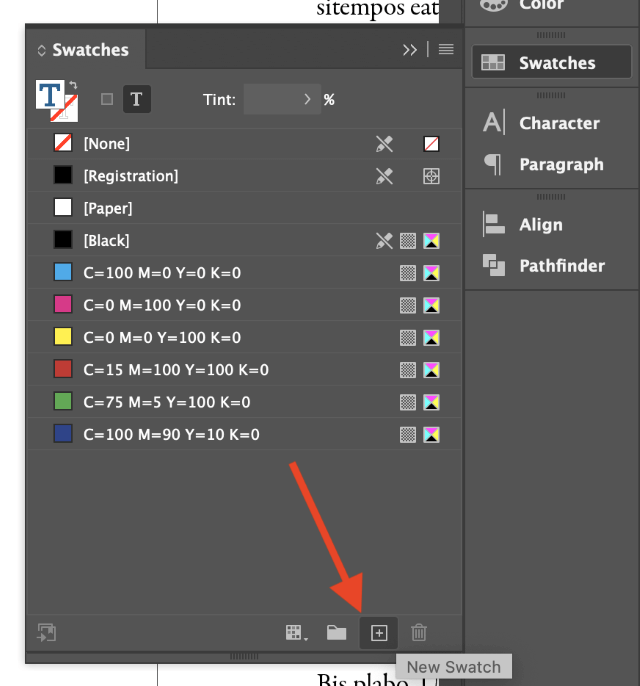
There are a couple of different ways to create new swatches. You can open the Swatches panel, click the New Swatch button at the bottom of the panel, and then double-click your new swatch to edit it, or click the Add CMYK Swatch button in the Color Picker dialog window.
To apply a swatch, select your text or text frame, make sure that the Swatches panel is set to Formatting affects text mode, and then click the appropriate swatch. Your text will update to use the new color.
FAQs
Considering how much text there is in most InDesign layouts, it’s no surprise that there are quite a few questions asked by readers, and I’ve tried to answer them all. If you have a question that I missed, let me know in the comments below!
Can I Change the Color of Multiple Text Boxes?
The only way to change text color across multiple unlinked text boxes is by using paragraph styles and color swatches, which is a bit more complex than the methods described earlier in this tutorial (but not too much).
Paragraph styles are like style templates for text, and once you’ve got each paragraph associated with a particular style, you can update the style in one centralized place, and all the paragraphs which use that style will adjust to match.
By default, all the text frames you create in InDesign will use the default paragraph style, which is named Basic Paragraph.
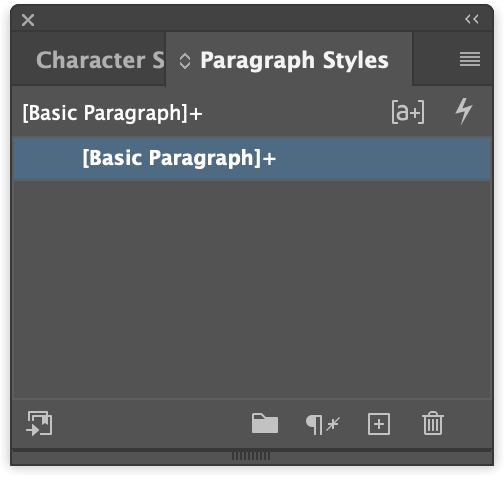
First, create a swatch for the color you want to use by following the swatch method described earlier. Next, open the Paragraph Styles panel, and double-click the entry labeled Basic Paragraph to open the style options.
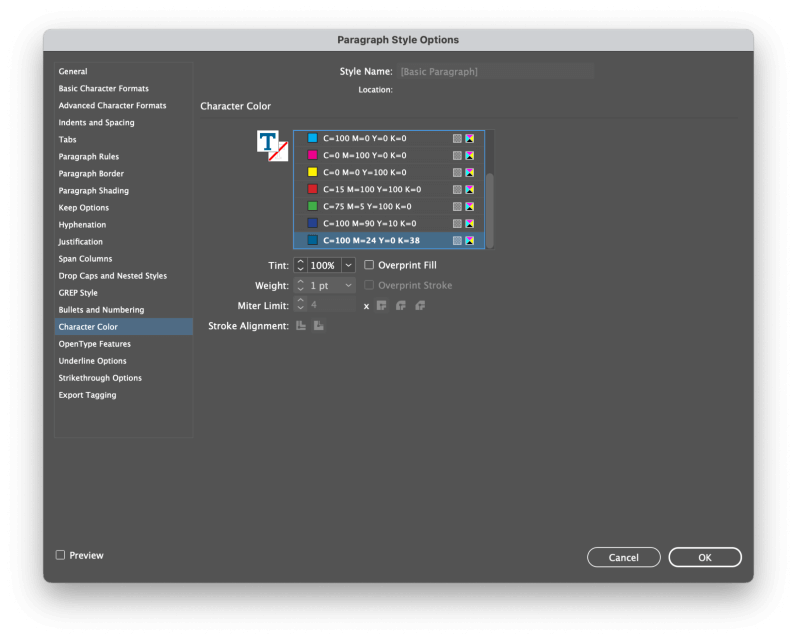
In the left pane of the Paragraph Style Options window, select Character Color. Select the swatch you created earlier from the list, and click OK. All the text which uses the Basic Paragraph style will update.
Why is My InDesign Text Highlighted Blue?
If your InDesign text is being highlighted in light blue unintentionally, you won’t be able to change it using the color settings described in this post because it’s not actually colored.
Light blue text highlighting is just InDesign letting you know that local formatting has been applied to override a Paragraph Style.
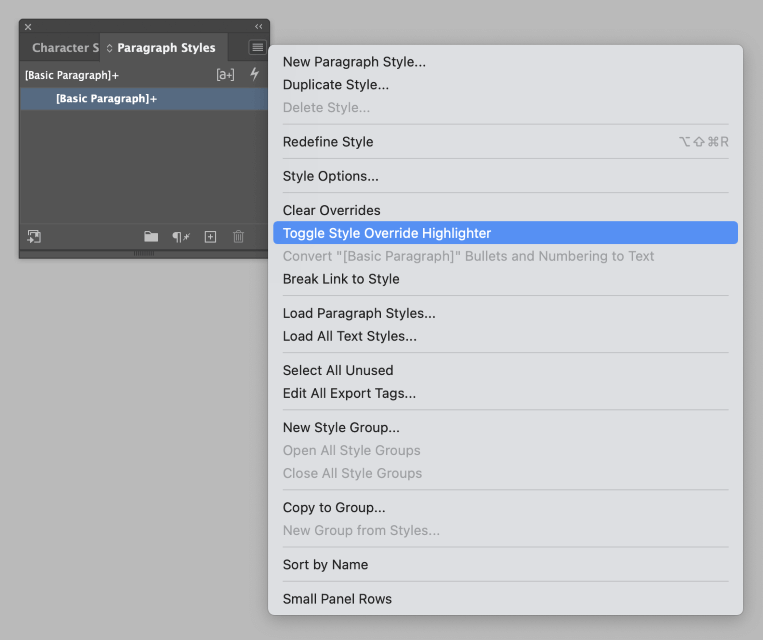
This is useful for finding local formatting in long documents, but you can disable it in the Paragraph Styles panel. Open the Paragraph Styles panel menu, and click the entry labeled Toggle Style Override Highlighter.
A Final Word
That’s just about everything there is to know about how to change text/font color in InDesign! It can be a bit frustrating at first, but you’ll get used to making sure that your formatting options are set properly, and you’ll find it easier and easier to create beautifully colored text.
Happy coloring!