
Bulleted lists are one of the most useful typographic inventions for displaying quick text snippets in a highly readable format.
InDesign has a range of options for working with bulleted lists, but the system can be a bit confusing to use, especially if you’re used to the fully automatic bulleting systems used in most word processing apps.
In this article, you’ll learn different ways to add bullet points and how to convert bullets to text in InDesign.
Table of Contents
The Instant Method to Add Bullet Points in InDesign
This is the quickest way to add points if you want to make a simple list in InDesign. You can make a bullet list in two steps.
Step 1: Start by selecting the text you want to convert into bullet points using the Type tool.
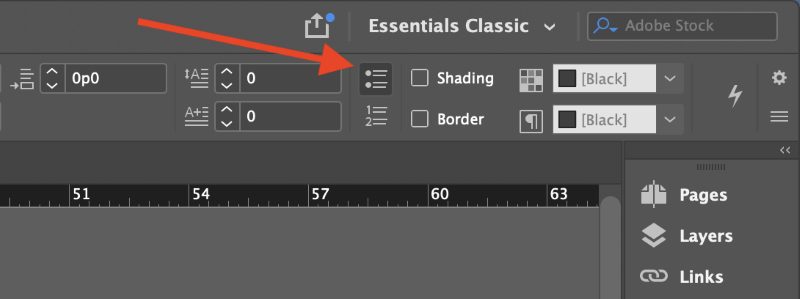
Step 2: In the Control panel that runs across the top of the main document window, click the Bulleted List icon (shown above).
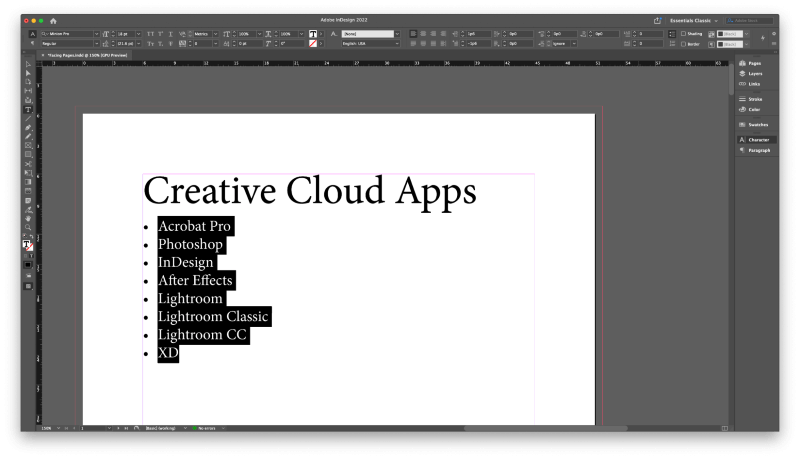
That’s all there is to it! InDesign will use each of the line breaks in your text as a cue to insert a new bullet point.
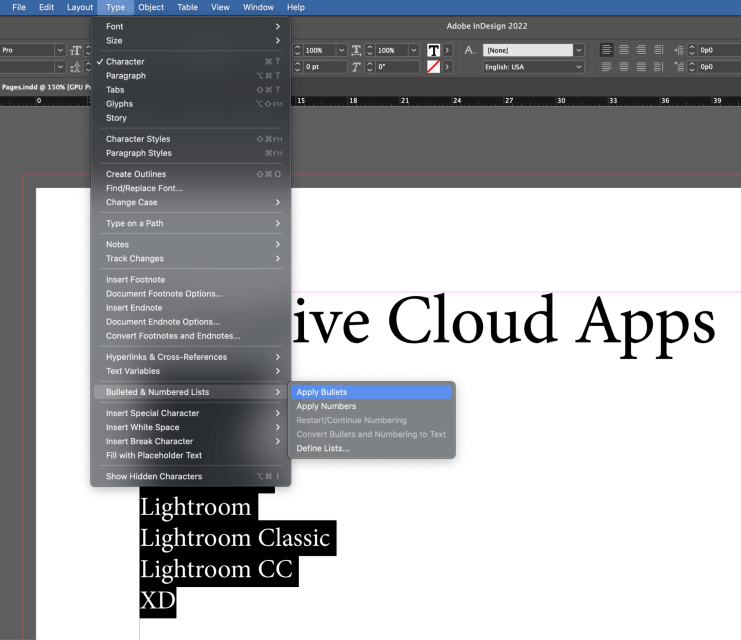
Alternatively, you can select your list text, then open the Type menu, select the Bulleted & Numbered Lists submenu, and click Add Bullets.
While the process of adding bullet points in InDesign is perfectly easy, things get a bit more confusing when you want to add multiple levels of bullet points or customize their shape and change the bullet size.
Those processes deserve their own section of the post, so read on if that’s what you’re looking for!
Adding Multilevel Bullet Points in InDesign
Many InDesign tutorials insist that you need to use Lists, Paragraph Styles, and Character Styles to create your multilevel bulleted lists in InDesign, and they can be a huge headache to configure properly.
If you’re just working on a quick project, it’s quite a lot of setup for just a few bullet points. The Styles method is a useful best-practice approach, but it’s more suited to extremely long documents that contain multiple bulleted lists. Fortunately, there’s an easier way!
Follow the steps below to add second-level bullet points in InDesign.
Step 1: Start by creating a standard bulleted list using the method described above. Don’t worry that every item will start at the same position in the list hierarchy because we’ll fix that soon!
Step 2: Using the Type tool, select the lines of text that you want to put into the next list level, then you can use the bullet point keyboard shortcut Option key (use the Alt key if you’re using InDesign on a PC), and click the Bulleted List icon at the right edge of the Control panel, as shown again below.
InDesign will open the Bullets and Numbering dialog window, allowing you to customize the appearance and placement of your selected bullet points.
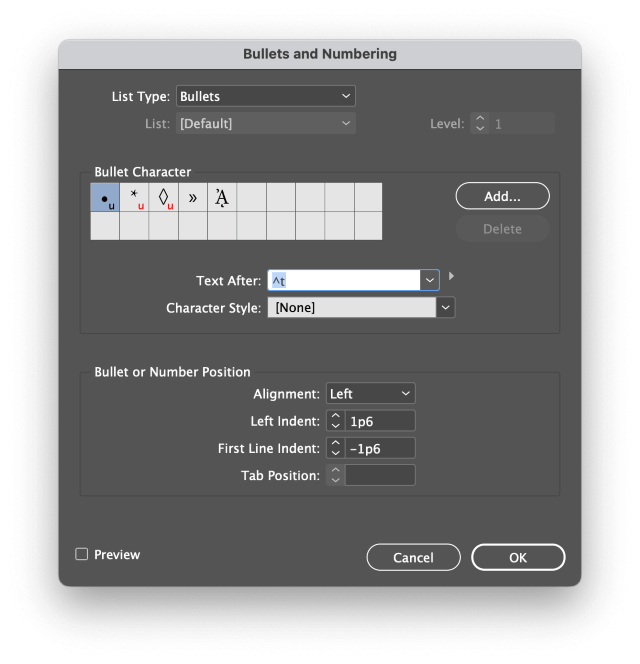
To help make the different levels of the list hierarchy distinct from each other, it’s usually a good idea to select a different bullet point character and increase indentation for each level.
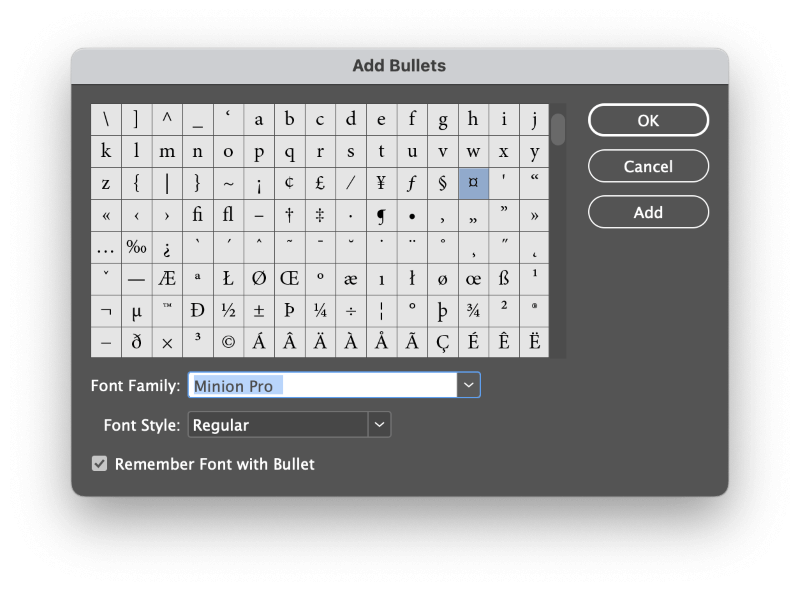
Step 3: Select a new option in the Bullet Character section as the second-level bullets, or click the Add button to scroll through the full glyph set of your currently active typeface.
Select a new character and click OK, or click the Add button to add multiple new options to the Bullet Character section.
Step 4: Increase the Left Indent setting to adjust the spacing between bullet points so that your sub-level list is indented more deeply than the previous list items.
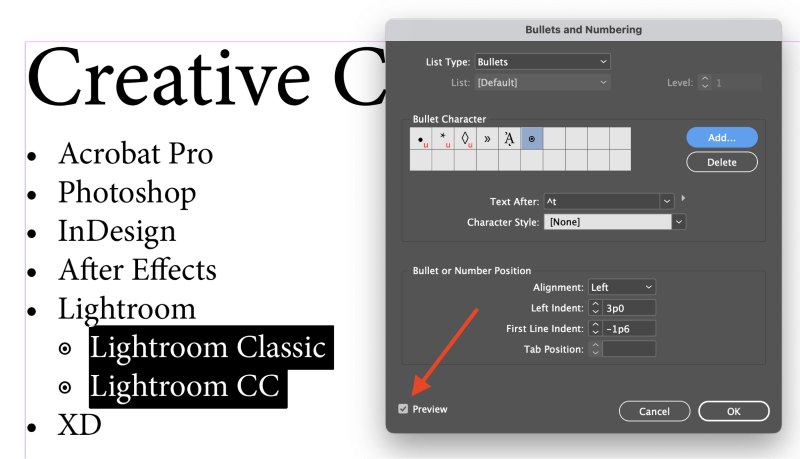
To speed up the process of fine-tuning your placement, you can check the Preview option in the bottom left corner of the dialog window. This should save you from having to open the Bullets and Numbering window repeatedly.
You can repeat this process for additional levels, although if you’re creating multiple complex lists, you may want to explore using the equally complex Styles method.
Converting Your Bullet Points into Text
While using InDesigns bulleting system has its good points, sometimes it’s necessary to get rid of all the dynamic adjustments and convert your bullet points into plain text characters.
This allows you to edit them just like any other text, but it also prevents InDesign from automatically creating new list entries for you.
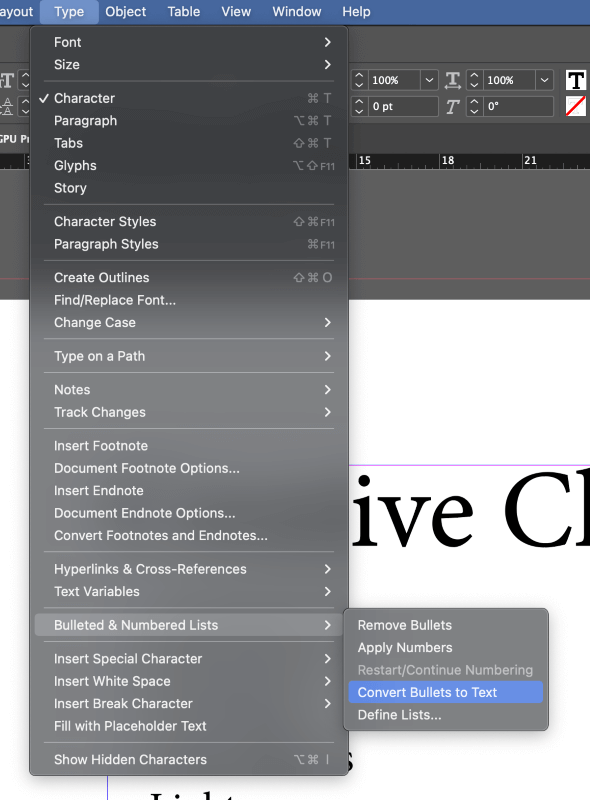
Select the list entries that you want to convert using the Type tool, then open the Type menu, select the Bulleted & Numbered Lists submenu, and click Convert Bullets to Text. InDesign will convert the selected bullet points and the associated spacing into standard text characters.
A Final Word
That covers the basics of how to add bullet points in InDesign, but as you now know, there’s a lot more to learn! Paragraph Styles, Character Styles, and Lists deserve their own specialized tutorial (or maybe even multiple tutorials), so if there’s enough interest, I’ll be sure to post one for everyone.
Happy listing!