
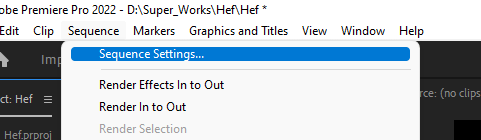
Changing the aspect ratio in Adobe Premiere Pro is simple. Just alter your Frame Size in your sequence settings. You can do this by going to Sequence Menu > Sequence Settings. If the sequence isn’t created yet, you can change the frame size value when creating your sequence. Then you are good to go.
We have different types of aspect ratios– Wide Widescreen (16:9), which is the aspect ratio for online and home videos; Vertical view (9:16), which is used on mobile phones; and Square (1:1), which is used majorly on social media.
In this article, I will reveal the secret behind aspect ratio, explain what a resolution is, how resolution affects exporting your project, and how to change the aspect ratio for a new and existing sequence.
Table of Contents
- How to Change Aspect Ratio in Premiere Pro
- What is Resolution in Premiere Pro
- How to Change The Aspect Ratio When Creating a Sequence
- How to Change The Aspect Ratio of an Existing Sequence
- Aspect Ratio Suitable for YouTube Video
- What is the Function of Auto Reframe in Premiere Pro
- Applying Cinematic Bar in Premiere Pro
- Change Aspect Ratio to Instagram Size
- Conclusion
How to Change Aspect Ratio in Premiere Pro
An aspect ratio is set to be the width and the height of your sequence. The aspect ratio determines how your video will export, and it is always written with two numbers in colons.
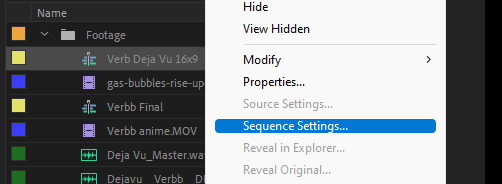
For an existing sequence in Premiere Pro, right-click on the sequence in your project folder. Then select sequence setting.
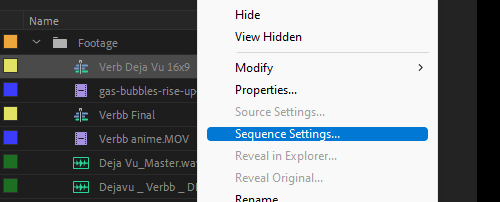
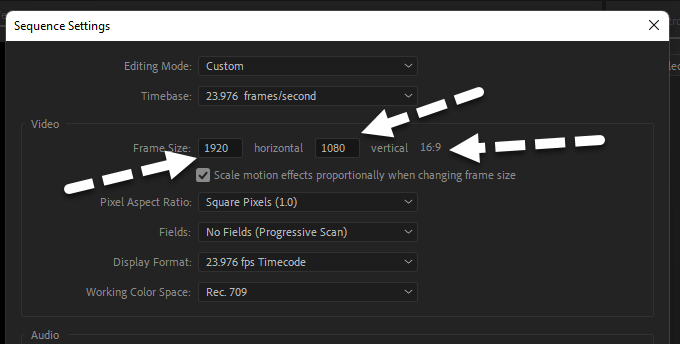
Under the Video section, update the Vertical value to your desired number.
You can only update the Aspect Ratio by altering your sequence’s vertical or horizontal values. You can also change your sequence setting by going to Sequence Menu > Sequence Settings.
What is Resolution in Premiere Pro
Resolution is the number of pixels in video clips. It’s usually expressed as width x height, for example, 1920×1080 or 4K 4096×2160. The higher the resolution, the more detail you can fit into a video clip, and the sharper it will look.
How Can Resolution Affect the Final Export in Premiere Pro
Resolution can greatly impact your final export in Adobe Premiere Pro. The higher the resolution of your video, the more information you will have to work with. This can result in better quality exports, but it also means larger file sizes.
Now, during the course of exporting, you can choose to export at the same resolution as your original footage or at a lower resolution. If you’re not planning on using the exported footage for anything high-resolution, then it’s probably fine to export at a lower resolution, and this will save you some disk space.
How to Change The Aspect Ratio When Creating a Sequence
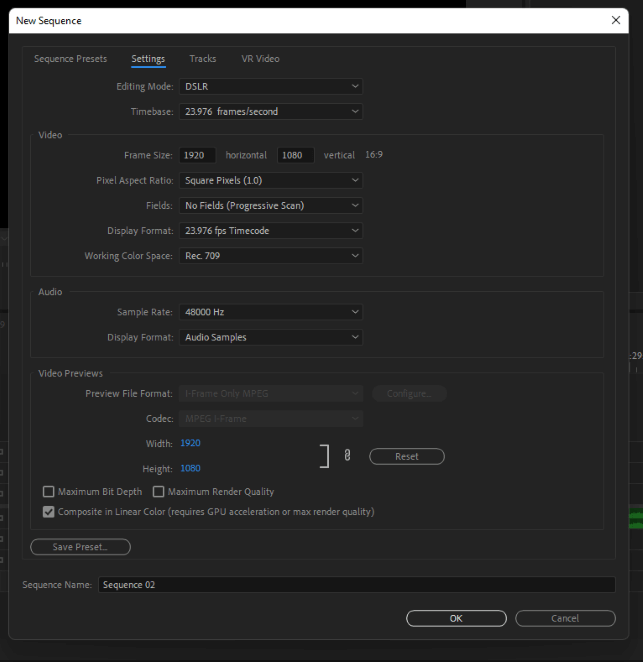
I discussed what a sequence is in detail. But you can create a new Sequence by going to File > New > Sequence or just by pressing the shortcut Ctrl + N.
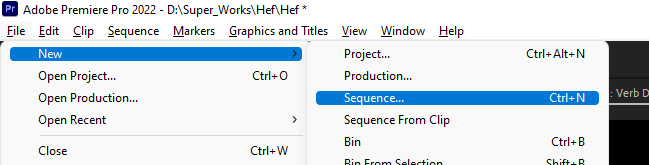
The New Sequence window will open up. Click on the Settings tab. Change the frame size – horizontal and vertical as desired to as you want your aspect ratio.
How to Change The Aspect Ratio of an Existing Sequence
Go to your Project Panel. Then, you right-click on the sequence that needs to be updated and select Sequence Settings. Change the frame size as desired.
Aspect Ratio Suitable for YouTube Video
The standard aspect ratio for YouTube on a computer is 16:9. If your video has a different aspect ratio, the player will automatically change to the ideal size to match your video and the viewer’s device.
What is the Function of Auto Reframe in Premiere Pro
Auto Reframe intelligently identifies the actions in your video and reframes the clips for different aspect ratios. This feature is convenient for posting your video to various social media channels such as Instagram, YouTube, or Facebook.
You can use Auto Reframe to reframe sequences for square, vertical, and cinematic 16:9 or when cropping high-resolution content like 4K and beyond.
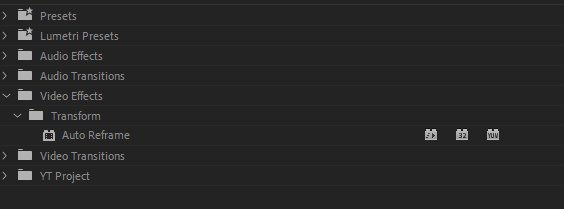
Search for the Auto Reframe fx in your Effects Panel. Or you can locate it under Video Effects > Transform.
Apply the Auto Reframe effect only once: Applying Auto Reframe multiple times (especially with nested clips) can cause unpredictable results – such as black bars on the sides of your videos. If you need to re-apply the Auto Reframe effect, apply it to the original clip.
Applying Cinematic Bar in Premiere Pro
There are many ways to do this, but an adjustment layer is the most efficient way. Create a new adjustment layer and drag the adjustment layer into the timeline. Stretch the adjustment layer over all the clips available in the sequence. Make sure the adjustment layer is on the very top of all clips.
Afterward, go to the Effect Panel, search for crop effect and apply it to the adjustment layer. Finally, go to the Effects Control Panel, select the crop effect tweak the parameters as wanted. You can adjust it to 12% for the top value and 12 % as well for the bottom value.
As a film editor, one of the most common requests I receive is to add the so-called “cinematic bars” at the top and bottom of video clips. This is usually done to give the clip a more polished, professional look.
Change Aspect Ratio to Instagram Size
Aspect ratios for Instagram have been 16:9 for a while now, but that may be changing. Some users have noticed that their video clips are cropped to a 4:5 ratio when uploading them to the site.
Conclusion
I know the aspect ratio is kind of hard to understand; there’s a lot to learn about it. But you are good to go with the basics I explained here.
Changing your aspect ratio only requires changing the frame size in your sequence setting. You can do this for a new to-be-created sequence or an existing sequence.
Got something to tell me? Let me know in the comment section. I will be there with you.