
The Preview app can perform a lot of basic image editing tasks, from cropping and resizing all the way to color and exposure adjustments.
Because it can handle those tasks, many new Mac users hope that they can perform more complex image editing tasks using the Preview app, but unfortunately, it’s not always up to the task.
It’s still a fantastic little app, but sometimes you need to choose your tools a bit more carefully. Although there isn’t a blur tool, there is a trick to slightly blur an image in Mac Preview and I’m going to show you how to do it in this tutorial.
Keep reading!
Table of Contents
Can You Blur Images in the Mac Preview App?
It is not possible to blur images fully using the Mac Preview app, but you can achieve a very slight blurring effect.
This is not a full blur, and the original content will still be visible. If it is text content, it will still be legible, so you can’t use this technique to obscure sensitive data, but you might still want to experiment with it to see how it works.
If you’re not satisfied with the slight blur effect created by Preview, there are some additional suggestions for other photo editors that feature proper blur effects further down in the post.
How to Slightly Blur an Image in Mac Preview
Remember – this method will only produce a very slight blurring effect, so don’t be surprised if you have to find another method!
To get started, open your image in the Preview app.
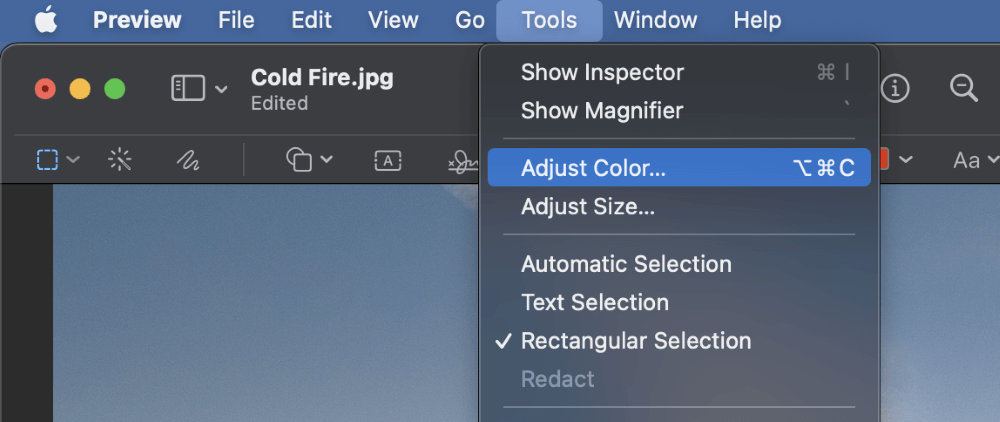
Next, open the Tools menu and select Adjust Color. You can also use the keyboard shortcut Command + Shift + C. This will open the Adjust Color dialog window, which contains a histogram of your image data and a few simple controls for exposure, saturation, and color balance.
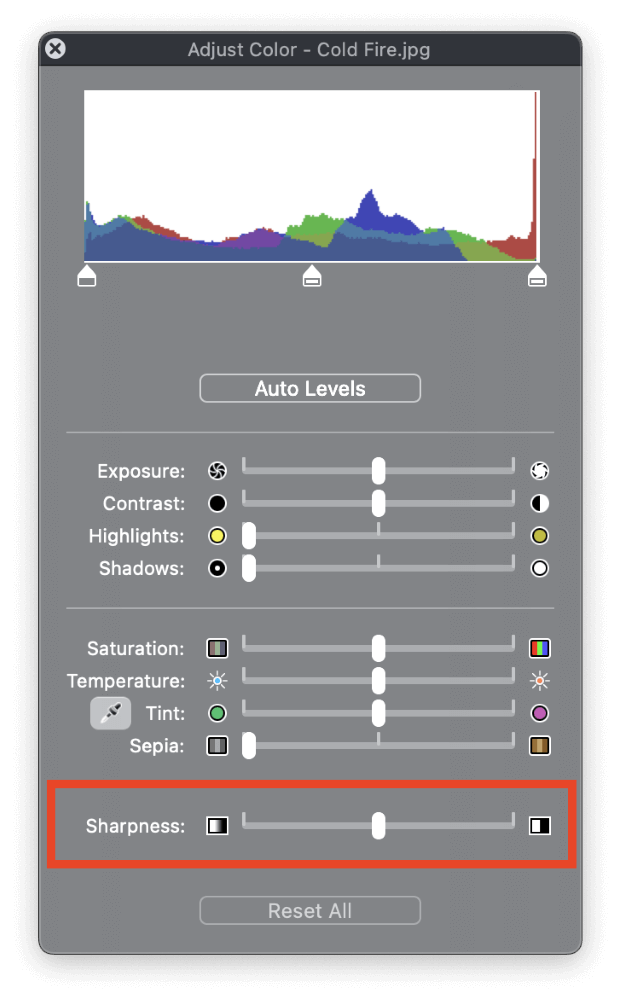
At the bottom of the dialog window, you’ll see a slider labeled Sharpness. Move the slider all the way to the left to very slightly blur your image.
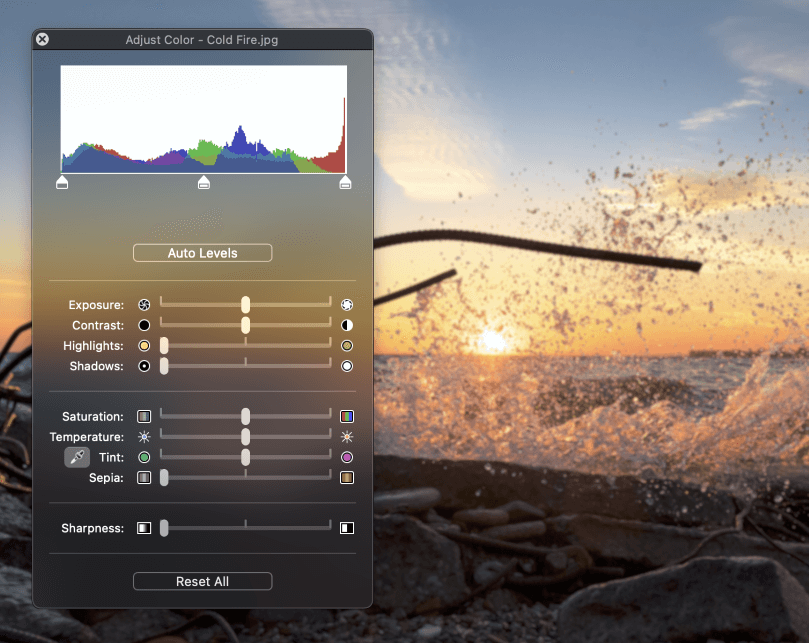
As you’ll see almost immediately, the blur effect is very limited. Technically, it’s not actually blurring your image at all, just reducing the sharpness, but the mathematical distinction between the two effects is definitely outside of my scope of knowledge.
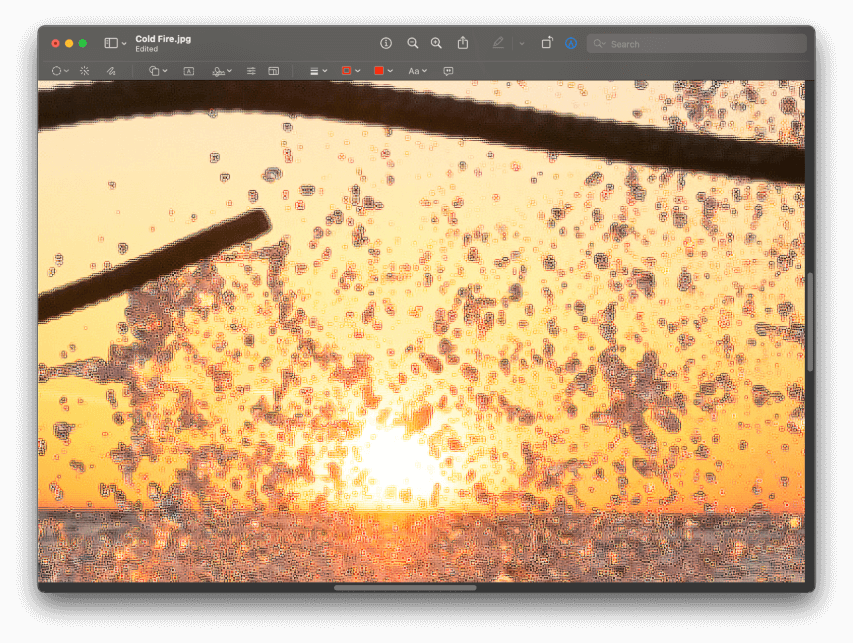
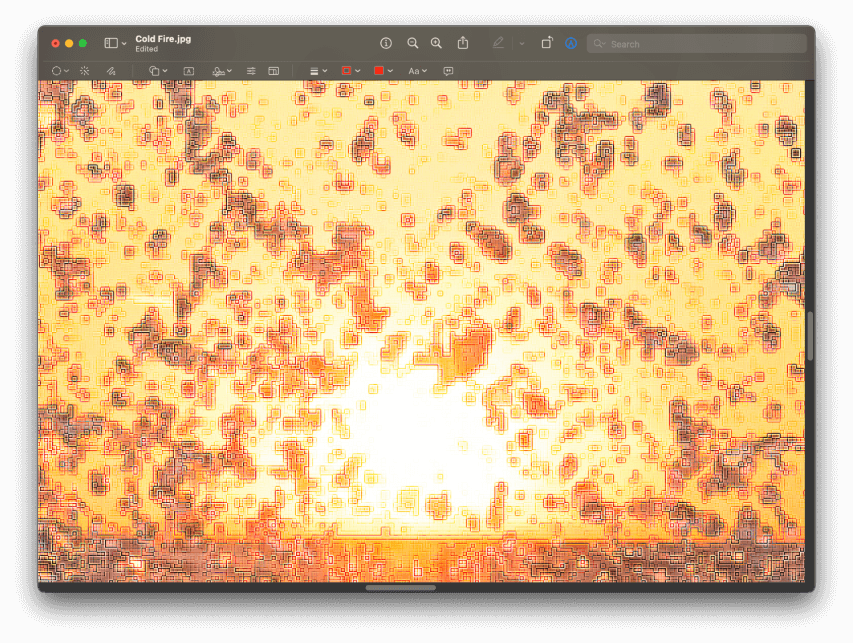
The end result looks like a very slight blur when zoomed out, but when you zoom in, you’ll see that it’s not really blurry at all. Instead, a wild pixelation effect appears! It looks cool, I guess, but it’s not going to fool anyone into thinking that it is the bokeh blur from a fancy camera lens.
To remove the effect, you can either reset the Sharpness slider to zero or click the Reset All button at the bottom of the Adjust Color window.
Some Better Ways to Blur Images
The Preview app is an incredibly useful tool, but when you want to get into more complex edits, sometimes you need a more powerful image editor.
Fortunately, you won’t have to shell out the big bucks for Photoshop or something that powerful just to blur an image! Here are a couple of free options that can help you out.
Use a Web-based Image Editor
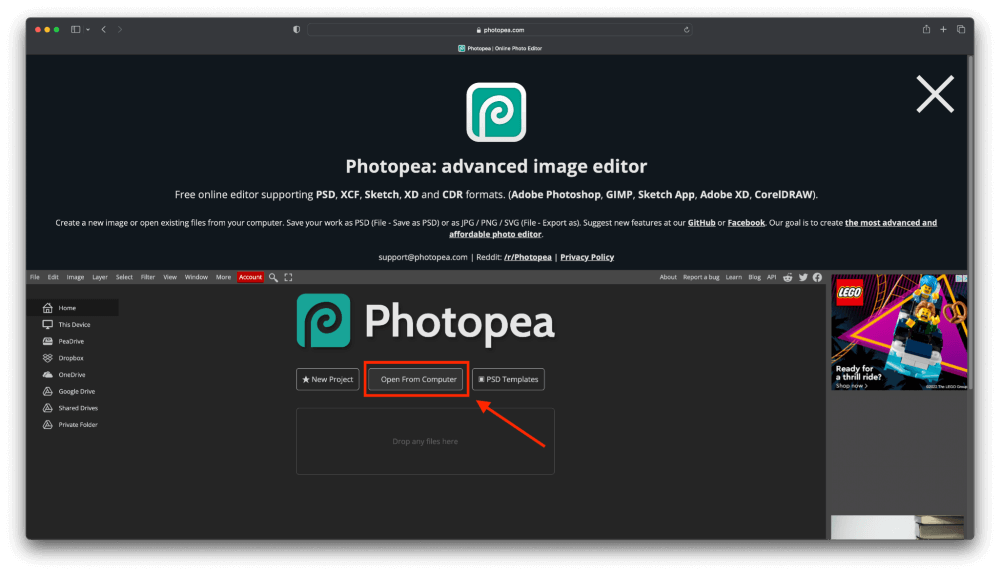
High-speed internet connections and powerful server computers make it possible to do some image editing tasks directly in your web browser! There are a number of different web-based image editors, but my current favorite is Photopea.
It works with almost any browser (including Safari), and it works on any operating system.
Just visit Photopea, and click the Open from Computer button. Browse to select your file, and click Upload.
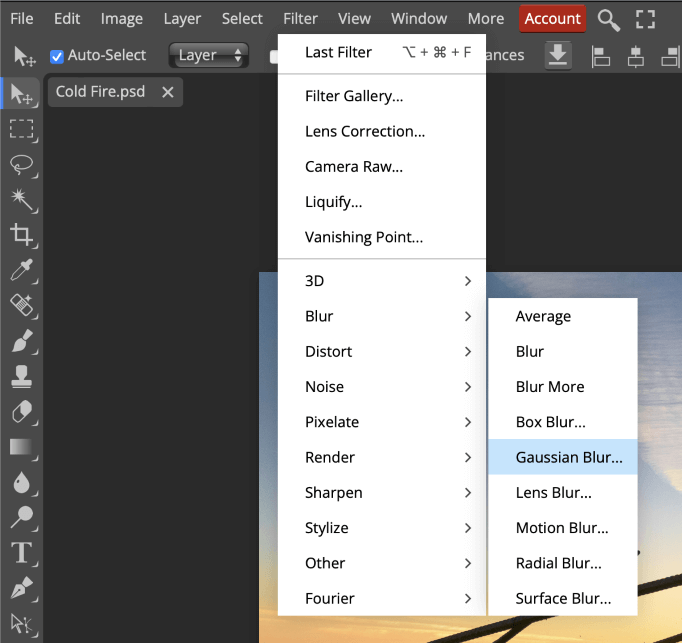
Once your file is loaded in Photopea, open Photopea’s Filter menu, select the Blur submenu, and click Gaussian Blur.
This is a much more capable blur tool than you’ll find in the Preview app, and you can easily adjust the blur amount by changing the Radius slider.
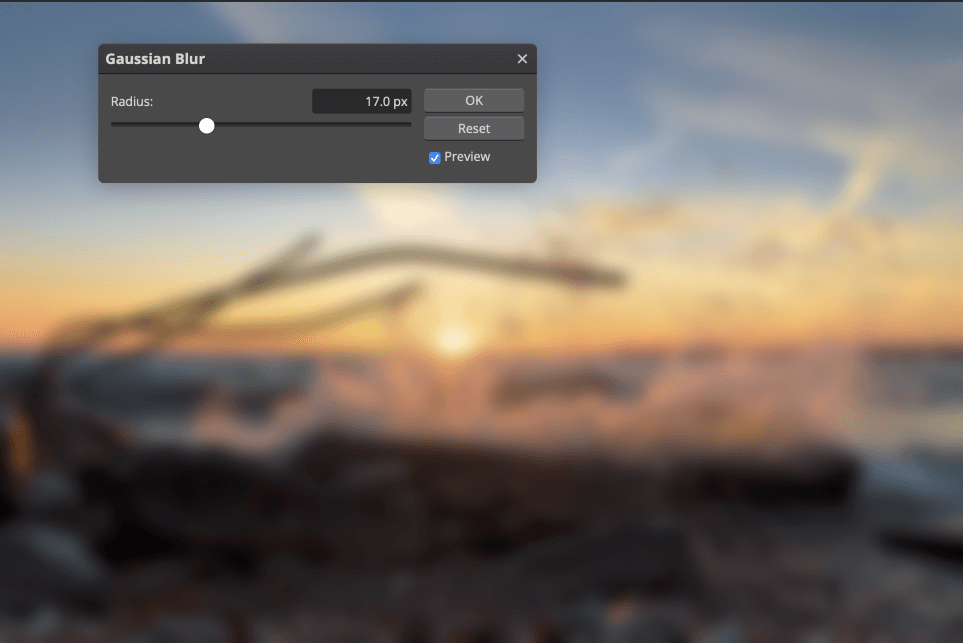
If you want to blur only a selected area of your image, use one of the selection tools to create a selection marquee before applying the Gaussian Blur filter effect.
Once you’re done, open Photopea’s File menu (not your web browser’s File menu!) and select the Export As submenu. Choose your desired format, and give your new file a descriptive file name.
That’s all there is to it!
Try a Dedicated Image Editor
If you’re working with a large image and it’s too big to upload, or if it contains sensitive content and you don’t want to share it on a strange web server, you can choose to use a dedicated image editing app for your Mac.
GIMP (GNU Image Manipulation Program) is a free, open-source image editor that’s been around almost as long as Photoshop. It’s not exactly user-friendly, but it has a massive range of powerful editing features, including a number of different options for blurring images.
If you don’t want to use GIMP, Acorn is another simple free image editor for macOS that will let you blur images, but there are also lots more options available in the App Store. Choose one that works for you!
A Final Word
That covers everything you need to know about how to blur images in Mac Preview, including the limitations of Preview blurring and some better alternative options for creating proper blur effects.
Remember, it’s always a good idea to choose the right tool for the job! While Preview is a great app, it’s never going to be as powerful as an app that was designed from the ground up as an image editor.
Happy blurring!