
The Preview app is a great tool for viewing images on your Mac, but it’s also got a handy suite of basic editing tools that allow you to tweak images without launching a more powerful editor like Photoshop.
You probably wouldn’t want to use it as your primary image editor, but Preview’s tools are perfect for simple editing tasks like cropping an image.
Let’s see how it works!
Table of Contents
3 Easy Steps to Crop an Image in Preview
I’m going to break down the three easy steps in detail.
- Step 1: Open your image in Preview.
- Step 2: Make a selection around the area you want to keep.
- Step 3: Apply the Crop command.
At this point, you can print your cropped image, export it as a new file, or copy and paste it into another app. If you want a bit more detail about how to crop an image in Preview, as well as how to apply a few unexpected crop formats, then read on!
Step 1: Open Your Image in Preview
The Preview app can read a wide range of image and document formats, and it can crop just about any file that it can open, including JPG, GIF, PNG, and TIFF files. It can even crop Photoshop PSD files without using Photoshop!
Opening an image in Preview is extremely easy.
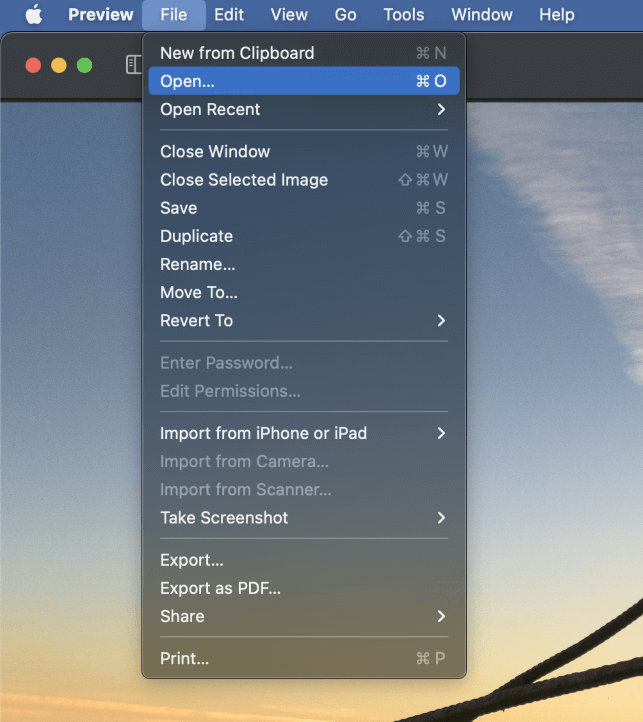
Launch the Preview app, then open the File menu and click Open.
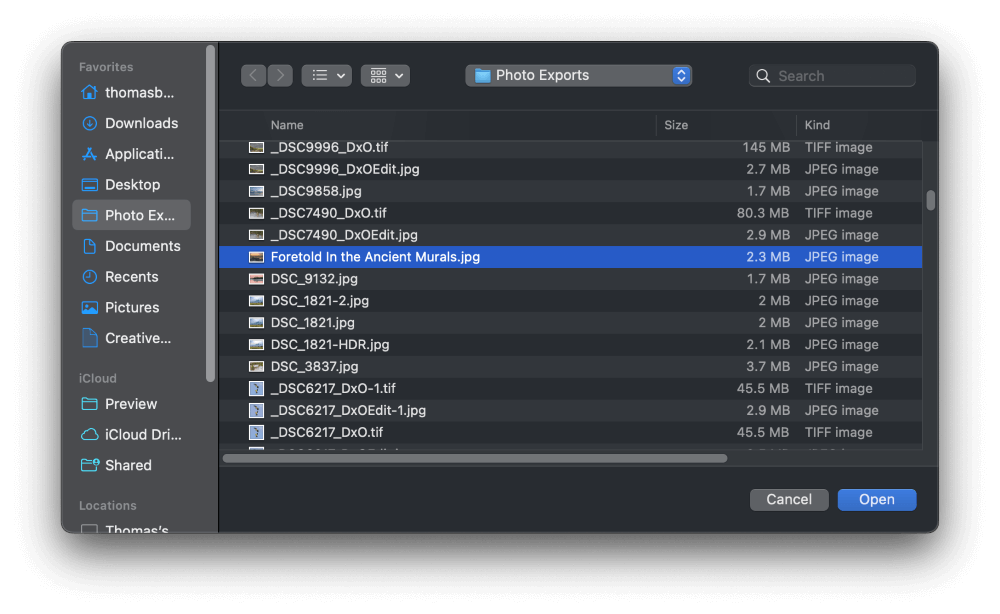
Browse through your files and select the image you want to crop, then click the Open button.
Step 2: Create a Crop Selection
The most fundamental part of cropping an image is the process of choosing which parts of the image you want to keep. If you were cropping a printed photo, you might have to rely on a ruler to help you estimate this, but when cropping digital images, a selection outline does a much better job.
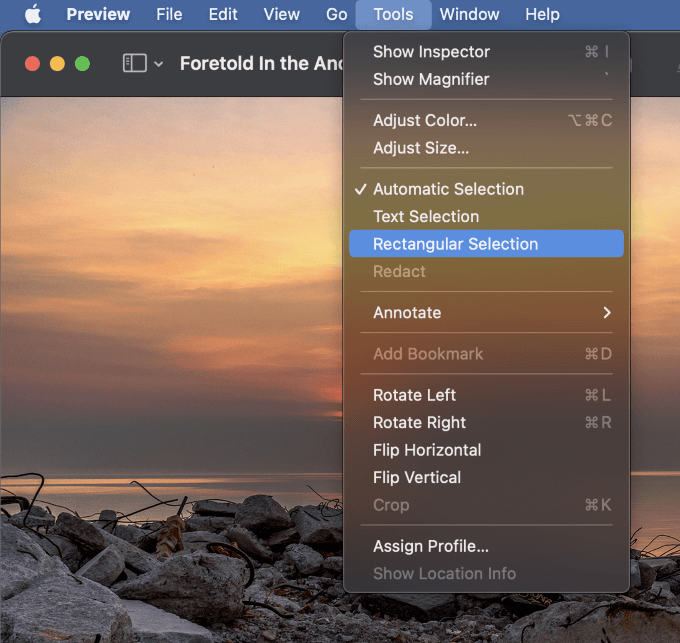
To make a rectangular selection, open the Tools menu and select Rectangular Selection.
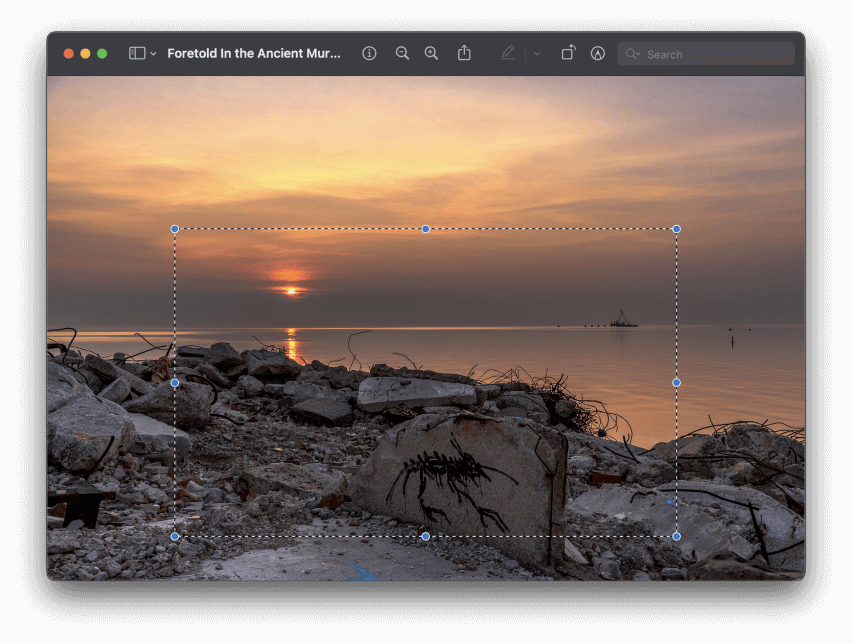
Click and drag to place your selection around the area of the image you want to keep. The first spot you click will become the new top left corner of your cropped image, but you can also work from the bottom right if you prefer.
Fortunately, because this is all digital, you can adjust the selection area as many times as you want before you actually complete the crop. This allows you to get the perfect placement for your crop every time!
To adjust your crop selection placement, position your mouse cursor inside the selection area. The cursor will change to a hand, which indicates that you can click and drag to reposition the entire selection area.

To resize your crop selection, click and drag any one of the eight round blue handles that are positioned around the edges of your selection (shown above). You can also hold down the Shift key while clicking and dragging a corner handle to lock the aspect ratio of your selection.
In addition to rectangular selections, the Preview app can create rounded selections and even custom selection outlines in almost any shape that you’re capable of drawing!
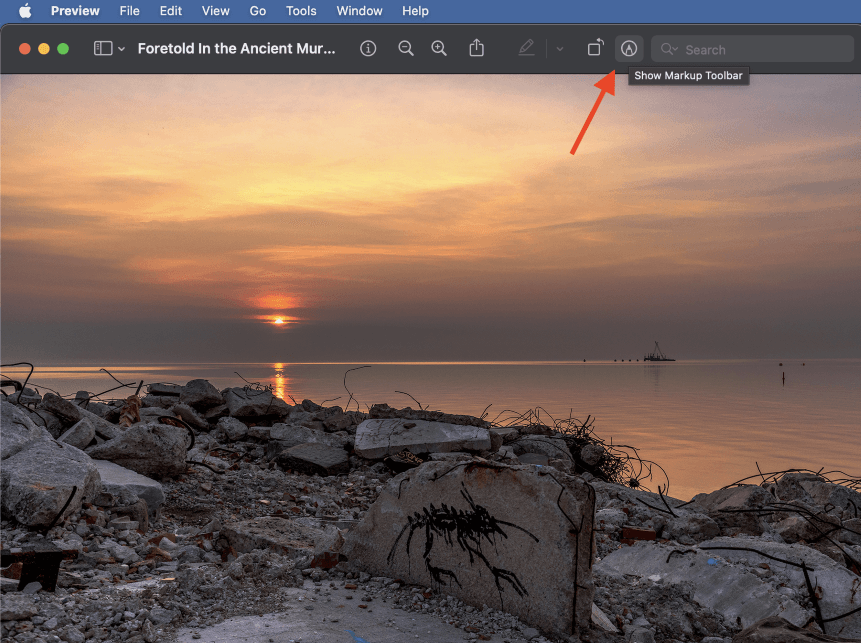
To work with these special selection types, you’ll need to use the Markup Toolbar. If it’s not already visible in the Preview app, you can click the small pen tip icon (highlighted above) to display it, or you can open the View menu and click Show Markup Toolbar.
You can even use the shortcut Command + Shift + A, although I find using the icon is even faster than the keyboard shortcut.
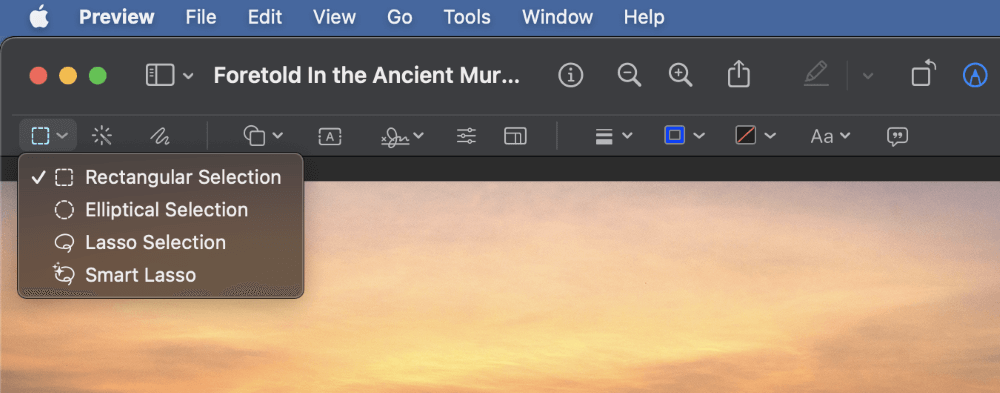
Once the Markup Toolbar is visible, click the Selection Tools icon at the left edge of the toolbar. In the dropdown menu, you’ll see three additional options: Elliptical Selection, Lasso Selection, and Smart Lasso.
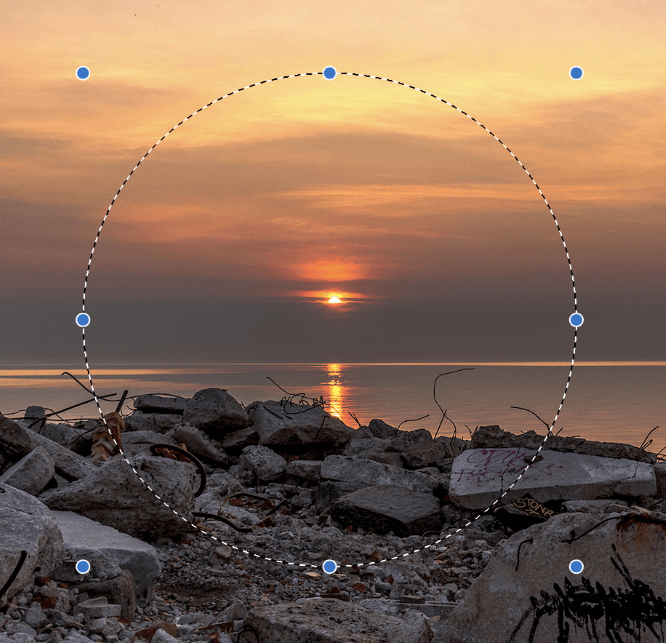
Elliptical Selection functions just like Rectangular Selection, except that you can create circles and ovals instead of squares and rectangles.
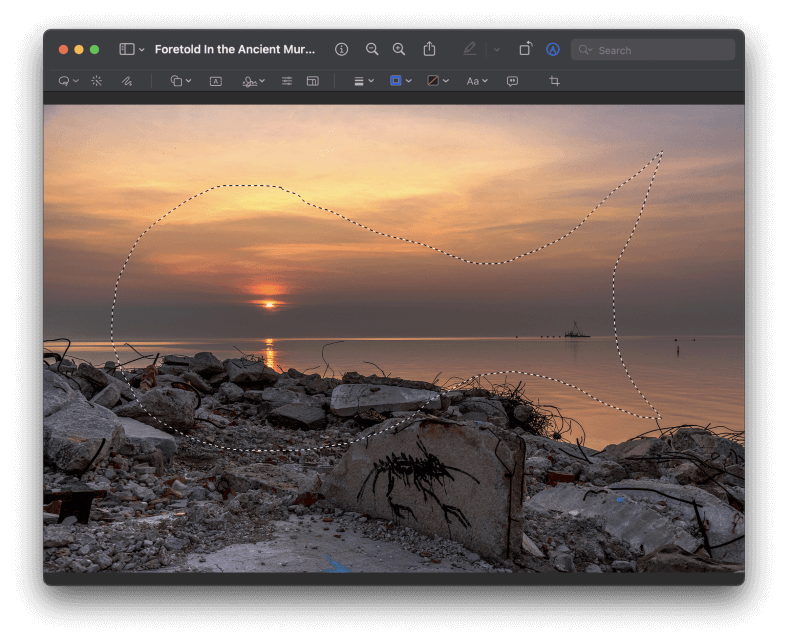
Lasso Selection is a completely free-form selection tool that allows you to create any kind of selection you want. Simply click and hold the left mouse button, and begin drawing, and your selection boundary will follow the cursor path.
Smart Lasso is a bit of a more complex tool, and it’s not the best choice for making crop selections, although it technically does work.
Step 3: Time to Crop
Once your crop area is perfectly positioned, it’s time to actually crop out all the pixels that you don’t want and reveal your new masterpiece.
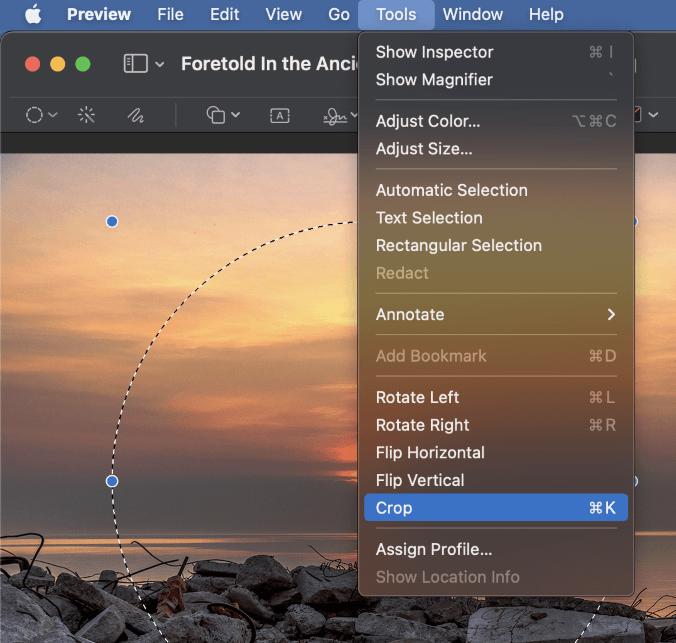
Open the Tools menu, and click Crop down near the bottom of the menu. You can also use the keyboard shortcut Command + K if you want to save a few seconds.
Everything outside of your selection area will be deleted!
If you use a simple rectangular selection for your crop, the image window will resize to match your crop boundaries.
If you use a more complex shape, such as an elliptical or lasso selection, you might see a message asking you if you want to convert your document to a PNG, a file format that supports transparent pixels.
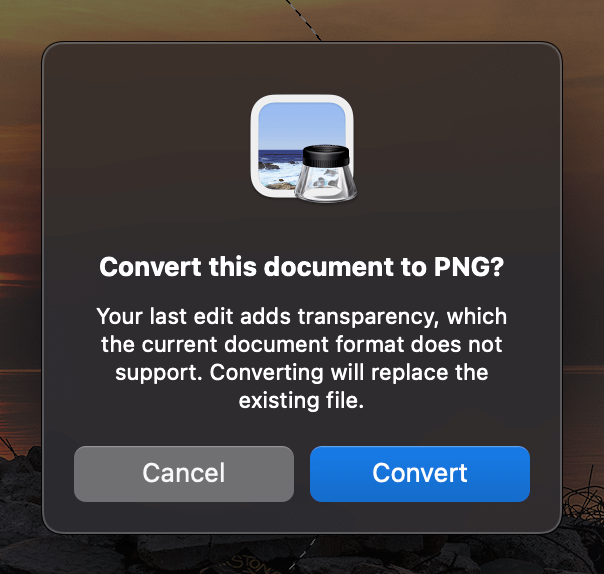
To preserve the transparency of your empty image areas, click Convert, and your image will be cropped.
A Final Word
That’s everything you need to know about how to crop images in Preview on your Mac! If you’re used to working with dedicated image editors like Photoshop, you might find that the cropping process is a bit basic, but Preview is still a great tool for quick cropping jobs when you don’t want or need a more powerful editor.
Happy cropping!