
The Magic Wand tool is the quick and easy option out of Paint.NET’s four selection tools. It’s ideal for selecting large, distinct areas, for when you’re selecting based on color, or when the big picture is more important than the details.
While the tool might appear to be simple and intuitive, there are a number of options and particulars to understand in order to really finesse your selections. If you have used the magic wand tool in Photoshop or the Recolor tool in Paint.NET, you’ll probably find these familiar.
This article will cover all of the features of the Magic Wand tool in Paint.NET and everything you need to get the hang of it.
Table of Contents
3 Steps to Use the Magic Wand in Paint.NET
All you’ll need to prepare is Paint.NET installed and opened. Now follow the steps below to use the Magic Wand in Paint.NET.
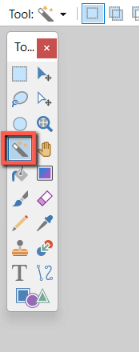
Step 1: Select the Magic Wand tool
Select the Magic Wand tool by finding it in the left-hand toolbar or pressing the S key four times.
Step 2: Decide Which Setting to Use
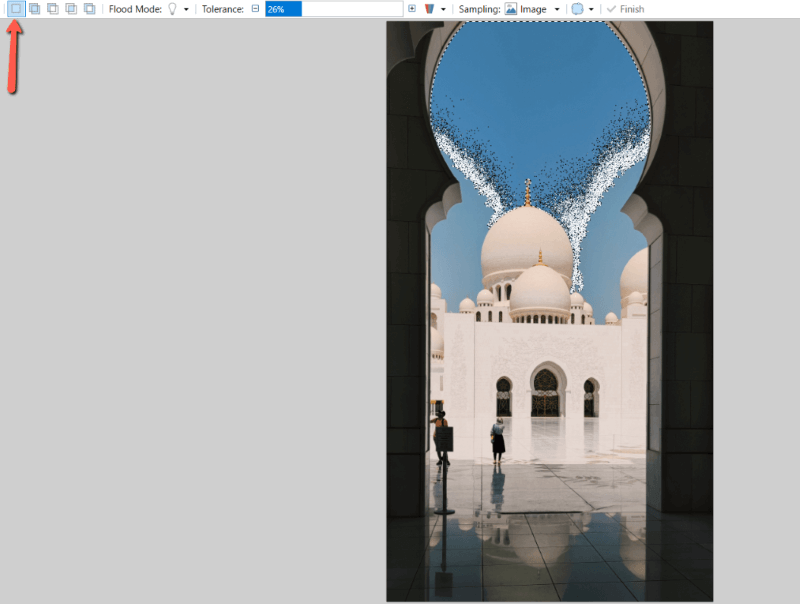
Find the right setting for your selection. The Options bar, from left to right, shows five selection modes, flood mode, Tolerance, and Tolerance alpha mode, and Sampling Image or Layer.
Selection quality determines whether the selection will have hard (or Pixelated) edges or soft (Antialiased) edges.
The selection mode is Replace by default. The other options from left to right are Add, Subtract, Intersect, and Invert. They do what they sound like they would do; Intersect saves only overlapping regions and Invert selects everything but overlapping regions.
The flood mode options are Contiguous or Global. Contiguous selects pixels from the point selected up until they stop meeting the tolerance, while Global selects all pixels in the layer which meet the set tolerance.
Tolerance can be adjusted by clicking inside the bar. At 0% only exact matches will be selected and at 100% all pixels will be selected. Tolerance alpha mode determines how transparent pixels are treated.
Set whether the selection should sample the layer or the entire image and lastly choose between Pixelated or Antialiased edges.

Step 3: Make a Selection
Click on the area you wish to select. To select the sky in this photo I started with Replace mode at a 26% tolerance.
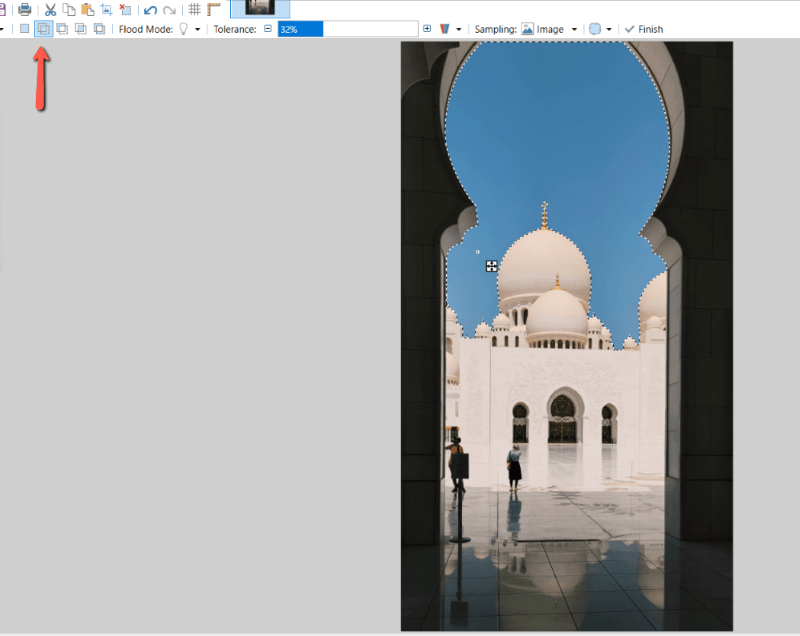
If the selection isn’t in the right place, either re-click while using Replace mode, or move to a new source point by clicking and dragging the square arrows icon.
While the selection is active, you can also adjust the tolerance by clicking on the percentage-labeled bar.
Optionally, change modes as needed to revise your selection. For this selection, I used Add mode and increased the tolerance. You might need to zoom in or use some of the other modes if your selection is more detailed.
Final Thoughts
From there, you have any number of artistic techniques open to you. You can use selections to move elements across the board or onto separate layers, add adjustments to specific elements, delete the selected pixels, and so on.
By understanding the Magic Wand tool you’ll improve your workflow and find new ways to create your designs.
What do you think of Paint.net’s selection tools? Which one do you use the most? Share your perspective in the comments and let us know if you have any questions.