
Shading in PaintTool SAI is easy! Using the Pencil or Airbrush with blending modes such as Multiply and Luminosity, you can add depth to your design in no time. All you need is your tablet and a few minutes to spare.
My name is Elianna. I have a Bachelor of Fine Arts in Illustration and have been using PaintTool SAI for over seven years. Throughout my academic career, I used PaintTool SAI to complete my color theory and shading assignments.
In this post, I will show you how to shade in PaintTool SAI using blending modes, brushes, and some helpful techniques.
Let’s get into it!
Table of Contents
Key Takeaways
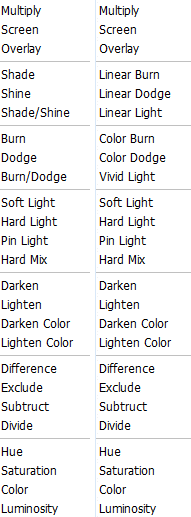
- PaintTool SAI has 23 blending modes that change the relationship between how colors blend on the layers below them.
- There are different types of light and shadow. Learning and studying them will help you gain a more intuitive sense of how to shade.
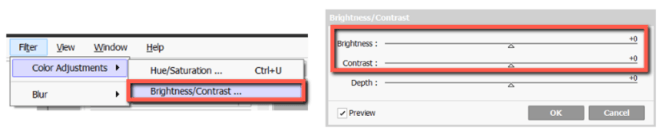
- You can adjust the brightness and contrast in an image using Filter > Color Adjustments > Brightness and Contrast.
PaintTool SAI Blending Modes
Blending modes are layer effects that change the relationship between how colors blend on the layers below them. They can be found in almost all drawing software with similar names and effects. Including normal, PaintTool SAI has 23 blending modes.
My favorite blending mode to shade include Multiply, Shade/Shine, Shade, and Luminosity. In PaintTool SAI version 1 some of these modes have different names such as Linear Burn (Shade) and Linear Light (Shade/Shine). Experiment to find which modes feel the most natural in your workflow.
Combining multiple blending modes at various opacities is the best practice for creating the most realistic and dynamic shadow.
Types of Shadows and Light
The visual appearance of interactions of light and shadow on an object can be described in specific terms within art. Here are some of them:
- Light Source: The source of light.
- Highlight: The lightest part of an object where the light directly bounces off of.
- Halftone: Tones that transition from light to dark.
- Bounce Light: Light bounces back on an object from the surrounding objects.
- Cast Shadow: Shadow cast by the object, but not on the object itself.
Learning the basics of color theory along with light and shadow will help you build a solid understanding of the mechanics of how you should shade a given piece. While it is not necessary and you can certainly use your own intuition to do so, it can never hurt.
To learn the basics of shading light and shadow watch the video below.
Brightness and Contrast
Brightness and contrast refer to the relationship between the brightest lights and darkest shadows within a piece. While shading it is important to keep this relationship in mind to create a dynamic and visually-appealing piece.
In PaintTool SAI you can easily adjust the brightness and contrast in an image using Filter > Color Adjustments > Brightness and Contrast.
This is the last step that can be done after completing your piece.
Types of Shading
There are many methods and techniques for shading in traditional and digital art. In traditional art hatching, cross-hatching, stippling, scumbling, and blending/ smudging can all be used to shade.
Of these methods, blending is the most popular and effective way to shade in PaintTool SAI.
Due to the number of tools available, all brushes can be used to shade, with layer opacities, and blending modes only adding more possibilities. Coupled with the number of visual styles in the art world there is truly no one “right way” to shade.
Experiment to find your personal shading style for the best results. That being said, let’s get into it!
Note: if you are wondering how to blend colors in PaintTool SAI, check this out.
How to Shade in PaintTool SAI
The easiest way to blend in PaintTool SAI is using a combination of the blending modes multiply and luminosity, clipping groups, varying layer opacities, and brushes such as the pencil and airbrush. Here’s how:
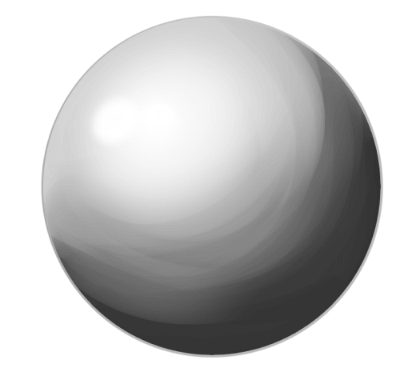
Step 1: Open your drawing in PaintTool SAI. For this example, I will be shading a sphere.
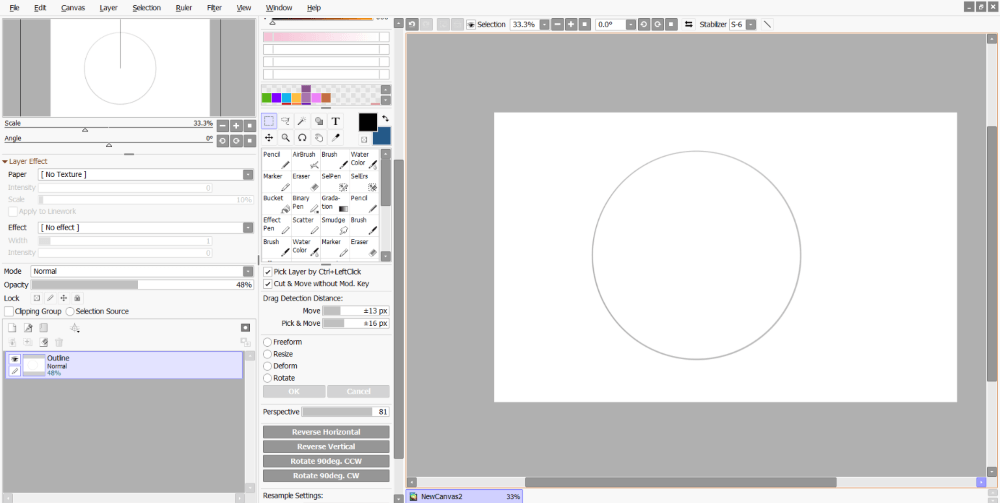
Step 2: Create a new layer and name it Color Flats.
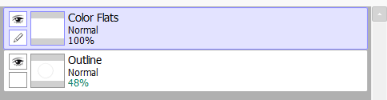
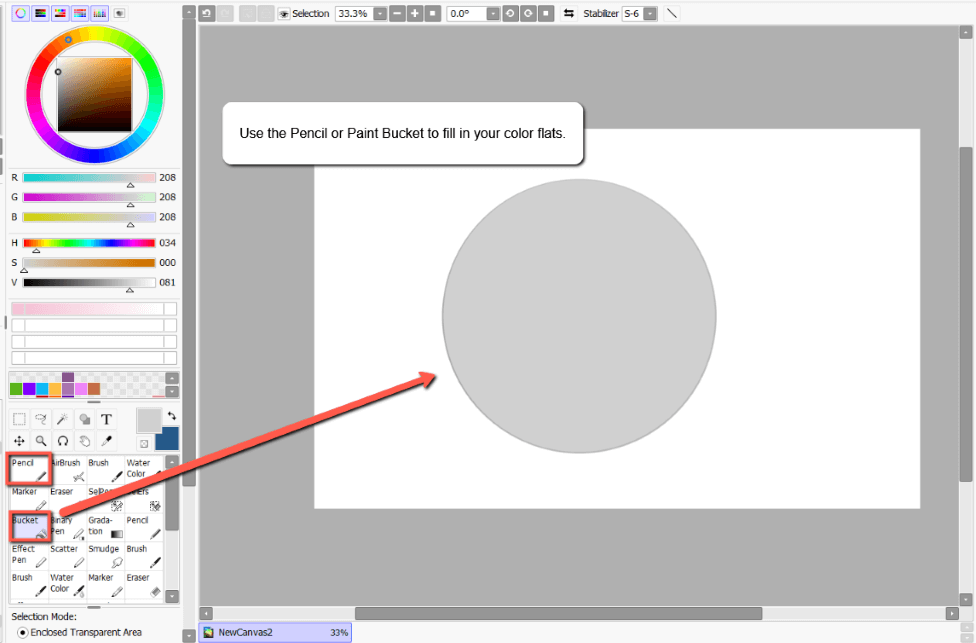
Step 3: Using the pencil or paint bucket Color in your color flats. This will be your object colors without any shadows or light. In this example, my color flat will be a medium gray.
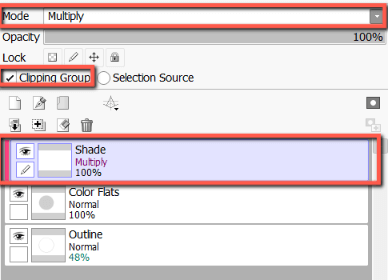
Step 4: Create a new layer above Color Flats and name it Shade. Check Clipping Mask and set the color mode to Multiply.
Step 5: Using the Pencil or Airbrush, shade in your shadows.
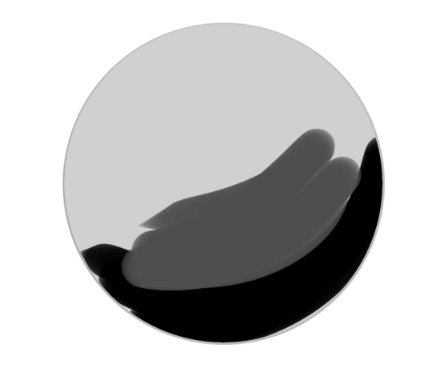
Step 6: Use the Brush to blend your shadows together. To learn how to blend check out my post How to Blend in PaintTool SAI.
Step 7: Create a new layer above Shade and name it Highlights. Check Clipping Mask and set the color mode to Luminosity.
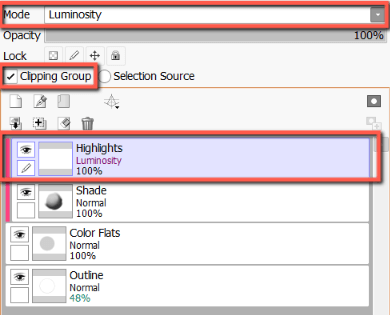
Step 8: Using a light color (or white/yellow) use the airbrush to fill in your highlights.
Step 9: Merge all your layers together with Layer > Merge Visible Layers.
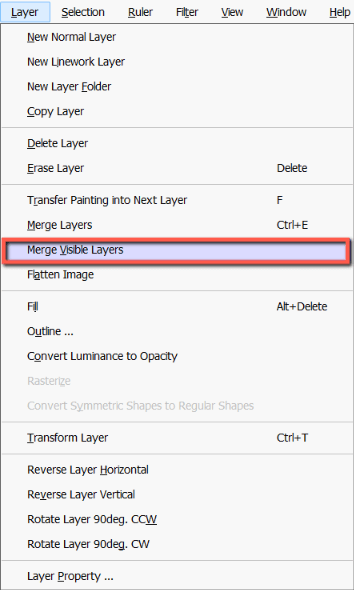
Your layers will all merge into one.

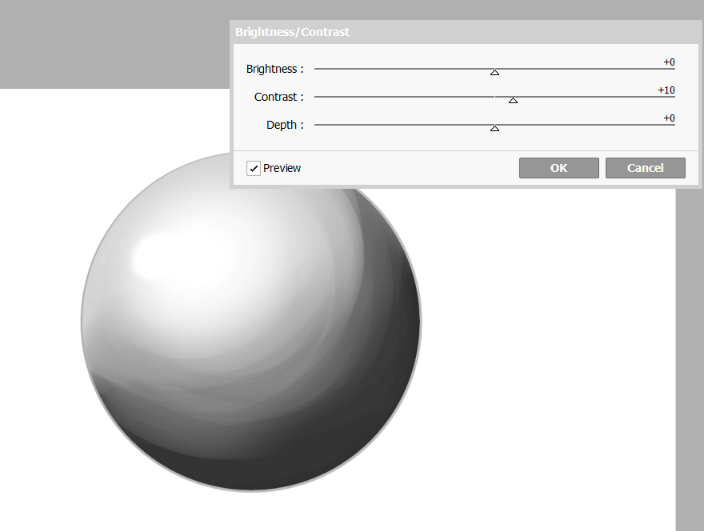
Step 10: Click on Filter > Color Adjustments > Brightness and Contrast to open the Brightness and Contrast menu.
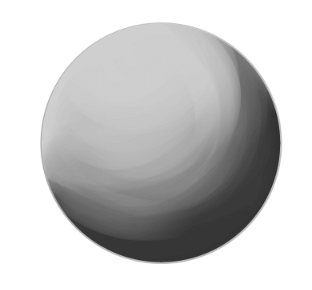
Step 11: Adjust the contrast of your object as desired. In this example, I felt that my image had too little contrast, so I added +10.
Final Thoughts
Shading in PaintTool SAI is easy and takes a few minutes. With blending modes such as multiply and luminosity, along with brushes such as the pencil and airbrush, you can create depth with ease.
Furthermore, the Brightness and Contrast menu can help you increase the drama of your image.
While this tutorial covers one way to shade there is no “right way”. Simply experiment to find a strategy that works best for you, and study color theory and the mechanics of light and shadow to gain a better intuitive sense of how to render.
How did your image turn out? What blending mode is your favorite? Let me know in the comments below.