
Images are an essential part of most page layouts, so there is a wide range of tools for resizing images in InDesign. No matter whether you need precision resizing or a quick automatic adjustment, one of these tools will do the job.
Let’s take a look at the various options and how to use them to resize your images.
Table of Contents
Working with Images in Adobe InDesign
Before we dig into the tools, there’s one important thing to know about how images work in InDesign: every image is contained within an image frame that is separate from the actual image object. The image frame has a blue bounding box (or whatever color your current layer is), while the image object has a brown bounding box.
If you place an image directly into a blank layout, InDesign will create a frame that matches the exact image dimensions. This can be a bit confusing at first because the two bounding boxes directly overlap each other.
It’s all too easy to accidentally resize the image frame instead of the image object itself, which will make the frame act as a clipping mask, hiding parts of your image instead of resizing them.

However, Adobe has recently added a new method to separate your image object from your frame. Click once on your image, and twin gray translucent circles will appear over your image. This is imaginatively named the Content Grabber, and it allows you to select, transform, and reposition your image object separately from the frame itself.
Now that you understand how images work in InDesign, you can choose any of the methods below to resize an image.
Method 1: Resize an Image by Hand
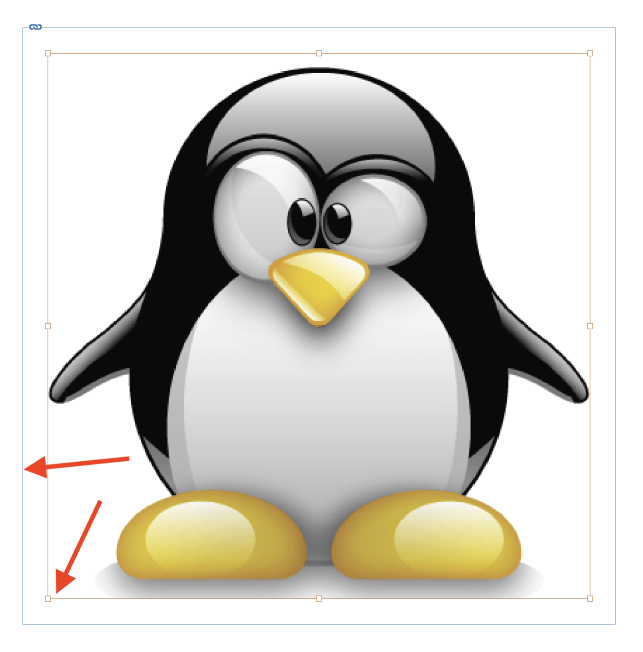
The fastest way to resize an image is by using the image object’s bounding box. Remember, that’s different from the image frame, so you’ll need to activate the image object instead before you start resizing.
Switch to the Selection tool using the Tools panel or the keyboard shortcut V. Click once on your image to display the Content Grabber, then click the Content Grabber itself to display the image object’s brown bounding box.
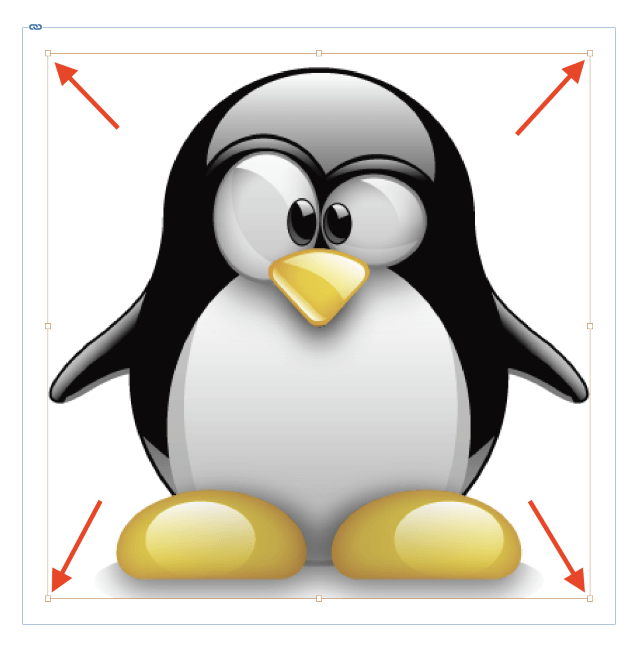
Click and drag any of the four bounding box corners to resize your image. If you want to resize the image proportionally, hold down the Shift key while resizing to lock the image to the current aspect ratio.
You can also resize the image frame and image object at the same time by holding the Ctrl key while resizing. You can also combine the two modifiers and hold Ctrl + Shift together while dragging to resize the image frame and image object proportionally at the same time.
This method is fast and simple, which makes it a great choice for the intuitive composition stage of your layout. You can quickly experiment with different size and layout options without having to break your flow by switching tools or making any calculations.
Method 2: Resize an Image Precisely with Transform
If you need to be more precise with your image resizing, then using the Scale transform command is your best option. You can apply this to either the image object or the frame and the object together, depending on which elements are actively selected.
If you want to resize the frame and the image at the same time, simply click the image using the Selection tool to select it.
If you want to resize only the image and not the frame, start by selecting your image with the Selection tool and then click the gray Content Grabber to activate the image object.
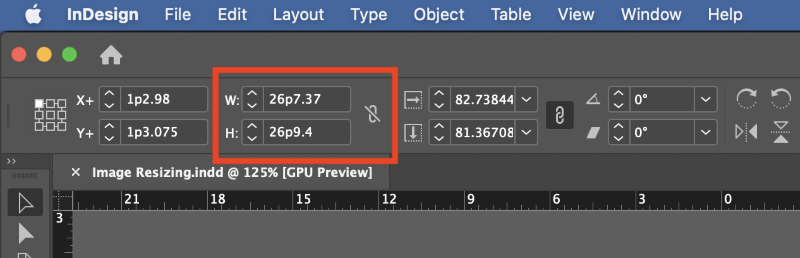
Next, locate the Control panel that runs across the top of the main document window. When the Selection tool is active, the Control panel provides a number of quick transform options, including the ability to resize your image using the Width and Height fields, as highlighted above.
If you want your image to be resized proportionally, make sure that the small chain link icon is enabled, which links the height and width together using their current aspect ratio.
Then all you have to do is enter the new dimensions you want for your image. InDesign is quite flexible when it comes to units, so you can enter the desired size for your image in any measurement unit you want (including percentages), and InDesign will handle all the unit conversions for you.
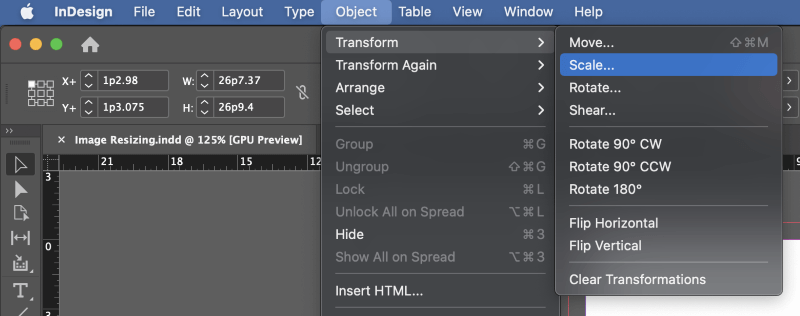
If you don’t want to use the Control panel or it’s not part of your current workspace, you can also resize your image through the menus. With your desired image element selected, open the Object menu, select the Transform submenu, and then click Scale.
InDesign will open the Scale dialog window, allowing you to enter the new dimensions for your image.
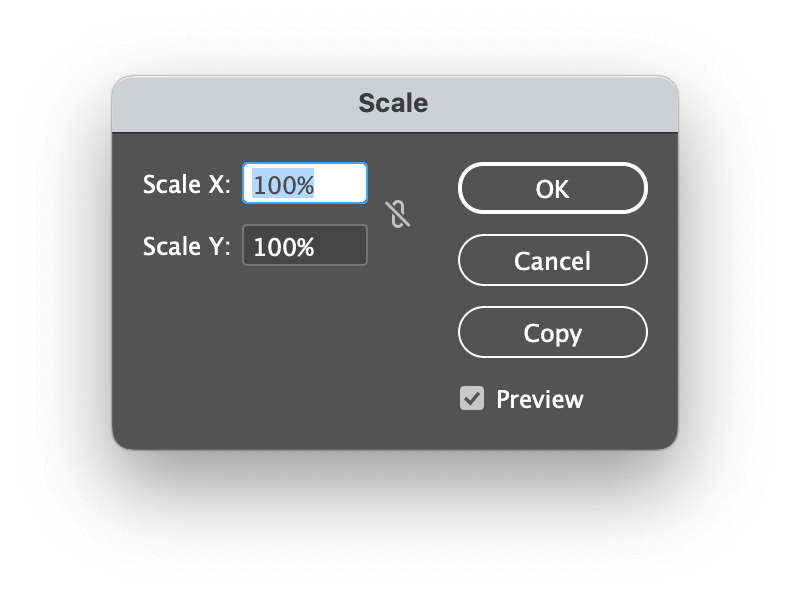
Using the Scale command from the Object menu does have the advantage of allowing you to create a scaled copy by clicking the Copy button instead of scaling the original image, but I’m not sure how often you’ll need to use that feature (I never have!).
Method 3: Resize an Image with the Scale Tool
While I personally find that this tool isn’t quite as effective as the other methods, some users swear by it. The key difference is that it allows you to scale your image relative to a specific anchor point, which you can place by clicking anywhere in your document while the tool is active.
The Scale tool is nested in the Tools panel underneath the Free Transform tool, so the fastest way to activate it is by pressing the keyboard shortcut S.
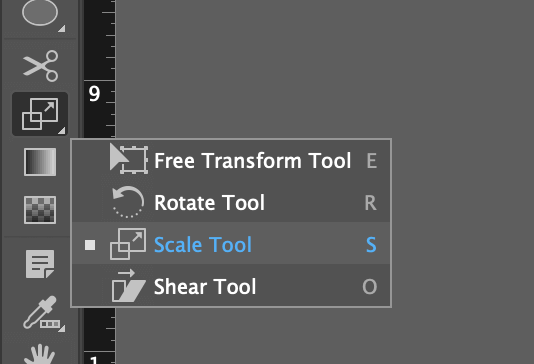
By default, the anchor point is set to the top left corner of your image, but you can left-click anywhere in the document window to set a new anchor point. When you’re satisfied with the anchor point placement, just click and drag to resize your image around that anchor point. You can also use the Shift key to key the image in its current proportions if desired.
Method 4: Automatic Resizing Tools
In some situations, resizing images by hand in InDesign can get tedious. You might have too many images to resize, or you need exact precision quickly, or your hand might not be steady enough for the job.
Fortunately, InDesign has a range of automatic resizing tools that can resize your image quickly, although they’re best suited for images that already have a differently-sized frame.
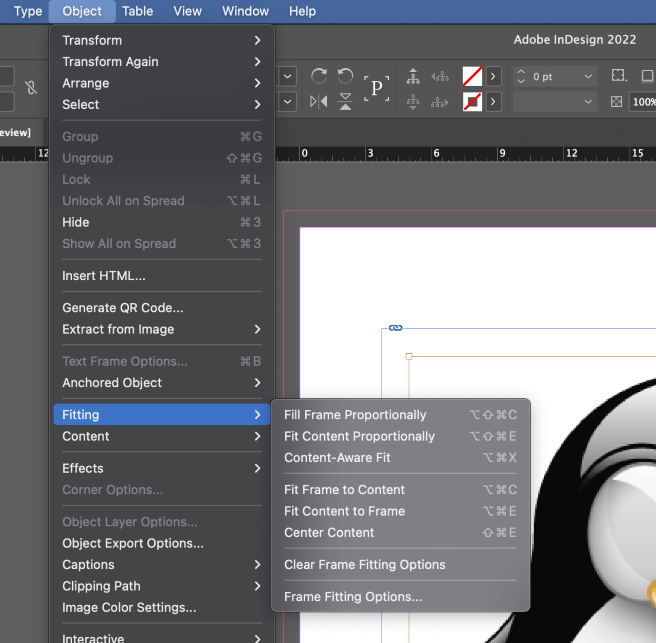
Using the Selection tool, click once on your image to select both the frame and contents, then open the Object menu and select the Fitting submenu. There is a range of options available here depending on the kind of resizing that you need to do, and they’re all fairly self-explanatory.
There is one other semi-automatic method for resizing images in InDesign: Transform Again. After you’ve applied a Scale command once using the Object / Transform menu, you can quickly repeat the same transformation without having to enter the same numbers over and over again. This can save a lot of time when you’ve got a few hundred images to resize!
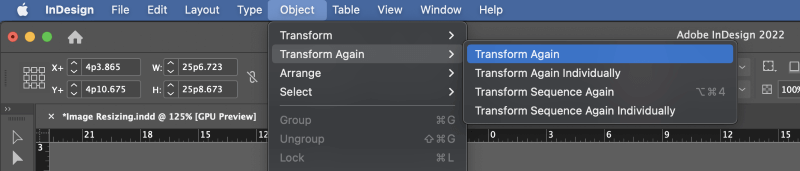
Open the Object menu, select the Transform Again submenu, and click Transform Again.
A Final Word
That’s everything there is to know about how to resize an image in InDesign! You’re going to be working with images a lot during your design career, so it’s a good idea to get familiar with as many different methods for image manipulation as possible.
While image frames and image objects can be a bit tedious at first, once you get used to the system, you’ll appreciate how effective it is.
Happy resizing!