
Shadows are great for adding drama and depth to an image. But sometimes the shadows can be too strong. You actually want to see the details in that part of the image, right?
Hello! I’m Cara and while I love a good shadow as much as anyone else, sometimes that shadow needs to be toned back a bit. Lightroom makes it easy to do this, especially if you’re working with a RAW file.
So let’s look at how to remove shadows in Lightroom!
Note: the screenshots below are taken from the Windows version of Lightroom Classic. If you are using the Mac version, they will look slightly different.
Table of Contents
Method 1: Global Adjustments
We’ll get into targeting specific areas of the image in a moment. But let’s start with adjusting the overall exposure of the image – highlights and shadows included.
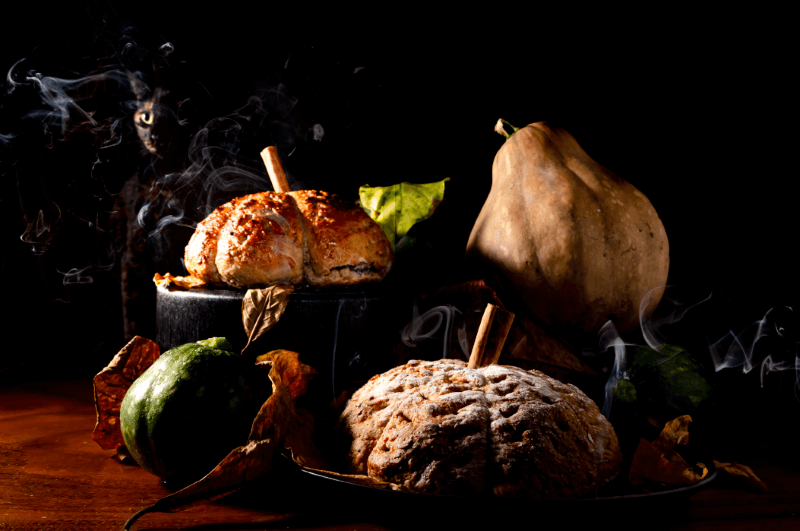
I’ll use this image as an example, we’ve got plenty of deep shadows going on here!
Let’s try raising the shadows a bit. In the Basics panel on the right side of your workspace, slide the Shadows slider up.
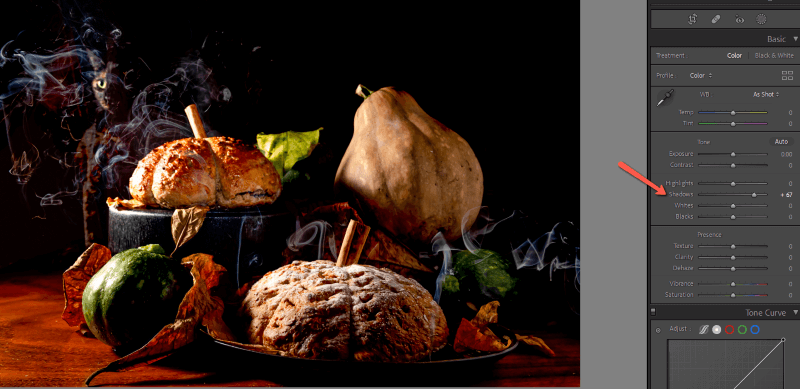
That has already made a significant difference. You can also bring up the overall exposure, though you might have to bring the highlights down if they start to blow out.
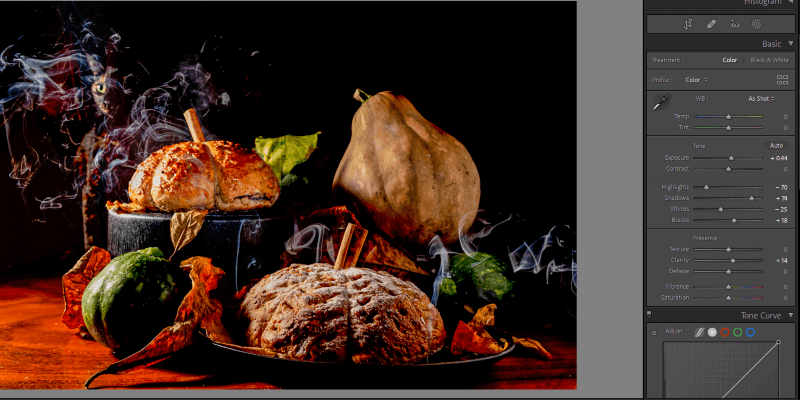
Boosting the whites makes the image seem brighter overall, though the shadows don’t get much lighter. Bringing up the blacks, however, does bring out some detail in the shadows, though it can also mess with the colors a bit.
Be gentle with your edits. Going too extreme will quickly ruin the realism of the image.
Here’s what I ended up with.
Method 2: Using Adjustment Masks
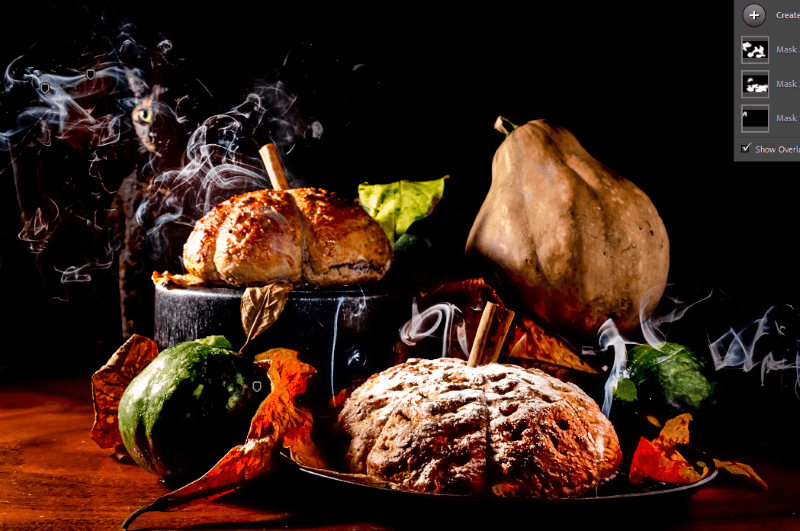
Global adjustments are great, but sometimes you need more control over the image. This image is a great example of this.
I’ve already got some nice light illuminating the cat’s face, the table, and the left side of the bread and squashes. My global adjustments brightened the shadows, but they also affected the bright areas of the image in a way I don’t want.
I’m going to walk back these edits and show you how to target the shadows with adjustment masks. Keep in mind that many images will benefit from a few global adjustments first, and then fine-tuning with an adjustment mask.
There are a few masks that you can use.
The Adjustment Brush
Click the Masking icon on the right side of the tool bar right above the Basic panel.
If you have an active mask as I do, click Create New Mask, otherwise go straight to choosing Brush from the menu.
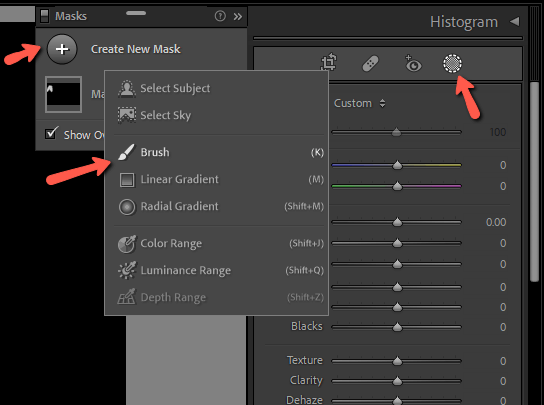
Adjust the size of the brush to fit the area you would like to brighten. You’ll also usually want a fairly thick feathering area to avoid harsh lines.
Bring up the exposure, shadows, or whatever settings you’ll need and begin painting over the shadows. You can adjust this after painting as well when you can see the changes better. The red area indicates where I’ve painted my image.
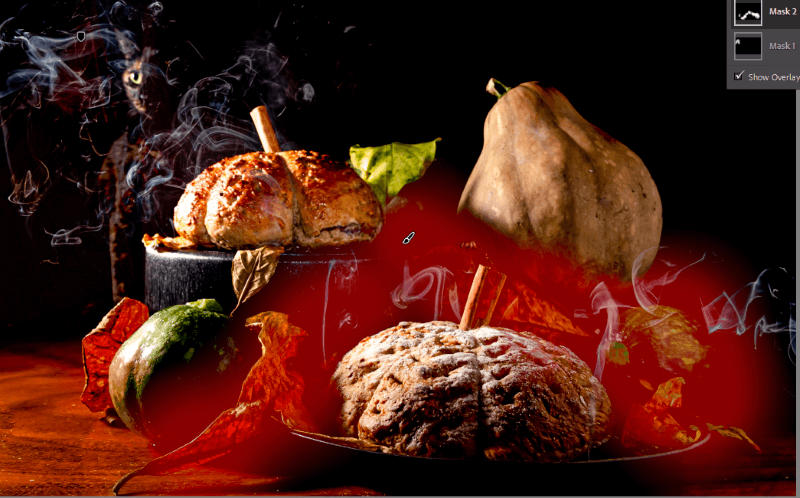
With this, you can see how the detail has come out a bit more in the leaves and squashes that were darker in the original image. Yet, we haven’t messed with the bright parts of the image.
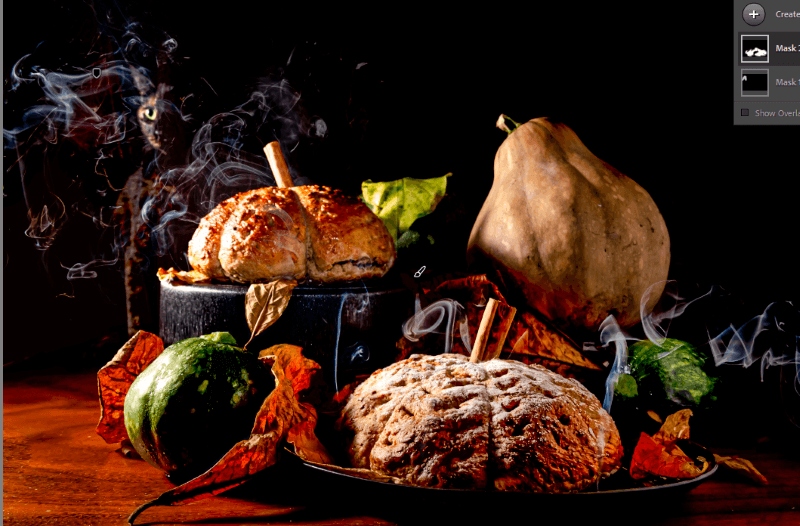
You can use multiple adjustment brushes to apply individual edits to different areas of the image. Or mix and match with any of the other techniques we’ll talk about.
For this image, I also brightened the smoke so that it stands out more, and here is my final result.
Luminance Range Mask
You can also have Lightroom automatically select the shadows for you. Do this through the Luminance Range Mask feature.
Click the Masking icon and choose Luminance Range.
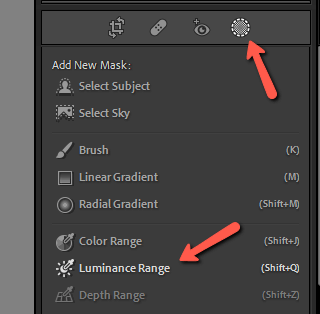
Your cursor will turn into an eyedropper. Click on a shadowy part of the image and Lightroom will automatically select everything else with a similar luminance value.

Now you can apply edits specifically to those areas just as we did with the brush tool.
You can also do the opposite with the range mask tool and use it to select and protect the highlights as you work on the shadows.
Select Subject
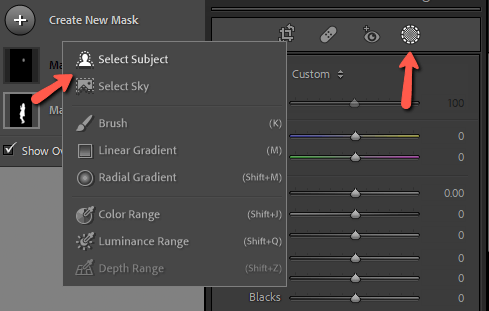
If your subject is too shadowy, try using the AI Select Subject feature. From the Masking menu, choose Select Subject.
Lightroom will automatically detect and select your subject.
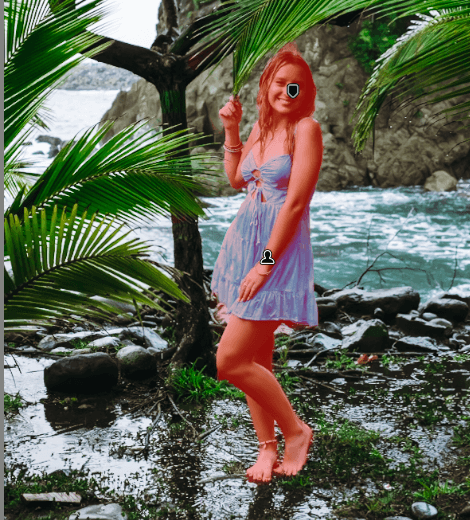
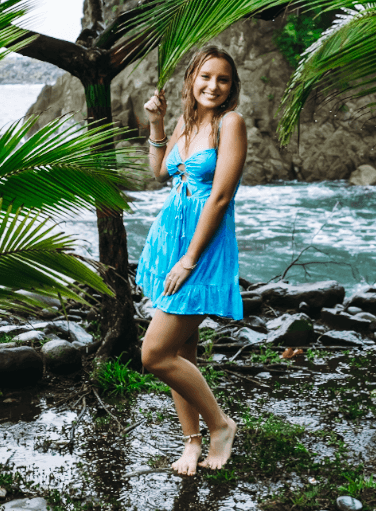
Once again, you can make adjustments as needed to brighten the subject.

Balancing Color Cast
Something to note is that the highlights and shadows of an image often have different color temperatures. For example, the highlights caused by the sun are generally warmer than the cool light in the shadows.
When you brighten the shadows in some images, it can be obvious that you did something because now the colors don’t match. The brightened areas have a cooler tone than the rest of the image.
This is easy to fix by selecting these areas using any of the methods we’ve described. Then, adjust the white balance temperature and tint until the image looks right.
A Note About RAW
Another thing to note is that these techniques will always work better if you use them on RAW images. JPEG files don’t retain as much information in the shadows as RAW files. Thus, you will not be able to brighten the shadows as much without them looking off.
Brighten It Up, Baby!
Lightroom gives us lots of great tricks for turning our images into masterpieces. Learning to control your shadows — both in camera and in Lightroom — is a key part of your photography journey. I hope this tutorial has helped!
That’s not all Lightroom can do. Check out how to fix overexposed photos here!