
It’s time to work on some important files you have stored on an external drive. You plug it into your computer and… nothing. No windows open, and no hard drive icon appears. You feel a sense of dread. “Have I lost everything?” What do you do next?
Whether your drive is an external spinning hard drive, or an external SSD, there are several reasons your computer might not detect it. Some are serious, and some are not-so-serious. It’s not time to panic yet.
The not-so-serious case? Your computer may have actually recognized your drive but can’t read what’s on it. You might be able to get your data back using the right app. In the worst cases, it won’t be able to see your drive at all due to physical damage.
I’m right there with you. I have a very personal reason to write this article: my own external drive isn’t working. I used it to back up my old iMac successfully when I replaced it last year, but when I tried to look at the files a few months later, I got nothing other than a blinking light. Frustrating! It’s a good example of why one backup isn’t enough.
I assumed my drive’s problem was serious. Now that I’ve finished writing this article, I can let you know the good news: one of the troubleshooting steps got it working again.
I hope your experience is as low-stress as mine, but I can’t make guarantees. Data recovery is a tricky business. Let’s get started with troubleshooting your external hard drive.
Table of Contents
Initial Troubleshooting
Here are some steps for troubleshooting external drive issues.
1. Does the Computer Actually Recognize the Drive?
It may be that your computer does recognize the drive even though it doesn’t open a window or display an icon. You may see an error message when you connect the drive. If your computer offers to format the drive, say “No.” That will only make it harder to recover your data.
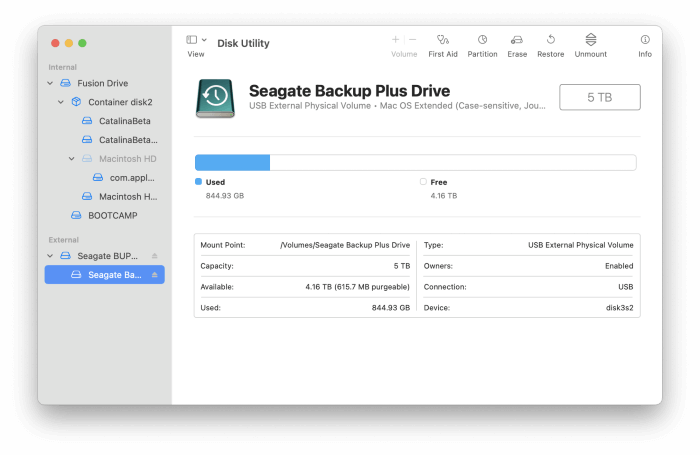
If you use Windows, open the Disk Management tool. If you’re on a Mac, open Disk Utility. Do you see the drive listed? You may wish to detach any other external drives to avoid confusion. On Windows, external drives are labeled “Removable.” On a Mac, there are two lists of drives: Internal and External.
If your drive is listed, the computer actually does detect it, and there is more hope of recovering your files. If it’s not there, run through the rest of the troubleshooting steps, keeping the same app open to see if we can help your computer recognize it.
2. Is There a Problem With the USB Port?
The problem may lie with your USB port rather than the drive. Try inserting the hard drive into another USB port—or even a different computer—to see if you have a different result. If you’re plugging it into a USB hub, try plugging it into your computer directly.
3. Is There a Problem With the Drive’s Cable?
Sometimes small things cause big problems. Maybe your drive is fine, and the problem lies with the cable it’s connected to. If possible, use another cable and try again. It will have to be the same type of cable, whether that’s USB, USB-C, mini USB, micro USB cable, or something proprietary.
I tried this with my own faulty drive. To my surprise, it worked! I thought I’d tried it in the past, but I may be mistaken. Fortunately, I immediately made a copy of the drive’s contents. Shortly afterward, the drive stopped working again.
4. Is Your Drive Getting Power?
If you have a 3.5-inch desktop hard drive, it requires an AC adapter or power cable. Yours may be faulty. Does the drive seem to power up? Does the light turn on? If it’s a spinning hard drive, can you feel any vibration? If not, try replacing the power cable and see if anything changes.
5. Is There a Windows Driver Issue?
A driver is software required to get a peripheral working on a computer. In Windows, driver problems are a common cause of device failures. The quickest way to see if that’s your problem is to plug the drive into a different computer.
Alternatively, there are a few things you can try on your PC:
- Open Device Manager to see if there is a yellow exclamation mark next to any listed devices. If there is, right-click the device and select “Update driver” or “Roll back driver.” Google any error messages that are displayed for a possible solution.
- Open System Restore and reset your computer’s settings back to a time when your drive was working.
- A final strategy is to uninstall the driver and hope that the correct one is automatically installed after restarting your computer. In Device Manager, right-click the device and select Uninstall.
What’s Next?
Now that our troubleshooting is out of the way, here’s what to do next:
1. If your drive now appears in your disk manager and you can read your data, your job is finished. Pat yourself on the back and get back to work!
2. If your drive appears in your disk manager and your computer can’t read the data, move to the next section: The Drive is Detected But Unreadable.
3. If your drive still doesn’t appear in the disk manager, move to our last section: The Drive Is Not Detected.
Situation 1: The Drive Is Detected But Unreadable
There doesn’t seem to be a physical problem with your external drive. However, your computer can’t read its contents. There’s a chance you’ll be able to get your data back using one of the steps below. If not, your drive is still usable—but first, you’ll have to reformat it, losing any lingering data in the process.
1. Ensure Your Operating System Can Read the File System
A Windows drive will usually be formatted with the NTFS file system, while a Mac drive will be formatted with the HFS or APFS file systems. They aren’t interchangeable with other operating systems: Windows drives work for Windows, while Mac drives work for Macs. If the drive worked on your computer in the past, it should have the correct file system installed.
You can determine which file system has been used by viewing the drive’s partition in Disk Management on Windows or Disk Utility on Mac. To read the data, just plug it into a computer running the right OS.
There are third-party software solutions available to make the drive readable, but that’s a can of worms I won’t open in this article. If you’d like your external drive to work with both Macs and PCs, the best solution is to use an older file system such as exFAT.
2. Perform Basic First Aid
If the drive has the right file system but can’t be read, it needs a checkup. You can perform basic first aid using tools built into the OS.
On a Mac, select your drive using Disk Utility, then click First Aid. This will check for errors and repair them if necessary.

The traditional tools on Windows are Check Disk and Scan Disk. Right-click your drive and select Properties. A button for one of those tools will be there. Click it, and Windows will check for system errors.
3. Use Data Recovery Software
If your computer still can’t read your drive, it’s time to use a more professional tool. Data recovery software can help get your data back in a wide range of scenarios. However, there’s no guarantee of success.
In our data recovery roundups for Windows and Mac, we discovered some applications are superior to the competition at recovering data from faulty partitions.
Running the free trial version of one of these apps will show you if you can recover your data. If you can, pay the money and proceed.
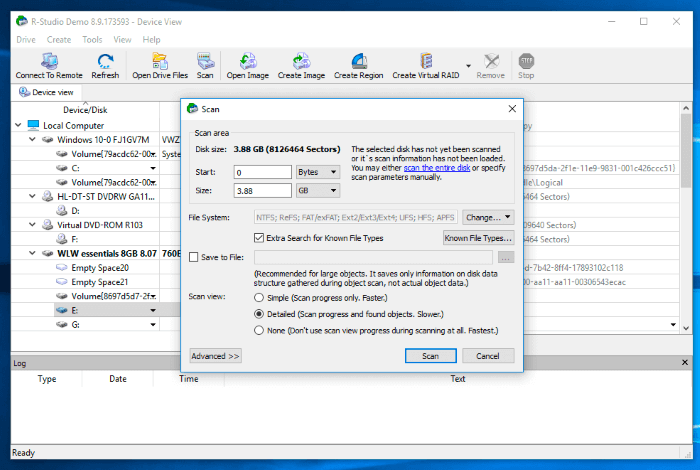
Be aware that these are advanced applications that are not ideal for beginners—but they offer the best hope of recovering your data. The basic steps are similar to performing first aid above—you select the damaged drive, then click Scan—but their user interfaces are more intimidating. Let me show you.
This is what R-Studio looks like before it performs a scan.
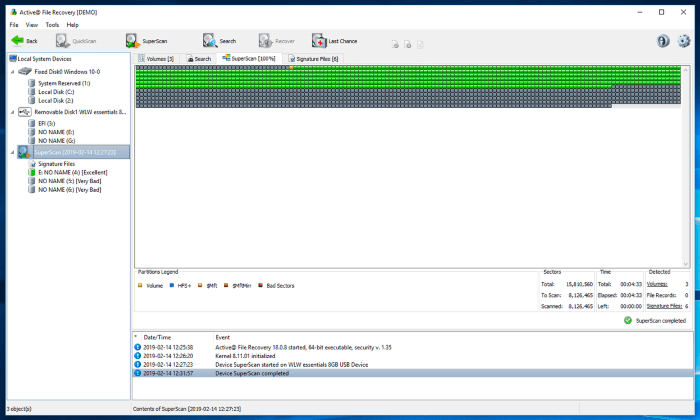
Here’s a screenshot of Active@ running a Super Scan.
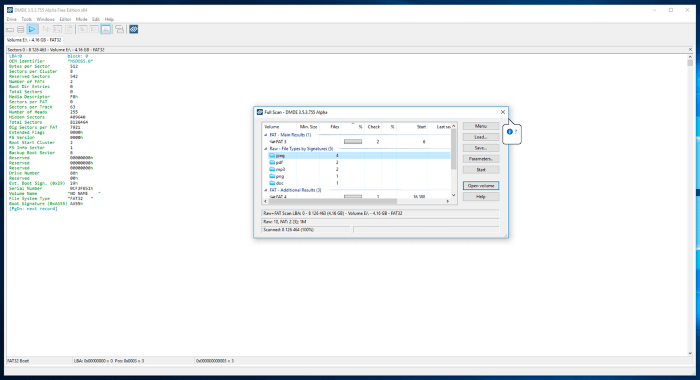
And here is an image of DMDE performing a full scan.
As I said, these tools offer the best chance of getting your data back, but there is no guarantee. If those screenshots look like they’re outside your comfort zone, see if you can get someone more experienced to assist.
Situation 2: The Drive Is Not Detected
If you’ve gone through our troubleshooting steps above and the drive still doesn’t appear in Disk Management or Disk Utility, you have a hardware problem. There is a physical problem with your drive or its enclosure.
1. Damaged Drive Enclosure
If you’re a technical user and don’t mind getting your hands dirty, you can test to see if the problem is with the enclosure. You may be able to do that by removing the drive from the enclosure and mounting it directly to your computer. That’s generally easier with desktop Windows PCs than other types of computers.
Alternatively, you can try putting it into a different enclosure. If you don’t have one laying around, one can be purchased inexpensively. Make sure you get one that matches the size and interface of your drive.
2. Damaged Drive
The worst-case scenario is that there is physical damage to the drive itself. This can happen due to wear and tear, a power surge, mishandling, or dropping the drive. Unfortunately, there’s no easy fix: recovering your data will be very difficult or impossible.
If your files are valuable enough to spend money on, your best chance lies with data recovery professionals. They will open up the drive in a cleanroom environment and attempt to repair the damage. Find one in your area by Googling “data recovery professional” or “data recovery specialist” and get a quote. How much will it cost? I explore that in another article.
If it’s not worth spending money on your data, there are some basic repairs you could try yourself. I don’t recommend this because you’re likely to do more harm than good. You know your own motivation, whether you have basic practical skills, and the consequences if you fail. Google is your friend if you’d like to learn more.