
Adding a colored stroke around the outline of your text is simple enough, but when people talk about outlining text in InDesign, they’re typically referring to a special process that converts text characters into vector shapes.
This process has some upsides and some downsides, so let’s take a closer look at how you can outline text in InDesign.
Table of Contents
Key Takeaways
- Text can be converted into vector path outlines in InDesign using the Create Outlines command.
- Outlined text cannot be edited using the Type tool but must be edited using vector path tools.
- Outlined text can be used as a clipping mask for images.
- Some of the text’s visual quality is lost during the outline conversion, especially at small font sizes.
Outlining Your Text in InDesign
The actual process of outlining text in InDesign is extremely simple. It only takes two steps to create outline text in InDesign.
Step 1: Create a new text frame using the Type tool, and enter some text. Make sure the text frame is still selected.
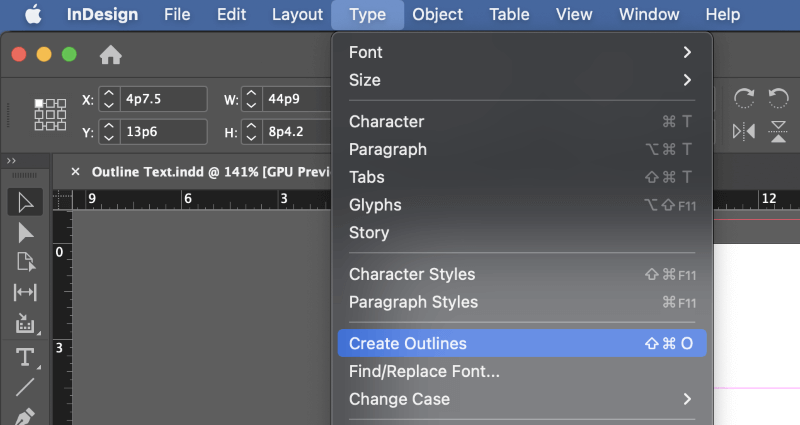
Step 2: Open the Type menu and click Create Outlines. You can also use the keyboard shortcut Command + Shift + O (use Ctrl + Shift + O if you’re using InDesign on a PC).

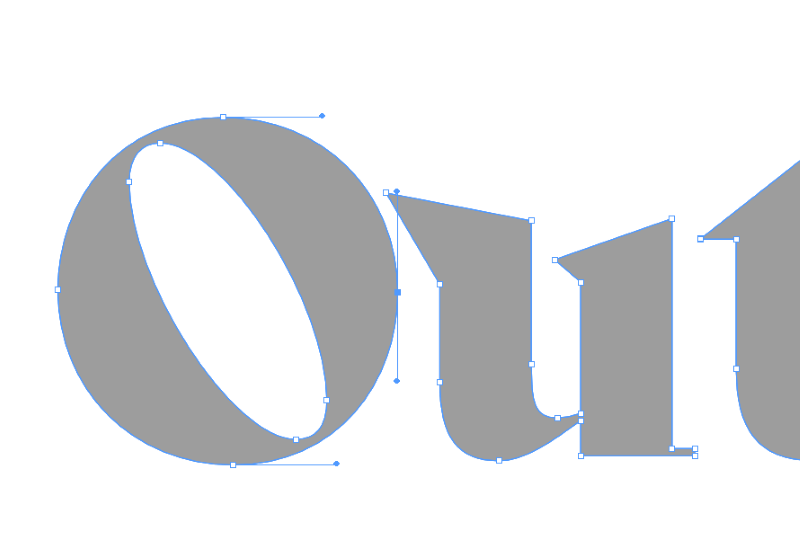
As you can see in the example above, the text is now closely outlined by a vector path with anchor points and curves that match the original shape of the letterforms.
How to Edit Outlined Text in InDesign
Once you have outlined your text, you can no longer edit the text contents by using the Type tool and typing in new letters with your keyboard. Instead, you have to use InDesign’s vector manipulation tools such as the Direct Selection tool and the Pen toolset.
You can use the Direct Selection to adjust existing anchor points and curves in your newly-outlined text. Switch to the Direct Selection tool using the Tools panel or by using the keyboard shortcut A.
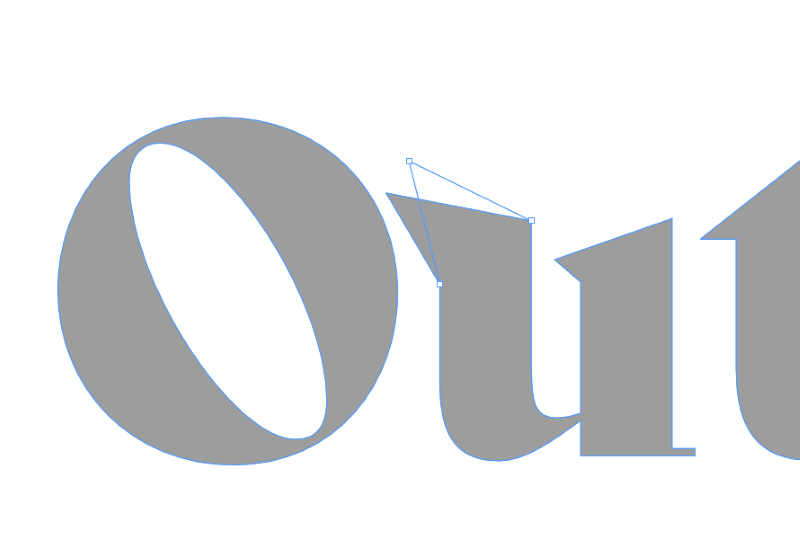
Click and drag an anchor point to move it around, or you can click an anchor point to select it and then use the handles to adjust the curves on either side of the point, just the same as any other vector shape in an Adobe program (see below).
If you want to add or remove anchor points, you’ll need to use the Pen tool. Switch to the Pen tool using the Tools panel or the keyboard shortcut P.
Look closely and you’ll see the Pen cursor icon change when hovering over an existing anchor point or path.
If it’s over an existing point, the cursor will switch to the Delete Anchor Point tool, which is indicated by the small minus sign next to the Pen cursor icon.
If you hover over a section of a path without a point, you’ll switch to the Add Anchor Point tool, indicated by the small plus sign next to the cursor.

Holding down the Option key (use the Alt key on a PC) changes the Pen tool into the Convert Direction Point tool, which is used to switch an existing anchor point between corner and curve modes.
An anchor point in curve mode has two handles that define how the path joins the anchor point, while an anchor point in corner mode has no handles and draws a straight line to the next anchor point.
Using Text Outlines as Image Frames
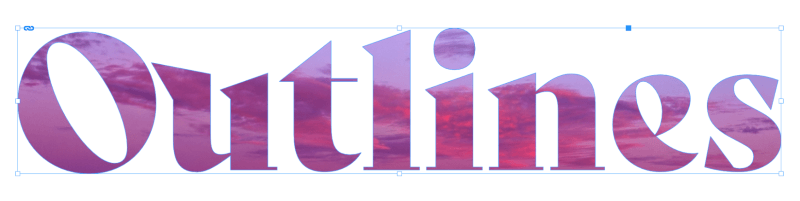
Now that you’ve got your text converted into outlines, you can use those outlines as a clipping mask for an image.
Clipping masks control which parts of an image are visible, so using your text outlines as a mask will create the effect of filling the letters with your selected image instead of a solid color.
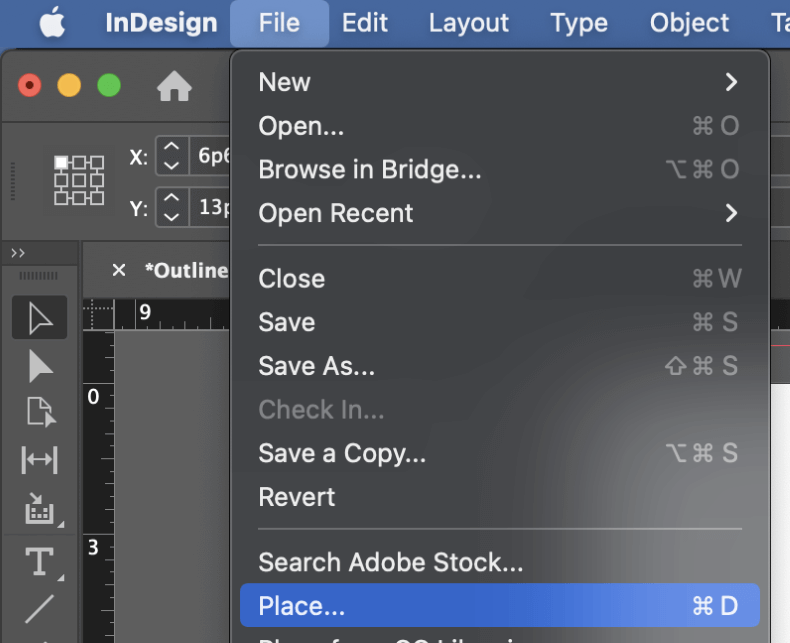
To use your text outlines as a clipping mask, make sure the text frame is selected, then open the File menu and click Place. You can also use the keyboard shortcut Command + D (use Ctrl + D if you’re using InDesign on a PC).
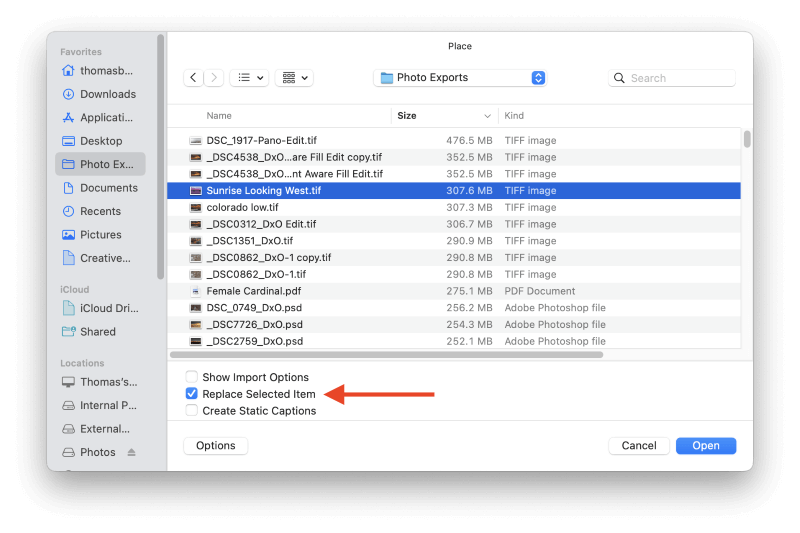
In the Place dialog, browse to select your image file, and make sure that the Replace Selected Item option is enabled. Click the Open button and your image will automatically fill the text outlines.
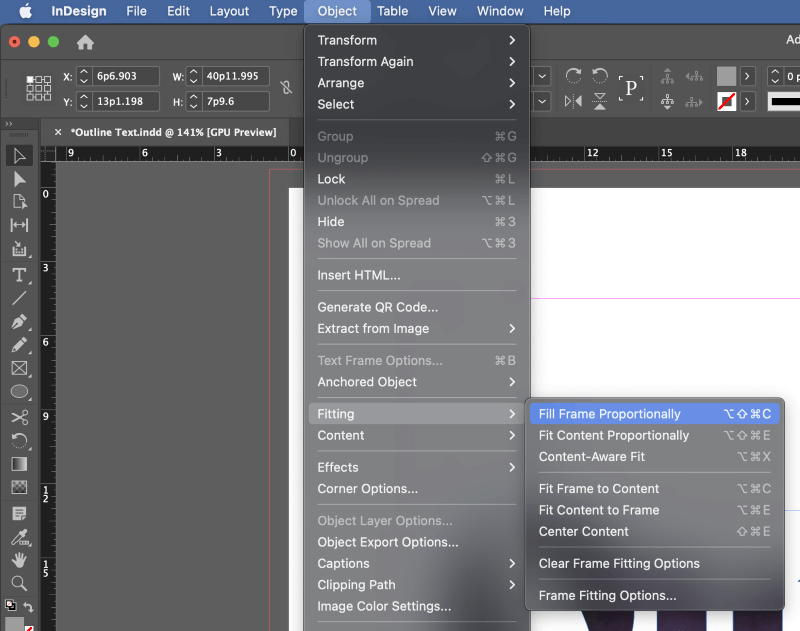
Depending on the size and resolution of your image, you may want to use a fitting command to quickly scale your image to fit your text outlines. With the image/text frame selected, open the Object menu, select the Fitting submenu, and choose the desired fitting option.
A Note About Outlining Text for Export
Many designers (and some print shops) are still under the impression that it’s a good idea to convert all the text in a document to outlines before exporting it as a PDF. The reasoning behind this idea is that outlines will guarantee that your fonts will display properly, even if there is some issue with your font files.
This advice is now quite out of date, and outlining text for the purposes of printing or sharing is NOT recommended. It’s a lot less likely that you’ll run into a situation where it’s demanded nowadays compared to a decade ago, but you can always quote Adobe directly to any doubters.
Dov Isaacs, who held the post of Adobe Principal Scientist from April 1990 through May 2021, had this to say on the subject in one of his many helpful comments on Adobe forum posts:
“We are aware of various “print service providers” who are under the distinct wrong impression that converting text to outlines is somehow more reliable than leaving the text as text realized by fonts.
Other than some dicey, prehistoric RIPs based on non-Adobe technology going back over fifteen years or more, we are not aware of any problem during the RIP process due to fonts.
If the font is embedded in the PDF and viewed correctly in Adobe Acrobat, it should RIP! If you have a “bad font,” you won’t be able to view the PDF file in Acrobat nor will convert text to outlines even work.
There are also many downsides to this Luddite practice. You lose the hinting of the font and often end up with overly bold printed output, especially with fine detailed serif fonts at text sizes. The PDF files become very bloated. RIP and even display performance suffer terribly.
Adobe specifically advises end users to avoid print service providers who demand/require PDF files with so-called “outlined text!”
The comment was written with the casual style commonly used in forums, and the post thread was specifically about creating outlines in Adobe Acrobat. Still, the message is quite clear: don’t outline your text just for printing purposes!
A Final Word
That’s just about everything there is to know about how to outline text in InDesign! Outlining text is a great tool for creating dynamic layouts with custom typography and image clipping masks, and it’s an important tool in any designer’s toolkit.
Just keep in mind that outlining text shouldn’t be automatically required for printing and sharing in the modern InDesign world – despite what your printer might say. It is useful in some technical situations, but they are quite rare.
Happy outlining!