
InDesign is a page layout application, but it shares a lot of the Adobe approach to design software found across the Creative Cloud suite.
As a result, InDesign’s shape tools will instantly feel familiar to anyone who has used shape tools in any other Adobe app – but even if you’re using them for the first time, they’re very easy to learn!
It’s worth pointing out that all of the shapes you can make in InDesign are vector shapes. Vector shapes are actually mathematical expressions that describe the size, placement, curvature, and every other property of the shape.
You can scale them to any size with no loss in quality, and they have an extremely small file size. If you want to learn more about vector graphics, there’s a great explanation here.
Here are the three best ways to make shapes in InDesign!
Table of Contents
Method 1: Make Shapes with Preset Tools
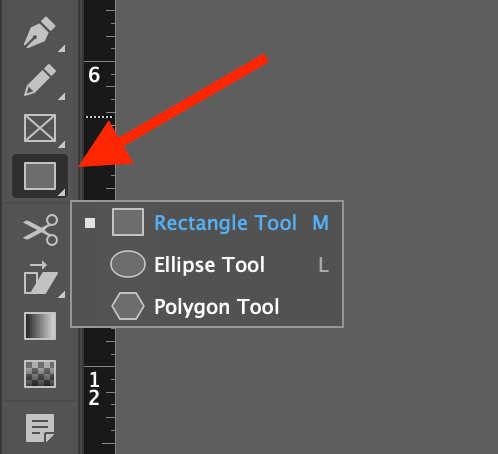
InDesign has three basic shape tools for making preset shapes: the Rectangle Tool, the Ellipse Tool, and the Polygon Tool. They’re all located in the same spot in the Tools panel, so you’ll have to right-click on the Rectangle Tool icon to show the nested tool menu (see below).
All three shape tools work the same way: with your chosen shape tool active, click and drag anywhere in the main document window to draw a shape.
While dragging your cursor to set the size of your shape, you can also hold down the Shift key to lock your shape to equal width and height, or you can hold down the Option/Alt key to use your initial click point as the shape’s center origin. You can also combine the two keys, if necessary.
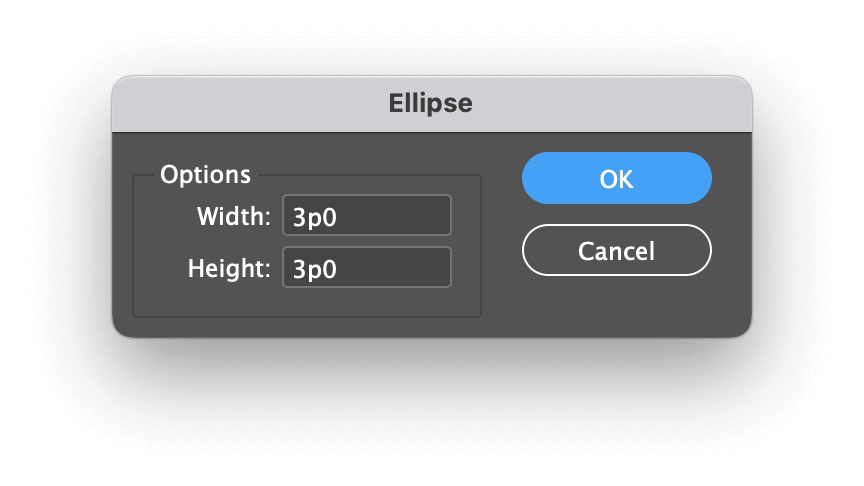
If you want to create shapes using exact measurements, you can simply click once anywhere in the main document window with your shape tool active, and InDesign will open a dialog window that allows you to enter specific dimensions.
You can use any measurement unit you want, and InDesign will automatically convert it for you. Click OK, and your shape will be created.
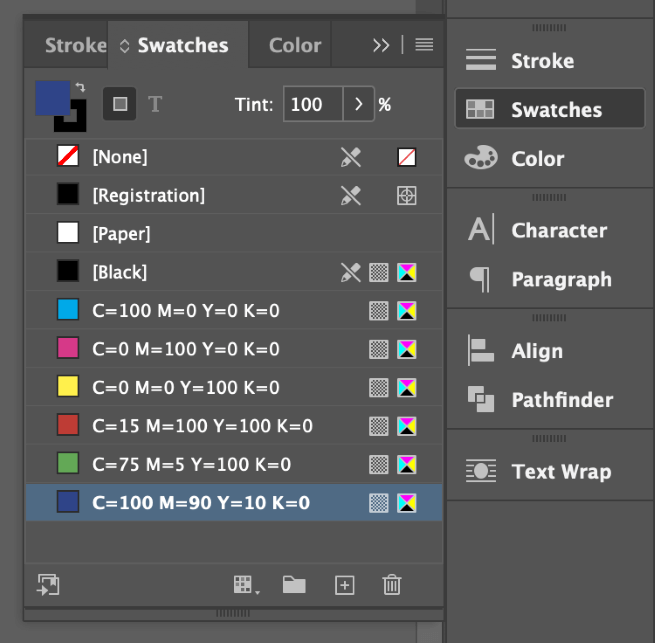
You can change the Fill and Stroke colors of your selected shape using the Swatches panel, the Color panel, or the Fill and Stroke swatches in the Control panel at the top of the main document window. You can also modify the Stroke settings using the Stroke panel or the Control panel.
Extra Polygon Settings
The Polygon Tool has a couple of extra options that aren’t found in the other shape tools. Switch to the Polygon Tool, then double-click the Polygon Tool icon in the Tools panel.
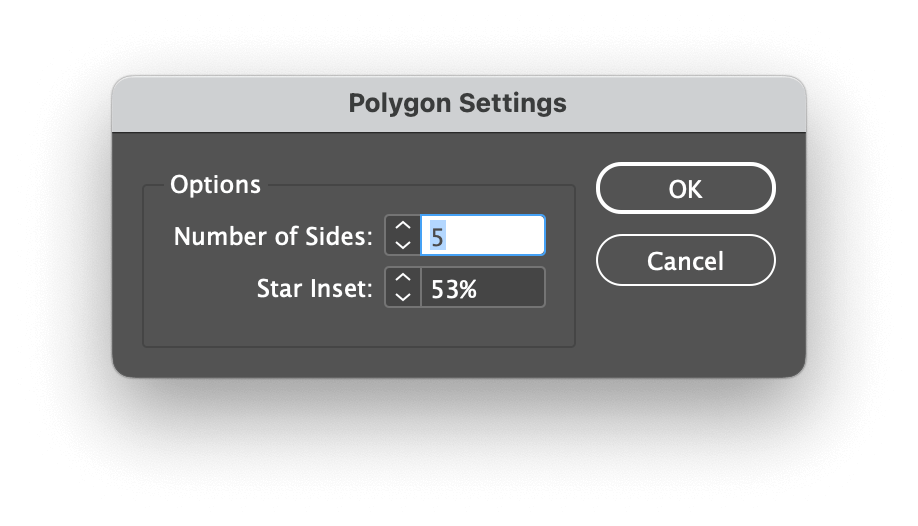
This will open the Polygon Settings window, which allows you to specify the Number of Sides for your polygon, as well as the option to set a Star Inset. Star Inset adds an additional point halfway along each of the polygon’s sides and indents it to create a star shape.
Method 2: Draw Freeform Shapes with the Pen Tool
There’s only so much you can do with preset shapes, so InDesign also includes the Pen tool for creating freeform vector shapes. The Pen tool uses a few basic principles to allow you to draw almost anything you can imagine, so it’s important to understand the basics.
Each time you click within your document using the Pen tool, you’ll place a new anchor point. These anchor points are connected together by lines and curves to form the edge of your shape, and they can be repositioned and adjusted at any time.
To create a straight line, click once to place your first anchor point, and then click again somewhere else to place your second anchor point. InDesign will draw a straight line between the two points.
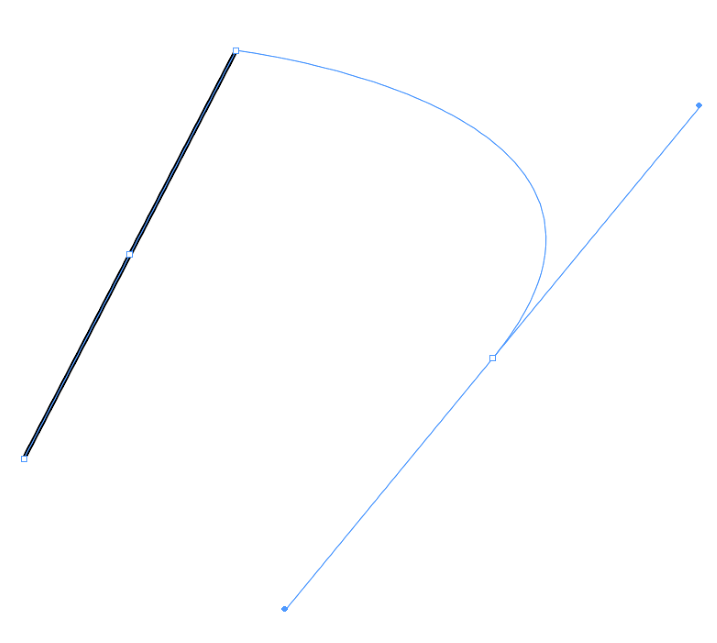
To create a curved line, click and drag your cursor when placing your next anchor point. If you can’t get the curve into the shape you want right away, you can adjust it later using the Direct Selection tool.
If you look closely, you can see that the Pen tool cursor icon also changes depending on what you’re hovering over. If you place the Pen tool over an existing anchor point, a small minus sign appears, indicating that you can remove the anchor point by clicking.
To complete your shape, you need to connect the end point of your shape to the start point of your shape. At that point, it is converted from a line into a shape, and you can use it like any other vector shape in InDesign.
To modify an existing shape, you can switch to the Direct Selection tool using the Tools panel or the keyboard shortcut A. This tool allows you to reposition anchor points and adjust the curve handles.
It’s also possible to convert an anchor point from a corner into a curve point (and back again). With the Pen tool active, hold down the Option/Alt key, and the cursor will change into the Convert Direction Point Tool.
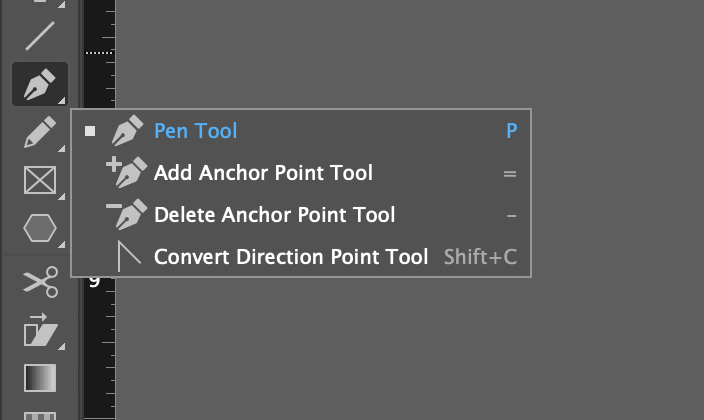
If you prefer not to use the Pen tool for all these different features, you can also find the dedicated anchor point tools by right-clicking on the Pen tool icon in the Tools panel.
If this seems like a lot to learn, you’re not wrong – but the best thing you can do is practice using them until they feel natural. Because the Pen tool is almost universal across Adobe Creative Cloud apps, you’ll be able to use your skills in most other Adobe apps too!
Method 3: Combine Shapes with Pathfinder
One of the most underrated shape tools in the InDesign toolkit is the Pathfinder panel. If it’s not already part of your workspace, you can load it by opening the Window menu, selecting the Object & Layout submenu, and clicking Pathfinder.
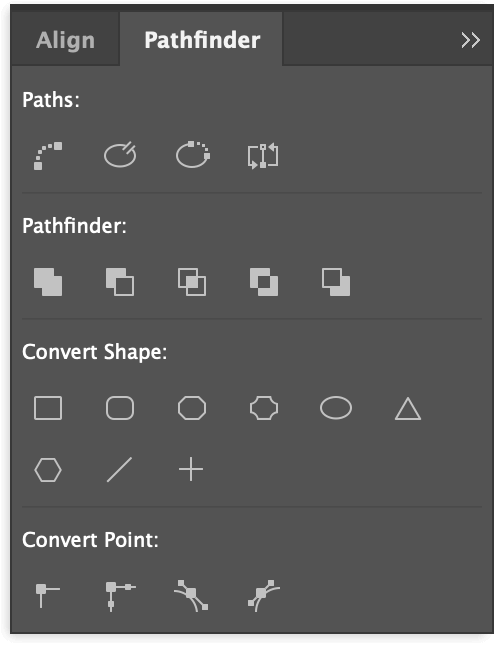
As you can see above, the Pathfinder panel offers a wide range of tools for working with existing shapes in your InDesign document.
The Paths section provides tools for working with individual anchor points, and the Pathfinder section allows you to combine two separate shapes in several different ways.
Convert Shape is fairly self-explanatory and contains some preset shape options that don’t have their own dedicated tools. These conversion tools can be used on any shape in InDesign – even on text frames!
Last but not least, the Convert Point section gives you full control over your anchor points. This is the closest you’ll get to Illustrator-style control over your anchor points, but if you’re using these tools a lot, you should consider working directly in Illustrator instead of struggling against InDesign’s lack of drawing options.
A Final Word
That’s everything there is to know about how to make shapes in InDesign! Just remember: it might seem faster to make illustrations and graphics in InDesign, but for complex drawing projects, it’s much more efficient – and much easier – to work with a dedicated vector drawing app like Adobe Illustrator.
Happy drawing!