
iMovie provides a powerful tool for adding animated maps to your movies. Like the iconic travel scenes from the Indiana Jones movies, you can show your travel between two locations on a map.
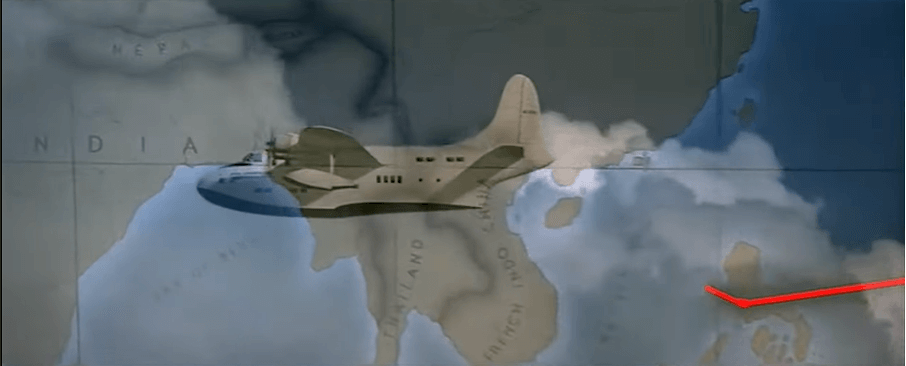
(Image from Indiana Jones and the Raiders of the Lost Ark. Photo Credit: Paramount Pictures)
I’ve been making movies for over a decade in professional video editing programs like Final Cut Pro and DaVinci Resolve, but I still open iMovie now and then when I need a basic animated map. It is a surprisingly useful, simple, and fun tool.
So in this article, I will show you how to add a map and how to adjust the settings to get the look you want. And I’ll wrap up with some honest talk about its limitations and possible solutions.
Table of Contents
How to Add a Map Effect in iMovie Mac
To create an animated map, we first need to add the map effect to our timeline. This is done in three simple steps:
Step 1: Select Backgrounds in iMovie’s media browser, highlighted by the red arrow in the screenshot below.
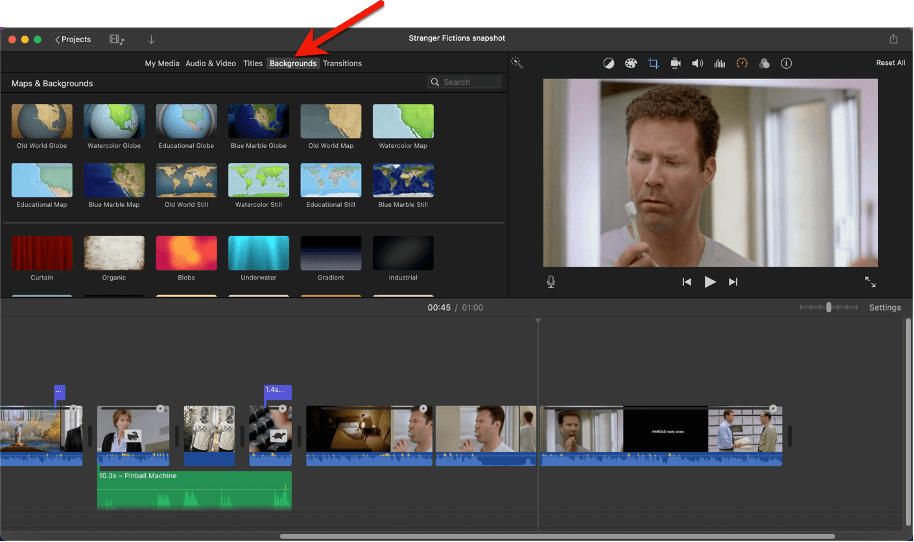
Step 2: Choose the map effect you want.
There are a lot of choices, as you can see in the screenshot above, but you can move your pointer across each one and get a preview in the viewer of how the map will animate when it is added to your movie.
For the Indiana Jones look, you will want either the Old World Globe or the Old World Map. And don’t worry that both maps start in San Francisco – I’ll show you how to change the start and end points later on. Right now, you are just looking for the style you like.
Step 3: Drag and drop the map effect onto your timeline.
When you’ve chosen a map, click on it and drag it to where you want it to start in your timeline (which is what iMovie calls the assembled clips that make up your movie at the bottom of your screen).
And don’t worry if you don’t get it exactly right. You can easily move the map around later and I’ll cover how to do that below.
How to Adjust Your Map’s Settings
If you click on your map effect in your timeline (highlighted by the red arrow in the screenshot below), the map controls will appear at the top of the viewer, highlighted by the red oval in my screenshot below.
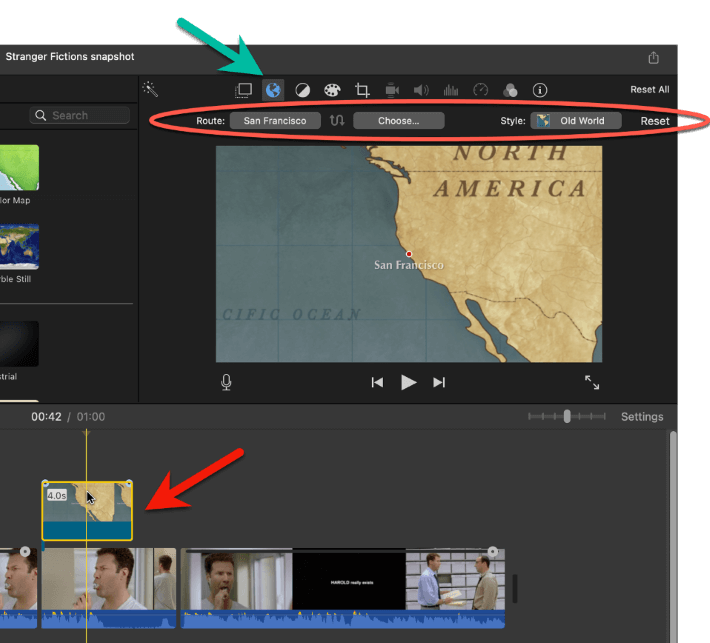
If, for whatever reason, you have your map highlighted and you don’t see the map controls, you can press the globe icon (highlighted by the green arrow in the screenshot above). Note that this icon will only appear when you have a map effect highlighted in your timeline.
As you can see in the oval I have highlighted above, iMovie allows you to modify the Route that will be shown in your map, and change the map’s Style.
The Style option allows you to toggle between the different map styles for the type of map you chose. For example, if you chose the Old World Globe effect, you can switch to other Globe effects, such as Watercolor Globe or Educational Globe.
But the real power of iMovie’s map effect lies in the Route controls:
To change the route, click on either of the two gray buttons to the right of the Route label (which is on the left side of the highlighted oval in the screenshot above).
The left button, which defaults to San Francisco (because that is Apple’s home), will be the starting point of your map, and the right button will be the end point.
Note that you can always flip the start and end points by pressing the Switch icon – the sideways “S” that lies between the two gray start and end buttons.
When you click on either the start or end point, you will get a dropdown box that looks like the screenshot below:
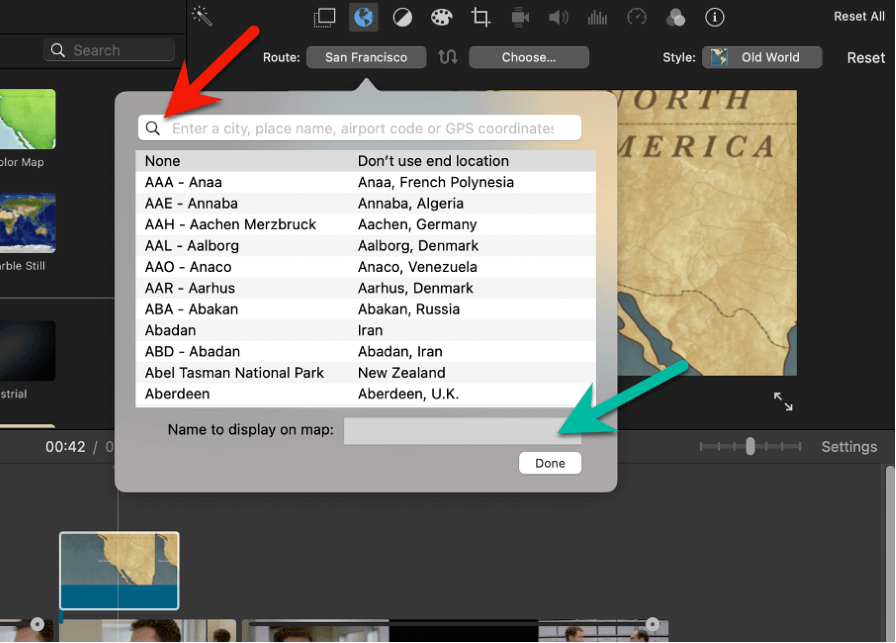
In the search box, highlighted by the red arrow in the screenshot above, you can enter a place name. iMovie has a very impressive database of places, including airport codes (such as SFO for the San Francisco airport), so you should be able to find your place, or at least a place near it.
If you can’t find the exact location you want and have to settle for a more well-known location near it, you can fudge it by changing the name (where the green arrow is pointing in the screenshot above) of the location that iMovie will display on your map.
Creative Tip: While changing the name the map displays for your start and end points is helpful, it is also a chance to be creative, or just silly. Why depart from San Francisco and arrive in New York, when you can depart from “Our Home” or “The Bat Cave” and arrive at “Grandma’s house” or “Avengers Mansion”?
How to Adjust Your Map’s Position and Length
The final, but perhaps most important, settings you can make to your map are its position in your timeline and its length. But you make these adjustments in the timeline directly, not in the viewer’s map controls.
To move your map effect left or right (changing its position and thus its start and end time) in your timeline simply click it, drag it where you want it, and let go.
You can increase or decrease the length of time the map is on screen by clicking on either side of the effect and dragging it left or right.
For example, if you want the map to stay on the screen longer, click on the right side of the effect, and hold while you drag it to the right. When the map is the length you want, just let go.
A Very Important Note: The length of the map effect in your timeline is what controls the speed of the traveling line in your animated map. The shorter the effect, the faster the travel line will go.
Final Mapping Thoughts
iMovie’s animated maps tool is a remarkable feature. Knowing how to use it will surely prove helpful and will probably be a source of some fun. But while iMovie allows some customizations of how its maps work, as I covered above, there is a lot it can’t do.
Like to use your own map? Nope. Like to have more than 2 points – you know, go from A to B then on to C? Nope. (Though you could add two separate maps to accomplish this). Even something as simple as changing the color of the traveling line is a no go (pun intended).
But I am not complaining. Instead, I am giving you a hint what life may be like when you begin to outgrow iMovie. Animated map tools like iMovie provides are awesome. Customizing them is even more awesome.
Final Cut Pro, Apple’s professional video editing software for Mac, allows for “plugins” from third parties – which you have to pay for, but there are some amazing map plugins out there. (We have a whole article on Final Cut Pro plugins, if you’re interested).
Or, if you have way too much time on your hands, you could consider buying Apple’s Motion software, for $49.00, and learning how to build your own custom animations that can be added to either iMovie or Final Cut Pro.
In the meantime, let me know if you found this article helpful or have any suggestions for making it better. Thank you, and Happy Travels!