
Digital comics are all the rage these days, with Webtoons and other digital media websites exploding in popularity. If you wish to make a comic the first thing you will need to do is plan your panels.
Thankfully, making comic panels in PaintTool SAI is easy using the Two-Point Perspective Grid, Layer > Outline, and Straight Line Drawing Mode.
My name is Elianna. I have a Bachelor of Fine Arts in Illustration and have been using PaintTool SAI for over seven years. I’ve published a variety of webtoons over the past seven years from action to drama and more, all of which were made in PaintTool SAI.
In this post, I will show you how to make comic panels in PaintTool SAI using the Two-Point Perspective Grid, Layer > Outline, and Straight Line Drawing Mode.
Let’s get into it!
Table of Contents
Key Takeaways
- PaintTool SAI does not have a native guide feature like Photoshop.
- You can use the 2 VP Perspective Grid to create guides for your comic grids.
- Right-click your perspective grid layer in the layer menu and open Property to add divisions to your perspective grid.
- Select Line in the Snap dropdown menu so your lines snap to the guides of your perspective grid.
- Use straight line drawing mode to draw freehand straight lines.
Method 1:Make Comic Panels Using the Two-Point Perspective Grid
Since PaintTool SAI does not have the ability to set guides or bleed lines like in Photoshop or Illustrator it is not the easiest to make comic panels with consistent border widths. However, we can simulate guides by using the Two-Point Perspective Grid.
Note: This is not a tutorial on how to make straight lines in PaintTool SAI. If you would like to learn how to make straight lines check out my post “How to Draw Straight Lines in PaintTool SAI”.
Follow the steps below to create comic panels using the Two-Point Perspective Grid.
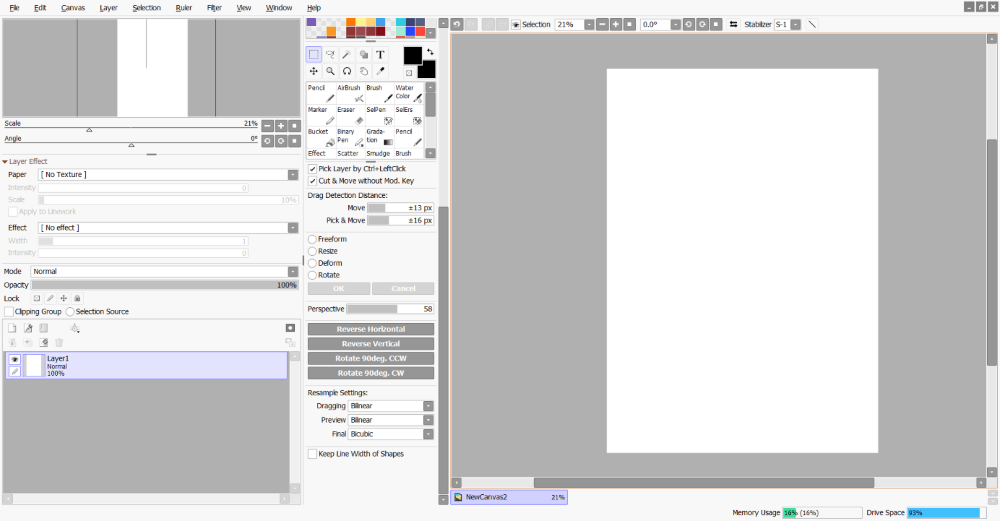
Step 1: Open your document in PaintTool SAI.
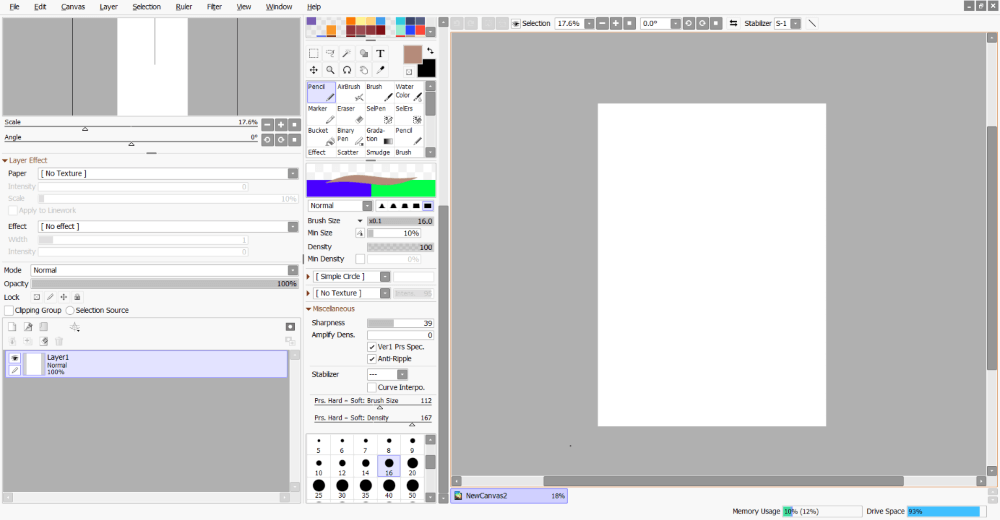
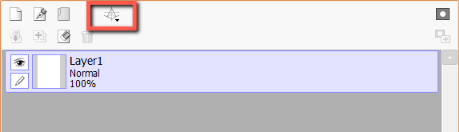
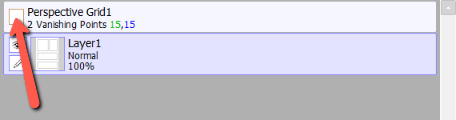
Step 2: Click on the perspective ruler icon in the layer panel.
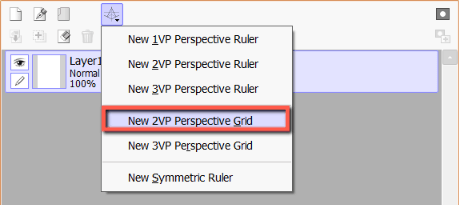
Step 3: Select New 2 VP Perspective Grid.
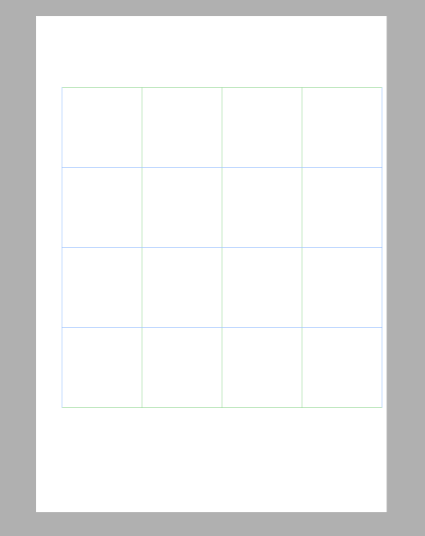
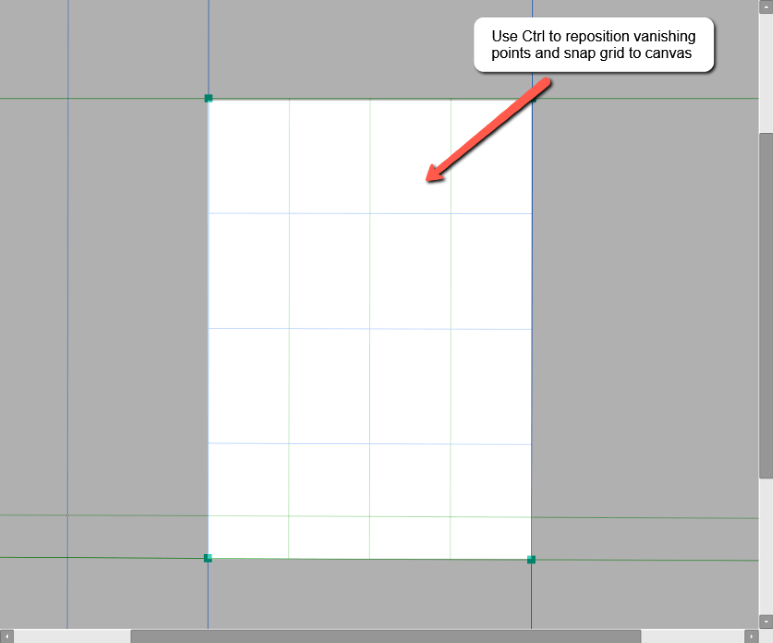
Your perspective grid will now appear on your canvas.
Step 4: Hold down Ctrl and click and drag the corners of the grid to snap it to the sides of your canvas.
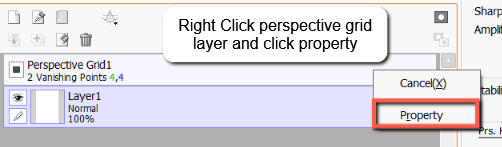
Step 5: Right-Click the Perspective Grid Ruler in the layer menu and select Property.
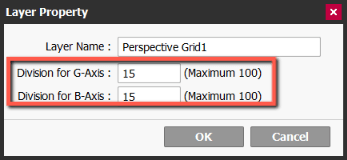
Step 6: In the fields Division for G Axis and Division for B Axis input a value from 1-100.
For this example, I will be using the value 15 for each field.
Step 7: Click OK or hit Enter on your keyboard.
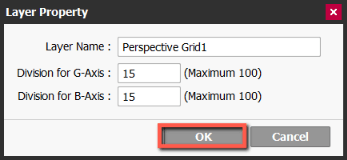
You will now see your perspective grid has added the divisions as inputted. We will use these grid divisions to plan our panels.
Step 8: Click Snap and select Line from the dropdown menu.
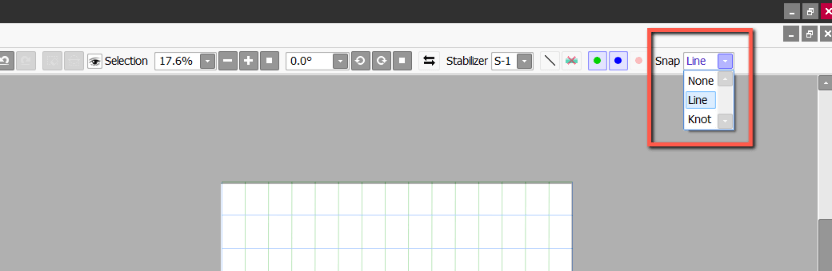
Your lines will now snap to the G and B-axis lines when drawn.
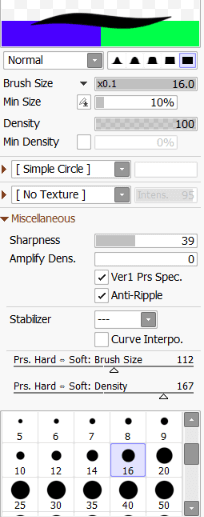
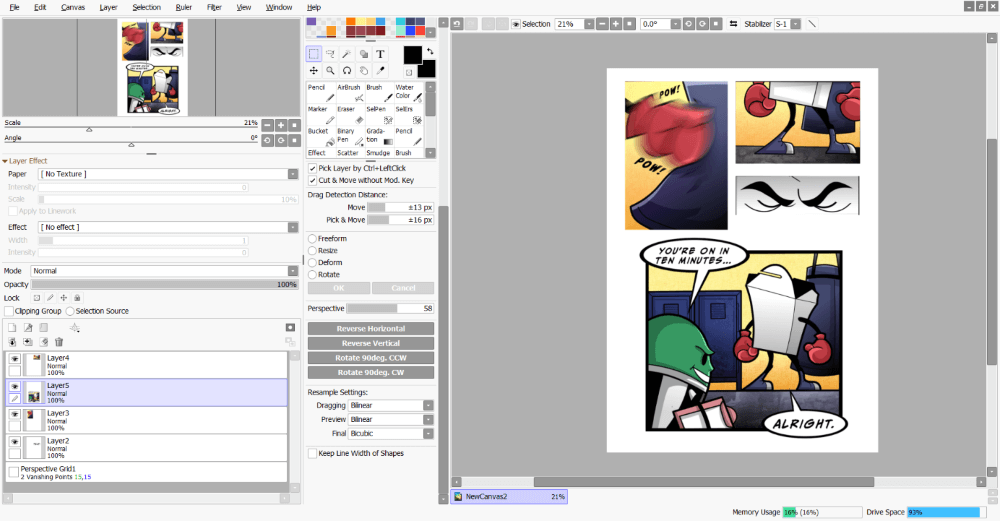
Step 9: Click on the Pencil tool, select Black on the color wheel, and choose a brush size. For this example, I am using 16px.
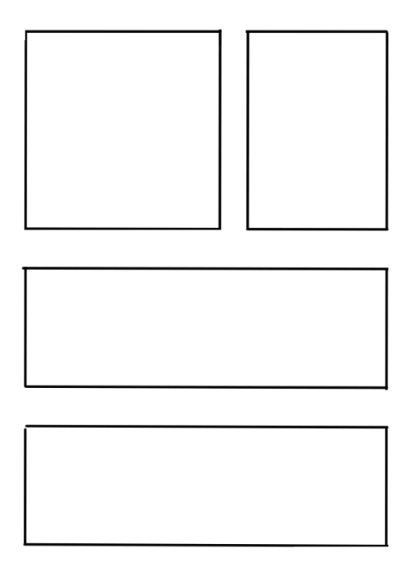
Step 10: Draw! You can now plan your panels as desired. If you would like to create panels that are not square, simply switch Snap back to None.
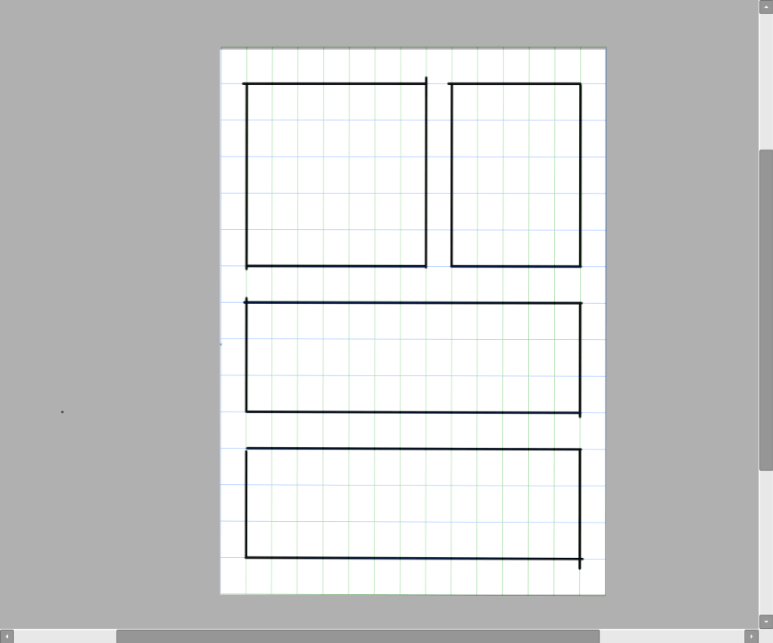
Step 11: Click the box in the layer panel to hide your grid.
Enjoy!
Method 2: Create Comic Panels in PaintTool SAI using Layer > Outline
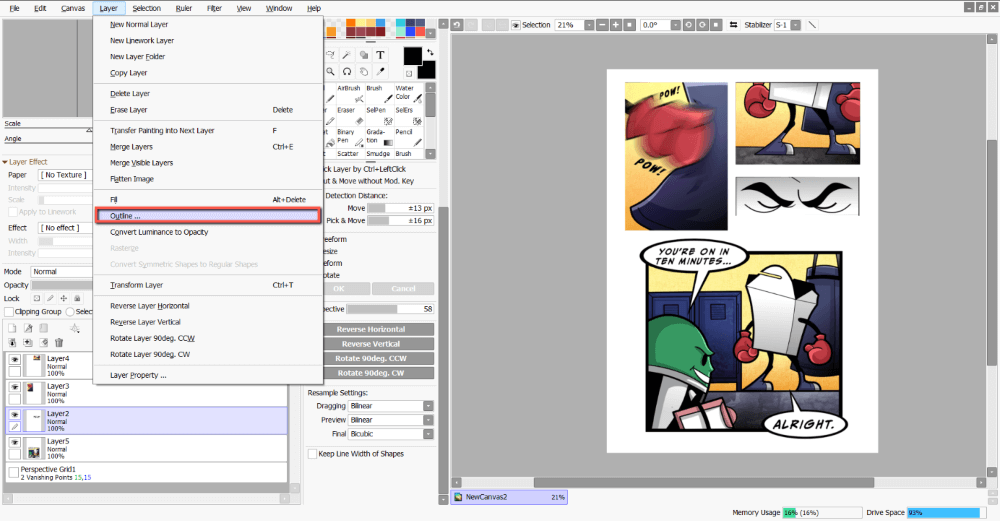
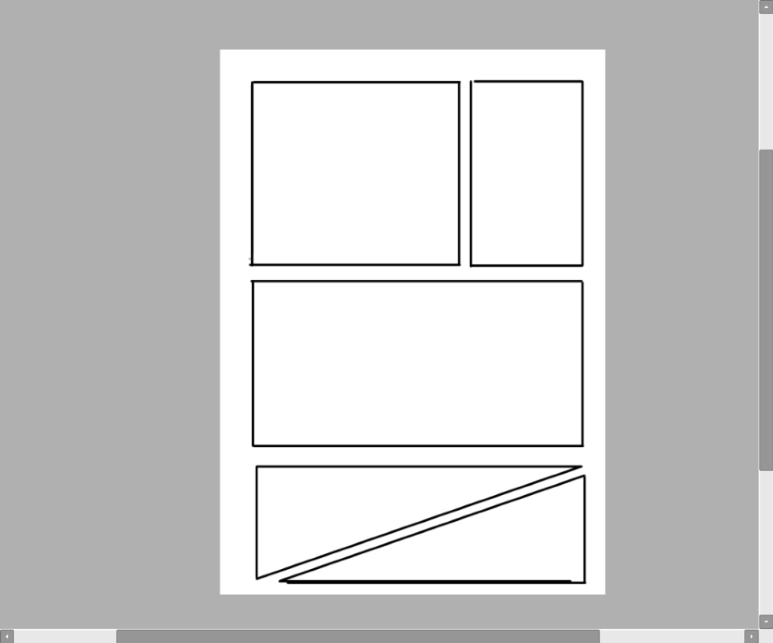
Say you already have some comic panels drawn but would like an easy way to outline them. You can do so in a few clicks using Layer > Outline. Here’s how:
Step 1: Open your document in PaintTool SAI.
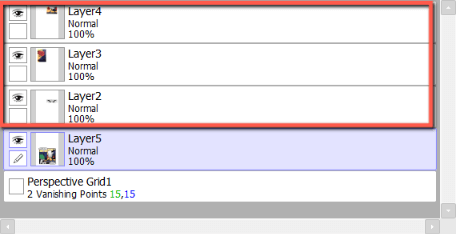
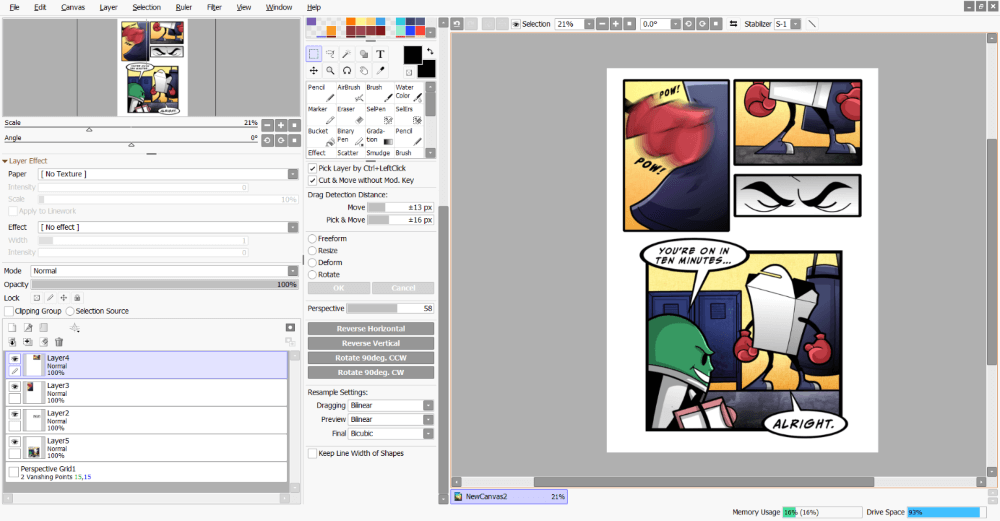
Step 2: Select your layer(s) with your comic panel in the layer menu. For this example, I will be adding outlines to the top 3 panels in my document.
Step 3: Click Layer in the top menu and select Outline. This will open the Outline Dialog.
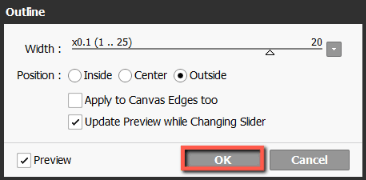
In the Outline Menu, you will see a few options to edit the stroke of your outline.
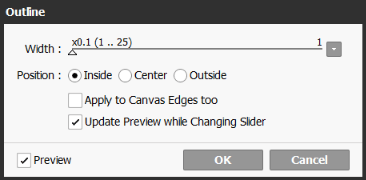
- Using the Width slider, you can easily manipulate the width of your outline stroke

- Using the Position options, you can choose where your outline will apply. You can apply your outline to the Inside, Center, or Outside of your selected pixels.

- Check the Apply to Canvas Edges Too box to apply a stroke to the canvas edge.

- Check the Update Preview While Changing Slider box to see a live preview of your outlines.

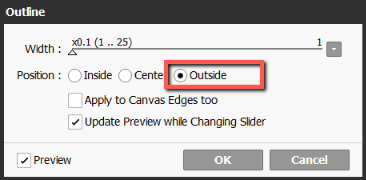
For this example, I will be using the Width and Position options.
Step 4: Click on the Outside position option to apply your outline stroke around the outside of your comic panel.
Step 5: Using the width slider, adjust the width of your outline as desired. You will be able to see a live preview of your edits if the Preview box is checked. For this example, I am setting my width to 20.
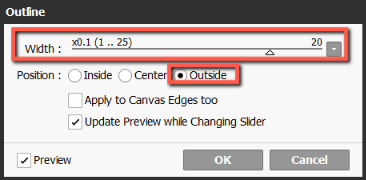
Once your outline is the width you desire, hit OK.
Repeat until all your comic panels are outlined.
Enjoy!
Method 3: Make Comic Panels Using Straight Line Mode
If you would like a way to freehand comic panels in PaintTool SAI you can do so with Straight Line Mode. Here’s how:
Step 1: Open PaintTool SAI.
Step 2: Click on the Straight Line Mode icon.

Step 3: Click and drag to make your lines. Hold down Shift while you draw your lines to make straight vertical and horizontal lines.
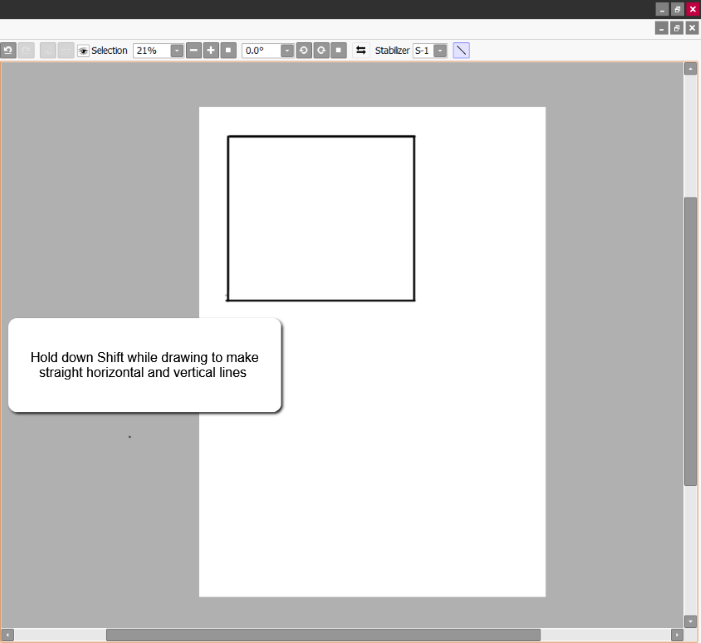
Repeat as desired.
Final Thoughts
Making comic panels in PaintTool SAI is easy using the Two-Point Perspective Grid, Layer > Outline, and Straight Line Drawing Mode.
The Two-point Perspective Grid is the best option for creating comics on a simulated grid, while Layer > Outline easily outlines previously existing artwork. If you are looking for a more causal approach, Straight Line Drawing Mode is the best option to create freehand comic panels
Making comic panels is the first step to creating your next work of sequential art. Have fun experimenting to discover which approach is the best for your workflow.
Which method to create comic panels in PaintTool SAI did you like most? How did your comic turn out? Let me know in the comments below!