
While iMovie is targeted at people new to film editing, it offers some easy tools for some very advanced features – such as overlaying one video onto another using the green screen technique.
The basic idea of a green screen video is that the foreground (such as a person) is easily separated from the background because the foreground is shot against a background with a uniform green color.
In just a few steps, iMovie can quickly remove just the green color, then overlay the remaining foreground from your green screen video on top of another video.
Below, I will take you through the steps to do this by demonstrating how you could overlay a video of a swimming shark onto a video of a Famous Actor brushing his teeth. Which I am sure many of you are eager to do.
And, because I have been making movies for years and have encountered some practical limitations with iMovie’s capabilities, I will demonstrate a limitation you are likely to run into and point you toward a solution.
Table of Contents
How to Use Green Screen in iMovie for Mac: Step-by-Step
Just follow the 4-step guide below, and you should be good to go.
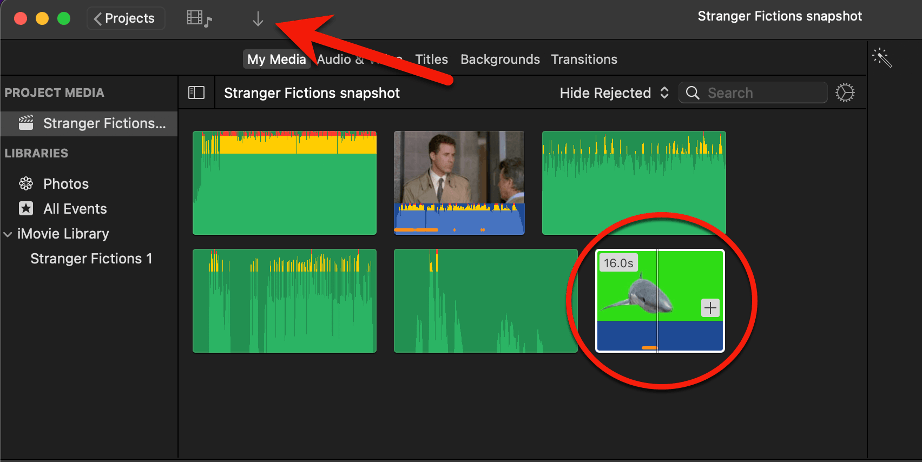
Step 1: Choose the green screen clip you want to use and import it into your iMovie project.
You can do this by clicking the import media icon (the down arrow at the top of the media library, where the red arrow is pointing in the screenshot below), or simply by dragging the clip into your media library.
In my example, I have added a clip of a shark swimming against a green screen, shown inside the red circle in the screenshot below.
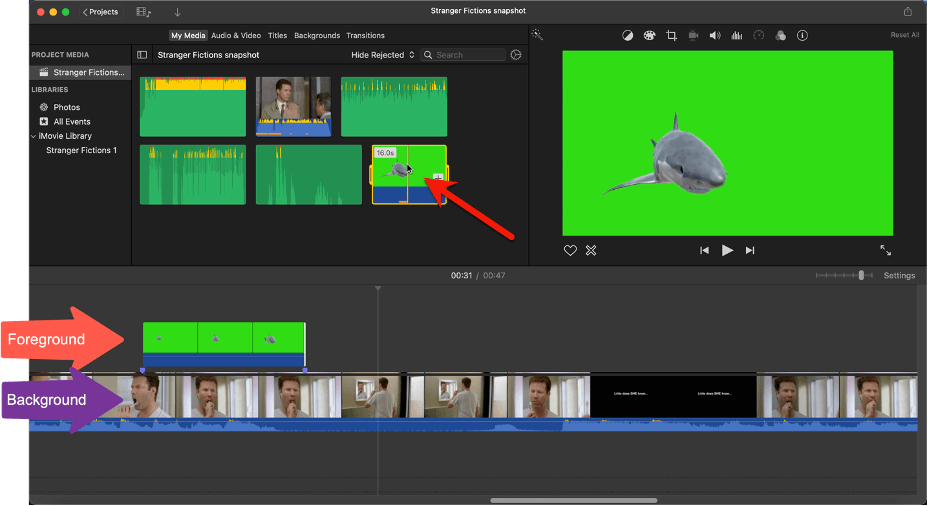
Step 2: Drag the green screen clip on top of whatever clip you want to use as the background.
In the screenshot below you can see that I dragged the clip of the shark (highlighted by the red arrow) and dropped it (see the red “Foreground” arrow in the screenshot) on top of a clip of a Famous Actor brushing his teeth (identified in the screenshot with the purple “Background” arrow)
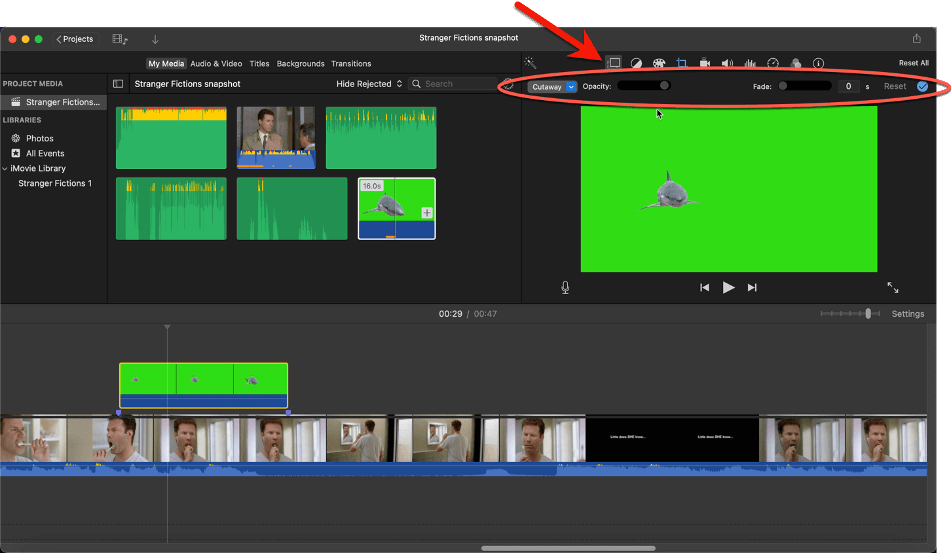
Step 3: Open the Video Overlay settings.
With the green screen clip selected in your timeline, click on the video overlay settings icon at the top of your viewer, shown by the red arrow in the screenshot below. This reveals a set of settings, highlighted with a red oval in the screenshot below.
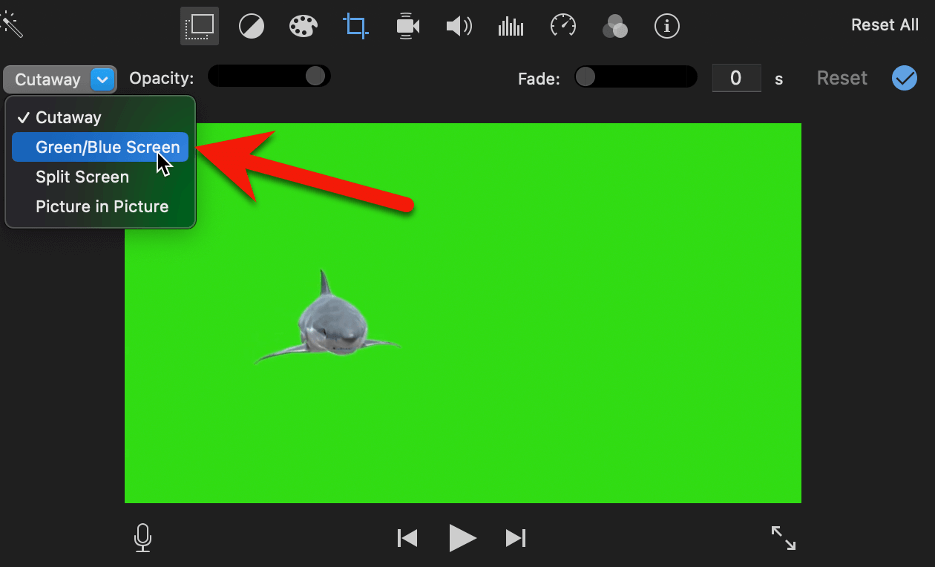
From the menu on the left side of these settings, select Green/Blue Screen, highlighted by the red arrow in the screenshot below.
Digression: Why is the option called “Green/Blue Screen” and not just “Green Screen”? Well, a blue screen does the same thing as a green screen but is… blue.
Reportedly, the idea of using a blue backdrop instead of a green one came about because too many actors were wearing green shirts, making our video editing programs work too hard to separate the foreground from the background.
The important thing is: If your foreground has to have a lot of green in it, try shooting your “green” screen video against a blue background instead. iMovie can handle green or blue.
Anyway, once you’ve selected the Green/Blue Screen option, all of the green (or blue) in your video clip should disappear, revealing the (background) clip below it.
Step 4: Adjust the Video Overlay settings.
Some adjustments are (almost) always necessary. For example, in my shot, shown in the screenshot below, iMovie was able to remove all the green around the shark, but the shark is appearing right over the Famous Actor’s face. That was not the look I was going for.
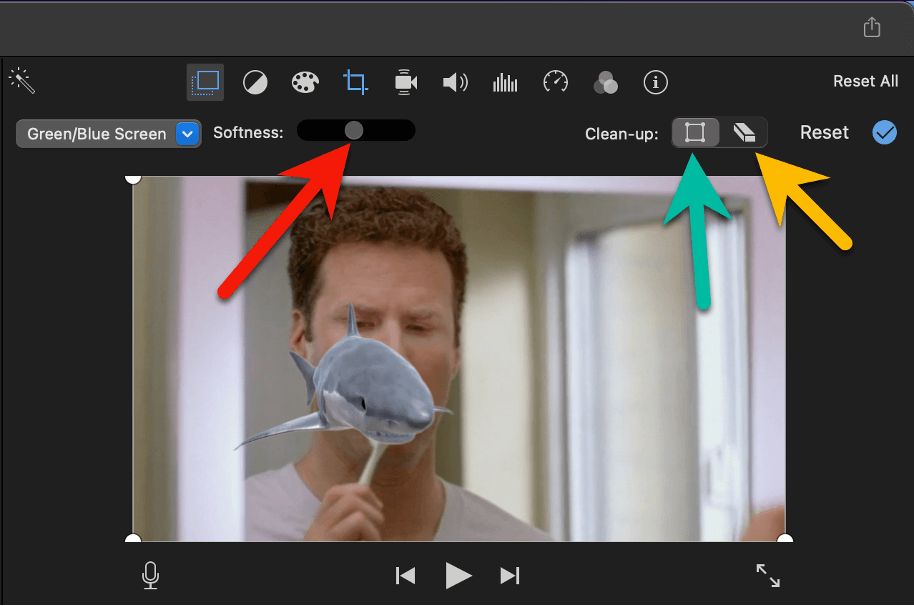
Luckily, iMovie provides a few settings to help you get your picture to look more like you want it to. From left to right, the setting available are:
- Softness: The red arrow in the screenshot above points to a slider that adjusts how much of a blur is put around the edges of your foreground shot. This can, as ridiculous as it sounds, make it look a little less fake to have a shark swimming in a bathroom mirror.
- Crop: The green arrow in the screenshot above is pointing at the crop icon. This is a way to help iMovie understand where your foreground is, and thus everything outside of the cropped area can be removed.
- Clean: Finally, the yellow arrow is pointing at an eraser icon that, when selected can be used to rub any parts of your shot where some green is still showing.
How Can I Reposition my Green Screen Shot?
Sadly, none of the settings above helped me with my problem: My shark was over my Famous Actor’s face. Even more sadly, iMovie simply does not provide a way to reposition an image in the green screen settings.
You can, by selecting the crop icon in the viewer options, adjust your green screen image somewhat, but this has the unfortunate side effect of enlarging the image – likely more than you would want, as can be seen in the screenshot below, where the shark has been moved to the right, but has also gotten bigger.
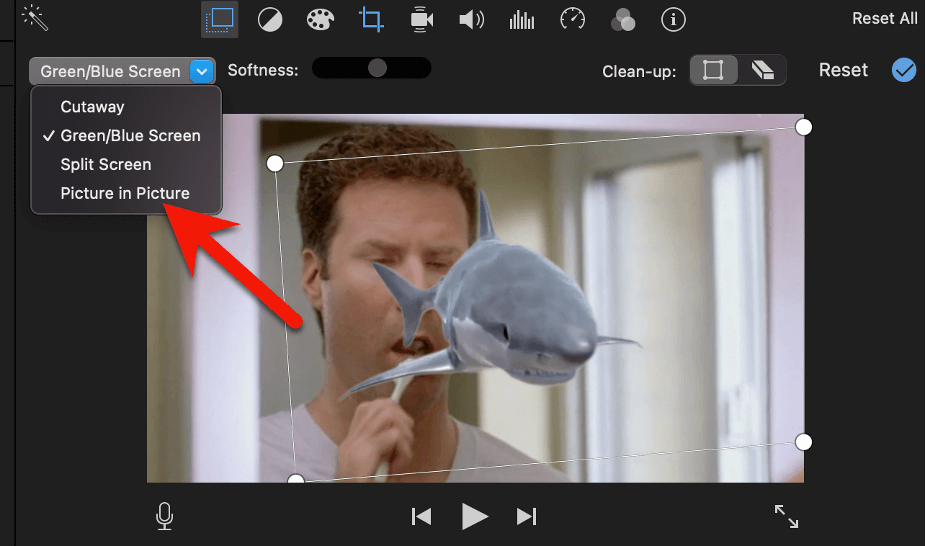
Users with some experience with iMovie may find the inability to reposition a green screen image surprising as you can do exactly that with the picture in picture controls, selected by choosing that option in the video overlay settings (highlighted by the red arrow in the screenshot above.)
And there is indeed a somewhat complicated workaround whereby you can follow a combination of green screen and picture in picture steps to accomplish a repositioning of a green screen image.
However, this process is beyond the scope of this article, and there is already an excellent video on the MacMost website that will take you through each and every step. I highly recommend watching it if you need to reposition your greenscreen or are just eager to learn more. You can check it out here.
Final Thoughts
iMovie is a wonderfully usable Mac movie making software for beginning editors. It allows you to dive right in and produce quality movies with very little frustration. Most of the time.
Overlaying an image with a green screen background on top of an existing clip is, as I have shown above, relatively straightforward. But when you want, or need, just a little bit more functionality, iMovie can disappoint.
But remember, Final Cut Pro, Apple’s professional movie editing software offers free trials and while it does have a learning curve, it also allows you to reposition green screen clips!
Please do let me know in the comments if this article has been helpful or if you have suggestions to make it better, or just have a question. I’m happy to help. Thank you.