
iMovie provides easy to use tools to create the picture in picture effect, playing one video in its own window on top of another. With iMovie’s picture in picture effect, you can overlay any video on top of another, adjust its size and position, whether it has a border, or a shadow, even how it appears and disappears on the screen.
And with over a decade in film making experience I can tell you that you will continually find new uses for such a powerful and versatile tool. The more you experiment with it, the more ideas you will have about how to make your videos more interesting or effective.
So below I will cover how to add the picture in picture effect, how all the various settings work, and how to position or resize your picture in picture.
Table of Contents
How to Add a Picture in Picture Effect in iMovie
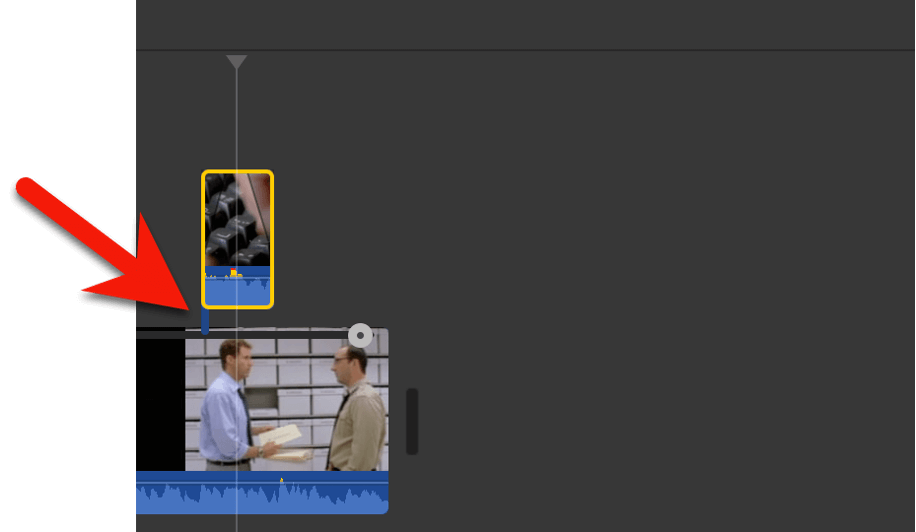
To add one video on top of another, first select the clip you want to appear on top of another, and then drag it – literally – on top of the other clip.
In the screenshot below, I have dragged a short clip of somebody typing, and placed it on top of a clip of two people talking.
Note the blue line, which is called a stem, highlighted by the red arrow in the screenshot below. This signifies the exact spot where the top clip is attached to the bottom clip and is thus where your picture in picture effect will start.
Now, making sure your top clip is highlighted (it has a yellow border around it, like in the screenshot above), you should see a row of Video Overlay Settings in iMovie’s Viewer (which is in the top right corner of the iMovie window)
This row, highlighted by the red oval in the screenshot below, only appears when a clip is selected that is on top of another clip – because that is how iMovie knows you will need the overlay settings.
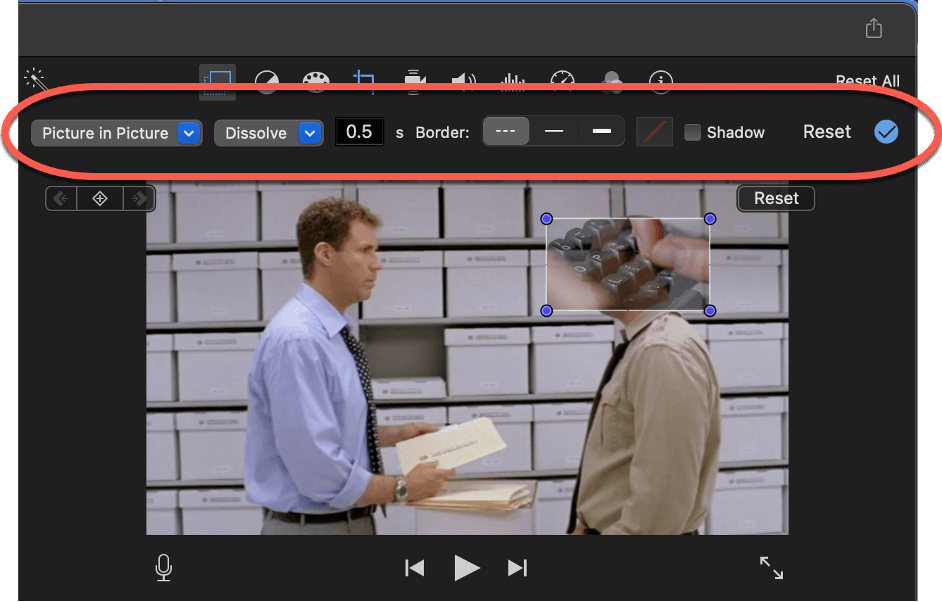
But if the Video Overlay Controls aren’t visible, for whatever reason, you can always click the Video Overlay Settings button, highlighted by the red arrow in the screenshot below, to make them appear.
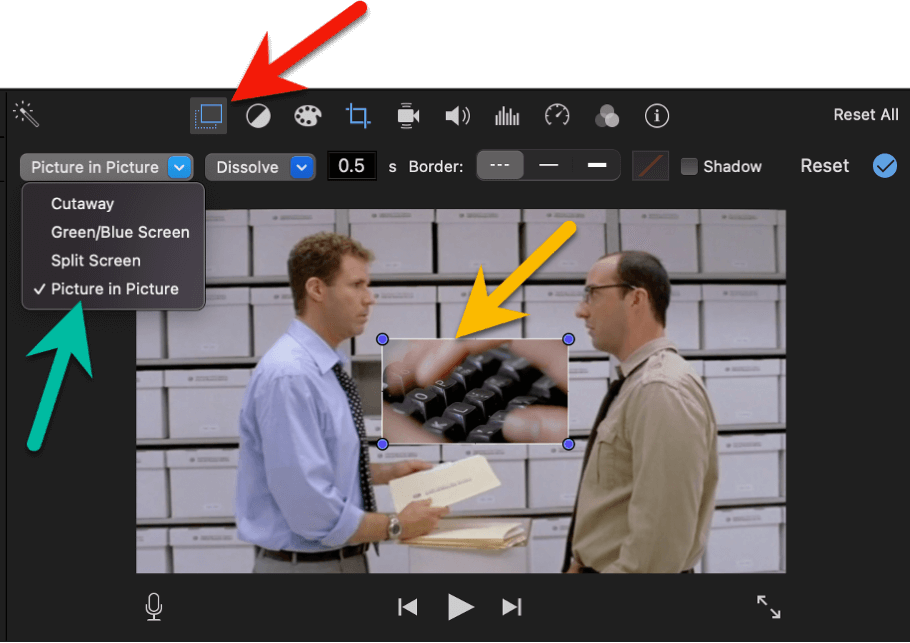
Now that this row of settings is visible, select Picture in Picture from the dropdown menu on the far left, highlighted by the green arrow in the screenshot above.
As soon as you’ve selected Picture in Picture, your top video will appear as a smaller window on top of your bottom video (or, if you prefer, in the foreground).
In the screenshot above, my top video of somebody typing is now in a small window between the two men talking (where the yellow arrow is pointing).
And that, my friends, is all there is to it. You have created a picture in picture effect!
How to Change the Settings of Your Picture in Picture Effect
It is unlikely that where iMovie placed your top video is exactly where you want it, or you want to adjust the size of the window, so below I will take you through all the various settings and adjustments iMovie provides to customize your picture in picture effect.
First, let’s take a closer look at the Video Overlay Settings, shown again in the red oval in the screenshot below.
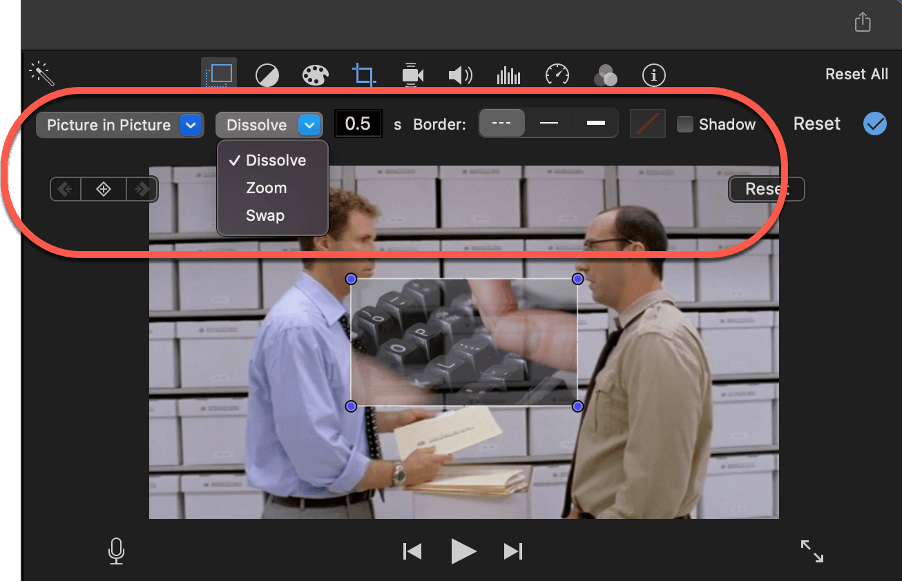
The first option, to the left of the dropdown menu where you selected Picture in Picture, and which is currently set to “Dissolve”, allows you to customize the top video’s Transition onto (and off of) the bottom video.
The Dissolve Transition is the default one for good reason. It is a kind of Fade Transition where the details of your picture sort of sprinkle in and sprinkle out. It is the most passive and natural feeling transition among the options, so is usually a safe choice.
But you can also have your top video zoom in and out, which means it starts as a dot and quickly zooms in to the size of your top video’s window and shrinks back to a dot when your clips near its end.
The last Transition option, the Swap Transition is pretty much the opposite of the zoom transition – your top clip starts as the full screen and shrinks to its window size when the picture in picture effect starts, and vice versa when the effect ends.
The next setting in the Video Overlay Settings is the number field, which is currently set to 0.5 in the screenshot above. This sets the time it takes for the Transition you chose to happen and is measured in seconds. Thus, 0.5 is ½ of a second.
The next group of settings provide control over the Border of your top video’s window. The three buttons to the right of the Border label allow you to choose between having no border (the dashed line icon), a line border, or a thick line border. Just to the right of these options is the box to set the color of the border’s line.
Finally, if you check the gray square next to the Shadow option, your picture in picture will cast a small shadow, which gives the whole thing a more three-dimensional effect, like the top picture is floating above the bottom video.
Moving and Resizing Your Top Picture
Because iMovie just sort of plops your top video onto the bottom video, and in a default size, you will want to move it to a place you are happier with, and probably adjust its size.
To move the top window, just click anywhere inside it (in the Viewer window), hold, and drag it to where you want it.
To resize the top video, click on one of the blue dots, which are called handles, in the corners of the window, as highlighted by the red arrow in the screenshot below.
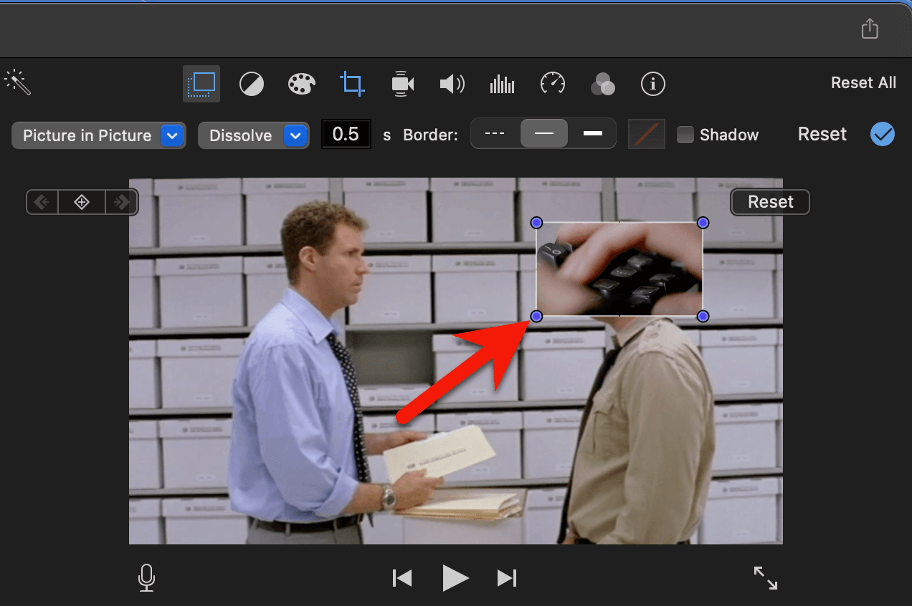
As you drag one of these handles towards the center of the image, the window will shrink, and as you drag it away from the center, the window will grow.
Lastly, if you are not happy with where you picture in picture effect is starting or ending in your movie, you can always click on it in your timeline and drag it left or right to change it’s starting point. And you can change the length of the clip by clicking on either edge of the clip and dragging it right or left.
Final Picturesque Thoughts
iMovie’s picture in picture effect is more powerful than it might seem, so I encourage you to play around with it and experiment with the different Transition options. I assure you, the more comfortable you get with it, the more creative, fun, or wild effects you will create.
But do let me know in the comments below if you have questions, suggestions, or additional insights that might help your fellow reader. Thank you.