
To rotate or flip a video clip in Adobe Premiere Pro, first import and select the clip in the sequence timeline. Next, click on the Effects control panel. In the Effects panel, locate the motion effect control. Under it, you will have the rotation effect control. Change the rotation value to 90.0º, which turns it to the side, or 180.0º, which flips it.
I am David, an expert in Adobe Premiere Pro. I have been using this great software to edit all of my videos for the past ten years. Rotating a video is one thing you can achieve in a few seconds in Premiere Pro.
In this article, I will show you how to rotate your video clips in Adobe Premiere Pro, balance drone footage due to the horizon, and straighten your video using the ruler.
Table of Contents
How to Flip a Video Clip in Adobe Premiere Pro
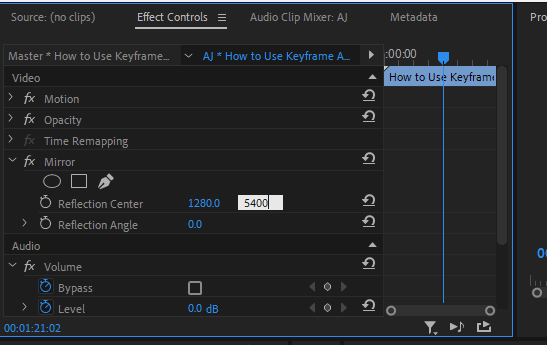
The act of flipping a video clip in Premiere Pro refers to the process of reversing the image and playing it back in reverse. You can do this by importing your desired video into Adobe Premiere Pro. Afterward, go to the effect panel, and search for the mirror effect from the search space. Select the mirror effect and drag it in on your video clip.

Now, go to the effect control panel, and change the reflection center to 5400 or the reflection angle to 90.
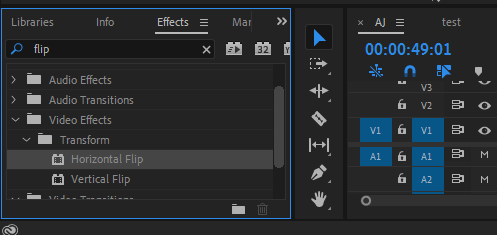
To flip Horizontally, go to the effect panel, and search for the flip effect from the search space. Select the horizontal flip effect and drag it in on your video clip.
Follow the same process to flip vertically. Go to the effect panel, and search for the flip effect from the search space. Select the vertical flip effect and drag it in on your video clip.
How to Rotate a Video Clip in Premiere Pro
To rotate a video clip in Adobe Premiere Pro, select the clip in the Project panel. Next, click on the Effects control panel. In the Effects control panel, locate the motion effect control; under it, you will have the rotation effect control.
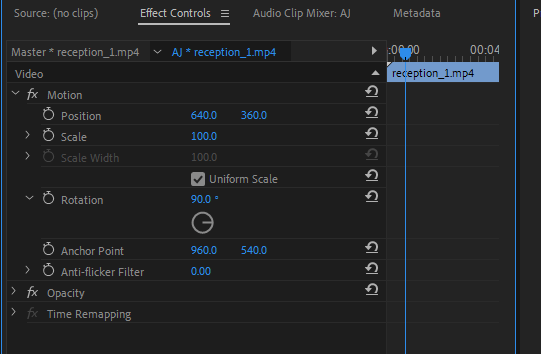
Change the rotation value to 90.0º, which turns it on its side, or 180.0º, which flips it, or 270.0º to rotate it again in the other direction.
Other Methods to Flip a Video Clip in Premiere Pro
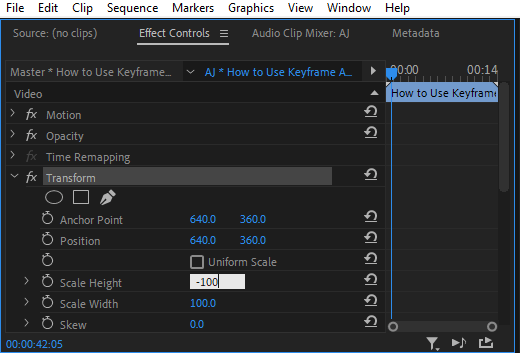
At the same time, you can also search for transform from the effect panel and drag it on the selected video clip.
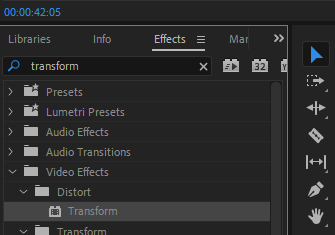
Now go to the Effect Controls panel, and scroll down to Transform. Make sure you Uncheck Uniform Scale.
To flip the video clip horizontally, change the Scale Width to negative (-100). To flip the video clip vertically, change the Scale Height to negative (-100).
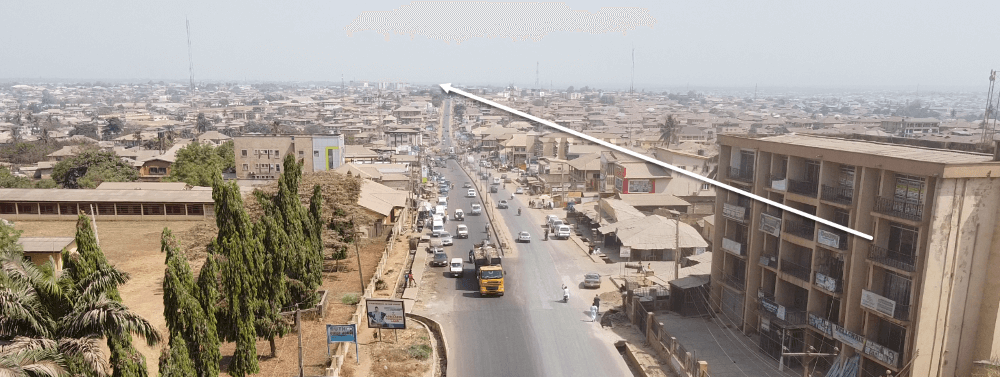
How to Fix a Tilted or Wonky Horizon in Drone Footage
The horizon in the footage appears to be ‘wonky’ or distorted because the drone is not properly calibrated, which makes the horizon appear to be moving up or down. Thus fixing this in post-production is very simple.
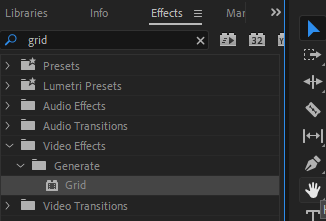
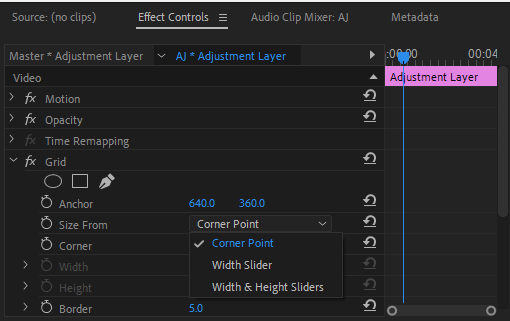
Select and drag your drone footage into your Premiere Pro Sequence timeline. Then create an adjustment layer. Drag the adjustment layer created in the Project Panel into the track above the drone footage in the timeline. Now, go to the effect panel, search for Grid, and drag it on the adjustment layer.
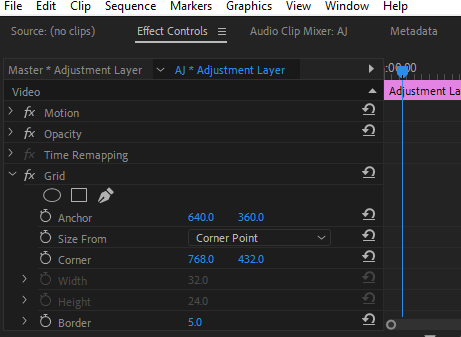
Go to the effect control panel to change the scale from the corner point to the width slider. Adjust the blending option to overlay, and you can also change the grid color.
Select the drone footage in your sequence timeline, then navigate back to rotation under the effect control panel.
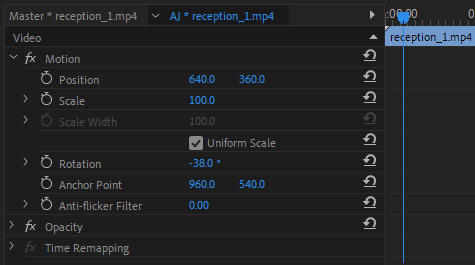
Try rotating it gradually to align with the grid line on the playback screen. After you’ve done this, you can do away with the adjustment layer created.
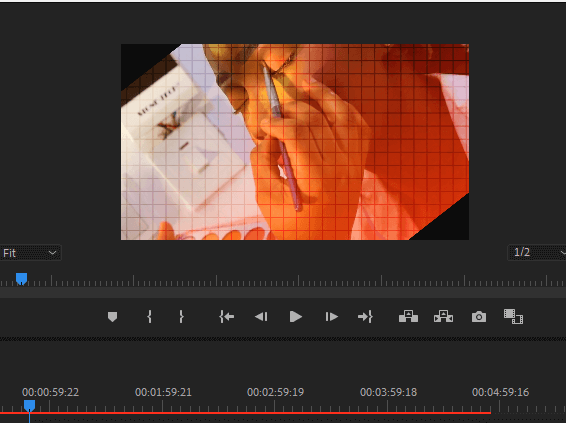
After that, you will notice black edges that are unsuitable for the final export. To fix this, scale up your footage using the motion fx in your effects control panel, and scale until the black edges go away. Then wonky horizon was removed. Remember to delete the adjustment layer once you are done balancing your footage.
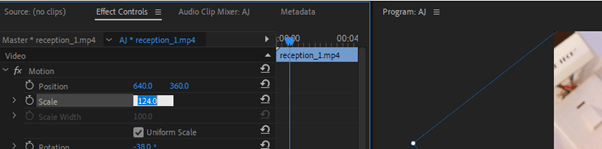
Note that the fact that you are zooming in through scaling, your footage will lose a bit of resolution. So, I will suggest whenever you are shooting, shoot in higher resolution, like 4K.
Using a Ruler Guide in Premiere Pro
As a video editor, you may have wonky footage or need to straighten a particular effect in Premiere Pro. This is where the Ruler comes into action. It will help you get things right. Balance up your video clips or even your texts on the screen.
Having a straightened clip is one of the criteria for knowing a professional cameraman or video editor. To do this, ensure your Program Panel is active, go to View Menu > Show ruler, or just press CTRL + R.

The ruler will show around your Playback screen/program panel. Just select it and drag it to your desired area. And to do away with the ruler guide, just drag it off. To disable the ruler, follow the same process or press CTRL + R.
Conclusion
Rotating or flipping your video clip is simple if you follow the above explanation. Select the clip in the sequence timeline. Navigate to the Effects control panel. In the Effects panel, locate the motion effect control. Under it, you will have the rotation effect control. Change the rotation value to 90.0º. That will do it.