
Drawing a line in Adobe Illustrator is easy, and there are at least six ways to do it. Whether you use a mouse or a drawing tablet there is a tool for you. All you need is a couple of minutes to spare.
My name is Elianna. I have a Bachelor of Fine Arts in Illustration and have been using Adobe Illustrator for over six years. Drawing lines was the first thing I learned in Adobe Illustrator, and as I continue to explore the program, I find more efficient ways to do so.
In this post, I will teach you how to draw a line in Adobe Illustrator using the Pen, Curvature, Line Segment, Arc Segment, Paintbrush, Blob Brush, and Pencil tools.
Let’s get into it!
Table of Contents
Key Takeaways
- The Pen or Line Segment tools are best for drawing a straight line.
- The Pen, Curvature, or Arc Segment tools are best for drawing curved lines.
- The Paintbrush, Blob Brush, or Pencil are best for drawing freehand lines.
Useful Shortcuts Cheatsheet
| Tool | Shortcut |
| Pen | P |
| Curvature | Shift+~ |
| Line Segment | \ |
| Paintbrush | B |
| Blob Brush | Shift+B |
| Pencil | N |
| Arc Segment |
Before you Draw
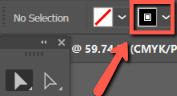
Set your stroke color to black. That way you can see the lines you are drawing in the Illustrator app. To set your stroke color, click on the Stroke icon in the Control Panel, and select a Black swatch.
How to Draw a Straight Line in Adobe Illustrator
You can draw straight lines in Adobe Illustrator using the Pen tool and Line Segment Tool. Here’s how.
Tip: If you hold down Shift while creating your lines with these methods you will get a perfectly straight horizontal or vertical line.
Method 1: Pen Tool
Step 1: Click on the Pen tool. Click on any point to create the first anchor point.
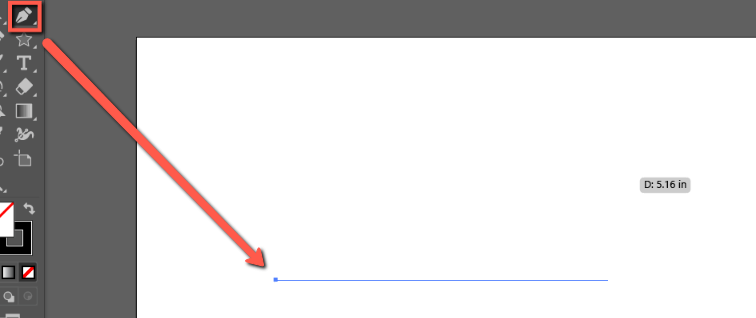
Step 2: Click anywhere else on your artboard to lay down a second anchor point and complete your line. Hit Enter on your keyboard to finish your line segment. Repeat as many times as necessary.
Method 2: Line Segment Tool
Step 1: Click on the Line Segment tool by holding down the Rectangle icon, or using the keyboard shortcut \. Click on any point to place an anchor point.
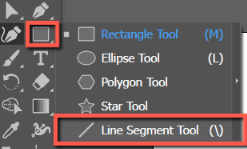
Step 2: Click and drag to create a straight line.

How to Draw a Curved Line in Adobe Illustrator
You can use the Pen tool to create more flexible curved lines, while the Curvature Tool and Arc Segment Tool make more of a perfect curve.
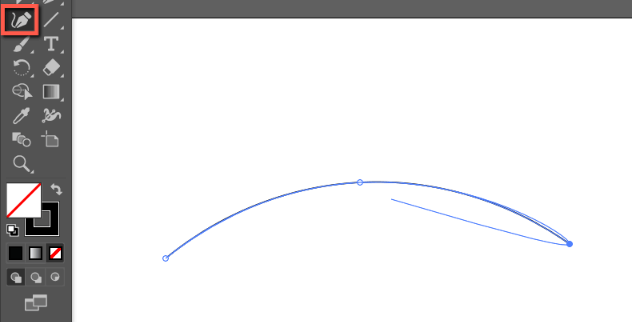
Method 1: Pen Tool
Choose the Pen tool from the toolbar and add the first anchor point. As you create the second anchor point, click and drag while placing your anchor point to create a curve.

Method 2: Curvature Tool
You can use the Curvature tool to curve a straight line or create a curve line from scratch. Select the Curvature tool on the toolbar.
Click to create two anchor points. When you place your third anchor point you will see your line start to curve. Repeat as many times as necessary to create your desired effect.
You can also make a straight line curved by clicking in between the anchor points to add a new anchor point and dragging it with the Curvature tool.

Method 3: Arc Segment Tool
Step 1: Click on the Arc tool. If you cannot find it, click on … (edit toolbar).
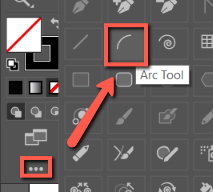
Step 2: Simply click and drag to create an arc.

Alternatively, you can double-click the arc tool icon to open the Arc Segment Tool Settings. Here is a breakdown of its settings. Modify as desired. When done hit OK.
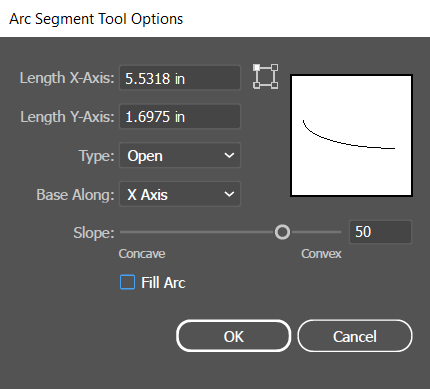
| Option | Function |
| Length X-Axis | Modifies arc X-axis with a specified value |
| Length Y-Axis | Modifies arc Y-axis with a specified value |
| Type | Modifies an arc as Open or Closed |
| Base Along | Toggles the start point of an arc based on the x or y axis |
| Slope | Adjust the slope of an arc using an input value or by modifying the slider. |
| Fill Arc | Modifies arc fill. |
You can also modify your arc by clicking and dragging its anchor points with the Direct Selection Tool.

How to Draw a Freehand Line in Adobe Illustrator
You can draw freehand lines in Adobe Illustrator using the PaintBrush, Blob Brush, and Pencil tools.
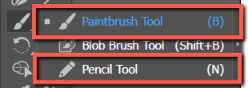
Method 1: Paintbrush or Pencil
Both the Paintbrush and Pencil tools allow you to create freehand strokes that can have custom effects applied to them. Here’s how to use them:
Step 1: Click on the Paintbrush tool or use the keyboard shortcut B, or select the Pencil tool by holding down on the Paintbrush tool, or by using the keyboard shortcut N.
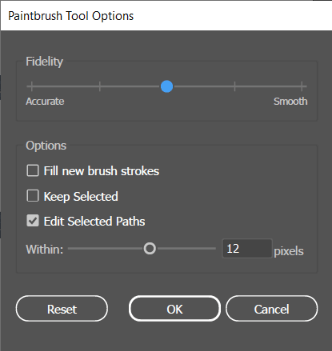

Step 2: Double-click the Paintbrush or Pencil icons to open their individual Tool Options. Modify as desired.
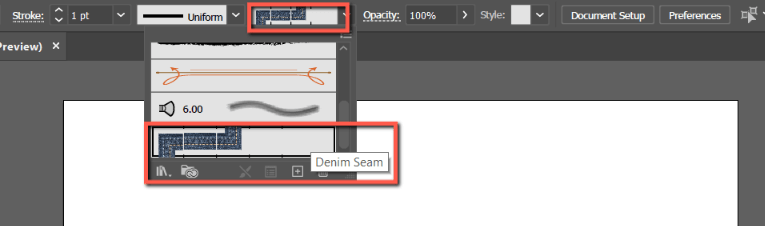
Step 3: Select a custom stroke from the control panel. For this example, I am using the Denim brush stroke. Draw to create your line.
Your line will now appear on your artboard.

Method 2: Blob Brush Tool
The Blob Brush Tool allows you to draw filled shapes that can merge with shapes of the same color. Here is how to use it!
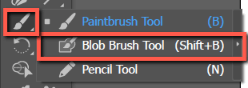
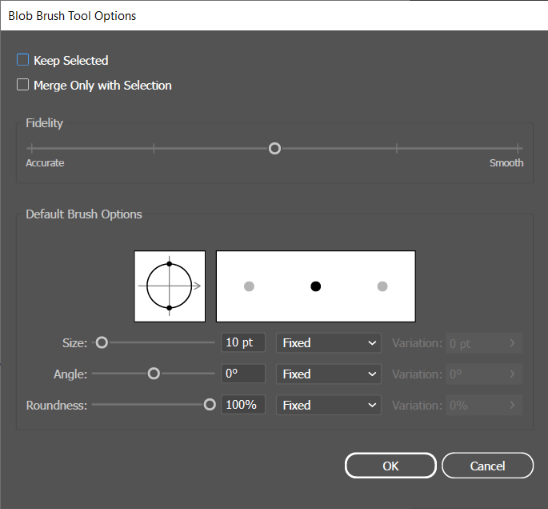
Step 1: Select the Blob Brush tool by holding down on the Paintbrush tool, or by using the keyboard shortcut Shift + B. Double-click the Blob Brush icon to open the Blob Brush Tool Options. Modify as desired and click OK.
Step 3: If using a mouse, draw your freehand line by clicking and dragging your mouse. If using a tablet pen, simply draw.

Final Thoughts
The ability to draw a line in Adobe Illustrator might seem like a small feat, but it is a foundational skill to unlock the creative potential Illustrator has to offer. With the Pen, Line, Curvature, Arc, Paintbrush, Pencil, and Blob Brush tools the possibilities are endless.
Experiment with each to discover their unique properties and find how they fit into your design workflow.
Which tool did you like to draw lines in Adobe Illustrator most? Tell me in the comments below!