
In your timeline, select the clip you want to color grade in Adobe Premiere Pro and then click on the “Lumetri Color” tab at the top of the screen. From here, you can adjust the various color settings to get the look that you want.
I am David, and I have been editing wedding videos for the past five years for both small and big clients using Adobe Premiere Pro and its color grading features.
In this article, I will explain how to color grade your video clips in Premiere Pro and the differences between color correction and color grading. I’ll also explain how to color grade an entire sequence with Lumetri Color and suggest some websites to download LUTs.
Table of Contents
How to Color Grade in Premiere Pro
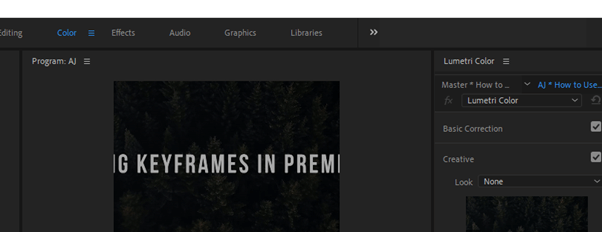
Navigate to the color tab, and the Lumetri color panel will appear on the right-hand side.
Pro Tip: I prefer color grading on a new adjustment layer. So, I suggest you follow suit. Create an Adjustment Layer and drag it on top of your timeline over all the clips you want to color grade.
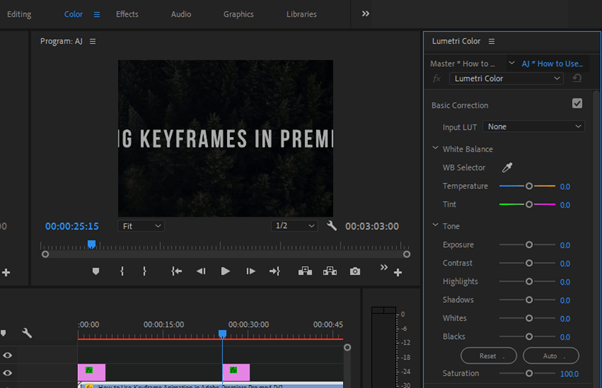
Select the adjustment layer in your timeline, and go back to the Lumetri Panel. Select basic color correction – here, you can tweak your white balance and tone of the video clip (exposure, contrast, highlights, shadows, white, black, saturation).
The creative aspect of the Lumetri color deals with the look; it is called the LUTs panel. LUTs literally means Look Up Tables. To add LUTs, just click on the look and choose your desired LUTs.
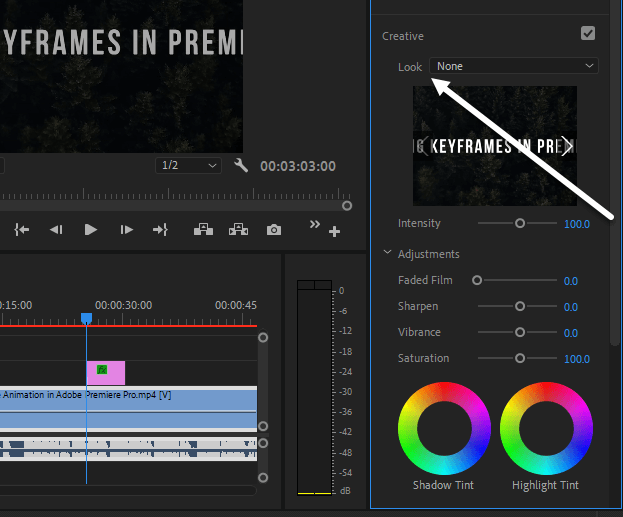
You can also change settings under the Adjustments tab to fade film, sharpen, vibrance, and saturation. You can also change the shadow and highlight tints here. I will explain some terms you need to know.
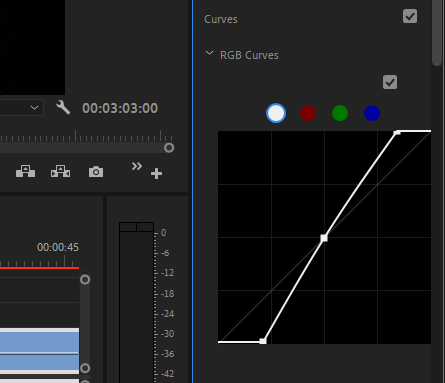
Curves – I often use curves to work with contrast by tweaking the bottom-left of the graph to adjust for shadows, the Middle to work on the mid-tones, and the top-right for highlights.
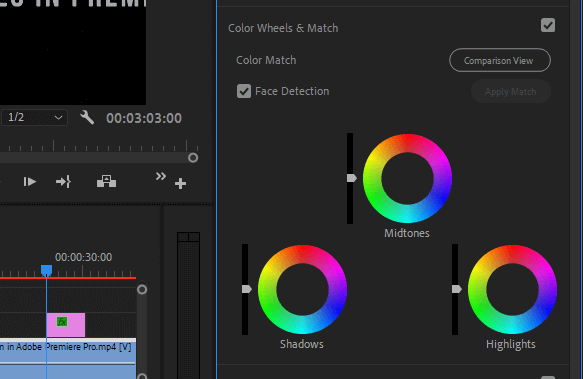
Color Wheels & Match – Here, you can tweak the hue of shadows, mid-tones, and highlights, and you can as well change the intensity of these hues.
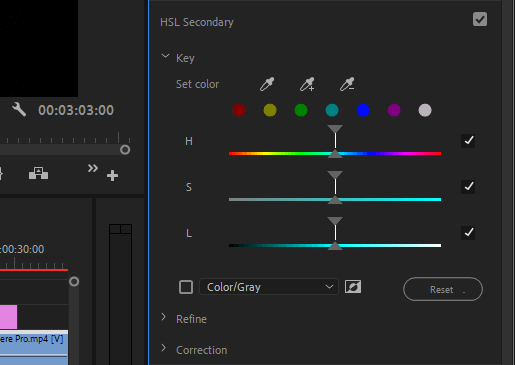
HSL Secondary – Here, you can use your eyedropper tool to select a specific color and work on that color compared to working on the video clips in general. Using the sliders, you can adjust for hue, saturation, and lightness.
Adding a Preset Color grade to Video Clips in Premiere Pro
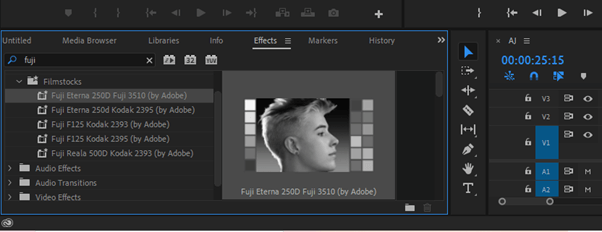
To color grade, go to the effect panel, and from the search bar, search for fuji. The free fuji presets in Premiere Pro will be opened, and then you can choose any of them and drag it to your clip.
If this doesn’t give you your desired color just go back to the Lumetri color Panel and tweak it a little bit. You can also adjust the intensity of the preset used on your clip. This will make the difference you need.
Color Grading VS Color Correction
Color grade is the process of assessing the colors in a video and making adjustments to create a certain look or feel. You can use it to match the mood of the scene, to make the colors more visually appealing, or to correct any issues with the color palette.
It helps to get your colors right and get your skin tones right. Using LUTs or Preset is associated with color grading. This is done if you want to add a little color effect to make the footage look to pop.
Whereas color correction is used to fix any problem with the colors in a video clip. This might include adjusting an image’s brightness, saturation, or hue to make it look more natural.
Most times as a videographer, it is best to get your color correction done in the camera before shooting by using the right exposure and white balance.
You can also use the color correction in your Premiere Pro by selecting the video you want to color correct and tweaking the white balance under the Lumetri color panel. You can as well bring down your highlights and shadows. You can adjust the intensity of black, saturation, and some sharpness.
Cinema Grade to Color Grade in Premiere Pro
Cinema grade is a plug-in available in Premiere Pro. This plug-in is a new way of color grading by applying a look grade on a video clip. Mastery of this cinema grade will save you from searching and looking up for LUTs.
Using cinema grade is very simple. The interface is intuitive– the arrangements show the direction you need to edit in.
It has three interfaces, base correction, matching your clip, and color grading cinematic look.
To use cinema grade, select the part you want to adjust, then drag it up or down to adjust the exposure. With cinema-grade, color grading a 4K footage is very easy.
You can purchase this plugin online. I use it, and I can say it’s the new modern, easy way to color correct and grade your footage; it is worth the price.
Conclusion
Color grading video in Premiere Pro is a great way to improve the look of your footage. By following the tips in this article, you can easily achieve beautiful results.
So get out there and start color-grading your videos like a pro. The final output of your color grading depends on you; the more you try it out, the more you become good at it.
If you find it hard to color grade your video clips, Don’t be frustrated; just drop your question in the comment below and I will respond promptly.