
In order to change the orientation of the canvas, a user must have access to the Canva Pro subscription that will give them access to the Resize feature on the platform. Users can also manually change this by navigating back to the home screen and starting a new canvas with reversed dimensions.
Hi there! My name is Kerry, a graphic designer and digital artist who loves sharing all the tips and tricks for Canva so that anyone can start using it! Sometimes, even when it comes to seemingly simple tasks, navigating new platforms can be a bit confusing, so I am here to assist!
In this post, I’ll explain the steps to change the orientation of your canvas on the Canva platform. This is a feature that is useful if you want to duplicate or use your creation for multiple venues that require different dimensions.
Are you ready to get started and learn how to change the orientation of your project? Wonderful- let’s go!
Table of Contents
Key Takeaways
- While you can change the orientation in Canva by resizing the dimensions, there is no button to simply change the orientation of your project on the platform.
- The “resize” feature that will help you change the orientation of your project is a feature that is only accessible to Canva Pro and Premium feature users.
- You can manually change the orientation of your canvas by navigating back to the home screen and switching the dimensions in a create your own canvas option.
Changing the Orientation of Your Design on Canva
When it comes to designing, the orientation of your project really is based on what you are using it for.
Presentations will normally be in landscape while flyers often are presented in portrait mode. (And just as a reminder, the landscape is a horizontal orientation and the portrait is a vertical orientation.)
Unfortunately, Canva does not have a button where creators can just switch between the two different orientations. However, there are ways to work around this and still be able to create your designs based on your needs!
How to Change the Orientation from Portrait to Landscape in Canva
It is important to note that this method of changing the orientation of your project is only available to those who are paying for a Premium Canva subscription. (Looking at you – Canva Pro and Canva for Teams users!)
The default setting for a new project is the portrait (vertical) setting, so for the sake of this tutorial we are going to assume that you started on a canvas that has a portrait orientation. Sound good? Great!
Follow these steps to learn how to change to orientation to landscape (horizontal):
Step 1: Open up a preexisting or new canvas project to being creating your project.
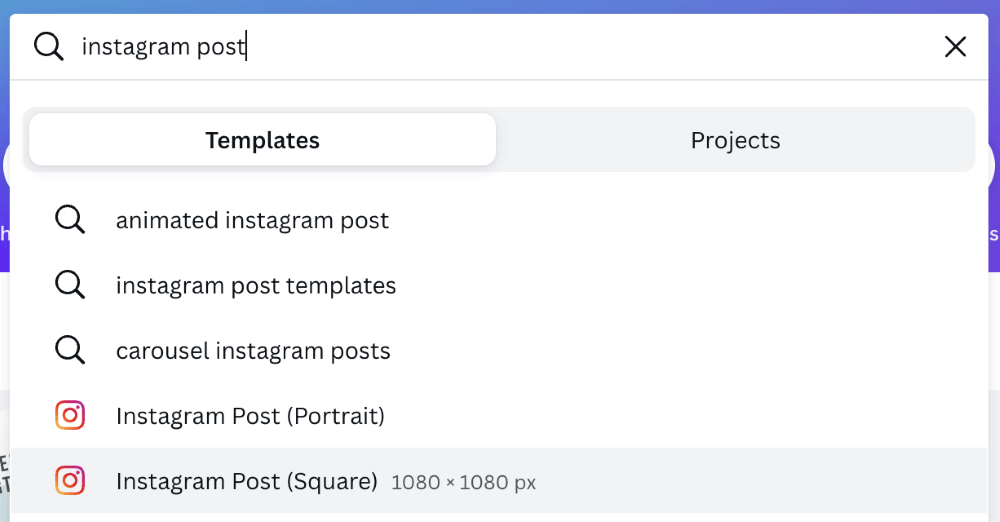
Step 2: If you have a Canva Pro subscription and want to rotate your page to landscape view, find the button at the top of the platform that says Resize. It will be found next to the File button.

Step 3: When you click on the Resize button, you will see that there are options to change your project’s size to various preset dimensions (including preset options such as social media posts, logos, presentations, and more).
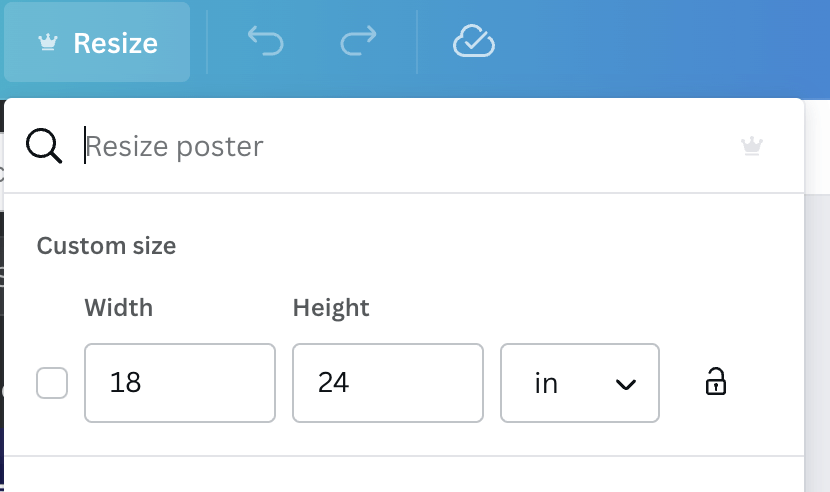
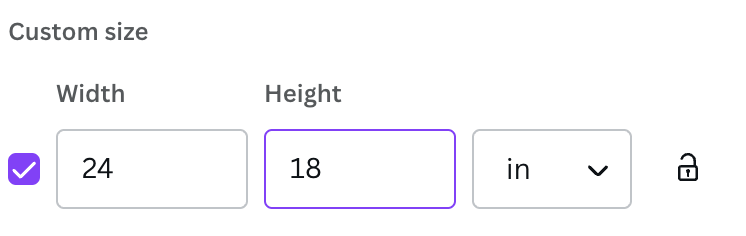
Step 4: There is a “custom size” button that displays the current dimensions of your project. To change it to landscape, switch the current width and height dimensions. (An example of this would be if the canvas is 18 x24 inches, you would switch it to 24 x 18 inches.)
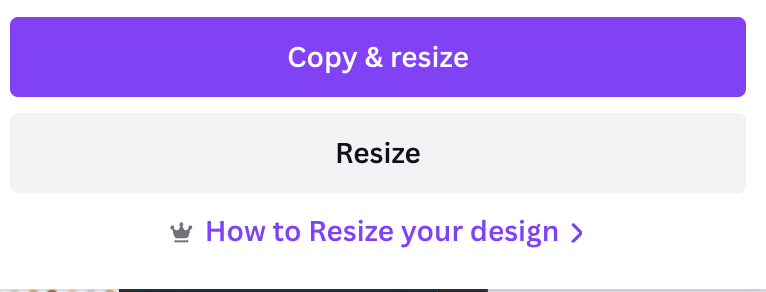
Step 5: At the bottom of the menu, click on Resize to change your canvas. There is also another option to copy and resize, which would make a copy canvas with the new dimensions and keep your original one the way that it started.
How to Change the Orientation Without Canva Pro
If you don’t have a subscription that allows you to dive into the premium Canva options, don’t worry! You can still change the orientation of your projects, but it will take a little more effort to bring all of your designs back into the resized canvas.
Follow these steps to learn how to change to orientation without a subscription account:
Step 1: Look at the dimensions of the canvas that you want to change the orientation of. If you created a specific set of dimensions for your project, it will be located underneath the project name on the home screen.
The dimensions for any project that was created using preset format options can be found by searching for the name of the design in the search bar and hovering over it.
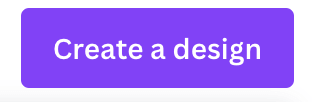
Step 2: Go back to the home screen and click on the option to Create a Design. When you select this option, a dropdown menu will appear that has preset options but also a spot to include specific dimensions.
Step 3: Click on the button that is labeled Custom size and you will be able to type in the desired height and width of your project. You also have the ability to change the measurement labels (inches, pixels, centimeters, or millimeters).
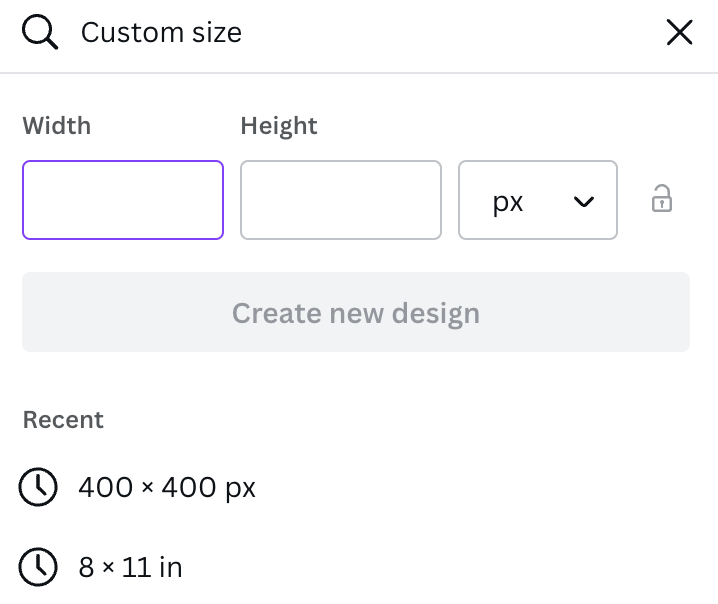
Step 4: Once you finish typing in the reverse dimensions of your original canvas, click Create new design and your new canvas will pop up!

In order to transfer any elements that you had previously created on the original canvas to your new canvas, you will have to go back and forth to copy and paste each piece. You may have to readjust the size of the elements to fit the new dimensions of your project.
Final Thoughts
It is interesting that there isn’t a button that automatically generates a canvas in either landscape or portrait orientation, but at least there are ways to navigate how to do it! Knowing how to work around this feature allows more people to be able to customize projects even further!
Have you found any tips about changing the orientation of a project that you think others could benefit from? Share your thoughts and ideas in the comment section down below!