
You want your viewers to see a particular entity in your project, how do you do that? You zoom in! Just by clicking on the clip, setting your anchor point then navigate to your Effect Control Panel, and keyframe the scale to have your in and out point set.
I am Dave. I’ve been editing and using Adobe Premiere Pro for the past 10 years. I have edited over 200 projects for known brands and content creators. I know the inside and out of Premiere Pro.
I’m going to show you how to zoom in to any point in your frame composition in a seamless and smooth way. Then give you pro tips to hasten up your project and finally cover some frequently asked questions. Are you ready?
How to Zoom in to Any Point in Your Frame
Make sure you have your project and sequence opened up and let’s get into the details.
You first and foremost click on the clip you want to apply the zoom effect to and set your anchor points.
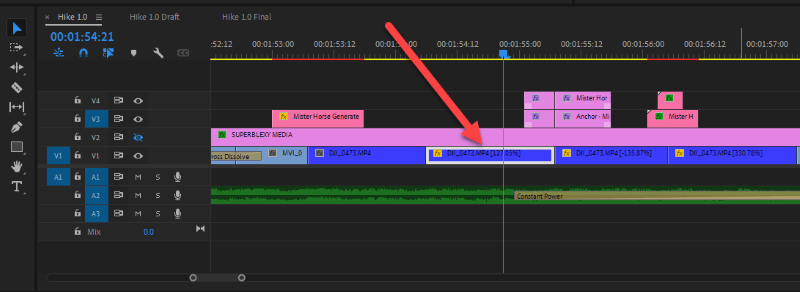
Step 1: Setting the anchor point
This is very important, your zoom-in effect will zoom into your anchor point so wherever you set your anchor point, that’s where Premiere Pro is going to zoom in. So get it right.
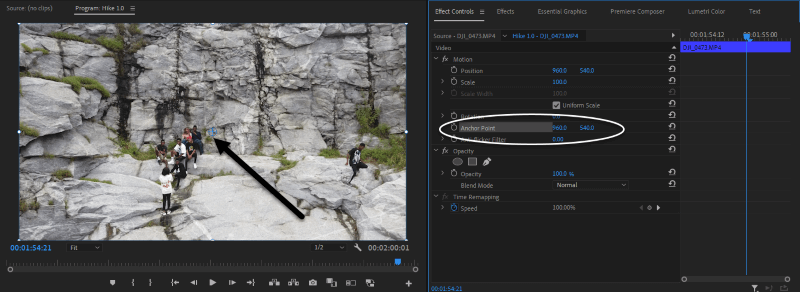
For example, in the frame below, I want to zoom in on the guy on the right, so I’m setting my anchor point to the right, on his body. To do this, you can go to the Effect Control Panel and click on the Anchor Point under the Motion fx.
You will see the anchor point and transform option appear in your Program panel. Click and drag the anchor point to your preferred location. In this case, the guy on the right!

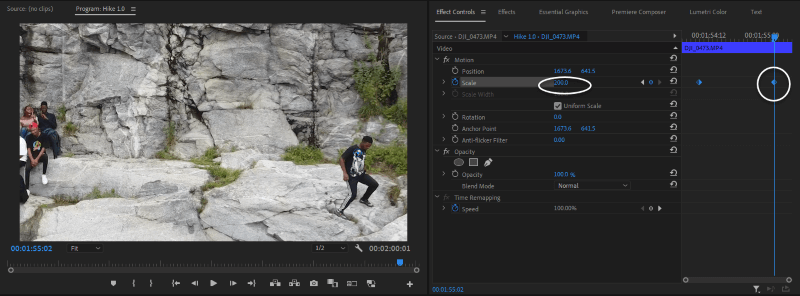
Now we are done with the first part of the job. The next step is to set our keyframe at the beginning and the end where we want our zoom effect to start and end. We are going to play with the Scale under the Motion fx to achieve the zoom effect.
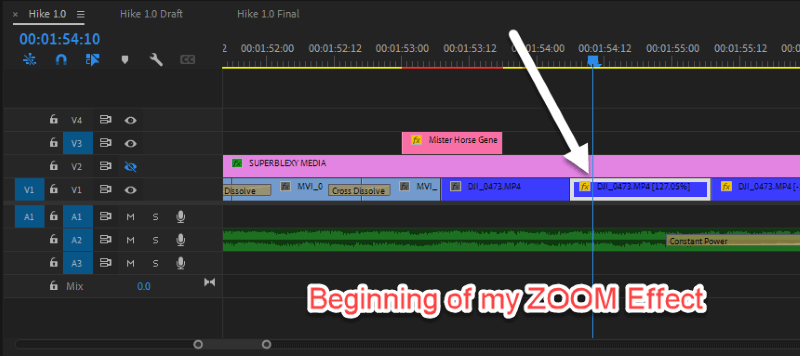
Step 2: Setting up the beginning of the zoom effect
In your timeline, move to the beginning where you want the zoom effect to start, then toggle on the scale fx. You would see it has created the first keyframe.
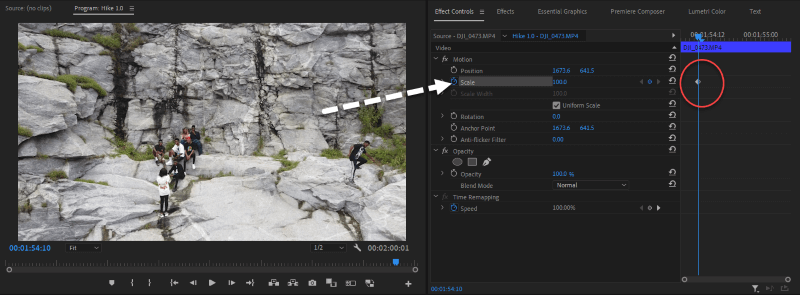
Step 3: Setting up the end point of the zoom effect
We have successfully created our first keyframe which is our starting point. Now the endpoint. Just as we did for the starting point, in our timeline, we are going to move the end point where we want to end the zoom effect.
After moving to the endpoint, the next is to scale up as wanted. In this case, I am going to scale up to 200%. You will notice a second keyframe has been created. There you go! As simple as that. Playback and see the magic you just did.
Pro Tips for Zooming in
These pro tips will change your editing game. Try and make use of it.
1. Getting a seamless, smooth, and buttery zoom effect
If you playback your zoom animation, you will notice it’s more or less like a camera zoom. We can be more dynamic by making it look smooth and buttery. How can you do that? It’s as simple as ABC.
Right-click on the first keyframe, there are so many options, but I prefer Ease In for my starting point. You can play with the various options and see what you like. Make sure you right-click on the keyframe, if not you won’t get those options.

For the endpoint, you can try the Ease Out and then playback, you love it right? Seamless, smooth, and buttery!
2. Saving your zoom preset
If you want to reuse the kind of effect again in the project or maybe another project, you can save yourself from the stress of doing all these all over and over. It can be tiring and exhausting. Saving the preset will save you from headaches.
To save your zoom preset, right-click on the motion fx and click on Save Preset.
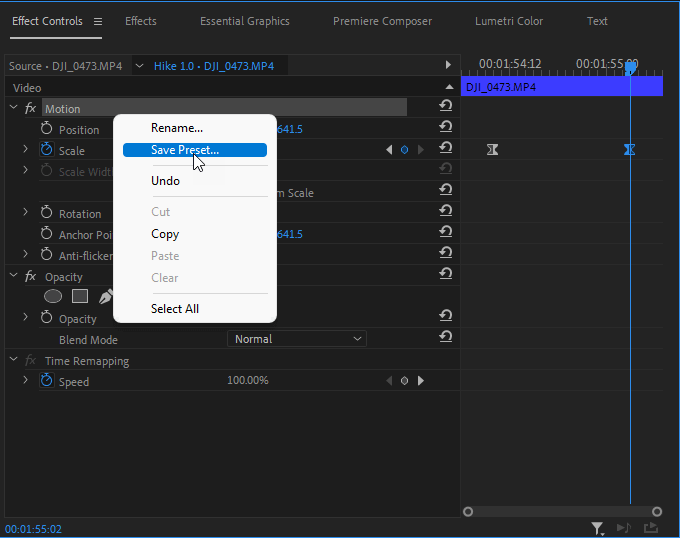
Use any name of your choice “David Zoommmmmmmmmm” then click on OK! We are done saving the preset. Now let’s apply it to other clips.
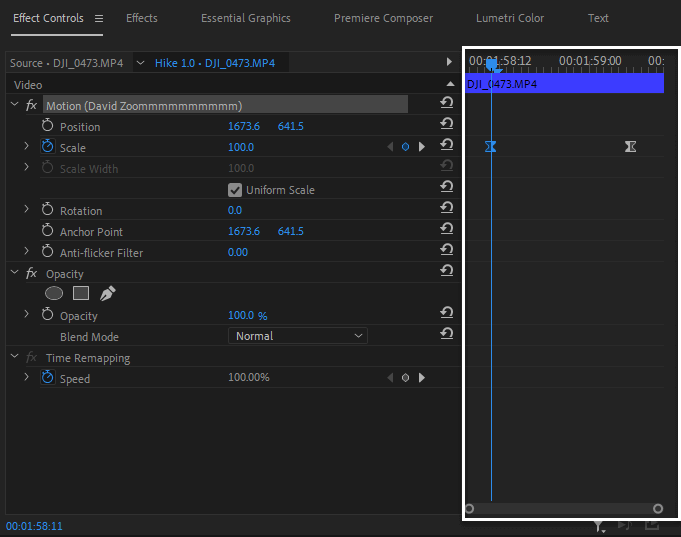
3. Applying your zoom preset
Go to the Effects Panel, find the preset, and click and drag it on the new clip. That’s it.

Do note that you can change your starting and ending point just by dragging the keyframe to your preferred location in the effect control panel.
Also, you can change your scale parameters by navigating to the keyframe you want to change and then changing the parameter.
You can as well change the keyframe effect as wanted, be it Bezier, Ease in, or Ease out.
FAQs
I found out some people are lost in one way or the other. Here are some FAQs you might find very useful.
How to make a zoom-out effect in Premiere Pro?
Just like we did for zoom-in, it’s the same process. The only difference is that you will set the scale parameter to a high number at the beginning of your zoom effect, for example, 200%. And you set a low parameter for the endpoint – 100%. There we go, the Zoom Out!
Is it normal that my Image looks pixelated after zooming in?
This is totally expected, the more you zoom in, the more pixelated your image will be. Just make sure you don’t totally scale it up to a higher number. Anything higher than 200% is not recommended unless your footage is in 4K or 8K.
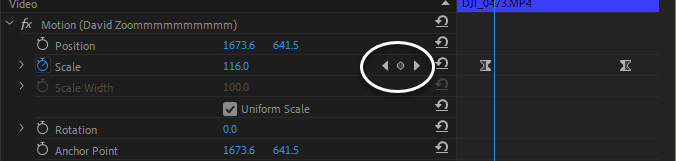
What to do when I change the zoom parameter and it creates another keyframe entirely?
The problem is, that you are not really on the keyframe you want to change the parameter.
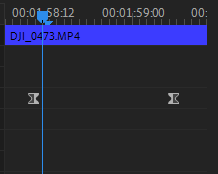
In the image above, you might think you are on the starting point keyframe but you are not. If you tend to change the scale parameter in this case, Premiere Pro will create a new keyframe for you instead. So ensure you are on the keyframe before changing anything.
A pro tip to navigate your keyframes is using the navigating options besides the scale fx.
What to do when I get a black screen after changing my anchor point?
Before you change your anchor point, make sure you are at the beginning of the keyframe. If you change the anchor point while your marker is at the endpoint or the middle or anywhere apart from the starting point of your keyframe, you won’t get your desired result.
Conclusion
You see it’s extremely simple to zoom in and zoom out in Adobe Premiere Pro. All it takes is just to click on the clip, set your anchor point, and keyframe the scale fx to have your in and out point set. That’s all.
Are you still facing problems when zooming? Don’t hesitate to ask me questions in the comment box below.