
To trim your video in Adobe Premiere Pro, drag the playhead to where you want to trim your video clip. Press CTRL + K on your keyboard. This will cut the video into two. Delete the unwanted part.
I am David, an expert in Adobe Premiere Pro. I have been editing videos all around the world for the past ten years using this software. And believe me, you will fall in love with Premiere Pro after learning how to trim your video like a pro.
In this article, I will explain how to trim and cut a video in Premiere Pro, how to use the razor tool, and finally, show you different shortcuts.
Table of Contents
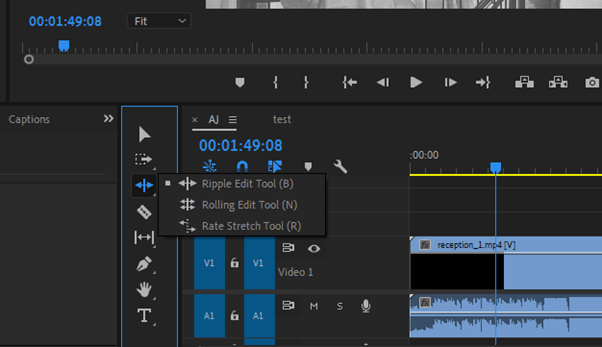
Method 1: With Ripple Edit Tool
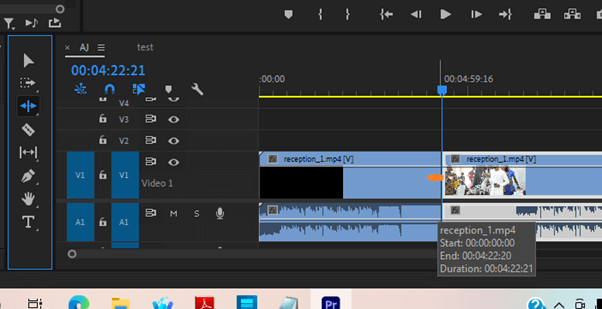
Trimming video clips has been easy using the ripple edit tool. To do this, select the ripple edit tool from the tools bar or press B to enable the ripple edit tool. After selecting it, drag the video clips to your desired point.
Adobe Premiere Pro is quite a great software. Do you know that you can trim your video clip by ripple next edit to playhead and ripple previous edit to playhead?
What do I mean by this; Ripple next edit to playhead means that your video clip will be trimmed automatically from the last edit point to the play head. All you need to do is just drag your play head to where you want it to stop and click on W. Then the clip will be trimmed automatically from the end to the playhead.
Ripple Previous edit to playhead means that your video clip will be trimmed automatically from the last edit point to the play head. All you need to do is just drag your play head to where you want it to stop and click on Q. Then the clip will be trimmed automatically from the Beginning to the playhead.
Method 2: Using The Rolling Tool
The rolling tool is just like the Ripple edit tool. To use this tool to trim your video, Select the rolling edit tool from the tools bar or just hold down the CTRL KEY and click the end of your video clip to activate the rolling tool. After selecting it, drag the video clips to your desired point.
Method 3: Using The Source Monitor
The source monitor is always on the left top of the Premiere Pro interface. To open the source monitor with video, you must go to the project panel and double-click on the video you want to edit. This will then open in your source monitor panel.

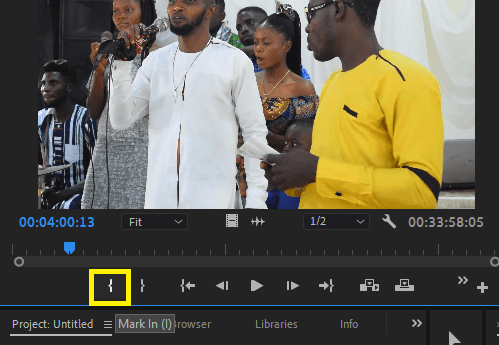
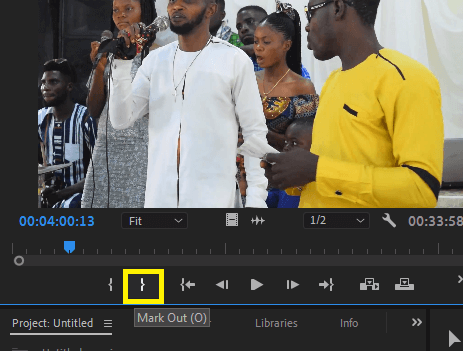
Now to trim here, just go to the exact area where you need, at the exact point where you need your footage to start press I – This is called the In Point.
At the point where you want your video clip to stop, Press O – This is called the Out Point. Doing this will select a certain area needed from your video clip.
To move this selected portion into the sequence timeline, click on the source monitor and drag the clip down into your sequence timeline. This method will not affect the original clip in the project panel compared to the other methods.
And lastly, using this source panel way will separate you from dealing with ruminants from the cuts littering the timeline before deleting.
Method 4: Using The Razor Tool
Another way to trimming is by using the razor tool. This razor tool method is simple and fast. To do this, import and select your video clips into your sequence timeline. Then navigate to the tools bar, select the razor tool or click C to enable the tool.
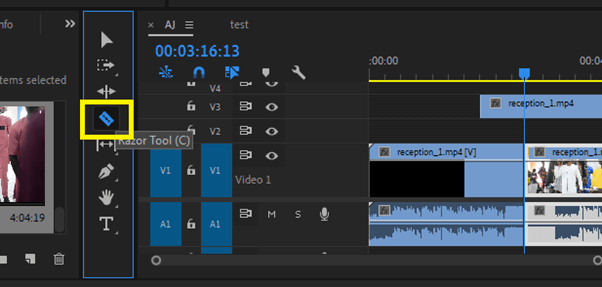
This tool will allow you to cut any video or audio clip in your timeline. Note that using the Razor tool, it is easy to cut more clips in different tracks. Hold on to the shift key alongside the razor tool, and all the clips in the racks will be cut.
Conclusion
Trimming video clips in Premiere Pro is relatively simple. You can complete it in just a few steps.
In your timeline panel, drag the playhead to where you want to trim your video clip. Press CTRL + K on your keyboard, and the video clip will cut into two. Delete the unwanted part. There you go.
Are you finding it tough to trim perfectly in your sequence? Drop a question for me in the comment box below.