
Perhaps the most popular use of Adobe Photoshop is to switch heads or faces. You’ll notice that a head or face has been substituted on just about every magazine cover and movie poster you encounter.
Overall, it’s a flexible technique that offers a wide range of opportunities. See for yourself how simple it is.
I have over five years of Adobe Photoshop experience and am Adobe Photoshop certified. In this article, I’ll teach you how to swap faces in Photoshop.
Key Takeaways
- The Lasso tool will be ideal for swapping faces.
- You will need to manually scale your photos to match the sizing of each other.
How to Swap Faces in Photoshop: Step by Step
You’ll need to have two photos, preferably taken in a similar background to do the face swap in Photoshop. Follow the steps below.
Step 1: Find the two photos that you would like to swap the faces of. Once you choose both photos, open them in Photoshop in two different tabs.
First, decide which face you want to put on the body of the figure. Select the Lasso Tool (keyboard shortcut L) to achieve it.
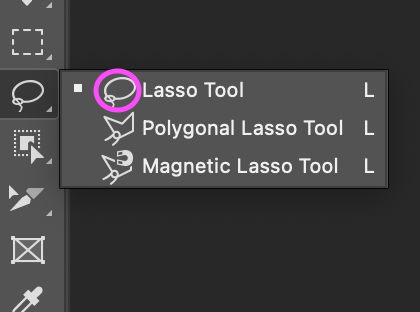
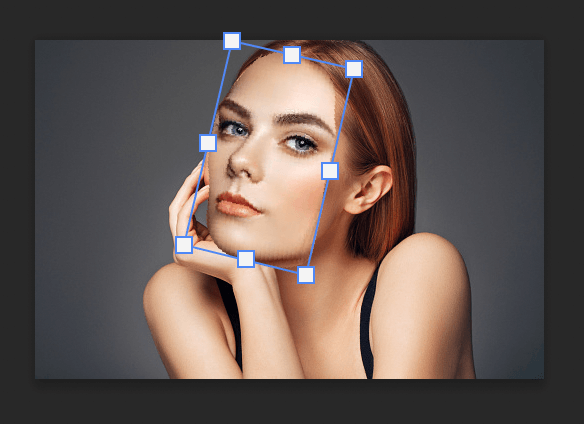
Step 2: You are able to make a selection around the face using the Lasso Tool. Select the area surrounding the face by clicking and dragging.
Note: Outlining the region doesn’t need to be exact.
Step 3: Press Ctrl + C (Windows) or Command + C (macOS) to copy the contents of the selection after you are satisfied with it.
Press Ctrl + V (Windows) or Command + V (macOS) to paste the face into the photo in your working document, which is the one that contains the body-only photo of the model.
Step 4: The scale and placement of the two faces should be as similar as possible in order to swap them in Photoshop.

To begin, choose the Move tool and position the face over the model’s face. Then use Ctrl + T (Windows) or Command + T (macOS) to transform the layer and align the new face with the model’s face.
Step 5: Click and drag the reference point to the model’s eye’s inner corner. A fixed location where all transformations are carried out is referred to as a reference point.
Note: To enable the reference point from the options bar, click on the reference point checkbox if you can’t see it.

Step 6: You might decrease the layer’s transparency as you transform it to better match the model’s face. If you want to scale the face, hold Alt (Windows) or Option (macOS) and drag a selection’s corner.
The model’s eyes and the face layer’s eyes should both be in alignment and have good proportions for you to know you did it correctly.
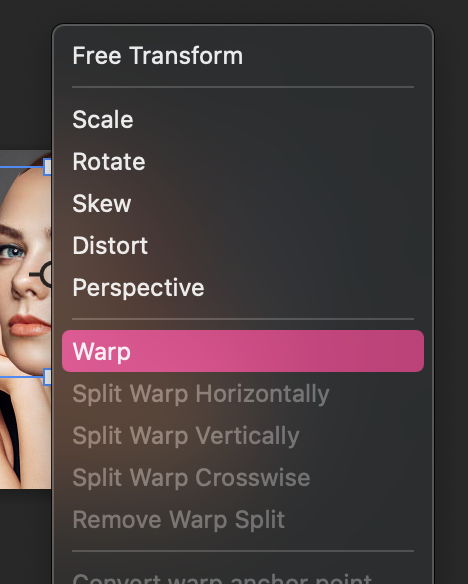
Using the Warp function, you also can alter and distort the layer. To warp, right-click and press Ctrl + T (Windows) or Command + T (macOS).
And your faces should be swapped! Make sure to take advantage of the warp tools, as that will help to place the face in the right position. Just be sure not to overuse the warp tool, as it could make the photo look unnatural and morphed.
Bonus Tips
- Remember always to save your work, you don’t want to start over from scratch.
- Warp and Transform will help you to achieve layering the face over the original photo.
- Have fun with it!
Final Thoughts
As you can see, using a face swap in Photoshop is a straightforward method that has a variety of applications. Even while it could take some effort to get it just right, if you know how to swap faces in Photoshop, you can apply the technique to create more detailed images.
Any questions about swapping faces in Photoshop? Leave a comment and let me know.