
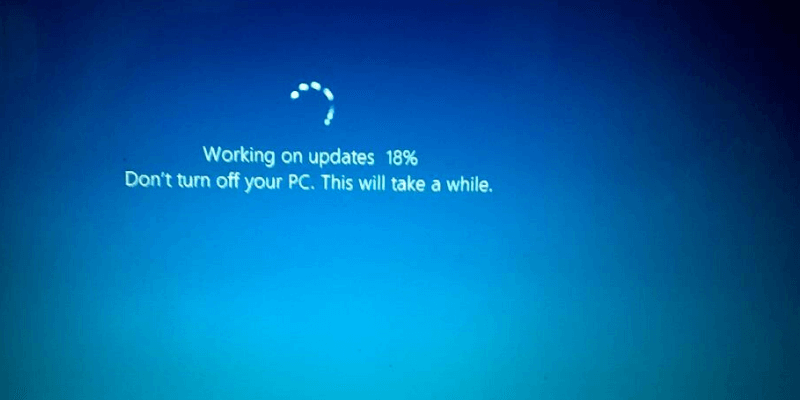
Updates are a key feature of using Windows 10 and Microsoft routinely releases new ones to keep your experience optimal.
There are pros and cons to allowing Windows to update automatically. We’ll go over some of these before outlining a few methods that will show you how to stop automatic updates on Windows 10, and give you more control over what gets installed and when.
Table of Contents
Should I Stop or Allow Updates?
Windows’ frequent release of new updates has several benefits.
- It is meant to give you the best experience on your PC by keeping you current with the newest software and additions to Windows 10.
- It provides you with up-to-date security patches. Having an older version of Windows 10 running may leave your PC vulnerable to security exploits.
- By automatically updating itself, Windows 10 allows you to focus on what you want to use your PC for instead of constantly checking for updates to install.
However, there are a few downsides to Windows 10 automatic updates.
- The most visible and the first issue one encounters is the often awkward timing of these updates. No one likes being interrupted. If you’re on an important Skype call or working on a project when this happens, you’ll be understandably upset.
- Some updates cause issues with performance. Glitching, poorer performance and unresolved security issues have been reported by users after some of the updates. To add to that, you may be using software that requires a specific version of Windows, and updates can prevent them from working properly.
5 Ways to Stop Automatic Updates on Windows 10
Keep in mind that the methods below will block driver and software updates but not security updates. Windows will continue to push security updates to prevent exploits.
1. Disable the Windows Update Application
You can disable Windows automatic updates with a few keystrokes using Windows search.
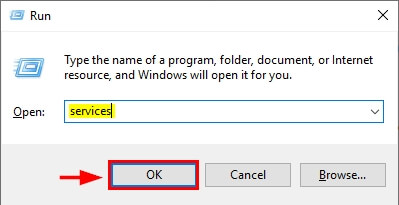
Step 1: Hit the Windows + R keys so that the search bar pops up. Type in services.msc and hit enter.
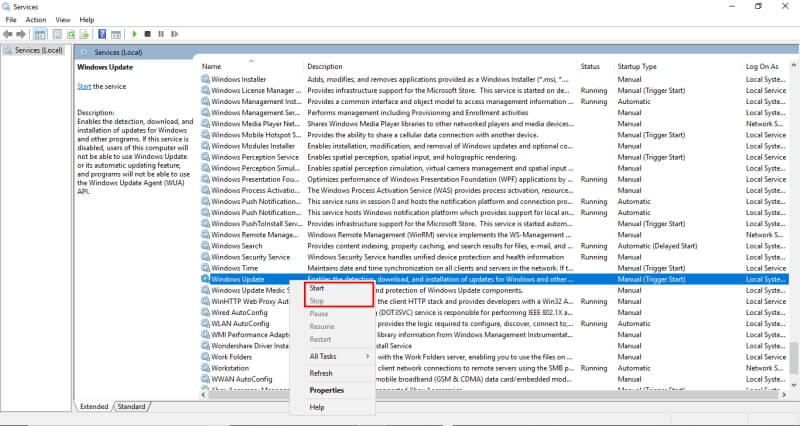
Step 2: Once Services pops up, scroll down to find Windows Updates. Right-click and select Stop.
2. Change your Internet Connection to Metered
If you change your connection to a metered one, Windows will only send priority updates. A metered connection is one that has a data limit. This method will not work if you are using Ethernet and may disrupt your internet usage.
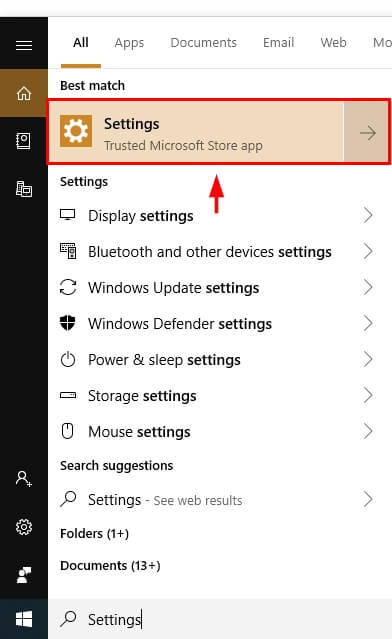
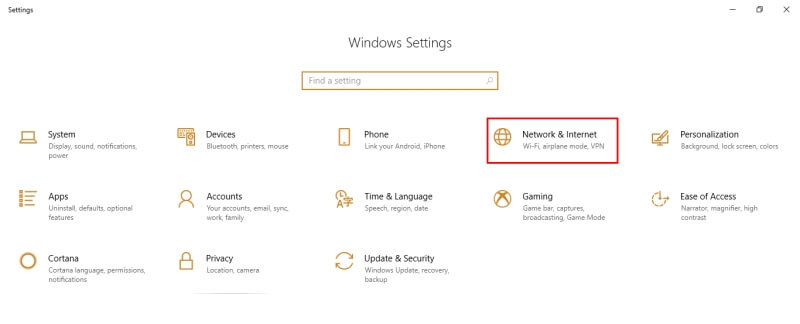
Step 1: Find Settings in the Windows Search bar and open it up.
Step 2: Click on Network & Internet.
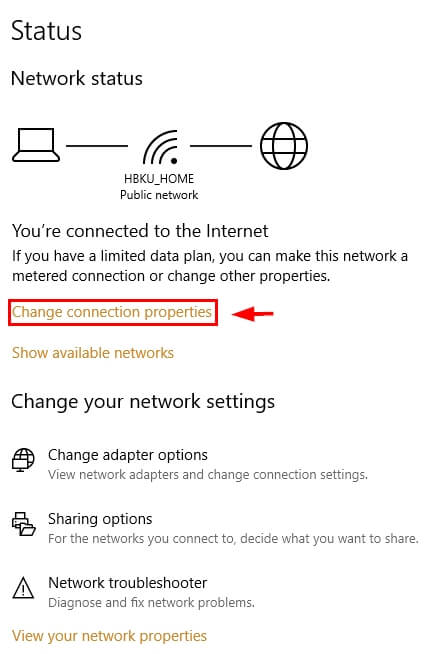
Step 3: Click on Change Connection Properties.
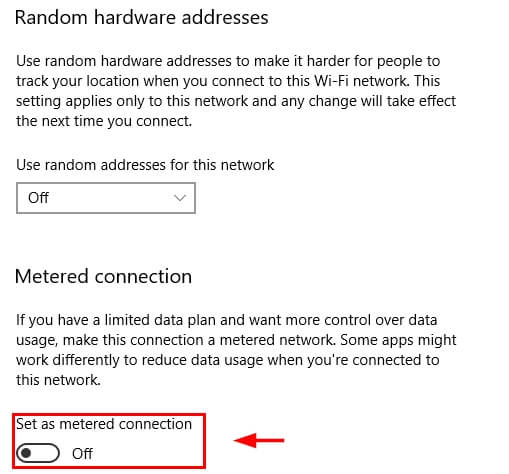
Step 4: Scroll down and select Metered Connection.
3. Use the Group Policy Editor
For those using an Education, Pro, or Enterprise Edition of Windows, there is another tool available called the group policy editor that will send you a notification when there is an update available without automatically installing it.
- Step 1: Click Windows + R to get the Run dialog. Type in gpedit.msc
- Step 2: Find Windows Update under Computer Configuration.
- Step 3: Change the “Configure Automatic Updates” setting to Notify for Download and Notify for Install.
- Step 4: Open Settings through the Windows Search bar. Go to Updates & Security. Select Windows Updates.
- Step 5: Click Check for Updates.
- Step 6: Restart your PC. The new settings will have been applied.
4. Edit the Registry
A final option is to edit the registry. This should be the last method you try as it can cause huge issues if done incorrectly. Before you do so, make sure to back up your data.
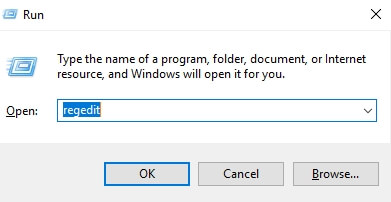
Step 1: Hit Windows + R. Then type in regedit in the dialogue that pops up.
Step 2: Click through the following path: HKEY_LOCAL_MACHINE→ SOFTWARE → Policies → Microsoft → Windows.
Step 3: Right-click Windows, select New, then select Key.
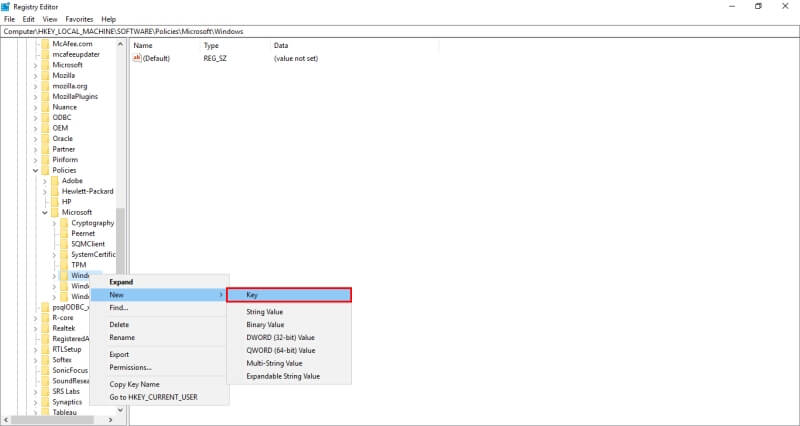
Step 4: Name the new Key WindowsUpdate, hit Enter, then right-click the new key, select New, then select Key.
Step 5: Name this Key AU and hit Enter. Right-click the new key, select New, then click DWORD (32-bit) Value.
Step 6: Name the new key AUOptions and hit Enter. Double-click the new key and change the value to 2 for “Notify for Download and Notify for Install”. Once you hit ok, close the registry.
5. Show/Hide Tool
To block Windows from reinstalling updates you have already uninstalled, you can use the Show/Hide Tool. Note that this will not prevent windows from installing updates, only from reinstalling them once you have uninstalled them.
Step 1: Download the tool from this link. Click Open when the dialogue prompts you. Follow the process to complete your download.
Step 2: Open the tool. Select the appropriate updates you wish to hide, click Next and follow the instructions from the tool to hide the appropriate drivers.
Final Thoughts
Whether you’re interrupted during an important task, use a software that requires a specific version of Windows, or just don’t want Windows updating without your say-so, the methods above will help you get peace of mind knowing you’ll be in greater control of the timing of your Windows 10 updates, the drivers that are updated, or if Windows updates at all.
So, which method worked the best for you to stop the annoying Windows 10 auto-updates? Leave a comment below and let us know.