
Whether you love it or hate it, the proper spelling is an essential part of any good design project, and InDesign documents are no exception. Nobody wants to leave a spelling mistake in a finished piece, but most of us don’t have the time to be copy editors as well as layout designers.
Fortunately, InDesign comes with a few different ways to make sure that all the text in your projects is spelled perfectly! You can manual spell check or use auto spell check.
Not sure how? Follow the methods below.
Table of Contents
Manual Spell Checking in InDesign
Manually spell-checking your document using the Check Spelling command is the most direct approach. This can be a bit slower than the other options described below, but it’s also the most thorough way to ensure that you haven’t missed any spelling errors.
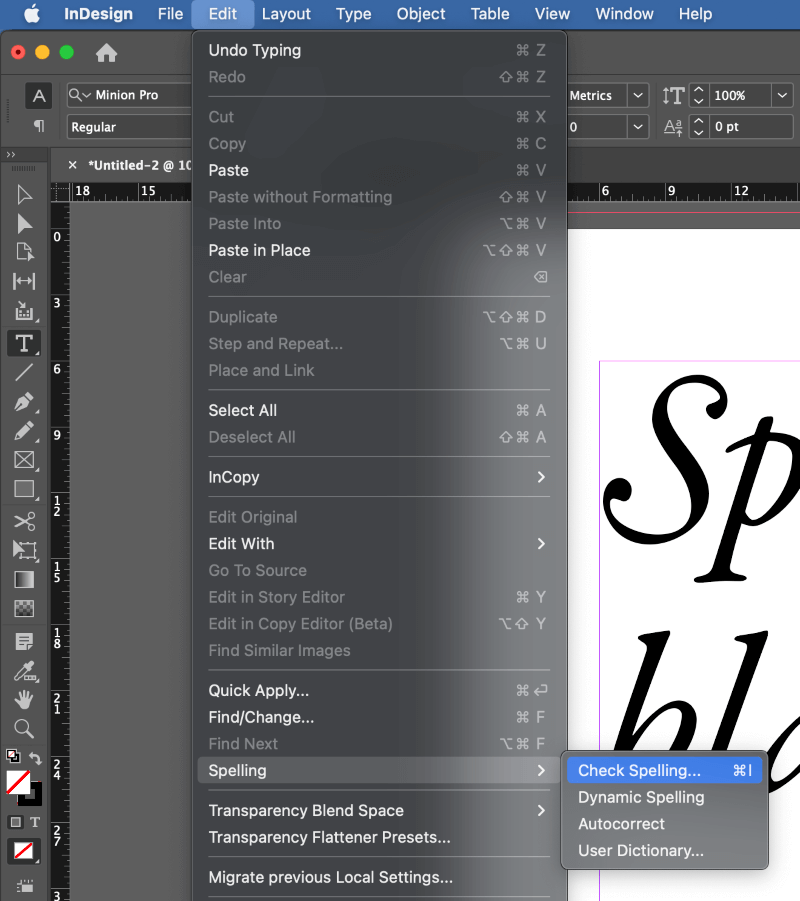
Step 1: Open the Edit menu, select the Spelling submenu, and click Check Spelling. You can also use the keyboard shortcut Command + I (use Ctrl + I if you’re using InDesign on a PC).
InDesign will open the Check Spelling dialog.
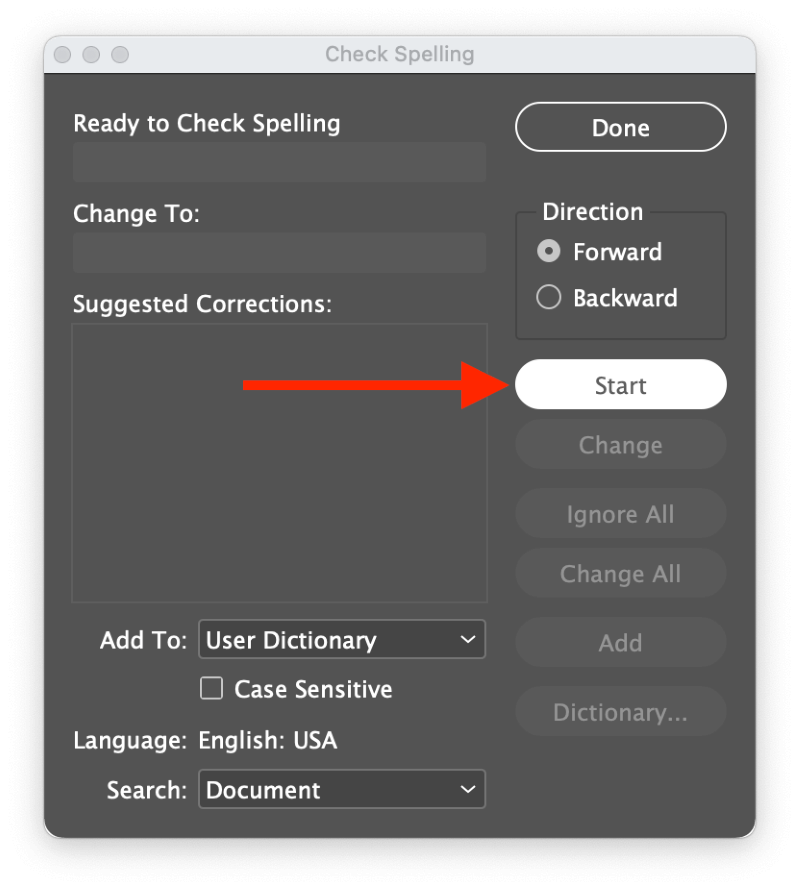
Typically, InDesign will automatically begin the spell check process, but in some cases, you may have to click the Start button, as you can see above.
InDesign will begin the spell check process starting from your current cursor position if it’s placed in an active text area, but if nothing in the layout is selected, it will begin at the start of the document, working from the top left of the first page.
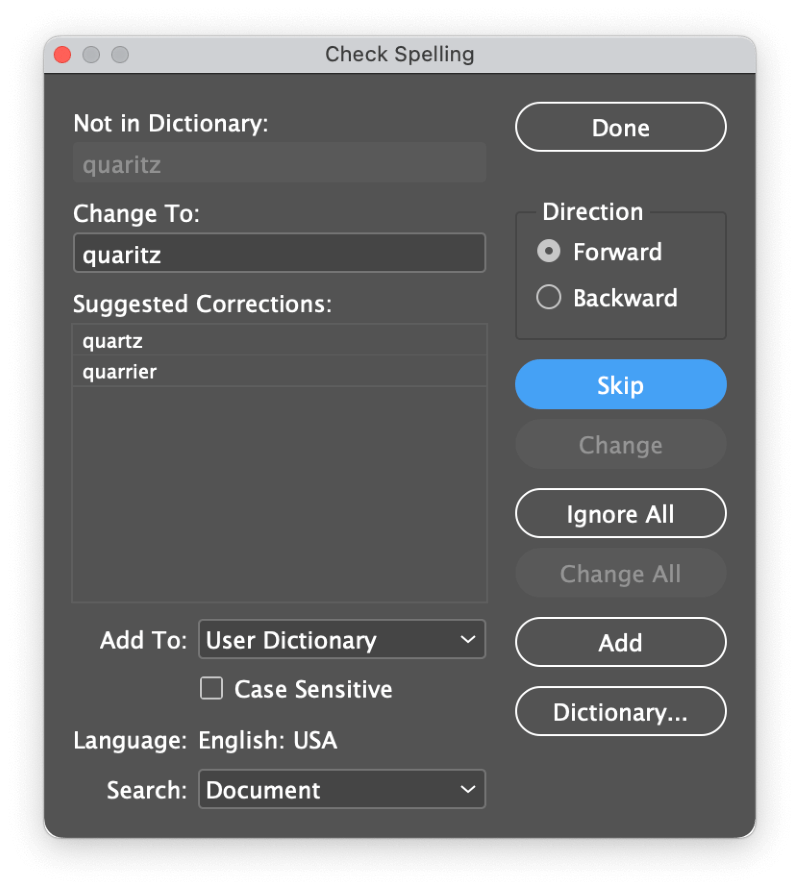
When InDesign encounters an error, it presents a list of suggested corrections.
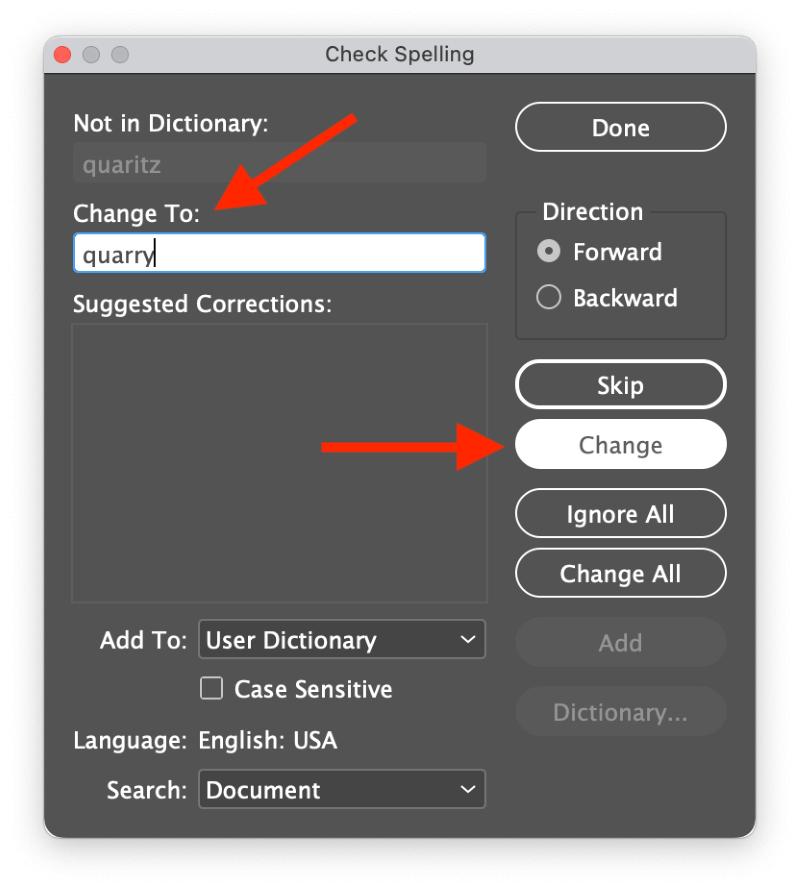
Step 2: Select the correct version of the word from the list, and click the Change button.
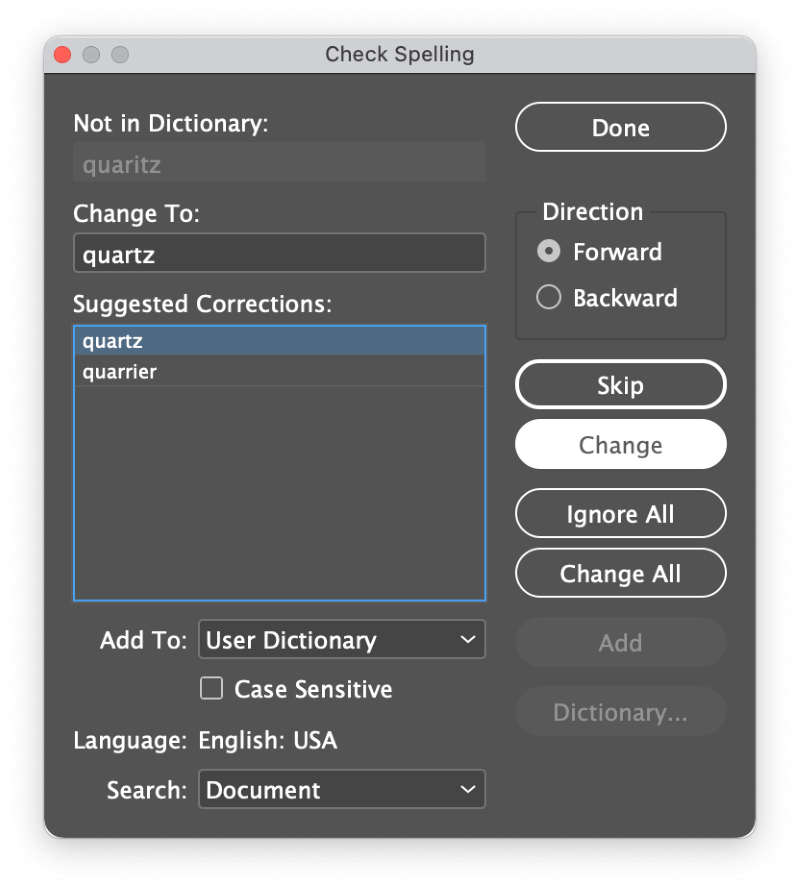
If you’ve spotted a recurring mistake, you can click the Change All button, which will correct all occurrences of the same error within the document.
If none of the suggestions are accurate, you can enter your own by entering new text in the Change To field.
Be careful not to click the Ignore All button unless you’re really certain because you will have to restart InDesign to reset the spell checker.
Repeat the process until InDesign doesn’t detect any more errors in your document.
If it seems like InDesign isn’t checking your document properly, make sure that you have set the Search option correctly at the bottom of the Check Spelling window (see below).
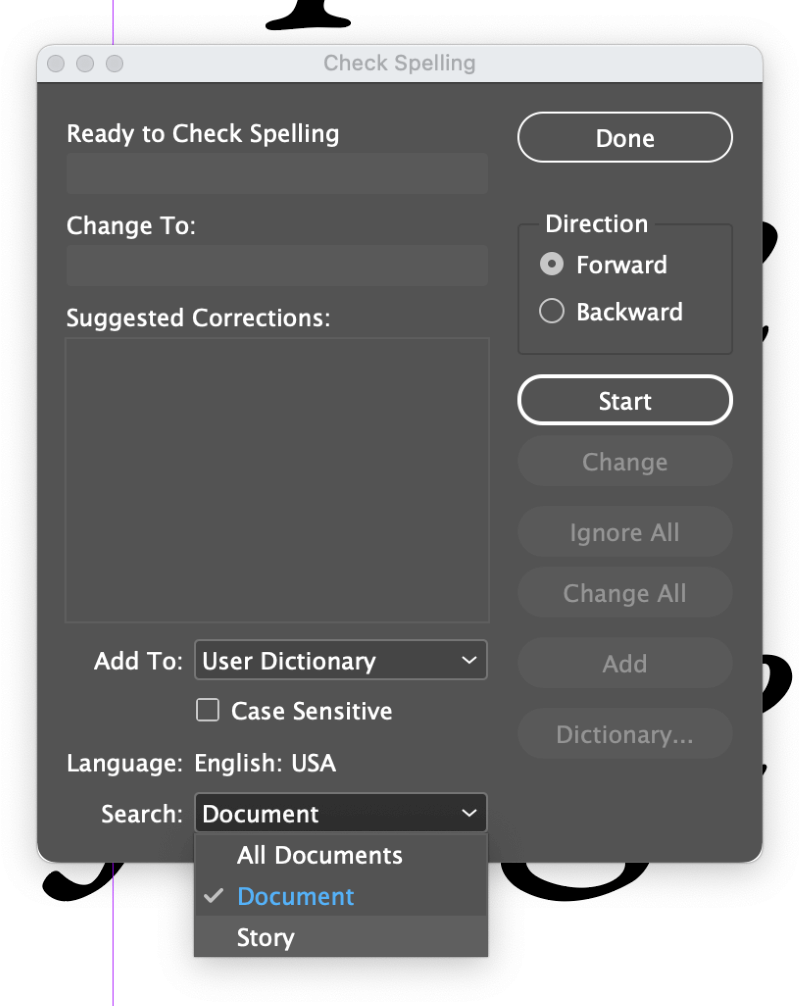
By default, the Search field is set to Document, which will spell-check your entire document (surprising, I know).
If you’re using linked text fields, you can select Story to only check those linked fields. You can also select All Documents to spell-check all your open documents at once.
Using Dynamic Spell Checking in InDesign
Dynamic spell checking should be immediately familiar to anyone who has used a word processor in the last 10 years.
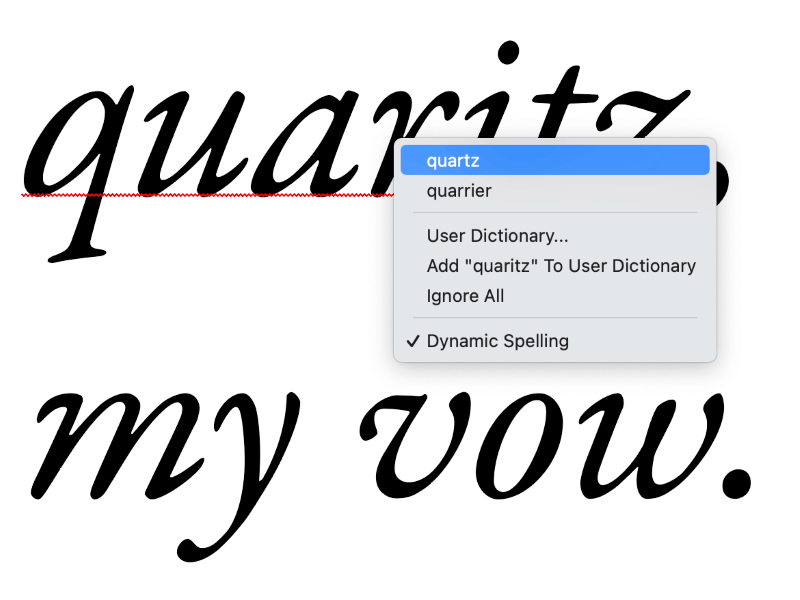
Misspelled words are immediately underlined in red to indicate an error, and you can right-click on any error to see a popup context menu of suggested alternatives, as well as options to add the mistake to the User Dictionary or ignore the error for the rest of the document.
Just like with the Check Spelling command, if you accidentally click Ignore All, you’ll need to restart InDesign to reset the spell checker. This seems like an area of InDesign that could use a bit of polish since there should be a much simpler way to undo a mistaken Ignore command.
Autocorrect Your Spelling in InDesign
While many of us are used to the autocorrect function found on our smartphones, InDesign’s Autocorrect system works slightly differently. It’s really more like ‘auto replacement’ than ‘autocorrection’ because the text strings are all predefined mistakes.
For example, if you consistently find yourself typing ‘freind’ instead of ‘friend,’ you can use Autocorrect to instantly swap the mistake for the correct spelling.
To configure Autocorrect in InDesign, you’ll need to open the InDesign Preferences. On macOS, you can find the Preferences window in the InDesign application menu, while on Windows, it’s located within the Edit menu.
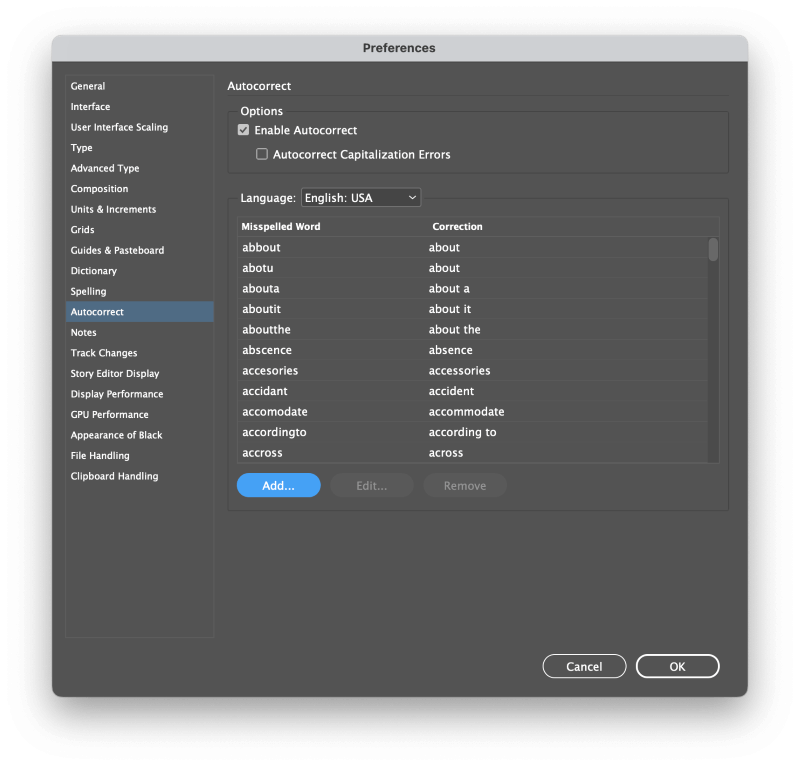
Select the Autocorrect section, and you’ll see the list of automatically corrected words for your currently selected language.
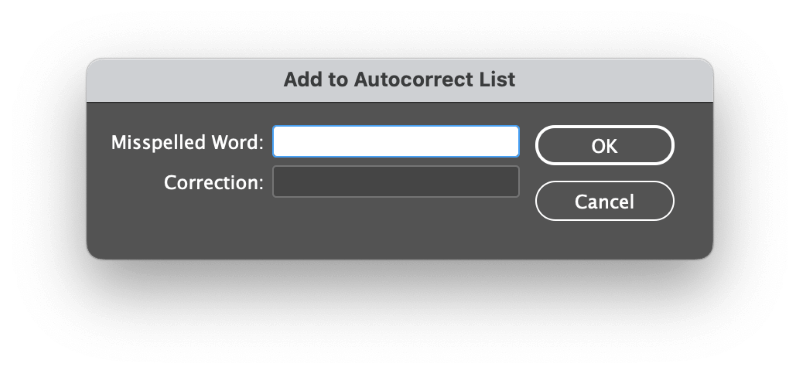
To add a new autocorrect entry, click the Add button, then enter the mistake you want to correct as well as the corrected text, and click OK. Repeat this process as many times as you need.
Arguably the most useful feature of Autocorrect is the ability to autocorrect capitalization errors, which is a common feature of most modern word processors. I don’t know why InDesign has it disabled by default, but perhaps there’s a good reason for the decision.
With that in mind, though, I want to recommend against using InDesign as a word processor since there are much better apps for that purpose! Entering small pieces of text is unavoidable, but for large sections of copy, you’ll be much more productive working with a true word processor.
Once you’ve configured Autocorrect the way you want, you’ll also need to enable it for each document by opening the Edit menu, selecting the Spelling submenu, and clicking Autocorrect.
Bonus: Changing Your Spell Check Language in InDesign
Whether you need to spell neighbour, neighbor, or voisine, InDesign has you covered with a range of languages that can be spell checked, including US and UK versions of English. But in order to use them, you’ll need to define the specific language for each text area using the Character panel.
Select the text using the Type tool, and open the Character panel.
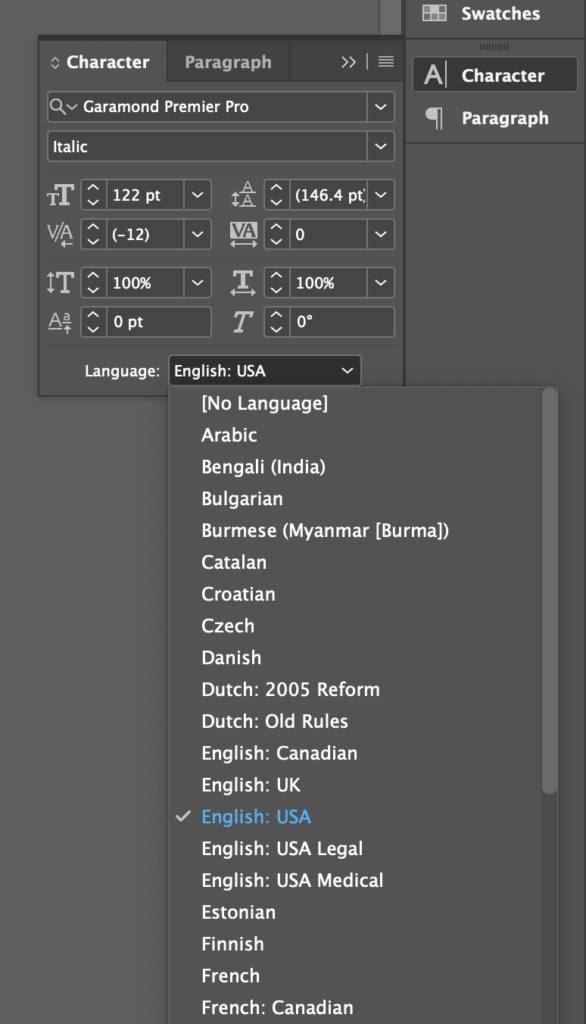
Use the Language dropdown menu to select the appropriate language that matches the text contents, and you’re done! The next time you use the Check Spelling command, it will recognize the language and use the correct dictionary.
Note: If the Character panel isn’t visible, you can activate it by opening the Window menu, selecting the Type & Tables submenu, and clicking Character.
A Final Word
That’s just about everything there is to know about how to spell check in InDesign! Personally, I find that the manual spell check method is the simplest and most direct option since the other two methods work best if you’re actually composing your text in InDesign, and there are better tools available for basic word processing. InDesign specializes in page layout, after all!
Happy designing!