
To separate audio from video in Adobe Premiere Pro, just select the linked video file that has an audio file and then right click on it. Select unlink from the options shown, and boom! The video with the attached audio file will be detached.
My name is David, a video editor. I have worked with many known brands taking several movie and audio projects. I use Adobe Premiere Pro for all my projects, and I’ve been doing this for the past ten years.
In this article, I will explain to you how to unlink, create a keyboard for unlink, why you need to separate audio, and how to export only audio.
Table of Contents
- How to Unlink Audio and Video in Adobe Premiere Pro
- Keyboard Shortcut to Unlink Audio and Video in Premiere Pro
- How to link Audio and Video Together in Adobe Premiere Pro
- How to Create a Keyboard Shortcut for Unlink in Adobe Premiere Pro
- Why Do You Need to Separate Audio from Video?
- How to Export the Audio File Alone in Adobe Premiere Pro
- Conclusion
How to Unlink Audio and Video in Adobe Premiere Pro
A video clip always comes with an audio file unless it’s a drone shot, or better still, it was planned not to have an audio file in the Pre-Production stage.
The audio and video clip moves as one and is edited as one. We use the Unlink option in Premiere Pro. To do this, right-click on the footage and click on the Unlink option.
Keyboard Shortcut to Unlink Audio and Video in Premiere Pro
You can also use the keyboard shortcut “Ctrl+L.” It will detach or separate the audio from the video clip.
It destroys the relationship between audio and video tracks, allowing you to independently move, copy, or delete them. You can pick numerous clips and unlink them all at once.
How to link Audio and Video Together in Adobe Premiere Pro
Click the video track, hold down the Shift key and click the audio track to select both. Select Link Audio and Video from the context menu when right-clicking either clip.
How to Create a Keyboard Shortcut for Unlink in Adobe Premiere Pro
The original shortcut to unlink in adobe premiere pro is Ctrl + L. Still, if you are not satisfied with it or while trying to create a keyboard shortcut, you mistakenly delete the default shortcut key, you can create another one as a custom shortcut.
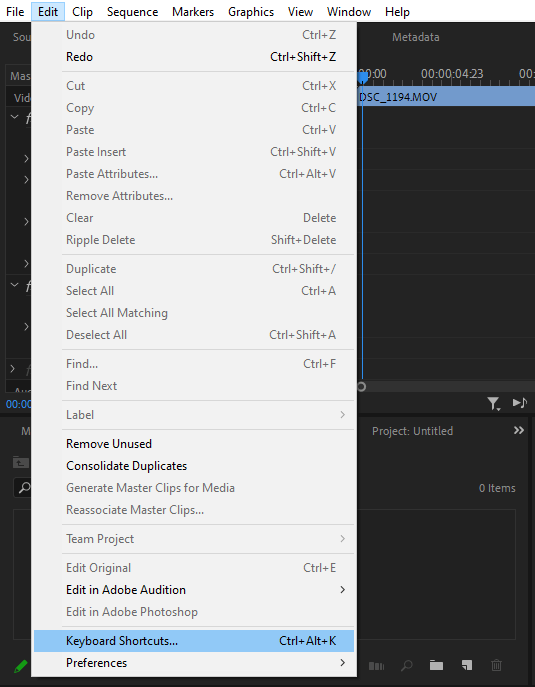
Now, open Keyboard Shortcuts from the edit menu or press Ctrl + Alt + K, after which you will search for unlink.
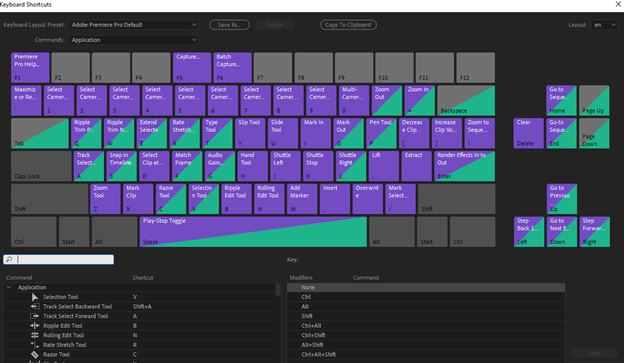
To assign a shortcut to a key, double-click in the Shortcut column to the right of the shortcut you want to assign, then type the keys you want to use.
Why Do You Need to Separate Audio from Video?
Separating audio in Adobe Premiere Pro allows users to make precise adjustments to the sound design of their projects, enabling them to create more dynamic and engaging compositions.
Specifically, separating audio tracks makes it possible to apply different EQs or effects to particular sounds, allowing users to hone in on specific elements within the mix and make subtle yet impactful changes.
Separating audio in Adobe Premiere Pro is essential for precise sound editing. It allows the user to edit the audio track independently of the video component on a separate timeline.
It enables users to control the audio with greater accuracy and flexibility, allowing them to apply various effects, such as reverb or compression. Additionally, separating audio can help improve the workflow of a video project, as you can use it in combination with other software tools, such as Adobe Audition.
Separating audio from video serves a variety of uses, like converting YouTube movies to a portable MP3 format or overlaying audio over narration in another language.
How to Export the Audio File Alone in Adobe Premiere Pro
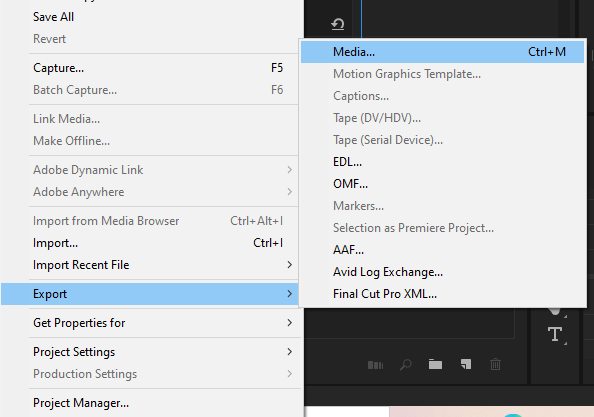
Is it necessary to extract audio from a single clip or the entire video? Go to file > export > media to export your audio separately, or use the keyboard shortcut Ctrl + M.
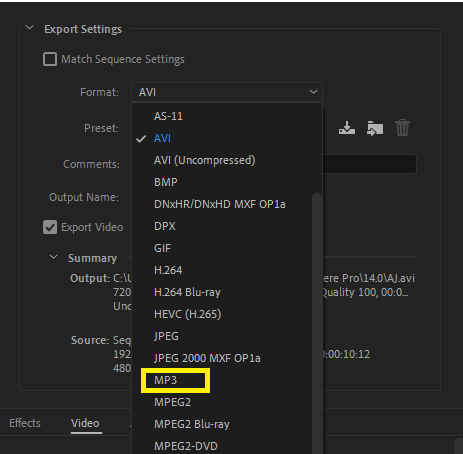
From the Export setting, select the file format to export the audio. WAV, AAC, and MP3 are available. I advise you to use the WAV format as it’s the best quality.
Mind you, WAV files are always heavier in size. If you want a much smaller file size, you can use MP3 instead.
To change the audio quality, use the drop-down menu below it.

If you want to export a portion of the clip, the source range will be In/Out. Set it to Entire Sequence if you’re exporting the entire audio. After that, select the audio file location and click Export to convert the audio to the format you specified.
Conclusion
Unlinking Adobe Premiere Pro audio is a simple process that you can complete in a few steps. First, select the clip you want to unlink. Click “unlink” from the drop-down menu.
Then you are now free to use the audio properties to achieve the desired effect. With a bit of practice, you’ll get used to it in no time!