
Most of the objects in InDesign start out as basic squares. Squares have a useful role in page layout, but they barely scratch the surface of what InDesign can do.
One of the simplest ways to break up an overly rectilinear layout is by adding rounded corners, although you have to know where to find the corner settings in InDesign.
I’ve collected three separate methods for adding round corners in InDesign, as well as an advanced script for adding round corners on more complex shapes. Let’s take a look!
Table of Contents
Method 1: Round Corners using the Control Panel
If you want to add equally round corners to a square object, this is your fastest option.
Follow the steps below to round the corners of an image in InDesign.
Step 1: Switch to the Selection tool using the Tools panel or the keyboard shortcut V, and select the object you want to have round corners.
When the object/image is selected, you’ll see the Corner Options section (highlighted in the screenshot below) on the Control panel at the top of the main document window.
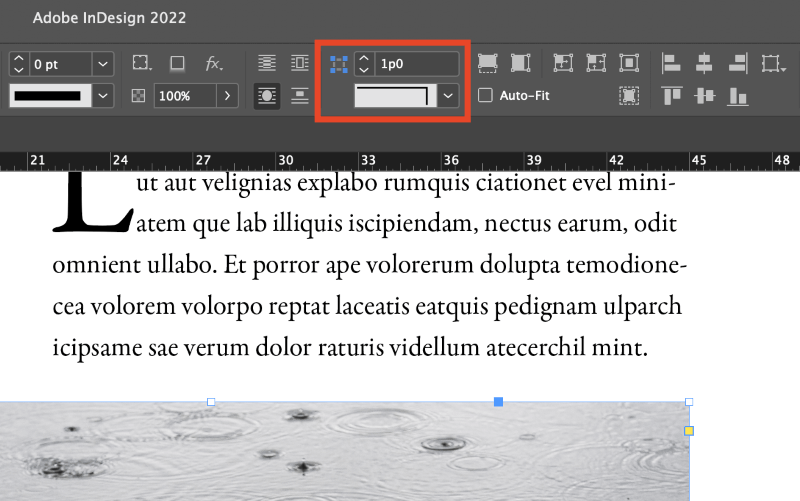
Step 2: Set the rounding amount using any unit format you want, and InDesign will automatically convert it into the document’s default units.
Step 3: Select the Rounded type in the corner shape dropdown menu, and InDesign will add rounded corners to each corner of your selected object.

Method 2: The Corner Options Dialog
If you want to have different rounding amounts on each corner of your square object, you can open the Corner Options dialog to control each corner individually.
To get started, make sure that the object you want to have rounded corners is currently selected.
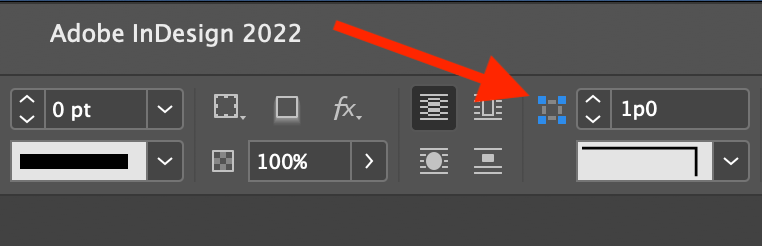
Next, open the Corner Options dialog box by holding down the Option key (use Alt if you’re on a PC) and clicking the Corner Options icon in the Control panel at the top of the main document window.
You can also launch the same dialog window by opening the Object menu and clicking Corner Options.
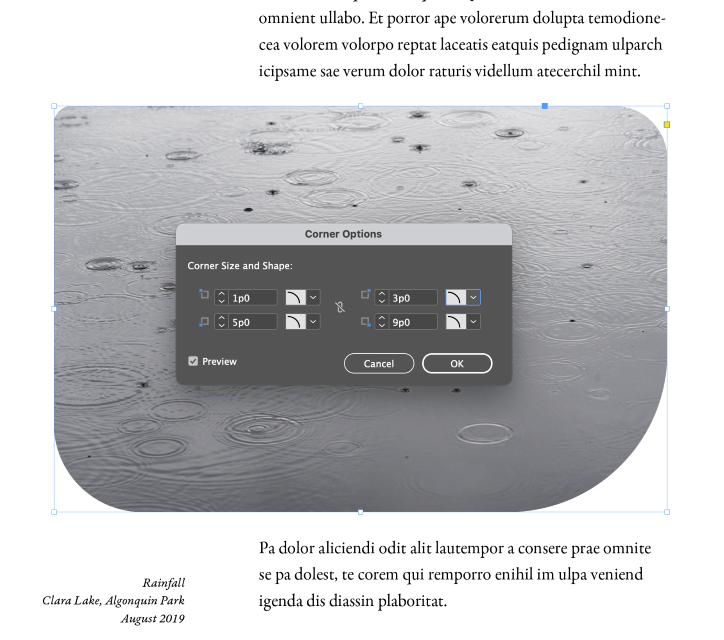
Select the Rounded option from the corner dropdown menu, and specify the rounding amount you want to use.
By default, the four corner options are linked to use the same rounding amount, but you can unlink the values by clicking the small chain link icon in the center of the dialog window.
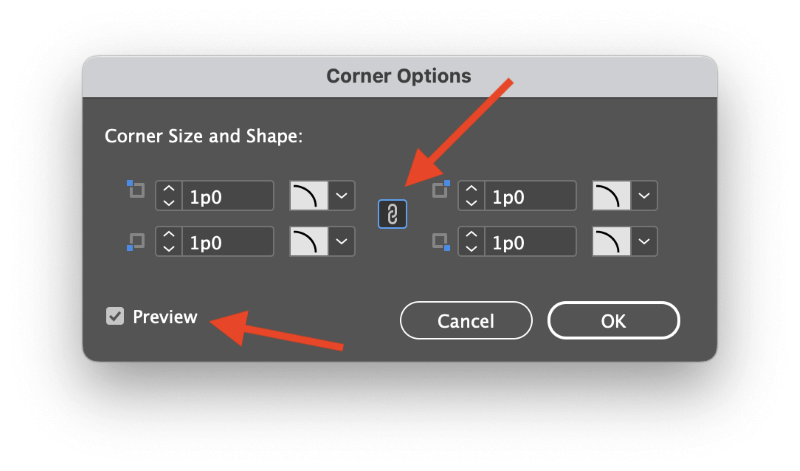
You may also want to check the Preview box so that you can see a real-time preview of the results of your corner settings.
Note that the preview won’t update until you move the focus away from the text input boxes that control the rounding amount, so don’t get frustrated if you can’t see the results right away.
Method 3: Live Corners Mode
If you’re not happy with either of those methods, you can also use Live Corners mode to add rounded corners in InDesign.
Live Corners is a more intuitive method of adding rounded corners since it works visually instead of forcing you to think about the exact measurement you want to use.
Here’s how it works.
Step 1: Select your object using the Selection tool. Along the edges of the blue bounding box that surrounds your object, you’ll see a small yellow square.
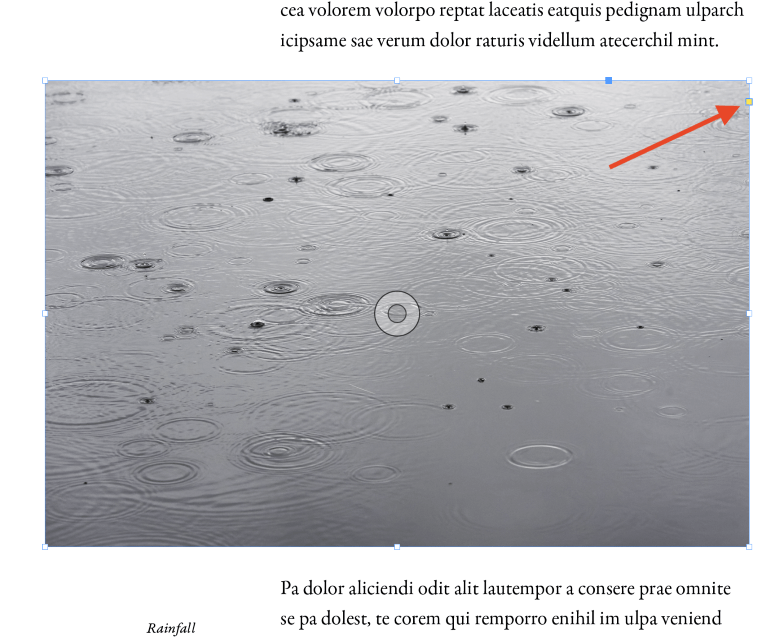
Step 2: Click the yellow square to enter Live Corners mode. The four corner handles of the bounding box will turn into yellow diamond shapes, and you can click and drag any one of these yellow handles to instantly round each corner equally.
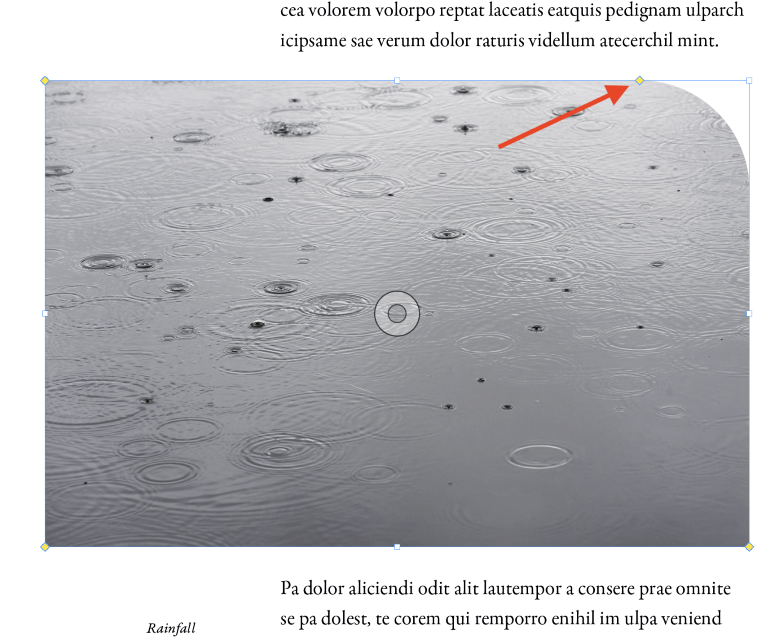
If you want to set different rounding values for each corner, hold down the Shift key while dragging one of the yellow handles and it will move independently of the others.
Live Corners mode should use the Rounded corner option by default, but it can also apply other corner effects.
Step 3: Hold down the Option key (use Alt if you’re using InDesign on a PC) and click the yellow diamond handle to cycle through the different corner options.
Advanced Corner Rounding with Scripts
Note: credit for this tip goes to Bob Wertz of Sketchbook B, who pointed it out in a blog post about a previous InDesign CC version – but it still works!
InDesign allows you to create some very complex frames in a variety of polygons and freeform shapes, but at soon as you convert your frame into one of these, you’ll lose the ability to add rounded corners using any of the methods described above.
While many users are content with the standard InDesign tools, it’s possible to expand InDesign’s capabilities using scripts. I’m no expert in this area of InDesign, but you don’t have to be an expert to run the script, which comes bundled as a free example script.
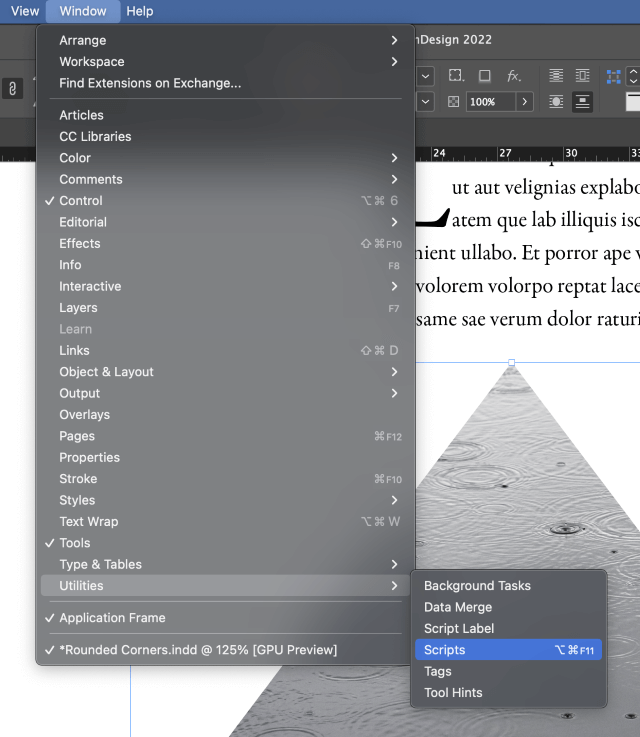
Open the Window menu, select the Utilities submenu, and click Scripts. You can also use the keyboard shortcut Command + Option + F11 (use Ctrl + Alt + F11 if you’re using InDesign on a PC).
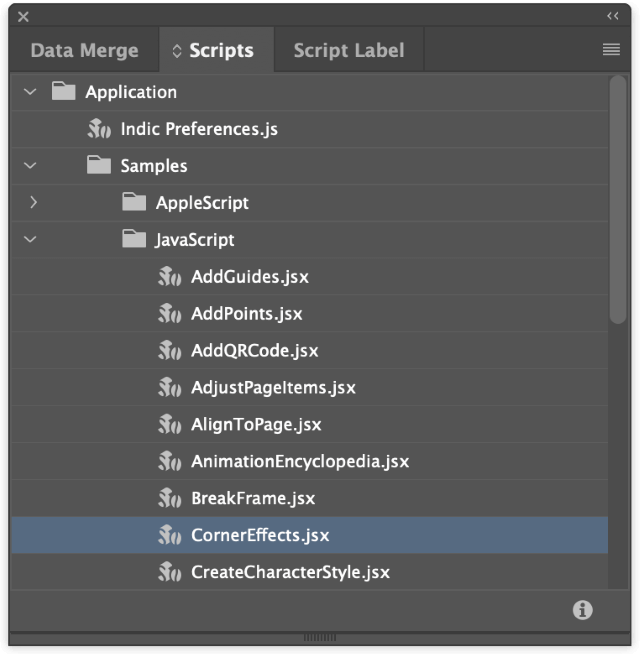
InDesign will open the Scripts panel. The script we want is located in the following folder: Application > Samples > Javascript > CornerEffects.jsx
Double-click the entry named CornerEffects.jsx to run the script, which will open a new dialog window so you can configure the options. Select your Corner Type, set the Offset to control the rounding amount, and then choose which points should be affected.
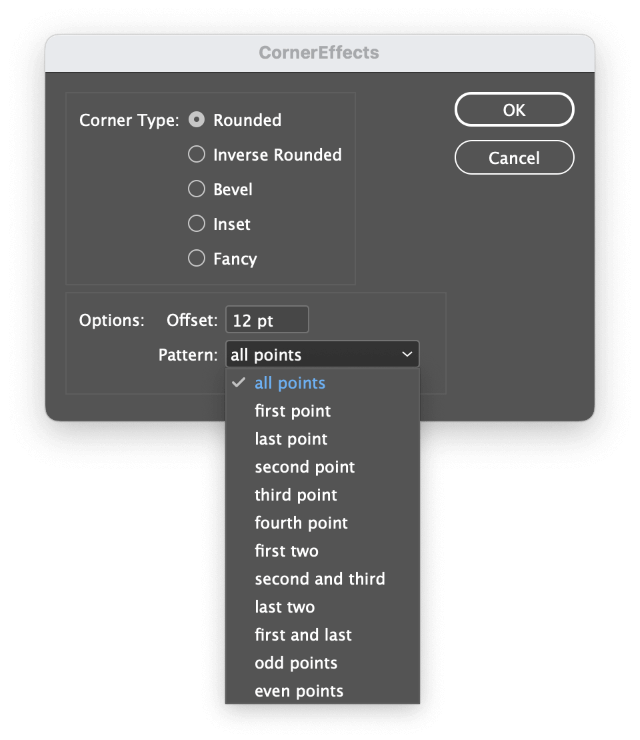
As you can see in the screenshot above, this script offers you far more flexibility when it comes to adding rounded corners in InDesign.
Just keep in mind that these scripts may sometimes produce unexpected results. For example, you may have to run the Undo command a few times to revert to your unrounded shape if you make a mistake or change your mind!
A Final Word
That’s just about everything there is to know about how to add rounded corners in InDesign. Everyone has to decide on their own favorite workflow, but now you have three different methods to choose from as well as an advanced trick for adding rounded corners to complex shape frames in InDesign.
Happy rounding!