
Well, that’s not the right way! Sometimes your portrait-orientated images show up in Lightroom on their sides. Or maybe the horizon in your landscape image turned out a little crooked.
Hello! I’m Cara and I can attest that getting a perfectly straight image out of the camera 100% of the time is a little unrealistic. Thankfully, Lightroom makes it super simple to straighten up images or rotate them to a new orientation.
Let me show you how to rotate an image in Lightroom here!
Note: the screenshots below are taken from the Windows version of Lightroom Classic. If you are using the Mac version, they will look slightly different.
Table of Contents
Rotate an Image 90 Degrees in Lightroom
Most photos will show up in Lightroom with the correct orientation. Your camera automatically positions the images in either landscape or portrait orientation according to the image.
However, sometimes a few images might show up the wrong way upon importing them into Lightroom. Here are a few quick methods to rotate the image 90 degrees.
Keyboard Shortcut
You can use Lightroom keyboard shortcuts to rotate the image to left or right in Lightroom. Simply select the image and press Ctrl + ] (right bracket key) or Command + ] on a Mac to rotate the image to the right. To rotate the image to the left, press Ctrl + [ or Cmd + [. This shortcut works in both the Develop and Library modules.
Select the Command
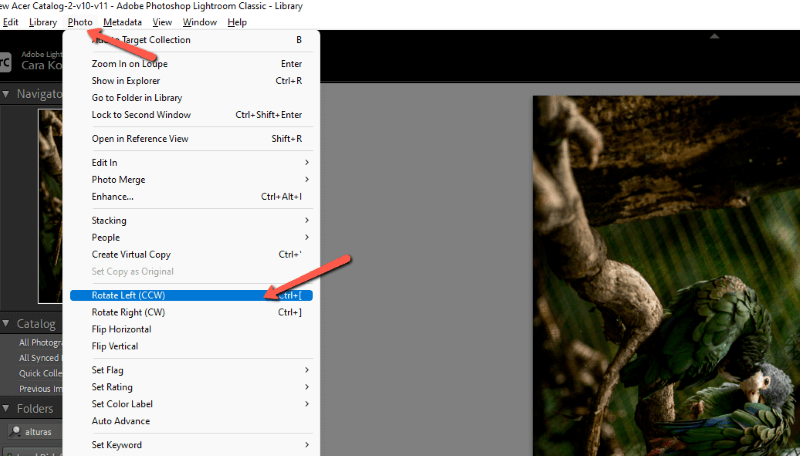
You can also access this feature through the menu bar in the Develop module. Go to Photo and choose either Rotate Left or Rotate Right.
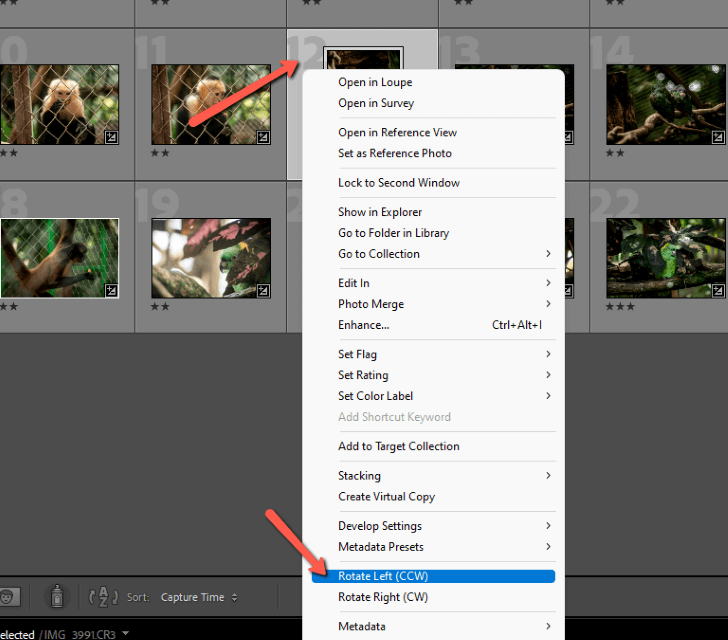
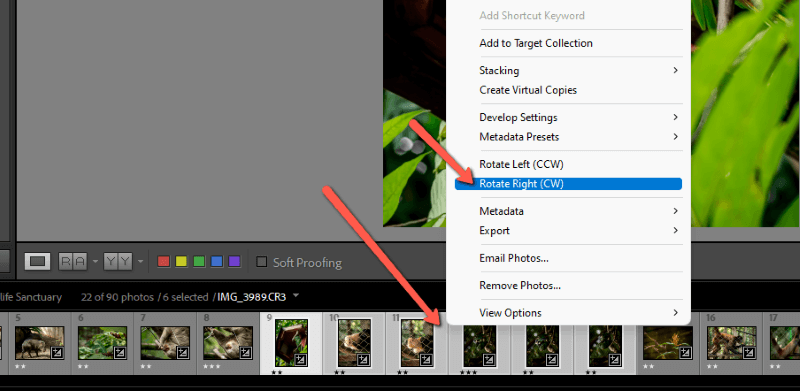
In the Library module grid view, you can right-click on the image to access the menu below. Choose Rotate Left or Rotate Right.
Rotate Multiple Photos at Once in Lightroom
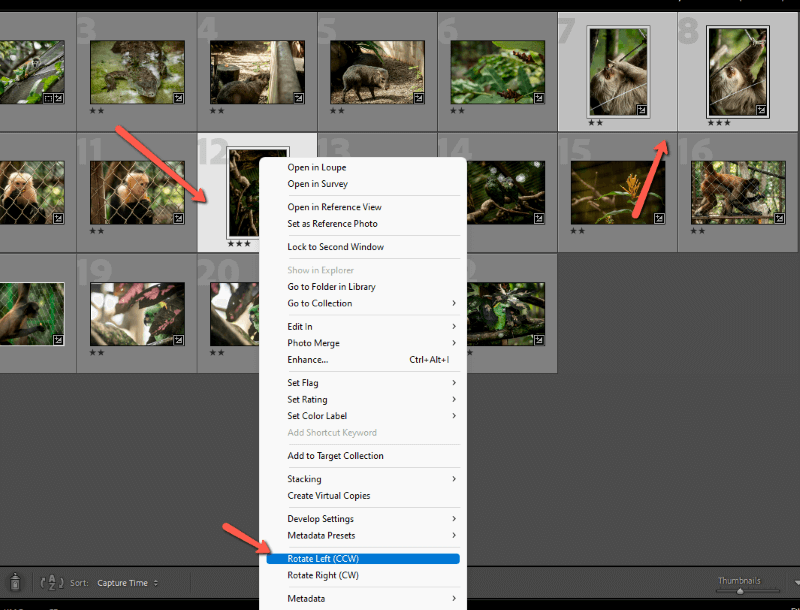
If you have several photos that all need to be rotated in the same direction, you can do this two ways. The first is in the Library module grid view.
Press the shortcut G to access the grid view. Select multiple photos by holding the Shift key while clicking the first and last photos in a series. Or hold the Ctrl or Command key while clicking individual photos.
Once the photos are selected, press the shortcut or choose the command to rotate the images.
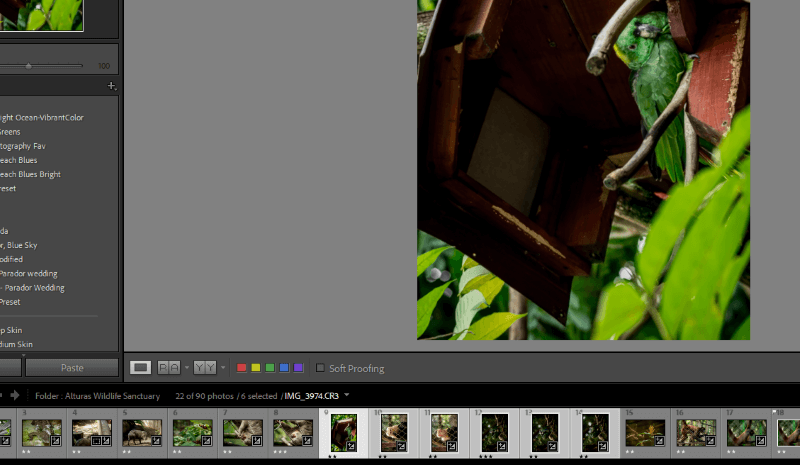
The second is in the Develop module. Select the photos you would like to rotate in the filmstrip at the bottom.
Important note: If you use the keyboard shortcut or menu commands only the big image in your workspace will rotate. To rotate them all at once, you have to right-click down on the filmstrip and choose the appropriate rotation command.
Rotate an Image Slightly in Lightroom
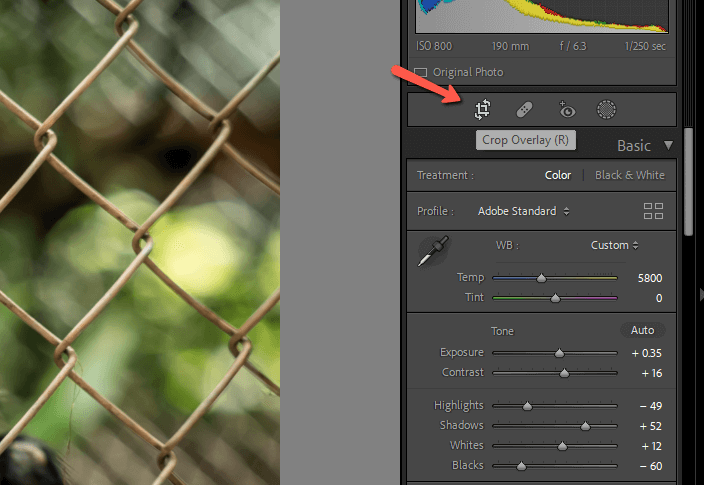
Of course, Lightroom doesn’t restrict you to 90-degree rotations. If you want to straighten crooked images (or put your image at a creative angle) you need to be able to rotate it in tiny increments. You can do that with the Crop Tool in the Develop module.
Use the keyboard shortcut R or click the crop tool icon in the toolbar above the Basic adjustment panel on the right.
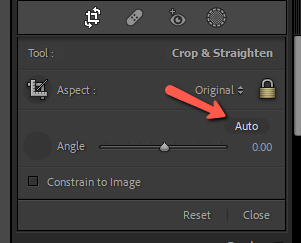
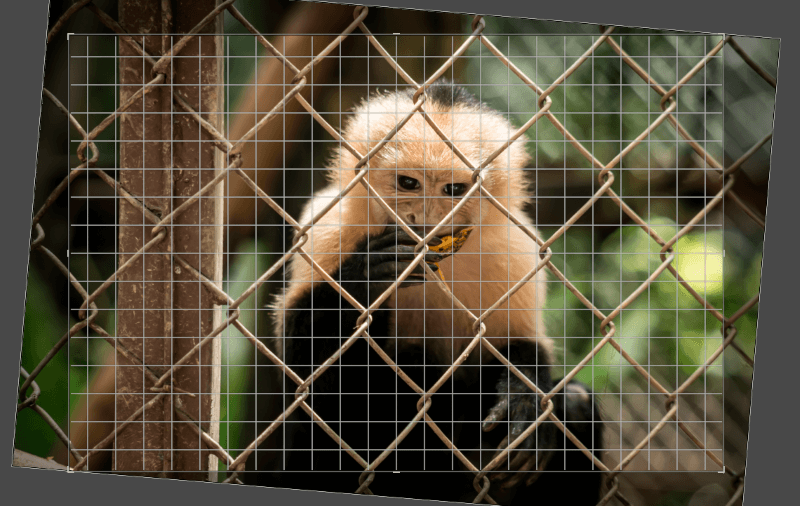
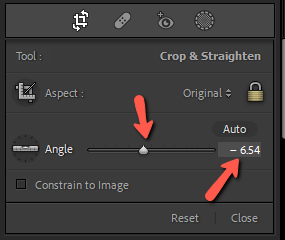
The crop overlay will appear on top of your image. If there is an obvious horizon or another reference to use, Lightroom may be able to straighten your image automatically. Press the Auto button in the crop tool control panel.
For manual control, hover the mouse outside the image and your cursor will turn into a double-headed 90-degree arrow. Click and drag to rotate/straighten the image.
Alternatively, you can slide the angle slider up and down to rotate left and right. Or type an exact value in the box on the right. A positive number will rotate the image to the right, while a negative one brings it to the left.
That’s all there is to it! Learning how to rotate images in Lightroom is quite simple You’ll have all your images perfectly straight (or creatively skewed) in no time!
Ready to learn more about Lightroom? Check out how to batch edit and speed up your workflow in Lightroom!