
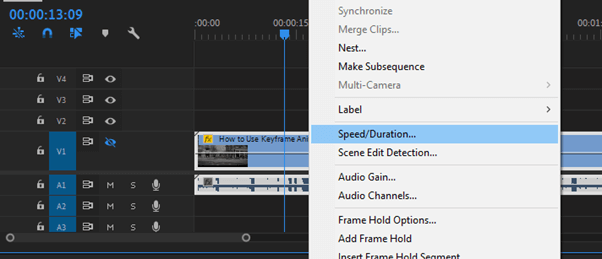
To reverse a video clip in Premiere Pro, right-click on your clip, and go to Speed/Duration from the drop-down menu. A function box will pop up, check the reverse function from the box, and press OK.
In this article, I will show you how to do that in detail, explain speed ramping, and different ways to reverse a video clip, and understand the amazing effect you can create in reversing video clips.
Table of Contents
How to Reverse a Video Clip in Premiere Pro
Before doing anything, ask yourself if you intend to reverse the entire Video clip or if you only wish to reverse a part of it.
To reverse part of the clip, all you need to do is to trim or cut the clip. To cut your clip, just drag your play-head bar from your sequence timeline and press Ctrl + K. Had you wanted to reverse all your clip, you wouldn’t need to cut it.
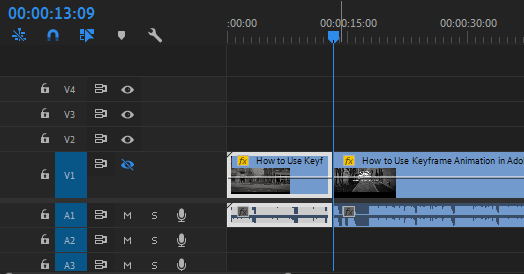
Now, to reverse your video clip in Premiere Pro. Hold down the ALT key while selecting the clip you want to reverse, then drag that clip forward to make a copy of it. Put the two clips next to each other. Duplicating the clip will create a stunning effect—a normal clip, then a reversed clip.

Right-click your copied clip, and go to speed/duration from the drop-down menu. A function box will pop up. Click to check the reverse function from the box, then press OK.
You can also change the speed of the clip you want to reverse, like to speed up or slow down from that function box, because using slow motion can also be a great way to enhance moments in your videos.
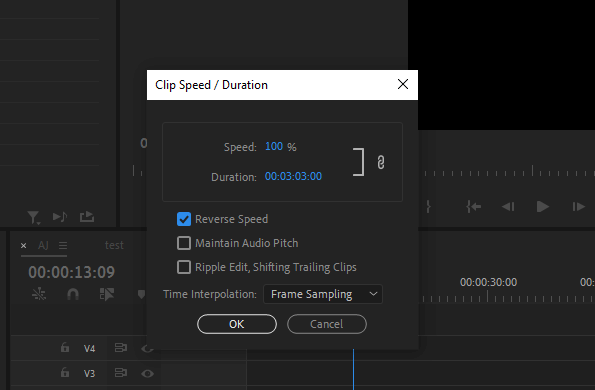
Note that the audio clip will also be reversed but if you don’t want it to be affected by the same function box, check the box labeled Maintain Audio Pitch.
Simple Way to Reverse a Clip in Premiere Pro
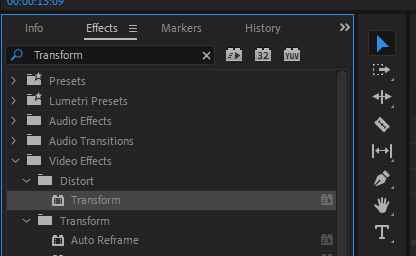
Another method to reverse a video in Premiere Pro is using Transform Effect. To use the transform effect to reverse a video clip, navigate to the effect panel and search for Transform. Select the transform effect and drag it on your video clip.
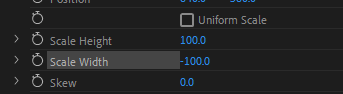
Now, go to the effect control panel. From the effect control panel, uncheck the Uniform Scale.

This will allow us to transform our video properly. Select the scale width, then drag it down to negative (-100). This will transform and change all points from left to right and all points on the right to the left-hand side.
Play it, and you will see that all actions will be going left to right. This method is good because it will maintain all the information in the video clip.
Speed Remapping to Reverse Video in Premiere Pro
Speed ramping in Adobe Premiere Pro is a technique used to gradually increase the speed of a video throughout a scene. This can be used to create a sense of urgency or to build tension. It is often used in conjunction with other techniques, such as slow motion or reverse footage.
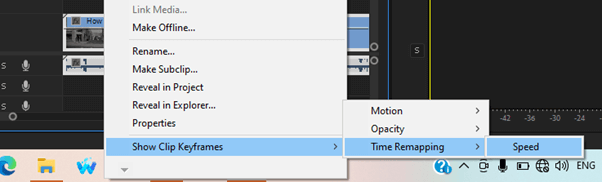
To do this, you will need a moving clip. Drag it into your project or sequence timeline. Now, right-click on the footage you want to speed ramp. Next, select clip keyframe, time remapping, and speed from the drop-down menu.
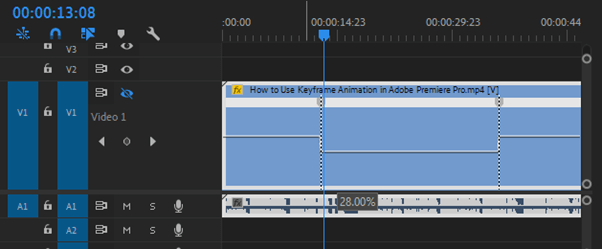
Enlarge the video track to see what you are doing. On the video clip layer, you will notice a speed line. Press and hold the CTRL key and click on speed the line to create keyframes. In between the keyframes, drag upward to make the speed fast or drag downward to make it slow.
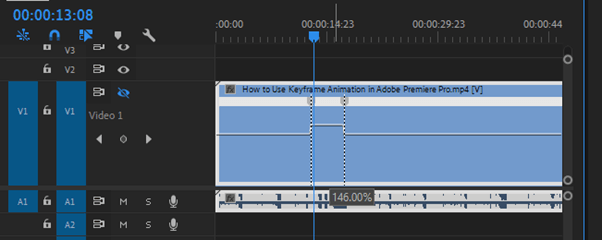
Drag this key frame forward to make two work as the transition.
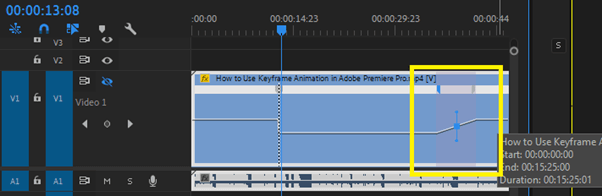
To reverse everything after the keyframe has been set. Just duplicate what you have done and then right-click on it. Select speed/duration and check the reverse function and select OK.
What Can I Achieve by Reversing a Video Clip in Premiere Pro?
The human brain is wired to process information sequentially. When we watch a video in reverse, our brain has to work harder to piece together the story. This can lead to some interesting perceptual effects, such as seeing objects move in ways that violate our expectations.
For example, if you reverse a clip of someone walking, they will appear to be walking backward. You can use this to create an optical illusion or add an element of interest to a video.
Conclusion
To reverse a clip in Adobe Premiere Pro is a relatively simple process that can be completed in just a few steps by following the steps outlined in this article. With a little practice, you’ll be able to create even more creative and unique videos.