
Pixlr is a popular web-based photo editing tool. It has a premium option, but you don’t need to sign up for it to use the basic features. If you want to resize a photo without committing to downloads, new accounts, or complicated software, Pixlr is a convenient choice. And resizing images or layers in Pixlr is super easy.
Many websites have limitations to the image sizes they allow – Pixlr itself will recommend you not work with images larger than 3840 by 3840 pixels. If you’re looking to resize your image to something below that, this tool is perfect.
You can resize an image or layer in either Pixlr X or Pixlr E. Pixlr X is a more streamlined editing software, ideal for those with minimal experience, while Pixlr E has a slightly more professional feel. Both options are outlined in this article.
Table of Contents
How to Resize an Image or Layer in Pixlr E
If you are using Pixlr E, follow the tutorial below.
First Things First: Open Your Image
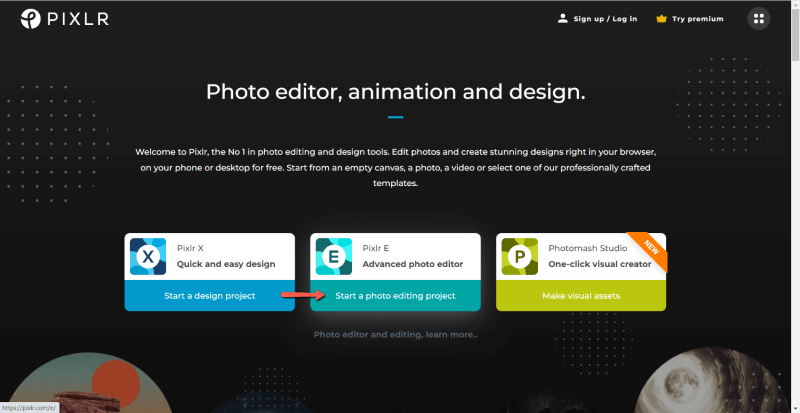
Go to Pixlr and choose Pixlr E, Advanced photo editor.
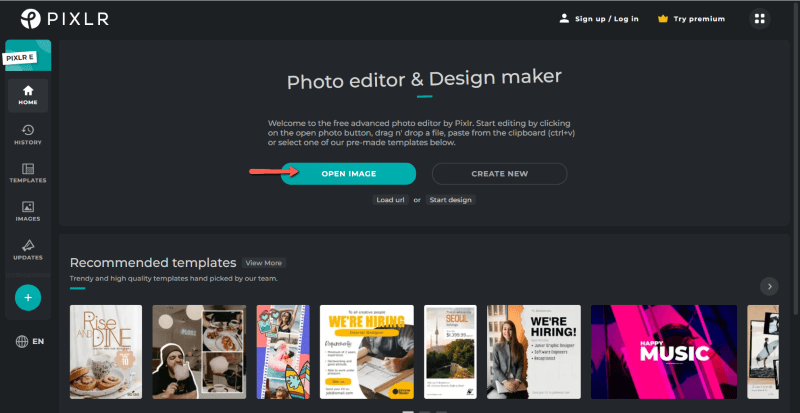
Select Open image, then find your image on your computer.
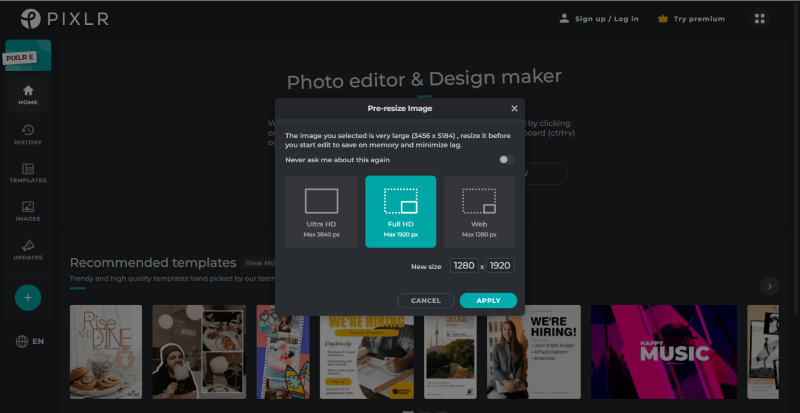
If your image is very large, over 3840 pixels on any side, Pixlr will ask you to resize it before it opens. Choose between Ultra HD, Full HD, and Web, or enter your own dimensions.
How to Resize the Entire Image in Pixlr E
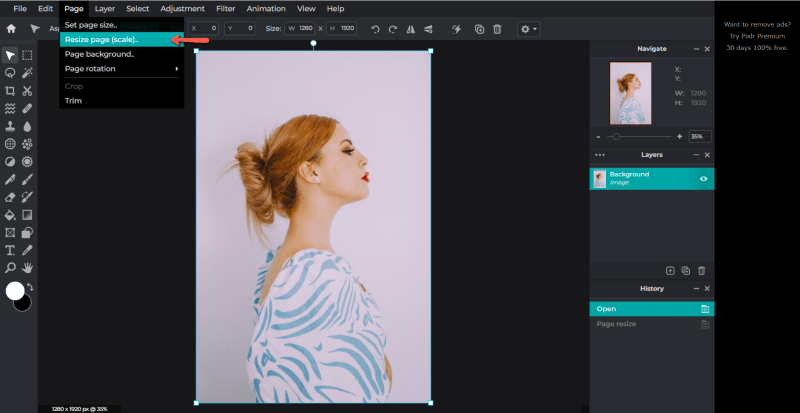
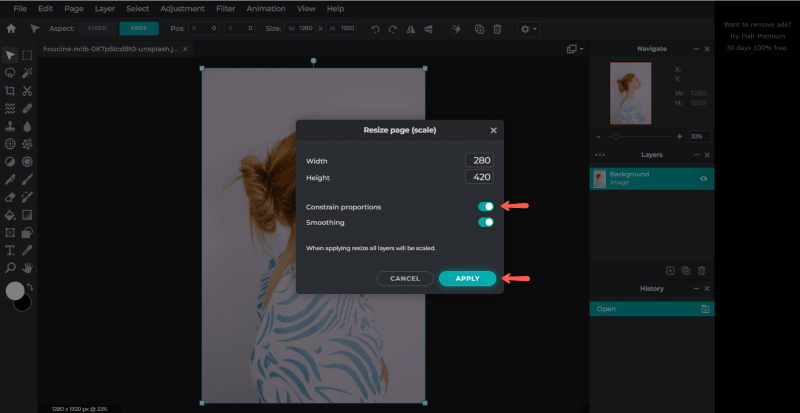
With your image open in the workspace, navigate to the menu bar in the top left hand corner and select Page. Under the Page menu, choose Resize page (scale).
Constrain proportions should be automatically on, so just leave it selected to maintain the original aspect ratio. Then enter the new desired dimensions under Width or Height. Click Apply.
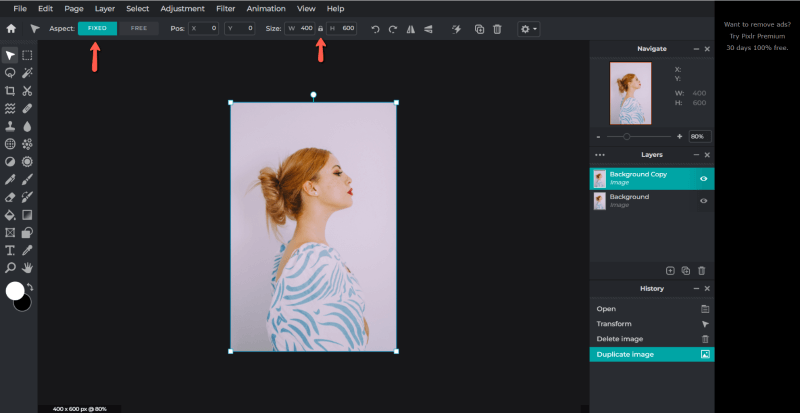
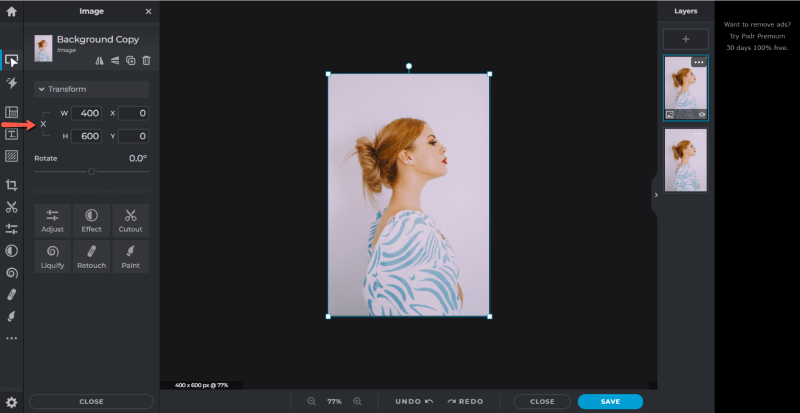
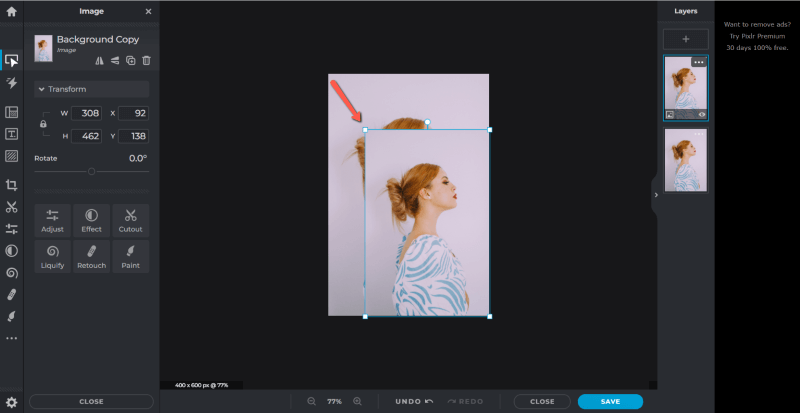
How to Resize a Layer in PIxlr E
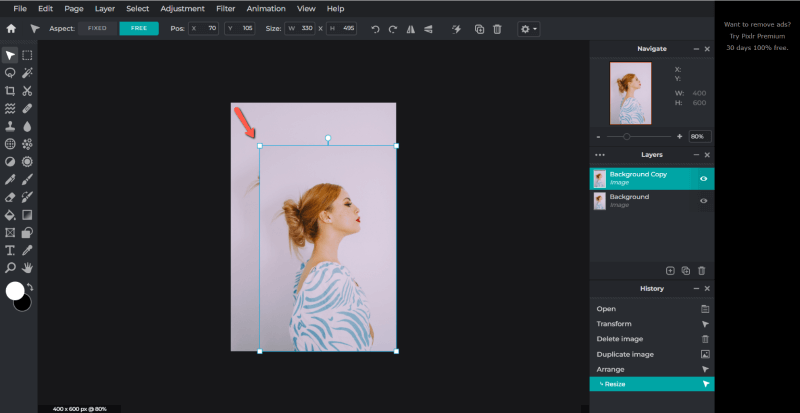
Navigate to the Arrange tool on the left hand toolbar, or press the keyboard shortcut, V. Make sure the word fixed is blue, indicating the original aspect ratio is being maintained. If it isn’t blue, either click on it or on the X icon between the width and height.
Then either drag from one of the corners or enter dimensions in the text boxes.
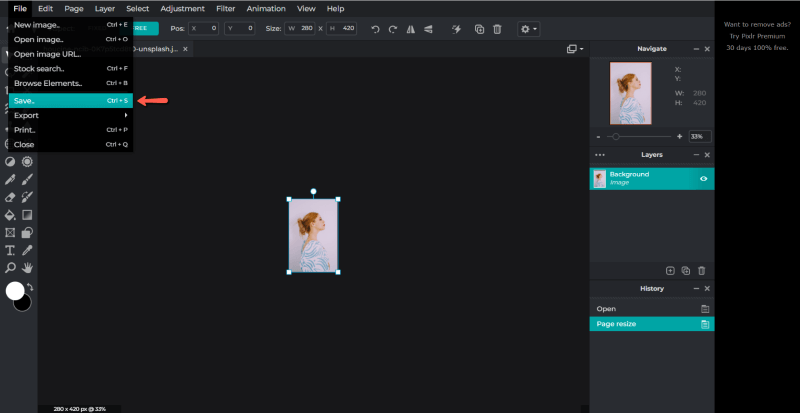
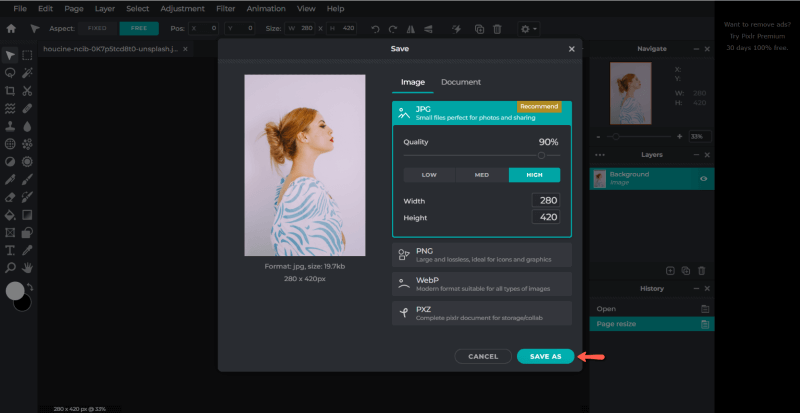
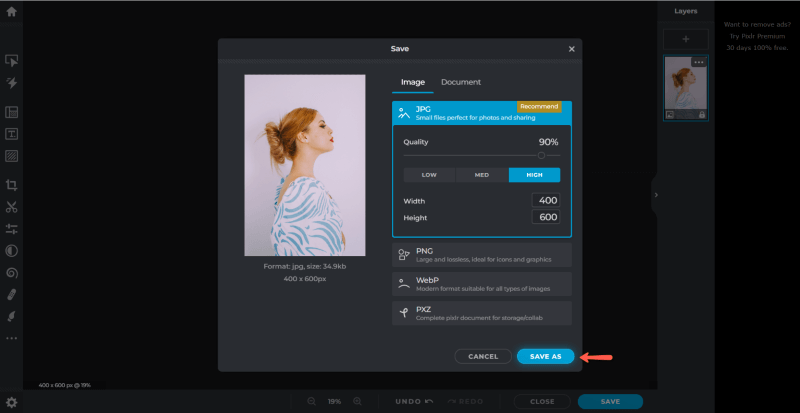
Saving the Image in Pixlr E
On the menu bar navigate to File and click Save. Alternatively, use the keyboard shortcut by holding down CTRL and S.
In the Save window, Pixlr will actually give you another option to resize your image, as well as a chance to adjust the quality for bigger or smaller file sizes. You’ll likely want to choose JPG for small file sizes, or PNG for the best possible image quality.
Check the file size and dimensions written underneath your image. Adjust the Quality slider or reenter dimensions as needed, and when you’re happy with them click Save as.
How to Resize an Image or Layer in Pixlr X
Pixlr X is a good choice if your project requires speed and simplicity. And, this tool will give you equally professional results.
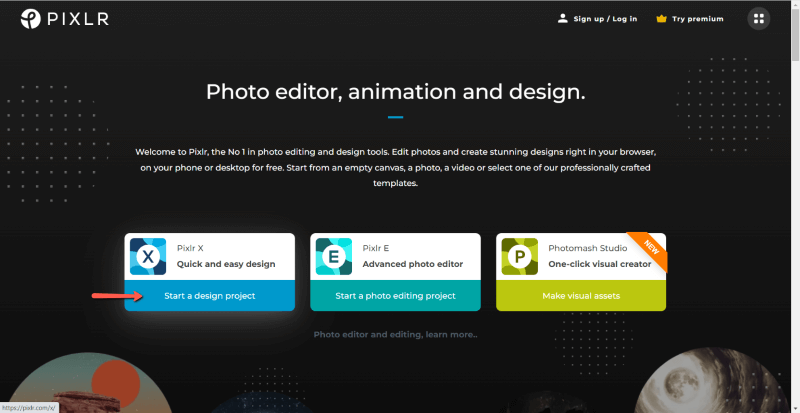
From the Pixlr homepage, select Pixlr X. Choose Open image and find your image on your computer.
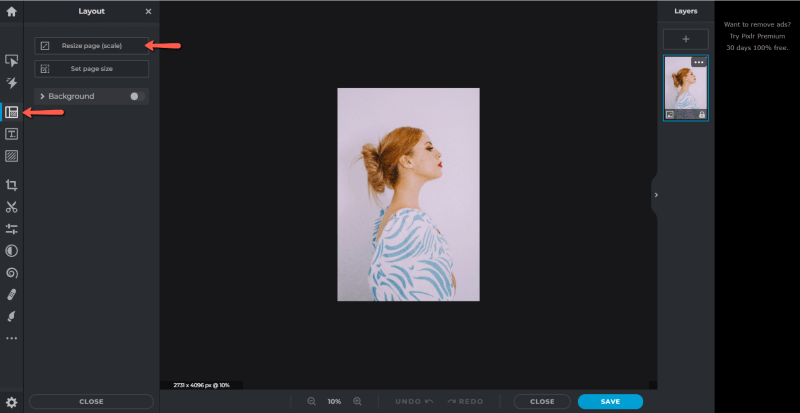
Resizing the Image in Pixlr X
With your image open in the Pixlr X workspace, find the toolbar on the left hand side. Find the Layout icon, shaped like three rectangles, and click. This brings up two options: Resize image and canvas resize. Choose resize page (scale).
Be sure Constrain proportions is checked. It should be indicated by a blue color. Then, enter your new dimensions in either Width or Height.
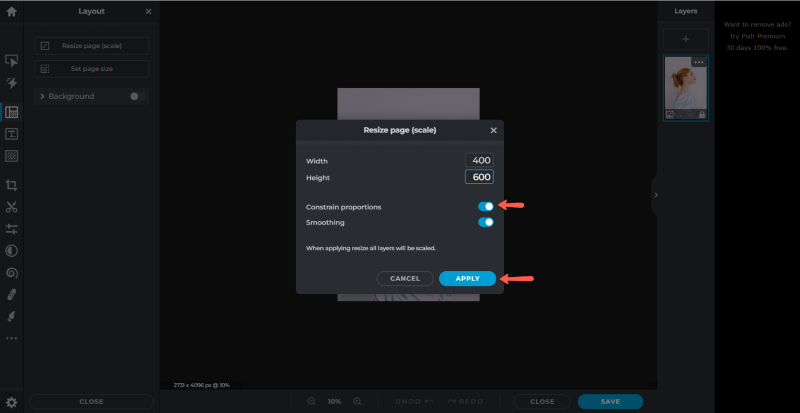
Once the width and height dimensions are correct click Apply.
Resizing a Layer in Pixlr X
To resize a single layer, navigate to the Arrange & Style icon on the left hand toolbar. To keep the original aspect ratio, click on the X symbol between the Width and Height.
Then either drag from one of the corners or enter the dimensions in the text boxes.
Saving the Image in Pixlr X
To save your resized image, just click Save, located at the bottom right of the workspace. Alternatively hold down the keyboard shortcut keys, CTRL and S.

As in Pixlr E, the Save window offers another way to resize your image. Check to make sure you have the correct quality, file size, dimensions and format, and click Save as.
Final Thoughts
With either of these two editing tools (Pixlr E or Pixlr X), you’ll be able to easily change the image size to meet most requirements.
Keep in mind that if you entered numbers below the original dimensions, this should leave you with a smaller image but with unchanged photo quality. If you are looking to increase your image size, this will always make the quality lower, regardless of software.
What do you think of Pixlr? How does it compare to other online photo editors such as Photopea? Share your perspective in the comments, and let us know if you need anything clarified.