
In Photoshop, you can use the Object Selection tool to select the object you’d like to remove, then go to Edit > Content-Aware Fill. This should fill in the selected area with something similar to what is around or behind it.
In this article, I’ll show you how to remove an object or selection in an image. Sometimes you need to go about it a different way so as not to mess up a different part of the image, or to make it believable.
Table of Contents
Key Takeaways
- With your object selected, go to Edit > Content Aware Fill. The green area is where AI will take from, to fill your selected area.
- Use the Clone Stamp tool by holding Alt/Option and clicking on an area you want the stamp to take from, then click on what you want to cover.
- Use the Object Selection tool or the Quick Select tool to quickly select an object/selection in Photoshop.
5 Ways to Remove an Object from a Photo in Photoshop
Depending on the object you want to remove, there are different tools to get rid of part of an image in Photoshop. But no matter which method you choose, first things first, you always want to make a copy of your image so that you can edit it non-destructively.
Method 1: Clone Stamp Tool
If you want to remove a smart part of an image, this method works best.
Step 1: Use the shortcut Ctrl/Command + J to make a copy of your image on its own layer.
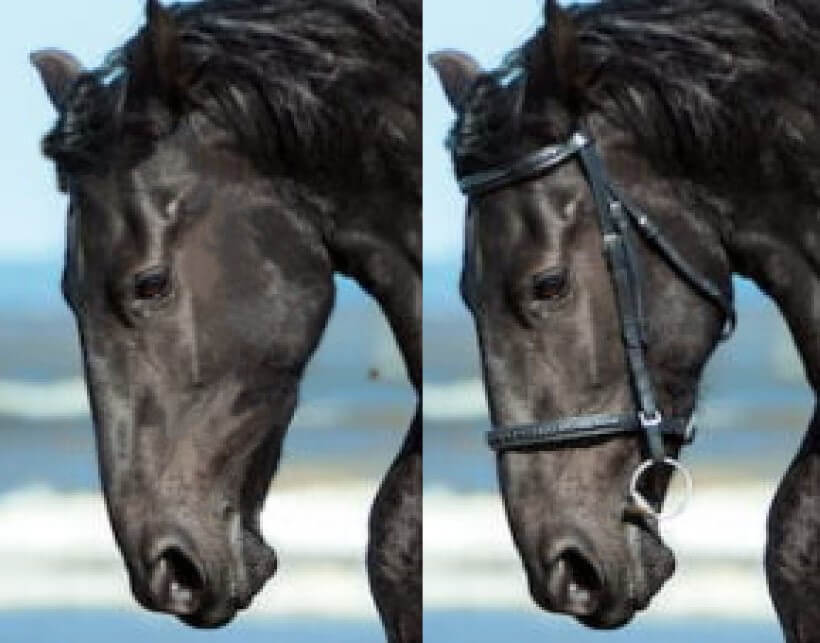
I’d like to see this Friesian without his bridle. Let’s use the Clone Stamp tool to paint away the bridle, using sections of nearby hair to cover it up.
Step 2: With the Clone Stamp tool selected, hold Alt/Option to select the source of the stamp.
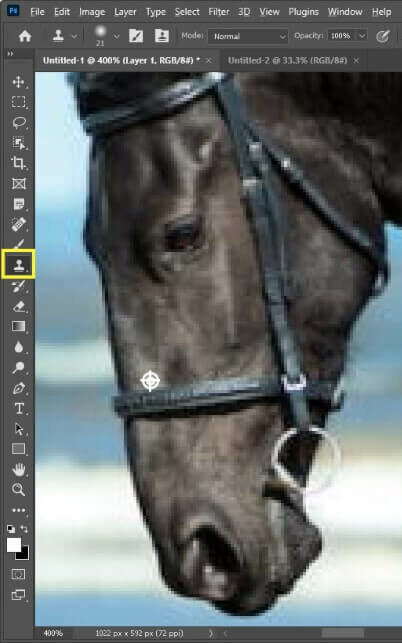
Step 3: Paint as far as you can, maintaining a realistic look. You can go back and forth between selecting the source, and painting.
Notice in the yellow box above, it is set to Current Layer as a source for the Clone Stamp tool. When necessary, you can change it to Current Layer & Below, or All Layers.
So far so good! Here is the before and after.
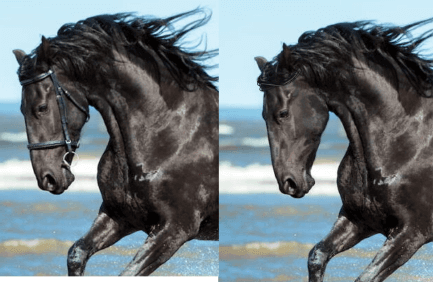
That’s pretty good.
Step 4: Touch it up by smoothing over patchy areas with the Smudge tool. You can adjust the brush size with the left and right bracket keys.
Method 3: Content Aware Fill
The Content-Aware Fill is an AI feature that Photoshop automatically fills the selected area with the background image, but you often need to touch up the photo for the best results.
For example, let’s use this hilarious photo of a man accidentally photobombing a proposal.
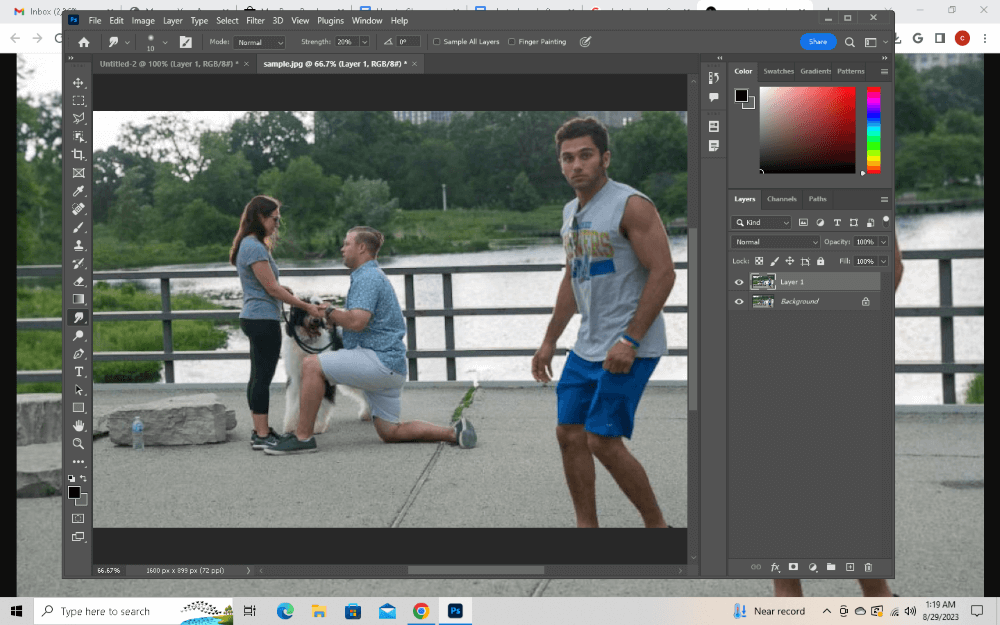
Step 1: Use the Lasso tool to loosely select the photobomber. If your object has a clearly defined edge, you can also use the Quick Selection or Object Selection tools.
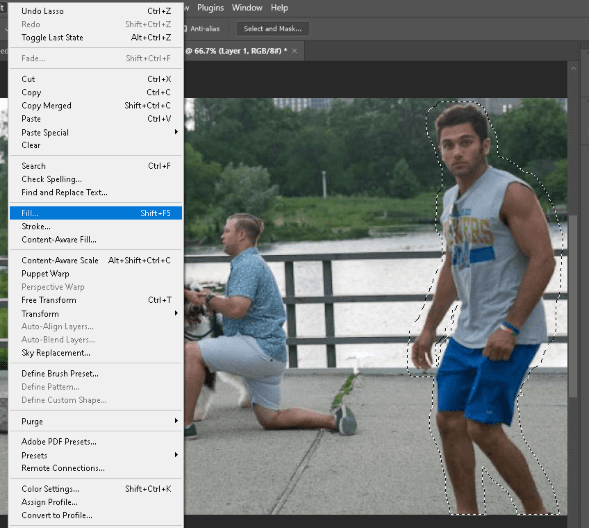
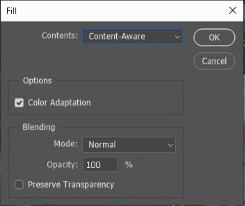
Step 2: Go to Edit > Fill, then in the drop box, select Content-Aware and then click OK.
AI will do the best it can to fill that area in a way that makes sense to us.
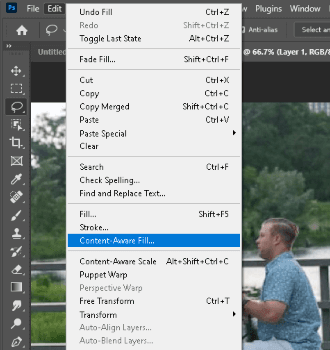
Step 4: Go to Edit > Content-Aware Fill to choose where the image fills from.
For example, I clicked on the background, and it was highlighted.
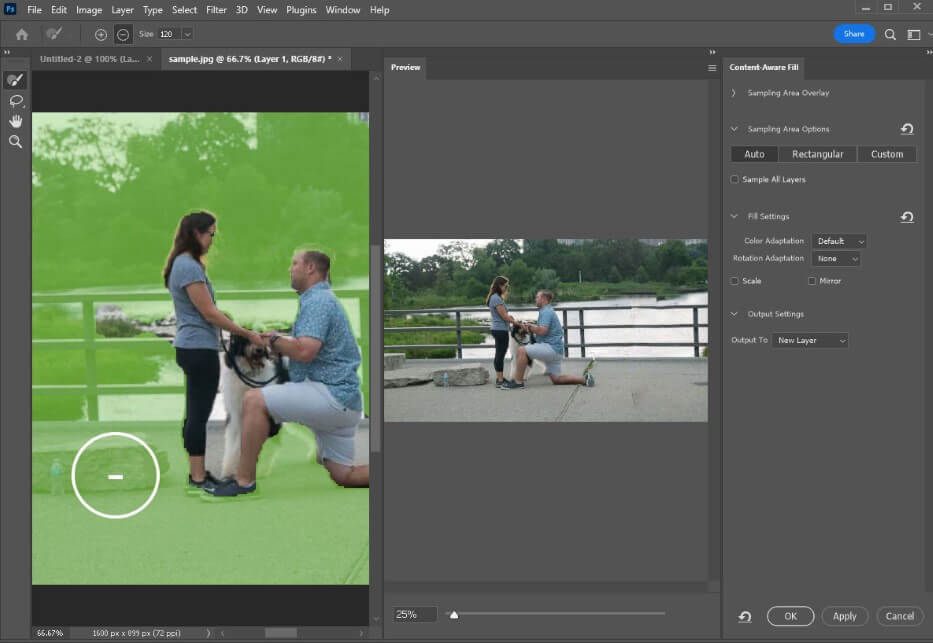
With a live preview, you can change where Photoshop takes content from to fill your selection.
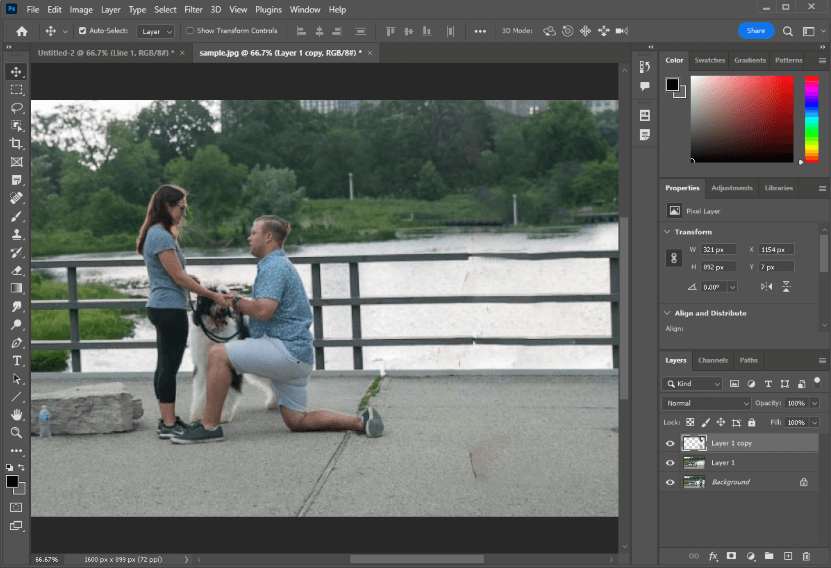
It’s almost there. As you can see, the photoboomer disappeared but the background isn’t perfect.
Step 6: With the Clone Stamp tool selected, go to Window > Clone Source and then click on the symbol below to flip your stamped pixels horizontally.

I’m going to paint the railing straight again and patch up some other inconsistencies. Look for areas you can duplicate and use elsewhere in your photo.
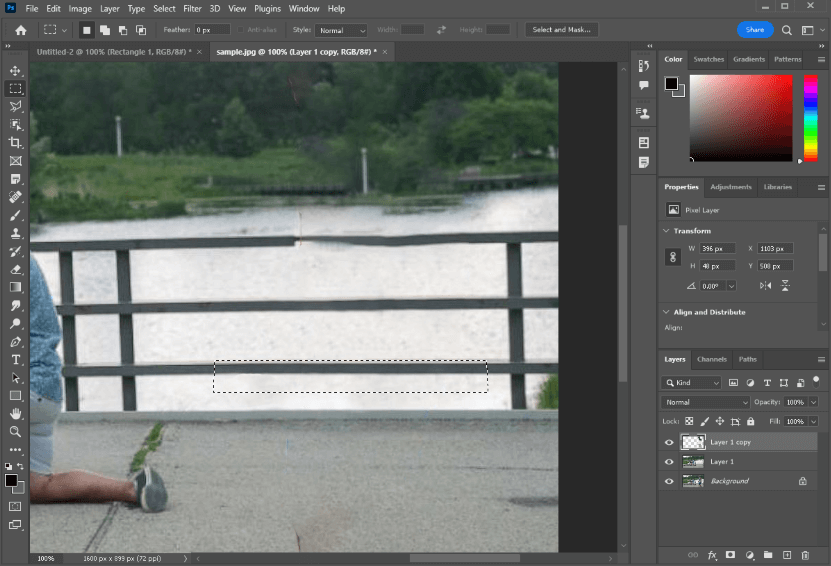
Step 7: Now that I have a straight railing made, I’m going to select, copy (Ctrl/Command + C), and paste (Ctrl/Command + V) it.
With it on this new layer, I can move it up to cover the broken railing. I continued doing these steps until I got my final image.
Content-Aware started off okay, but the more detailed the area around and behind the removed subject, the longer it will take to perfect.
Method 4: Using the Object Selection Tool
Let’s take the human out of this picture.
Step 1: Choose the Object Selection tool on the toolbar. If you can’t find it, you can also find it with Object Finder checked off at the top. In some cases, having it checked helps make an automatic selection with just one click.
Select the object or space you want to remove. In my case, I clicked on the person.
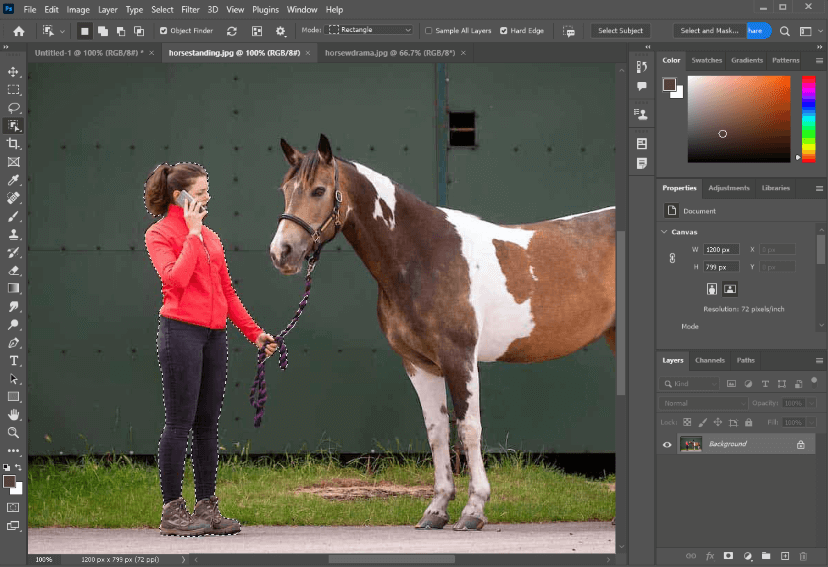
As you can see, it did an excellent job with just one click.
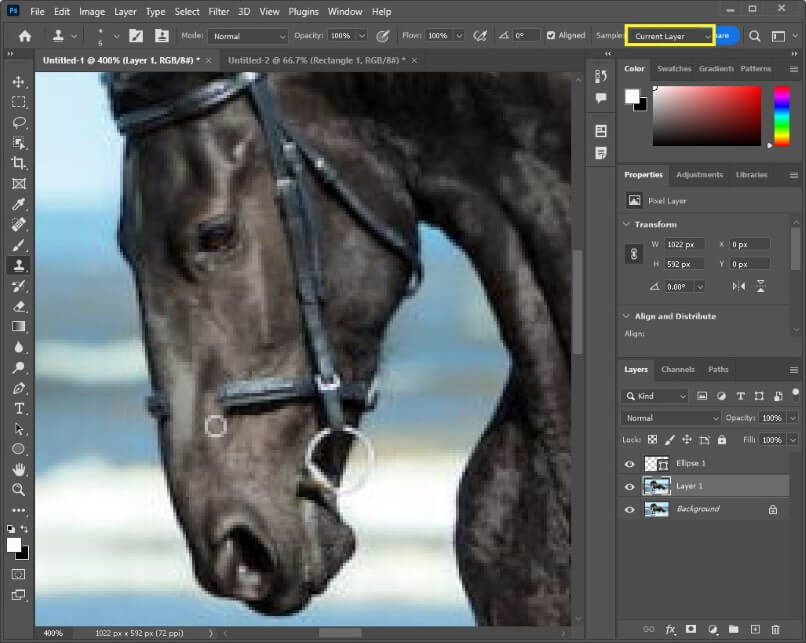
Step 2: Use the Quick Select tool to perfect your selection by adding or subtracting parts from it. I’m going to add more of the rope to my selection since I want the horse to be standing alone.
Step 3: Go to Select > Modify > Expand and expand your pixel selection by approximately 4 px.
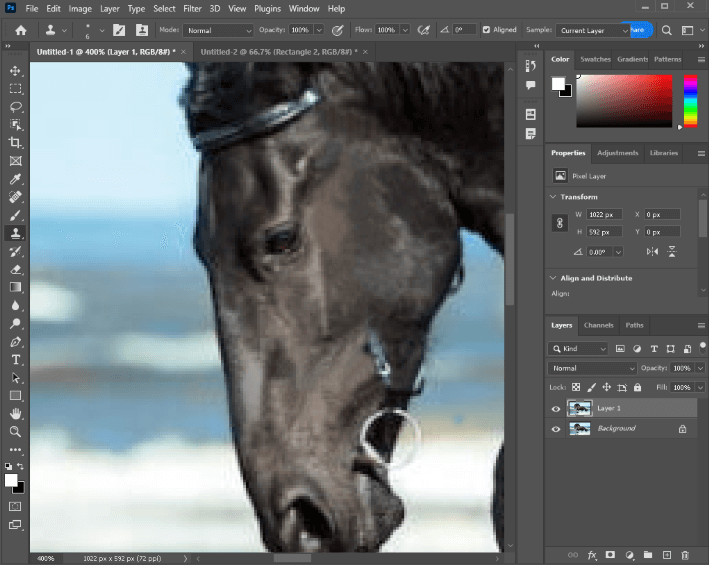
Step 4: Go to Fill > Content Aware Fill.
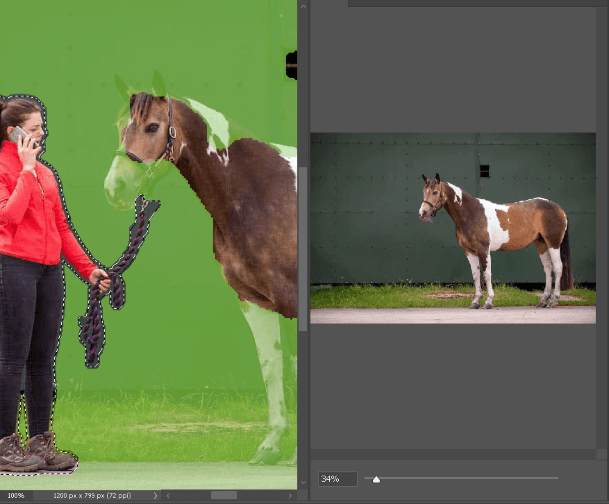
With a live preview of the Content-Aware effects, we can see that it did a great job overall, there’s just a small bit of white under the horse’s chin that we don’t want.
On the left side of the screen, I’m going to use the brush tool to erase the green color off the horse. This is telling the AI that I don’t want it to take from the area with the horse.
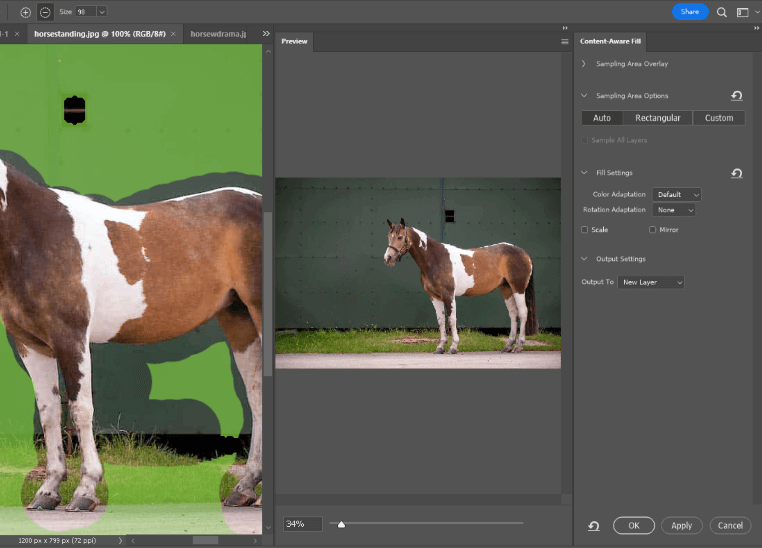
That’s better. Click OK.
I can see that some of the dots on the wall are missing, but beyond that, our image is done.
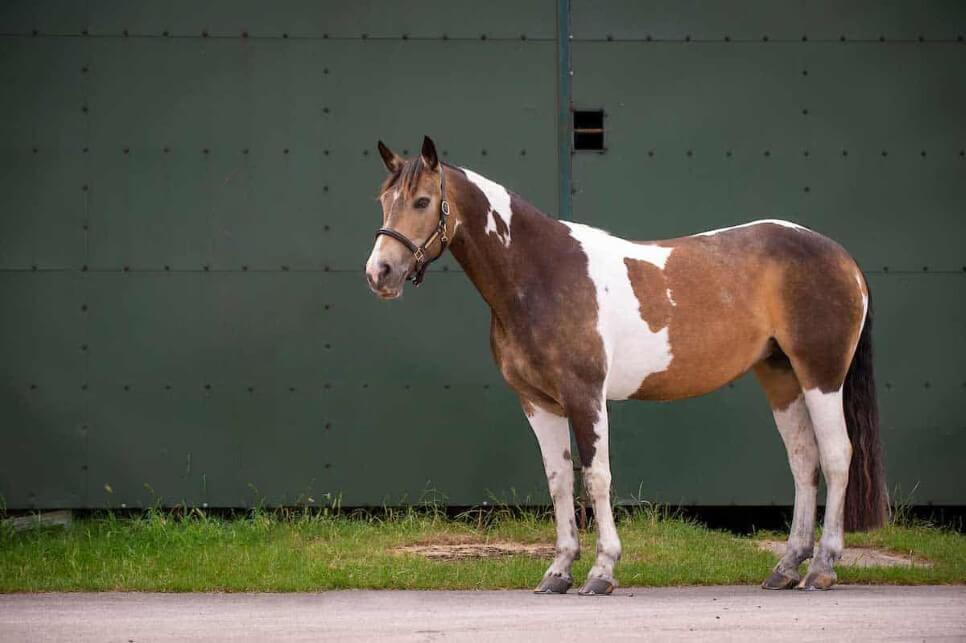
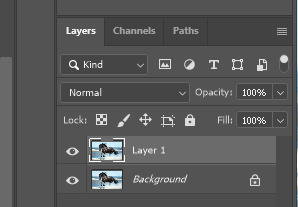
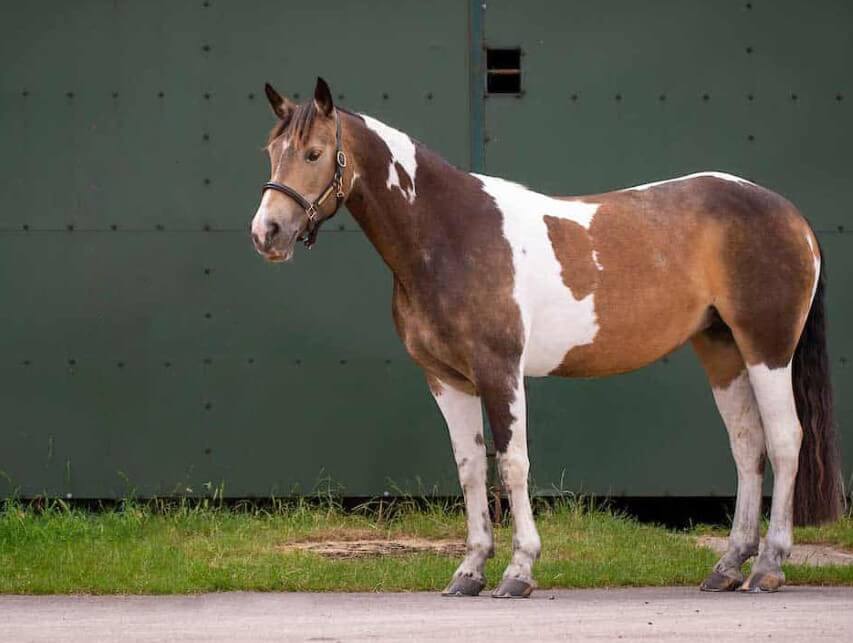
I don’t know if you noticed, but the eye of this horse looks odd, almost as if someone edited this photo before.
Method 5: Using Another Image to Cover it Up
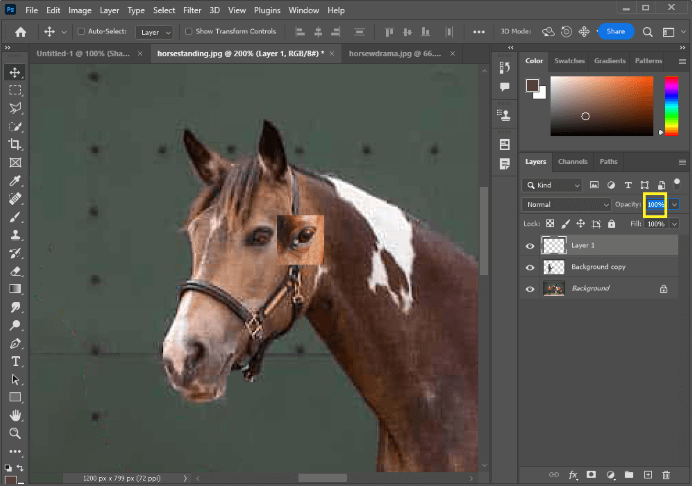
Let’s give this horse a new eye, just because we can.
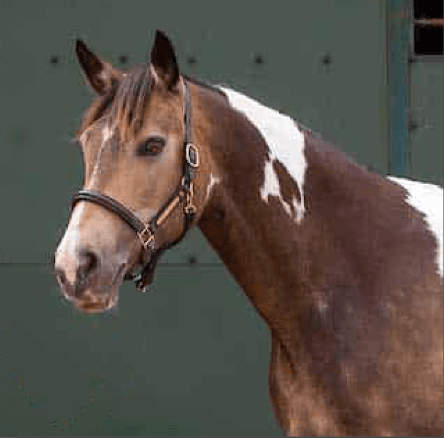
Step 1: Find a different photo that seems similar enough to the one you’re working with. I’m going to use this horse’s eye.
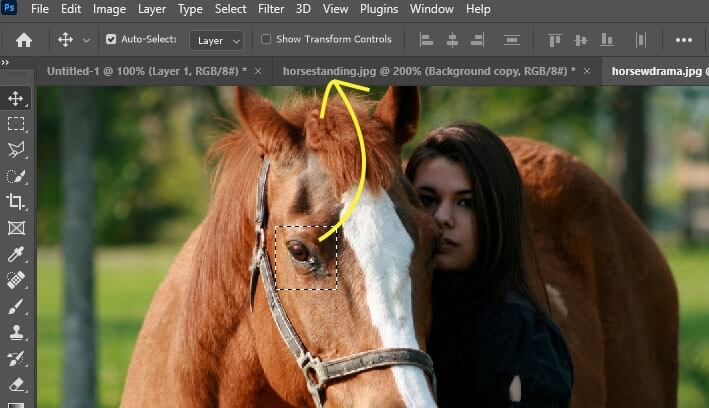
Step 2: Select your selection (I used the Rectangular Marquee) and use the Move tool to click and drag it into the other file in Photoshop. Once in the other file, don’t let go of the mouse clicker, continue to drag it into the center of the other file.
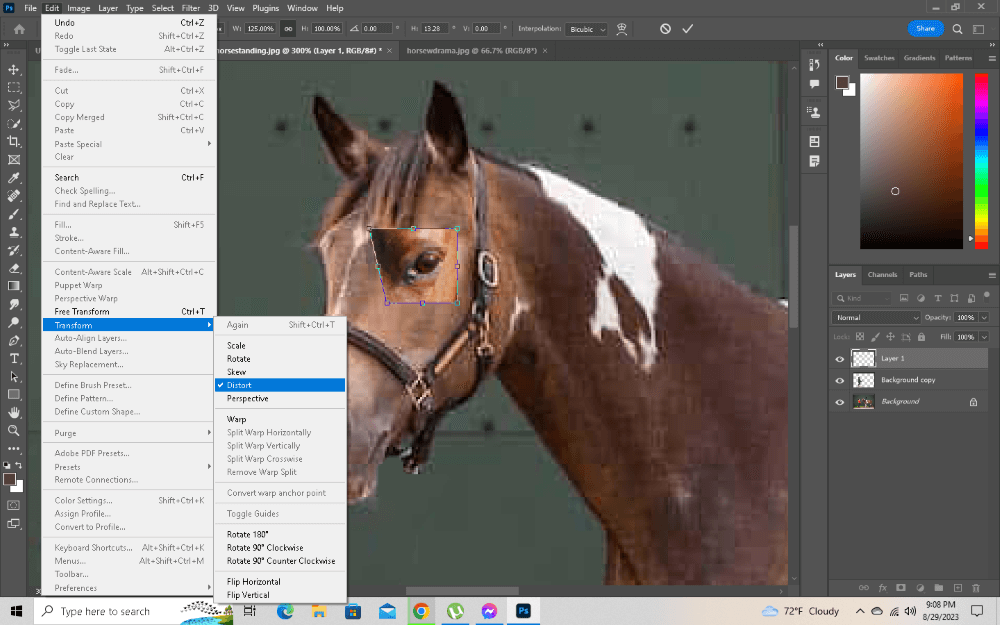
Step 3: Go to Edit > Transform > Flip Horizontally. Use the shortcut Ctrl + T to Free Transform this new image layer. Resize it or rotate it from the corners.
Here’s what we have now.
Step 4: Change the Opacity of this layer to 50% so you can see how well it is lining up with the original image.
Once you get it lined up nicely, restore the opacity.
Step 6: Go to Edit > Transform > Distort and move one of the corners to see the effect. I needed to make this eye a little wider, to match the original eye.
Step 7: Use the Eraser with a feathered edge to start blending this in.
Final Thoughts
Learning the ins and outs of Photoshop is key to building your graphic design skills. By taking the time to learn how to professionally remove objects and selections, we’ve become familiar with helpful and universal tools that will make your future projects come to life.
What did you find most helpful in this tutorial? Do you use Photoshop for work? If so, what is your most common task? Let me know in the comments below.