
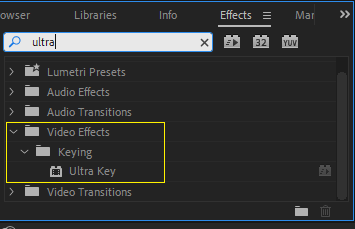
To remove a blue or green screen background in Adobe Premiere Pro, go to “Effects” and search for “Ultra Key“. Click and drag this effect onto your blue or green screen footage.
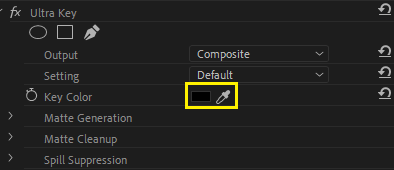
Then, navigate to the effect controls panel and, under the “Ultra Key” effect, select the eyedropper tool. Use this to choose your blue screen or green screen background color. Immediately after you select this, all the blue or green screen colors will disappear.
I’m David, a professional video editor who has been shooting and editing studio clips for the past ten years using Adobe Premiere Pro.
In this article, I will explain to you the steps to effectively remove a blue screen background, how to use the crop tool to remove some sections of background, how to add another background to a video, and how to use opacity to remove a black and white background in Adobe Premiere Pro.
Table of Contents
- How to Remove a Blue or Green Screen Background in Premiere Pro
- Can I Remove Any Video Background in Premiere Pro?
- How to Use The Crop Tool to Remove Some Sections of Background in Premiere Pro
- How to Remove the White Background with Opacity Mode in Premiere Pro
- How to Add Another Background to a Video in Premiere Pro
- How to Remove the Black Background with Opacity Mode in Premiere Pro
- Conclusion
How to Remove a Blue or Green Screen Background in Premiere Pro
Import your footage into Adobe Premiere Pro or drag the footage onto the timeline.
Select the clip on the timeline and go to the Effects panel. Under “Video Effects,” select “Keying.” drag the Ultra Key effect to the clip.
In the effects controls, select the eyedropper next to the Screen Color parameter and click on your footage’s green or blue background.
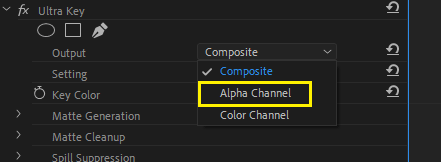
Change the output view to “Alpha,” which will help you see the details of your subject. You can also use the Setting option to control the effect’s aggression.
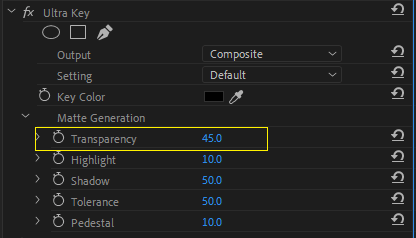
To clean the matte, use the “Matte Generation” drop-down menu and experiment with transparency, pedestal, and other options.
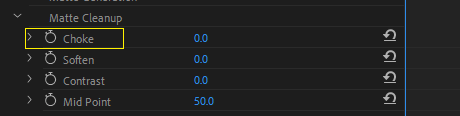
Using the “Matte Cleanup” option, you may smooth off the edges of your object. Choking will make the edges smaller, while softening them will make them fuzzier.
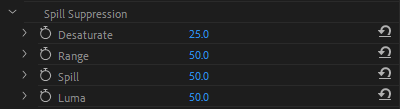
There will be some background color leakage on your subject from time to time. To resolve this issue, modify the “spill suppression” settings.
Can I Remove Any Video Background in Premiere Pro?
Yes, removing a video background in Adobe Premiere Pro is possible. You can do this by using the “Ultra Key” effect, a chroma key effect that makes it possible to remove backgrounds from a video. Or better still, you can crop the video background out.
How to Use The Crop Tool to Remove Some Sections of Background in Premiere Pro
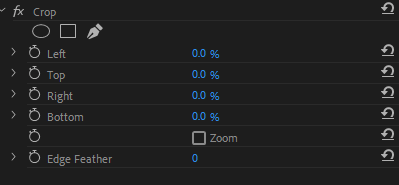
Go to the Effects tab and choose Video Effects > Transform > Crop. But it is simple when you use the search space in the effect panel.

Then apply the effect. If the clip you want to crop is selected in the timeline, double-click on the Crop effect to use it, or You may also drag and drop the crop effect onto the footage you want to alter.
Once the effect has been applied to the clip, the Crop function will appear in the clip’s Effects Controls panel. Crop the image from the bottom, top, left, and right.
How to Remove the White Background with Opacity Mode in Premiere Pro
This looks simple. So all you need to do is select the clip you want to edit.
Navigate to the Effects controls panel and look for the opacity setting. Go to the blending mode and change it from normal to darken, and that will remove the white background.
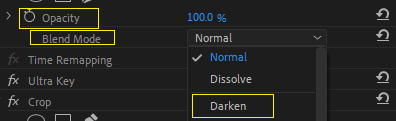
Adjust the opacity of your clip to make the background transparent.
How to Add Another Background to a Video in Premiere Pro
Open the Project panel in Adobe Premiere Pro. Import the background you want to add to your video. Drag the background video into the timeline below the main video.
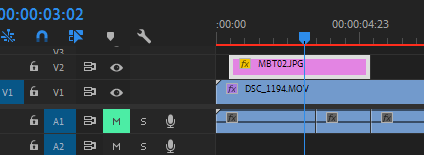
Resize the background video to fit the frame of your main video. Adjust the opacity of the background video to make it more or less visible. Add any effects, transitions, or other adjustments to the background video to complete your desired look.
How to Remove the Black Background with Opacity Mode in Premiere Pro
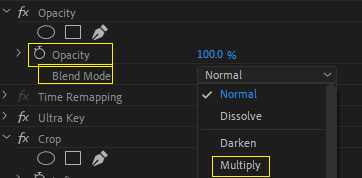
Select the clip you want to edit. Navigate to the Effects controls panel and look for the opacity setting.
Go to the blending mode and change it from normal to multiply, and this will remove the white background. Adjust the opacity of your clip to make the background transparent.
Conclusion
Removing a video background in Adobe Premiere Pro can be a rewarding and creative experience. You can take your video projects to the next level with a few simple steps.
You can quickly isolate and remove unwanted backgrounds from your videos by utilizing built-in tools like the Chroma Key, the Ultra Key, and the Lumetri Color Panel. With practice, you can learn how to create professional-looking chroma keys for your projects.
I hope this guide has helped show you how to use and master the green screen in Adobe Premiere Pro. If you need any additional help, don’t hesitate to contact me by dropping your question in the comment box.