
Large, oversized PDF files can take up unnecessary space, especially if you have a lot of them. Many compression tools are known to reduce the quality of your PDF if you’re not careful. So, how can you reduce PDF file size on Mac without losing quality?
As an Apple computer tech, I’ve been asked this question many times. Fortunately, there are plenty of ways to compress a PDF and reduce its file size. Some are easier than others, and some require payment, but all of them accomplish roughly the same thing.
In this post, I’ll explain how to reduce PDF file size on Mac without losing quality.
Let’s get to it.
Table of Contents
Key Takeaways
- PDF files can become large and difficult to manage, making it necessary to reduce their file size.
- Luckily, there are multiple options available to reduce PDF file size on a Mac.
- The easiest solution is to use Preview, the default PDF viewer on Mac.
- Another method is using the ColorSync Utility to open the PDF, go to File > Export, select Reduce File Size under Quartz Filter, and save the compressed file.
- You can also utilize Adobe’s free online compression tool by visiting their website, uploading the PDF, and downloading the compressed version.
- Another good option is to use Nitro PDF, a paid application offering advanced compression options.
Why Reduce PDF File Size on Mac
PDF files can get quite large and unwieldy, especially if you’re working with a complex file with images and many pages. Many email applications have a limit on the maximum size of files that can be sent. Additionally, freeing up storage space on your Mac is always a great benefit.
While there are plenty of free online tools available that will claim to reduce PDF file size without losing quality, we’re going to stick to the tried and tested options.
Let’s start with the easiest solutions first.
Option #1: Using Preview
Preview is likely your default application for PDF viewing on your Mac (provided you haven’t downloaded or set another option), so to open Preview, simply double-click on your PDF.
Or, in case Preview is not your default application, Open Launchpad and Search Preview. Open the PDF that you would like to reduce the file size.
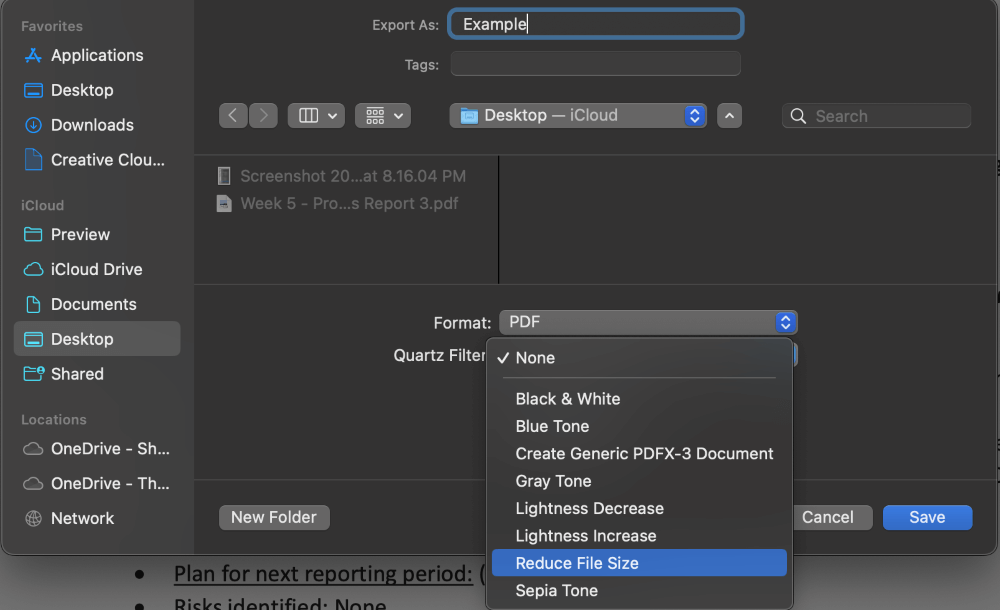
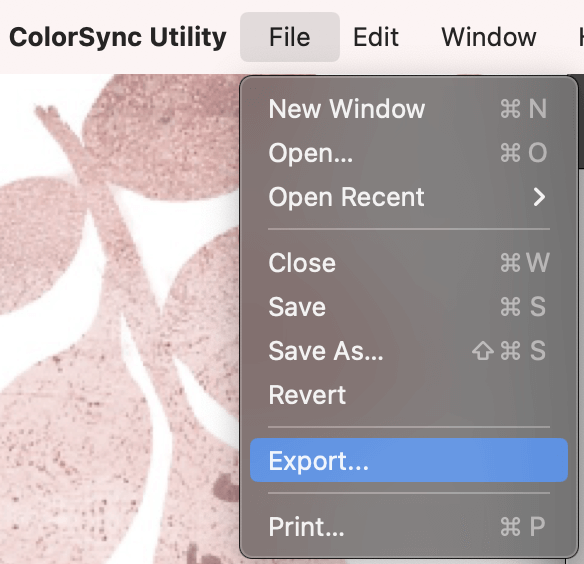
With the PDF open, click File from the top, and hit Export from the drop-down selection.
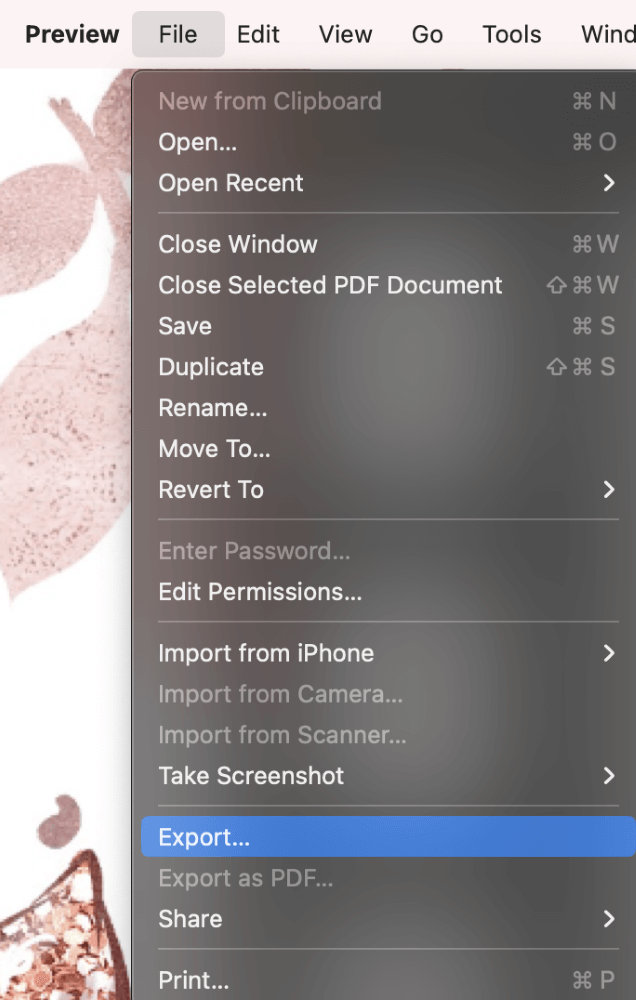
If desired, you can change the name of your file.
Under Quartz Filter, click Reduce File Size.
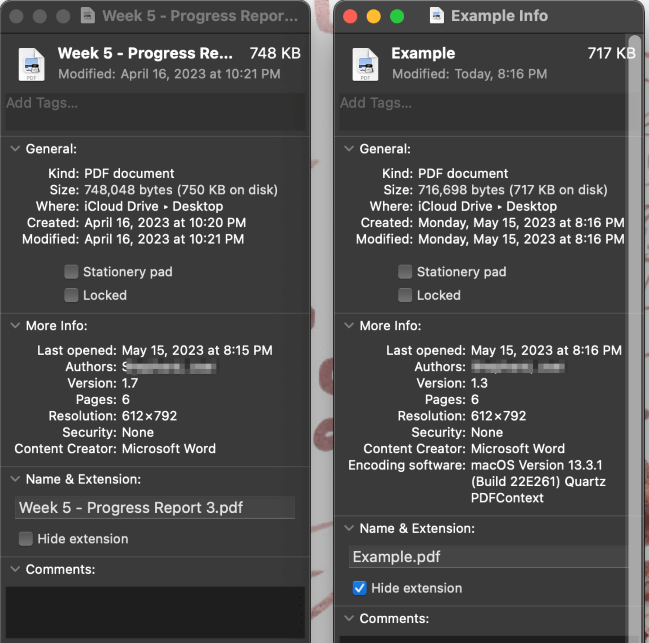
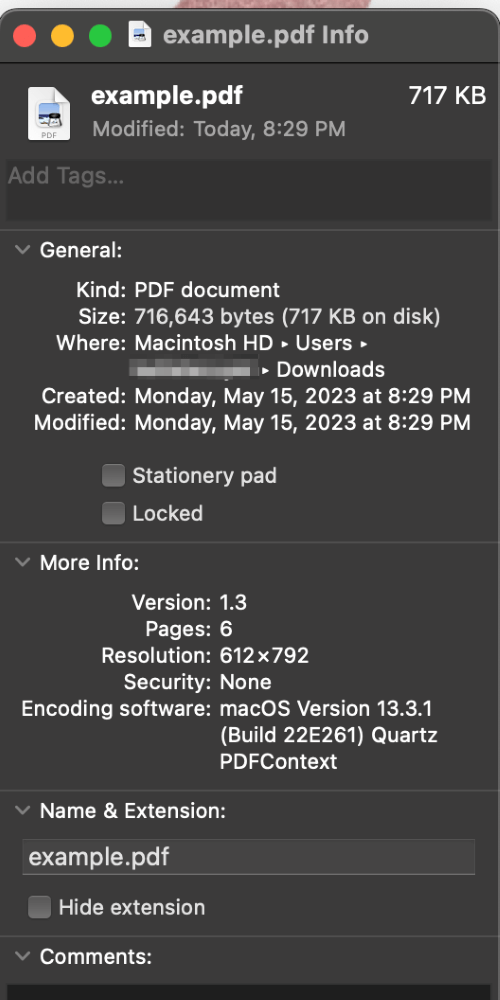
As you can see through the information below, (With Week 5 – Progress Report and Example being the exported version), you can see the exported version of the file is approximately notably smaller than the original.
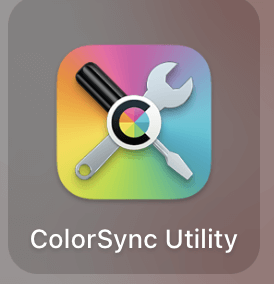
Option #2: Using ColorSync Utility
ColorSync Utility, similar to Preview, is capable of viewing and utilizing a quartz filter on the PDF file.
Open ColorSync Utility by searching in Launchpad.
Open your document by clicking File, and selecting Open from the drop-down menu.
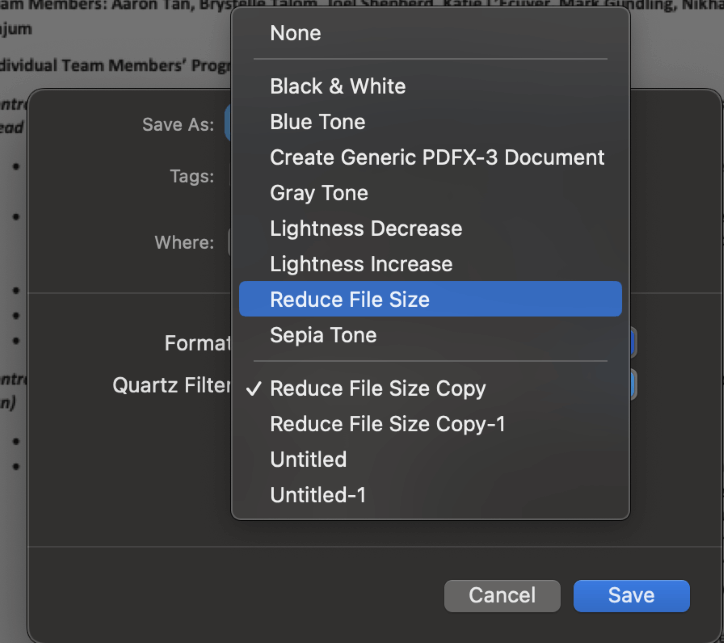
With your document open, click File again, and select Export.
Fill in the appropriate information and choose “Reduce File Size” under Quartz Filter.
Again, by viewing the document information, we can see that the file size was reduced slightly.
Option #3: Using Adobe PDF Online Tool
While you can use the paid version of Adobe Acrobat Pro, they also have a free online compression tool that works very well.
To use it, navigate to their website on your web browser. Next, hit the Select a file button and locate the PDF you would like to compress.
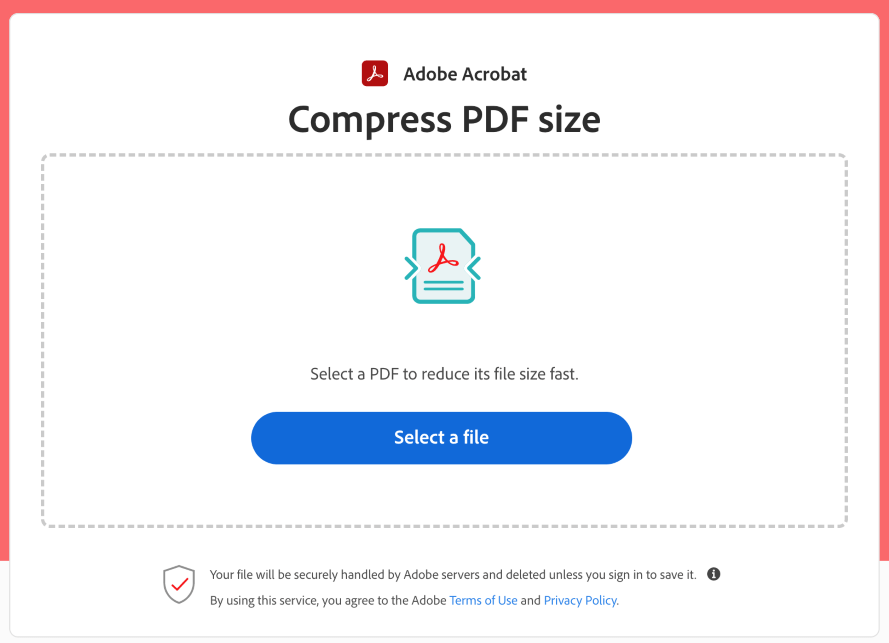
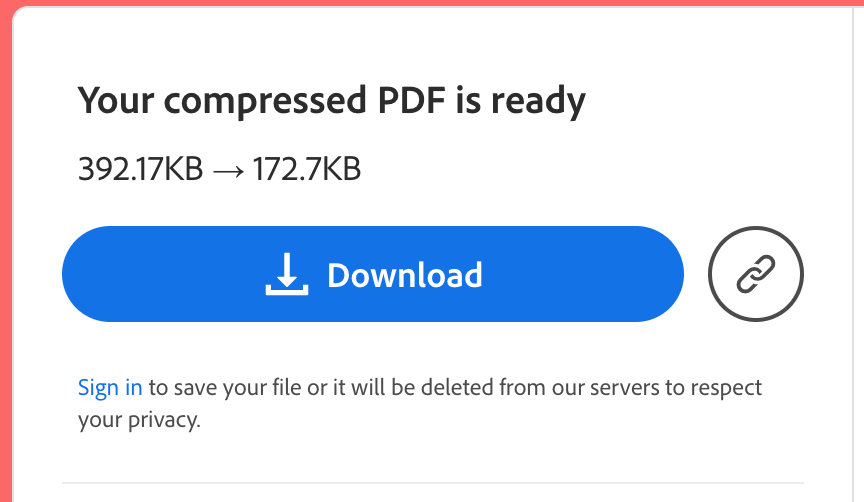
Adobe will take a moment to compress the PDF for you. Once it’s done, you can see how much the file size has been reduced and download it to your computer.
Option #4: Use Nitro PDF
Another great option to reduce PDF file size on Mac is to use Nitro PDF. While not a free program, this utility offers far more advanced options than any of the other applications on our list.
To get started, download and install the application. On the first launch, you’ll be greeted with the following screen.

You can select Open File and locate your PDF that way. Alternatively, you can select File from the toolbar and Open from the drop-down menu.
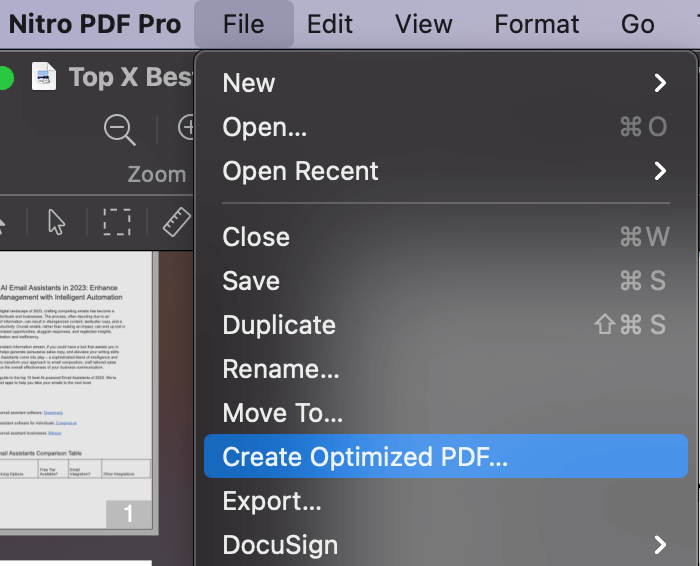
Once you locate your PDF and open it, you’ll need to select Create Optimized PDF from the File drop-down.
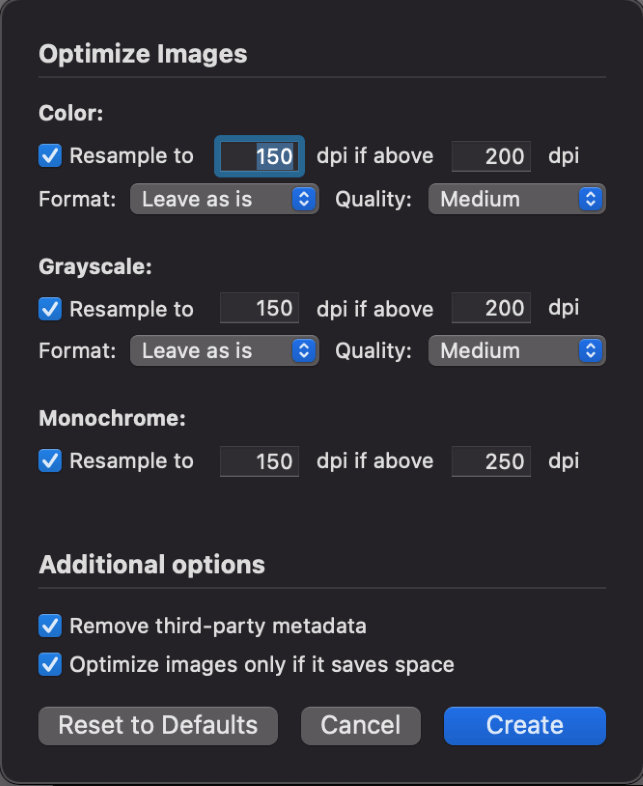
You’ll be presented with another window of options. Leaving these on their default setting will give you a reasonable level of compression.
You can also tweak them to your preferences. But keep in mind that setting the compression level too high might result in lower quality.
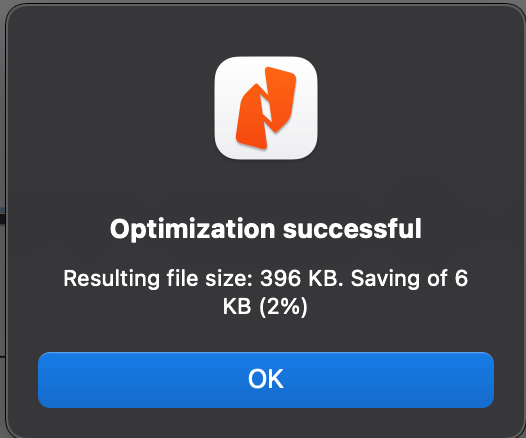
Click Create when you are ready. Nitro PDF will reduce the file size of your PDF for you in just a few seconds.
Final Thoughts
This article provided you with a few options that are already pre-installed on your Mac to reduce the file size of your PDF without losing quality.
Preview is likely the default PDF viewer on your Mac, provided you did not install a new viewer and/or change the default. ColorSync Utility is more of a tool for color management between your devices.
However, it can also be used to reduce the file size of a PDF. Both ColorSync Utility and Preview use what Apple calls Quartz Filters to alter the graphics. This is what allows you to reduce the file size and keep the quality of the image of your PDF.
Other compression methods, like using Adobe’s online compression tool, might lead to a slight loss in quality. Additionally, some applications, such as Nitro PDF, require payment.
Which option do you prefer? Did any of these options work for you? Let us know in the comments below!