
Many users have reported excessive SSD wear for M1 Macs. While this sounds alarming, there are a few tips to make the problem disappear.
My name is Tyler, and I am a Mac technician with over ten years of experience. In this post, I’ll explain what causes excessive SSD wear on M1 Macs and explain why it is not a challenging issue to repair.
You’ll also learn what causes this problem and 5 different methods you can use to solve the root cause, as well as tips to continue optimizing your SSD health.
Table of Contents
Key Takeaways
- M1 users reported excessive SSD wear when the first M1 Macs were launched. While the issue has since been fixed, it can still cause problems for some users.
- Update your operating system to macOS 11.4 or later to download the patch and fix the root cause of the issue.
- To ensure your SSD is still healthy, Check your SSD health through Disk Utility.
- Backup files online or on an external hard drive to clear up space on your Mac and prevent excessive SSD wear.
- Disable TRIM via Terminal to save your SSD from unnecessary write cycles and help it last longer.
- Keep your Mac optimized and free from junk by emptying the trash, clearing cache and unused apps, and running maintenance scripts. You can also use a third-party app like CleanMyMac X to help speed up the process.
What Causes Excessive SSD Wear on M1 Macs?
The SSD in your M1 Mac works on a cycle of writing and erasing data. Unlike a conventional hard drive, SSDs have no moving parts. Instead, they write data to a grid of cells and rewrite new data over old cells.
While this results in a faster and more efficient storage device, each cycle wears down your Mac’s SSD. Every SSD has a finite amount of times you can write and erase data. So minimizing excessive SSD wear is paramount to making your computer last longer.
With the release of Apple’s new M1 Macs, some users noticed excessive SSD wear–even more so than similar Intel models. Developers quickly discovered that the issue was software-related. As a result, Apple released a fix via macOS 11.4.
Method 1: Update Your Mac
If you’re using an M1 Mac with an older version of the operating system, you will have to update your software to apply the fix. Fortunately, this is a very simple process.
To update your Mac, select System Preferences from the Apple icon dropdown in the upper left of the screen. Click on the software update icon in the Preferences pane and look for any updates.

Method 2: Check Your SSD Health
You should monitor your Mac’s SSD health to ensure that your files and documents are safe. Luckily, macOS provides a built-in utility for checking the S.M.A.R.T. status of your SSD. To check your SSD health, take the following steps:
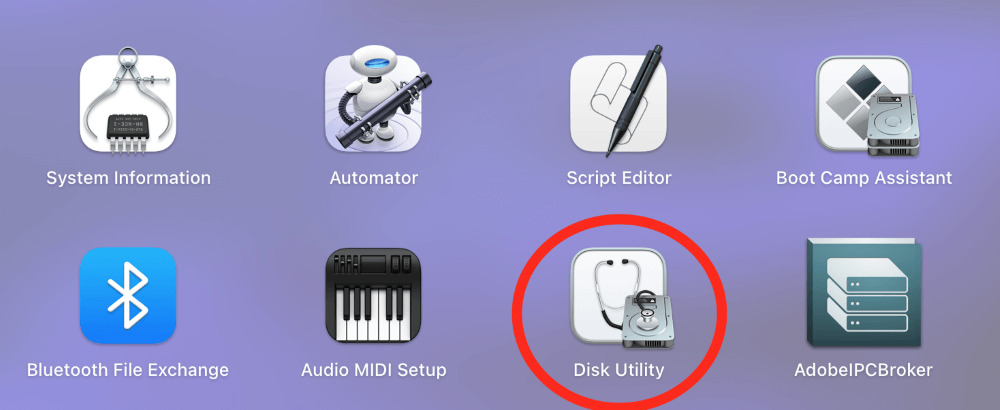
Step 1: Open the Disk Utility via the Launchpad or your Applications folder.
Step 2: Click on your SSD from the options in the left sidebar.
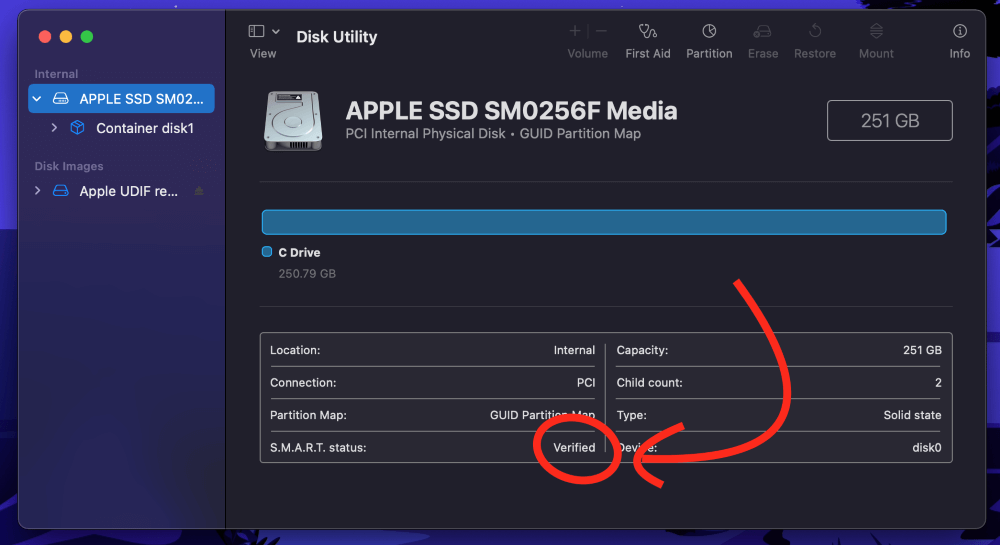
Step 3: Look for the S.M.A.R.T status in the pane that appears. If it says verified, your SSD is healthy. If it says failing, your SSD does not have much time left, and you should back up any important files.
Method 3: Backup Your Files Online or With an External Hard Drive
Backing up files is a relatively straightforward process, and clearing files off your SSD will help you save space and prevent excessive SSD wear.
While you can opt for multiple methods of backing up files, you should ideally have a local backup on an external hard drive and a cloud backup via a service like Google Drive.
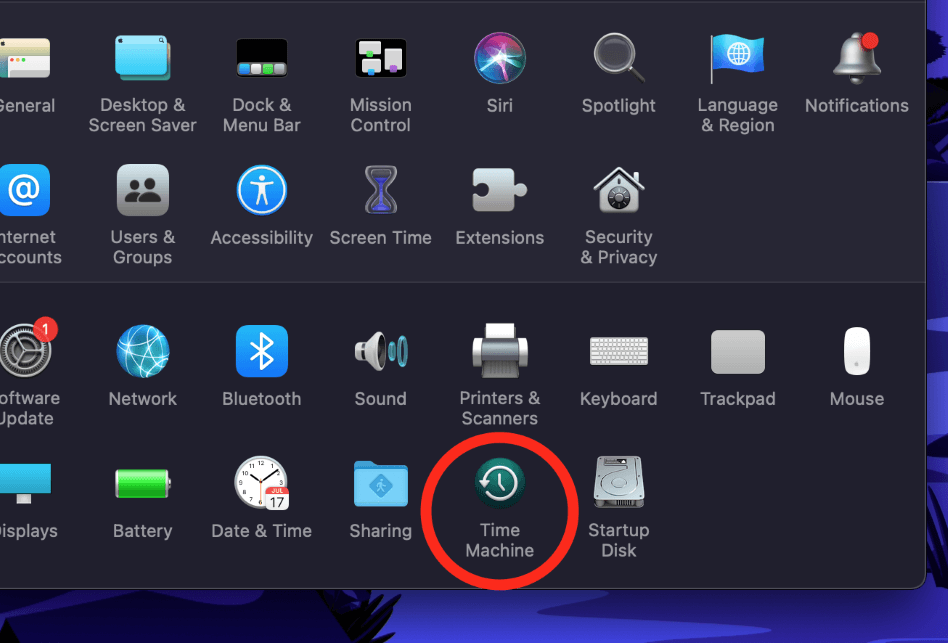
Using Time Machine to back up your Mac is preferred for most users if you have an external hard drive. To get started with Time Machine, plug in your external drive. Next, open System Preferences and select the Time Machine icon.
Finally, you can configure your backups to run hourly, daily, or weekly. Your Mac will back up your files as long as your external drive is connected.
Method 4: Disable Trim Via Terminal
TRIM is a feature built into macOS that automates the erasing process on M1 Mac SSDs. TRIM works by telling your Mac which data blocks it can erase as they are no longer needed, resulting in a performance boost.
However, this also increases the write cycles performed by your drive. If you are less concerned about SSD wear and want to maximize performance, you should keep TRIM enabled. Otherwise, disabling TRIM is one way to prevent excessive SSD wear.
The only way to disable TRIM is via Terminal. To get started, open Terminal from your Dock or Applications folder.
Once Terminal is open, enter the following command and hit Enter:
sudo trimforce disable 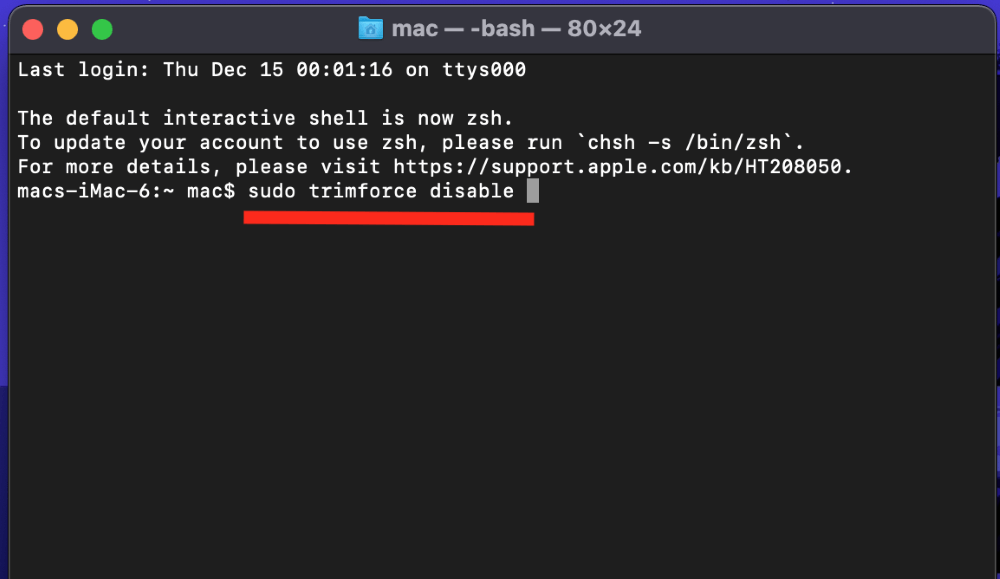
The Terminal will ask for you to enter your administrator password. Once you enter your password, TRIM will disable. If you want to enable it again in the future, you will have to enter the following command:
sudo trimforce enable Remember that keeping TRIM disabled will help prevent excessive SSD wear, but it might come with a decrease in performance.
Method 5: Keep Your Mac Optimized and Free of Junk
Another way to prevent excessive SSD wear on M1 Mac is to keep your system optimized and free of junk. You can do this by taking the following steps regularly:
- Empty your Trash bin.
- Remove unused applications.
- Clear cache and temporary files.
- Run maintenance scripts.
While emptying the Trash and clearing cache files can be done via Finder, running maintenance scripts requires you to use the Terminal. Maintenance scripts clean up minor software bugs present on your Mac and can help prevent excessive SSD wear.
To run maintenance scripts, Open Terminal as we discussed earlier, and enter the following command:
Sudo periodic daily weekly monthlyAdditionally, you can keep your Mac optimized with a third-party app. While many Mac cleaner apps claim to improve your Mac’s performance, one highly promising one is CleanMyMac X. This app puts everything in one place so you can handle all optimization tasks at once.
To get started, download CleanMyMac and install the app. Upon opening the app, you’re presented with several options for cleaning up your Mac.
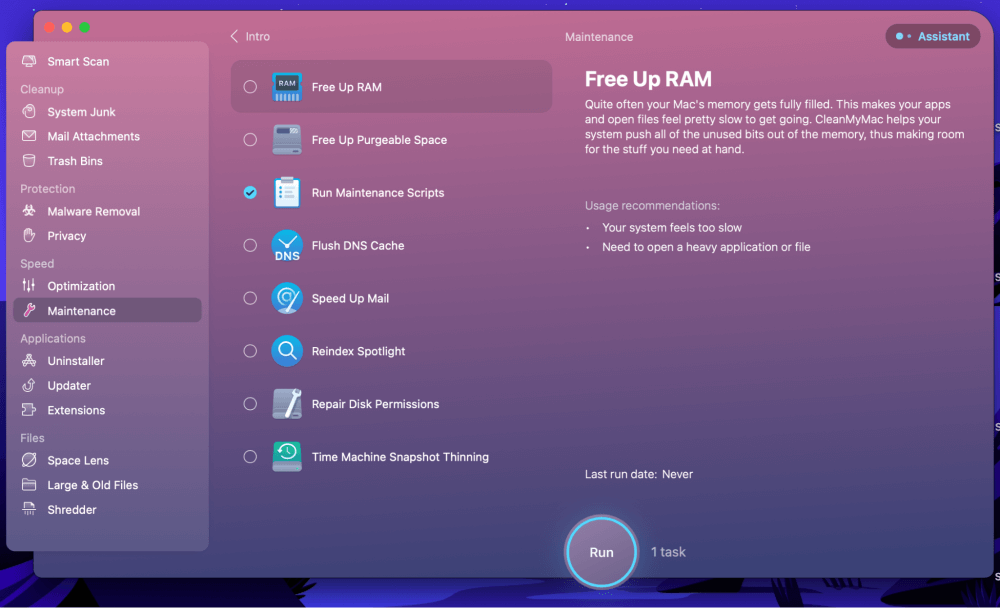
If you want to run maintenance scripts without using the Terminal, you can select Maintenance from the left sidebar, check Run Maintenance Scripts, and hit Run.
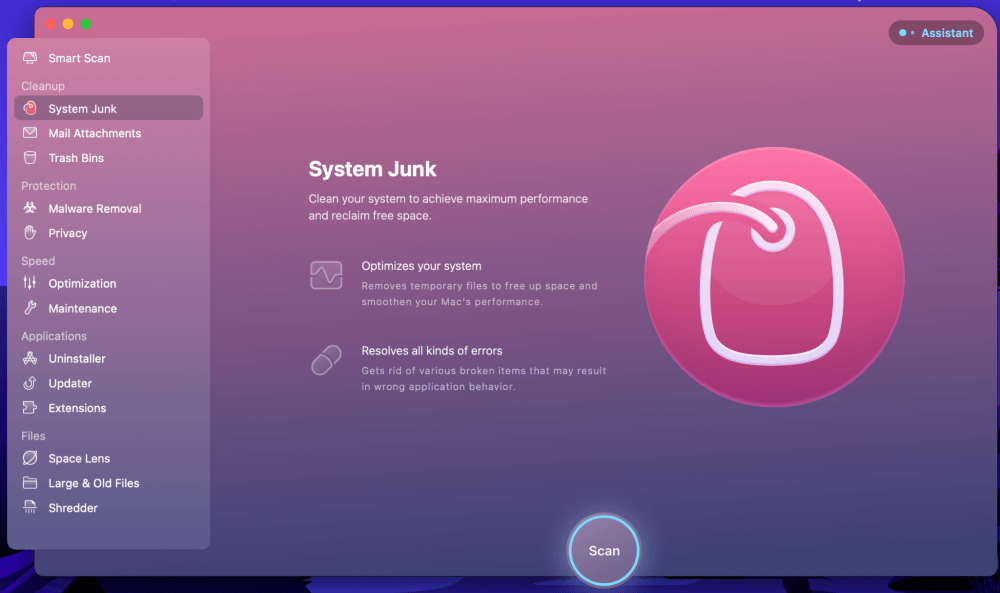
Additionally, if you want to use CleanMyMac X to remove system junk and unnecessary files, hit the System Junk tab on the left, and select Scan. CleanMyMac X will take care of the rest.
Note: CleanMyMac X is not freeware. While some features of the app are free, you can get more advanced features by upgrading to the full version.
Final Thoughts
If you don’t take precautions, excessive SSD wear can severely shorten your M1 Mac’s lifespan. Fortunately, Apple’s latest updates have fixed the root cause of the issue, so saving your Mac only requires you to update it to macOS 11.4 or later.
However, there are a few additional methods you should consider to prevent SSD wear on your M1 Mac. After all, your SSD will not last forever, so you should maintain a backup to prevent losing your files. Additionally, you can prevent further wear by disabling TRIM and keeping your Mac optimized and free of system junk.
Hopefully, some of these tips come in handy for you and help you get a longer lifespan out of your M1 Mac. Drop any comments below if you have any questions or need help!