
One of the most challenging things about learning a new software program is keeping track of all the new terminology, especially in a program as complex as Adobe InDesign. When you combine that with all the new typography terminology as well, there’s quite a lot to learn!
Table of Contents
So What is Overset Text in InDesign?
In a typical InDesign workflow, each piece of text in your document is placed within a text frame that acts as a container. These frames define the size and placement of the text within your InDesign layout.
It is possible to link multiple containers together so that long sections of text flow naturally from one text area to the next across multiple pages, even when editing or adding entirely new text. But when InDesign runs out of space to display the full text within visible text frames, the undisplayed text content is known as overset text.
How to Fix Overset Text in InDesign
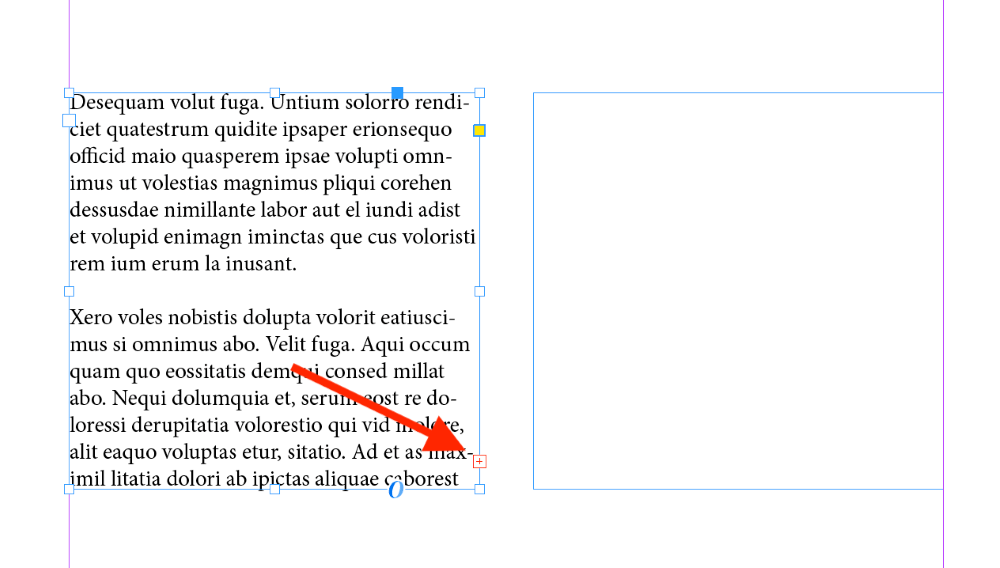
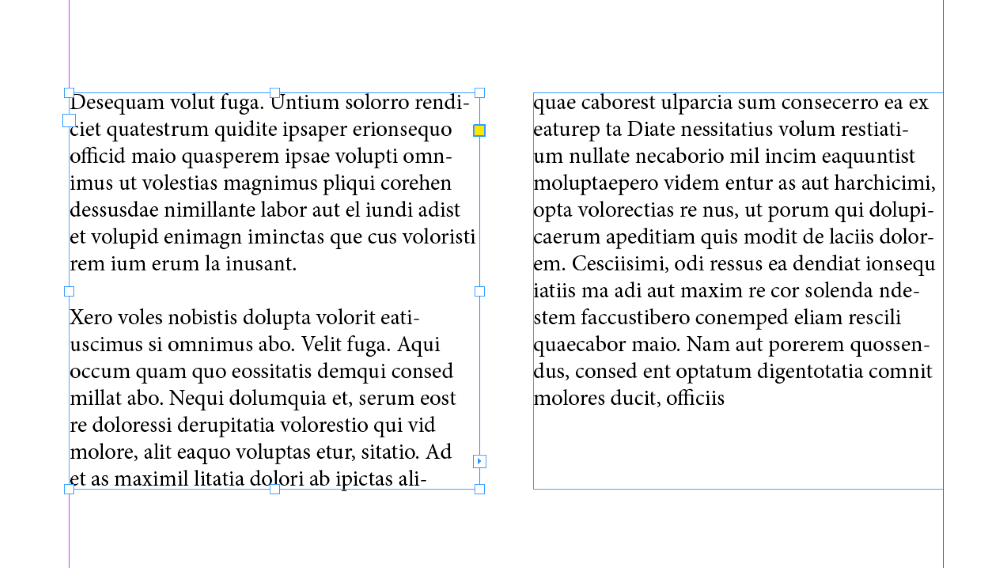
When you fill a text frame with so much text that it’s overset, you’ll notice that InDesign places a small red box near the bottom right of the text frame bounding box, as shown below.
It’s not the most attention-grabbing indicator I’ve ever seen in a user interface, but it’s displayed there because it’s also the button that is used to link text frames together (more on that in a minute).
Finding Your Overset Text Using InDesign Preflight
Overset text often goes unnoticed until it’s time to export your document and you suddenly get unexpected warnings about overset text.
But when you discover that your text is overset, the last thing you want to do is search through hundreds of pages, looking for that tiny red box at the end of a text frame.
Fortunately, there’s a much simpler method: the Preflight panel. Follow the steps below to find overset text in InDesign.
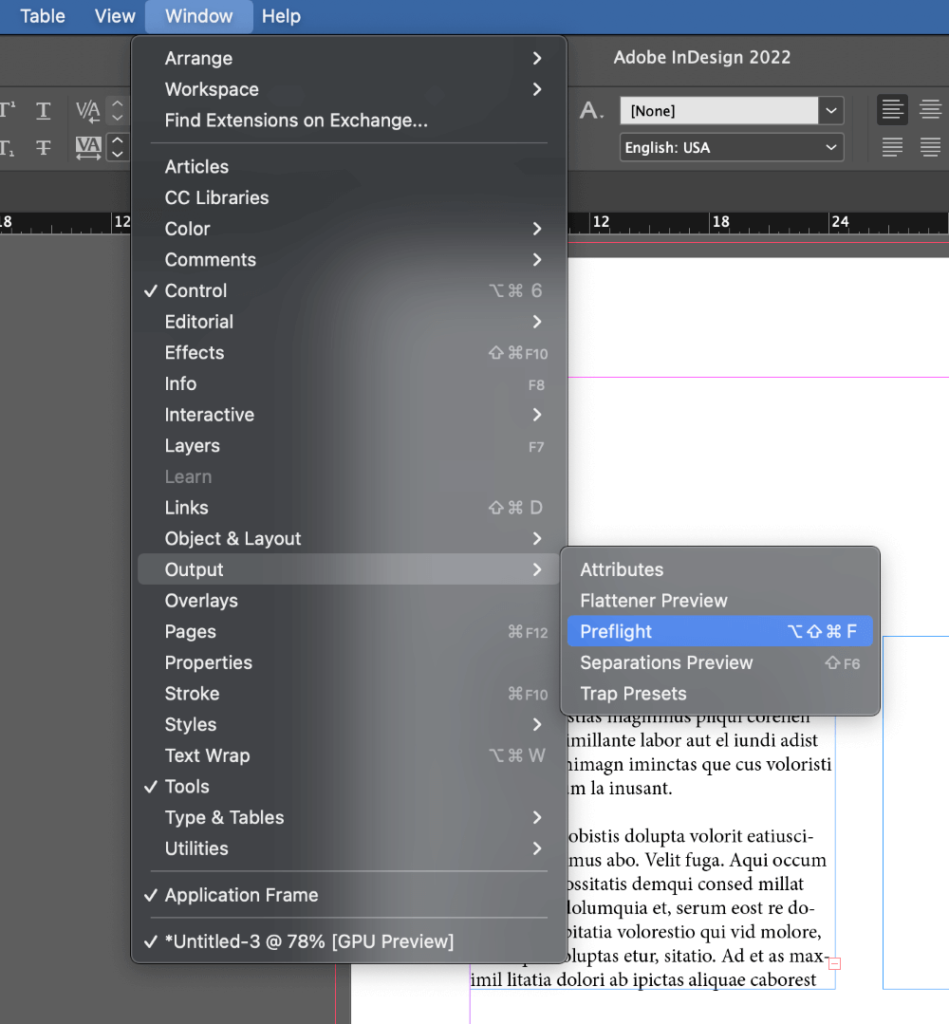
Step 1: Open the Window menu, select the Output submenu, and select Preflight. You can also use the finger-bending keyboard shortcut Command + Shift + Option + F (use Ctrl + Alt + Shift + F if you’re using InDesign on a PC).
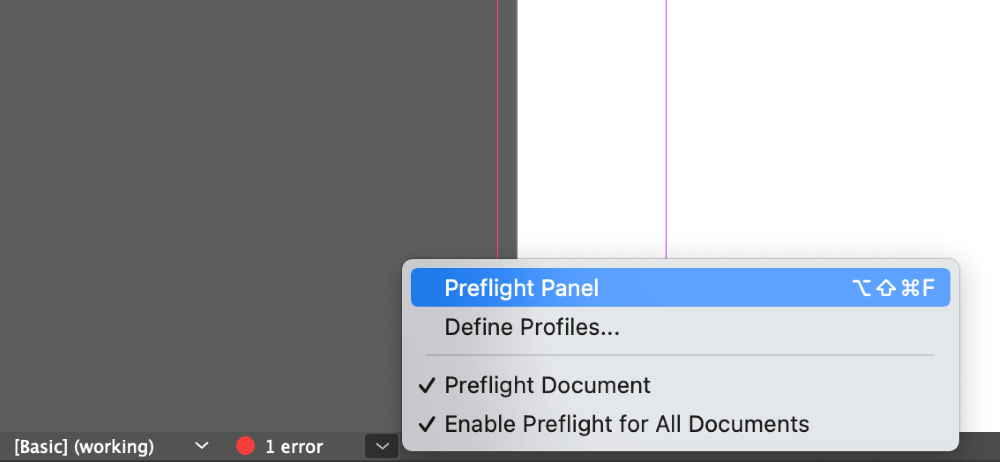
Depending on your workspace configuration, you can also see a preview of the Preflight data in the info bar at the bottom of the main document window. Double-click the error section to open the Preflight panel as fast as possible, or click the arrow to see a few Preflight options (shown above).
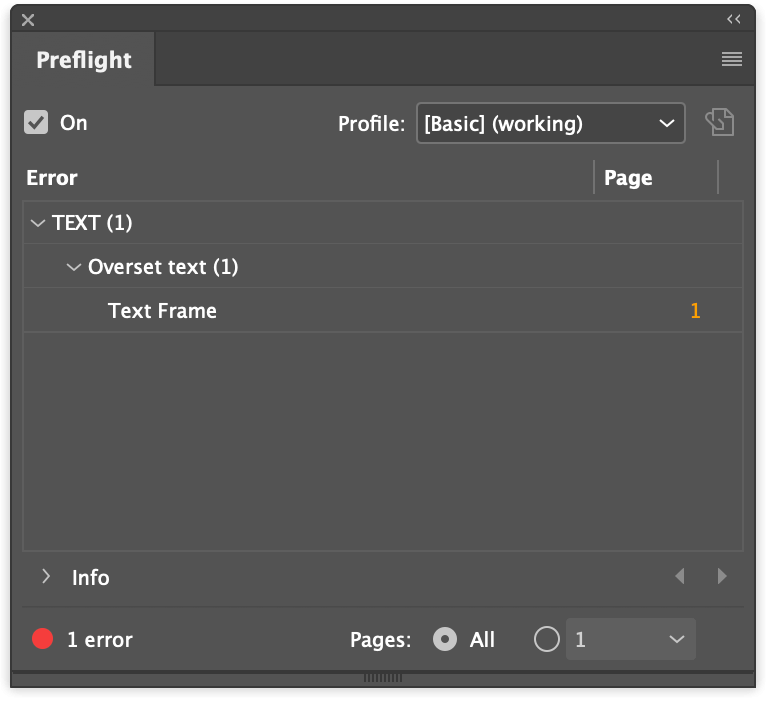
The Preflight panel displays all potential errors in your document, including overset text.
Step 2: Click the entry labeled Text in the Errors column to expand the section, then do the same to the entry labeled Overset Text.
Each text frame that contains overset text will be listed, as well as the relevant page number. The page numbers also act as a hyperlink to that page, allowing you to quickly jump to the location of the error.
Quick Fix: Delete All Overset Text in InDesign
If you’re absolutely sure that you don’t need any of the overset text, then you can simply get rid of it. Sometimes overset text can be quite long, but there’s a quick way to select it all and remove it.
Here’s how you can do it.
Step 1: Click on the text frame containing the overset text that you found using Preflight, and then place the text cursor at the very end of the text you want to save, including any final punctuation.
Step 2: Use the keyboard shortcut Command + Shift + End (use Ctrl + Shift + End if you’re on a PC) to select all the text that is located after your current cursor position. Remember that you won’t be able to see this happening because the overset text is hidden by default.
Step 3: Press the Delete key, and all the overset text should be gone, along with the tiny red overset text indicator.
Keep in mind that while this quick fix is simple and direct, it’s not always the best solution – especially if you want that overset text to appear on another page.
Linking New Text Frames
The more comprehensive method for fixing overset text is to add a second text frame and link the two together. The linking process is extremely simple and only requires two clicks.
Switch to the Text tool using the toolbox or the keyboard shortcut T, and then click and drag to define a new text frame. In the text frame containing the overset text, locate the text linking icon in the bounding box, as shown again below.
Click the small red + icon, and InDesign will ‘load’ your cursor with the overset text.
Unfortunately, I can’t take a screenshot of the cursor change, but it will be immediately obvious if it’s worked properly. Then simply click the second text frame you want to link with, and the text will flow naturally between the two text areas.
The overset text indicator will disappear, and the warning should disappear from the Preflight panel.
How to Use Smart Text Reflow to Prevent Overset Text
If you’re setting a lot of text that is still a work in progress, or you’re not quite sure exactly how you want to define your text frames over the course of a long document, you might find yourself constantly adding and removing pages and text frames at the end of your document as the text grows and shrinks.
Instead of doing this manually, it’s possible to configure InDesign to add new pages at the end of your document automatically using Smart Text Reflow, which effectively prevents overset text.
This works best if you’re using primary text frames that have been set up using parent pages (formerly known as master pages).
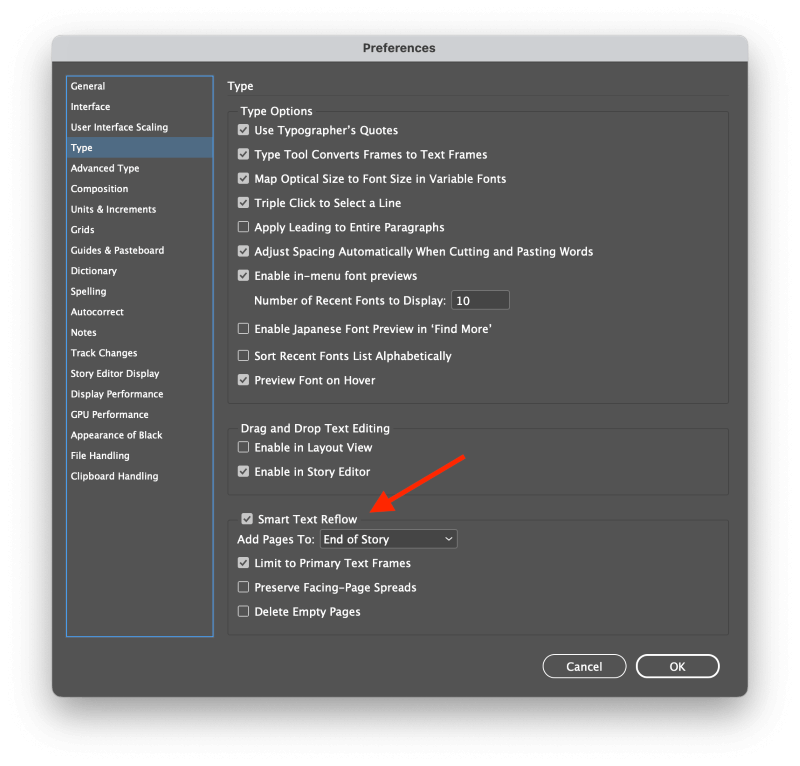
Open the InDesign Preferences, and select the Type section. Make sure that Smart Text Reflow is enabled.
If you’re not using parent pages to define a text frame for every page, you should disable the setting Limit to Primary Text Frames.
Optionally, you can also enable the Delete Empty Pages setting to ensure that you don’t wind up with a bunch of empty sheets at the end of your document.
Click OK, and InDesign should now be able to reflow text automatically to avoid overset text. It won’t prevent every instance of the overset text, but it can be a big help!
A Final Word
That covers the basics of overset text in InDesign and how you can fix it! Say goodbye to those unexpected warnings you get while making PDF exports, and you might even be able to keep the Preflight warning indicator in the green.
Happy typesetting!