
To move audio tracks in Audacity, use the track dropdown menu and select one of the four move options. To move audio clips in Audacity, click and drag the clip to the desired location using the clip-handle drag bar.
Hello, I’m Andrew, a long-time Audacity user. In this article, I’ll detail the various aspects of moving audio tracks, including adding new tracks, splitting audio, and moving multiple tracks. In the end, I’ll answer some frequently asked questions about clips and tracks in Audacity.
Shall we get started?
Table of Contents
How to Add an Audio Track in Audacity
Before diving too deep, we must highlight the differences between tracks and clips.
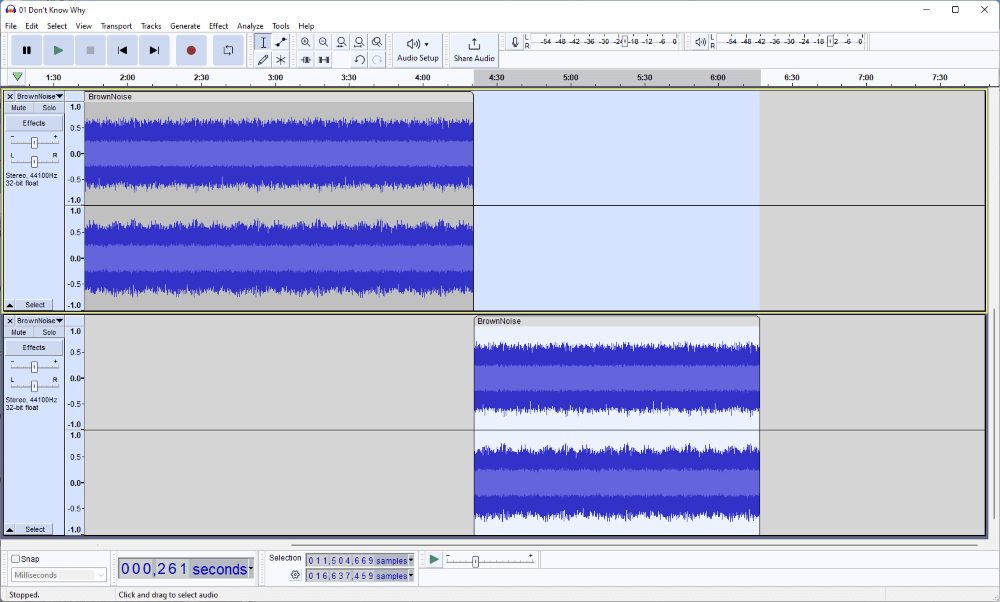
A track is an individual, independent unit of audio in Audacity. Multiple tracks can play in parallel to one another. Tracks can contain multiple clips and one or two channels (mono or stereo, respectively).
Audacity has no hard limit on the number of tracks you can have in a project. Still, your computer’s hardware will eventually prevent the software from running optimally as you increase the track count.
Clips are sections of audio that make up a track. When you import audio into Audacity, your audio file will come into the software as one clip. You can split a clip into multiple clips as needed and move clips independently of others.
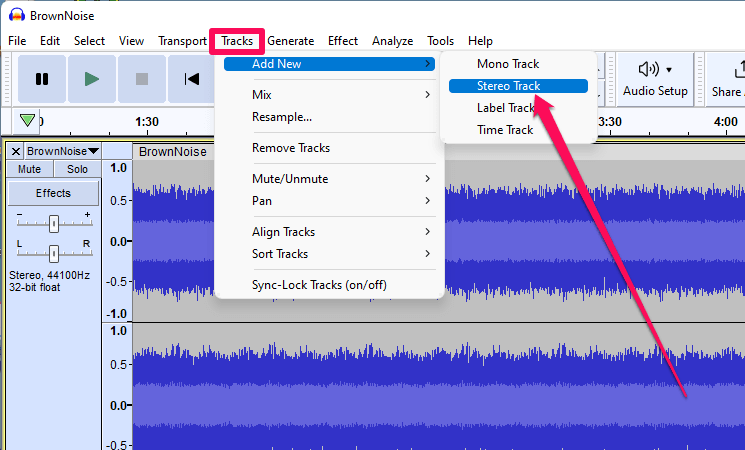
To add an audio track in Audacity, click Tracks > Add New, then select either Mono Track or Stereo Track depending on your preference.
Remember that you cannot move a stereo clip to a mono track.
How to Add Multiple Audio Tracks in Audacity
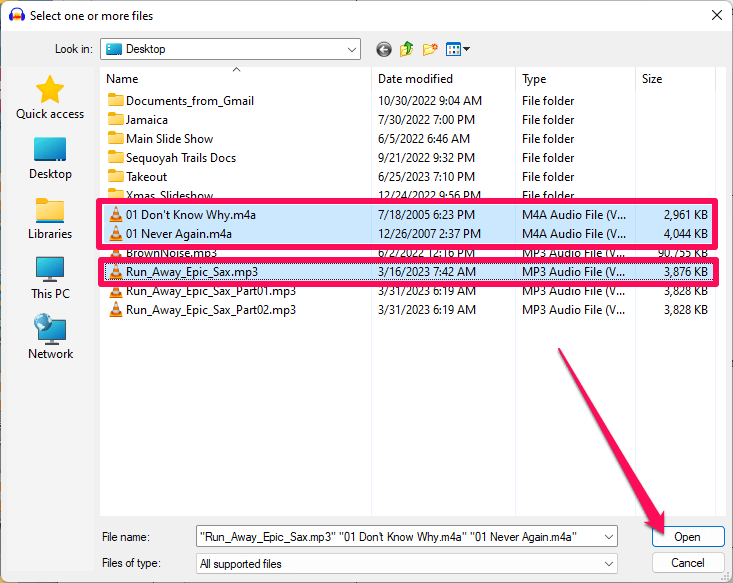
If you have more than one audio file you want to import to your Audacity project; you can add them all at the same time, provided the files are all in the same location.
- Go to File > Import > Audio… on the menu bar.
- Browse to the folder where your audio files reside.
- Click on the first file you want to import to select it.
- While holding down Ctrl (Windows) or Command (macOS), click on each additional file you wish to import.
- Click Open.
Audacity will import each selected file as a unique track in your project.
If you want to add multiple empty tracks, here’s what to do:
- Add a new track using the Tracks > Add New as described above.
- Click and drag your cursor on the new track’s timeline to select a portion.
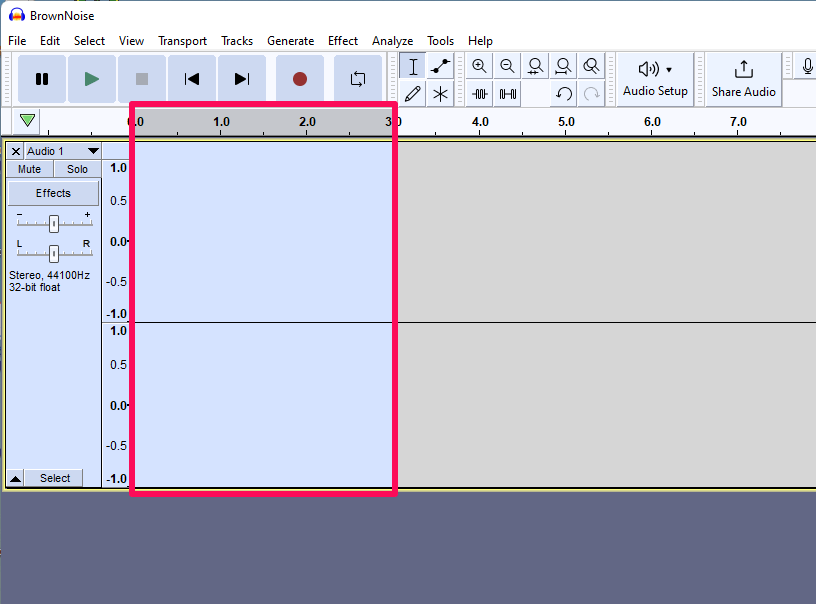
- Click Edit > Duplicate from the menu bar or press Ctrl+D (Windows) or Command+D (macOS).
You will now have two blank tracks.
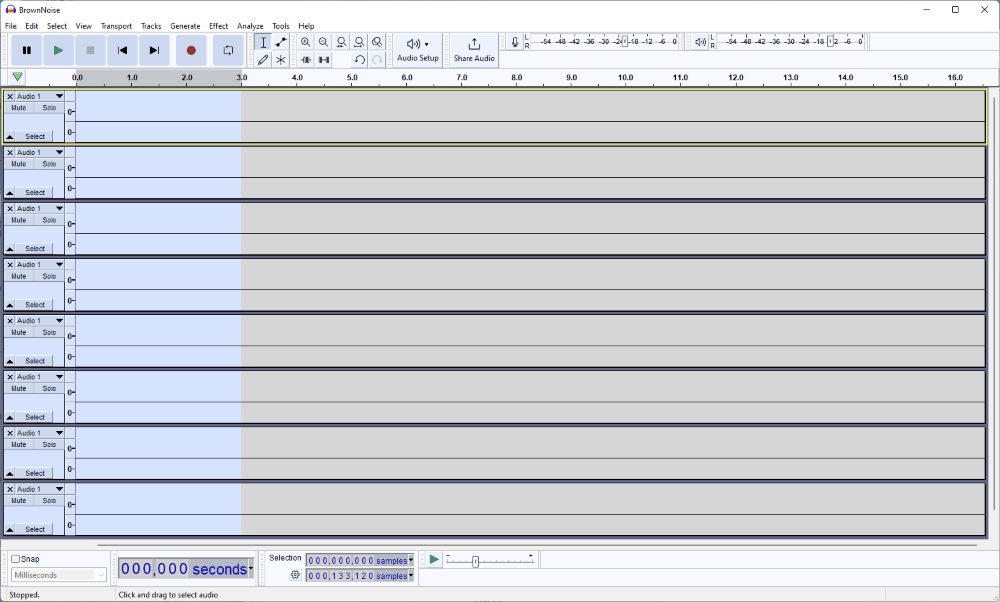
- Repeat step 3 as needed to achieve the number of empty tracks needed.
Duplicate will automatically select the originally selected tracks plus the newly created tracks, so repeating the action will have a multiplicative effect and quickly give you many blank tracks to work with.
How to Split Audio in Audacity
If you want to move just a portion of a track, you’ll have to split the audio into two clips:
- Click the track to place the cursor at the point where you want to split your audio.
- Click Edit > Audio Clips > Split.
See Also: How to Split Audio Tracks in Audacity.
Your track will now be split into two separate clips that you can move to new tracks.
How to Split and Move Tracks in Audacity
If you’re planning on moving the newly split clip to a new track, you can do so in one step using the Split New command:
- Select the portion of audio you wish to move.
- Click Edit > Audio Clips > Split New.
The selected audio will move to its own new track. The audio will move to the same relative location on the project’s timeline.
How to Cut and Move Audio in Audacity
To cut and move audio somewhere other than a new track, use the Split Cut option:
- Select the portion of audio you want to move.
- Click Edit > Remove Special > Split Cut.
- Click the location where you wish to paste the clip.
- Click Edit > Paste to add the clip to the specified location.
If you click in the middle of an existing track, Audacity will automatically split and expand the track to make room for the new clip.
How to Move a Track up and Down
To move an entire track up or down:
- Click the dropdown menu arrow to the right of the track name.
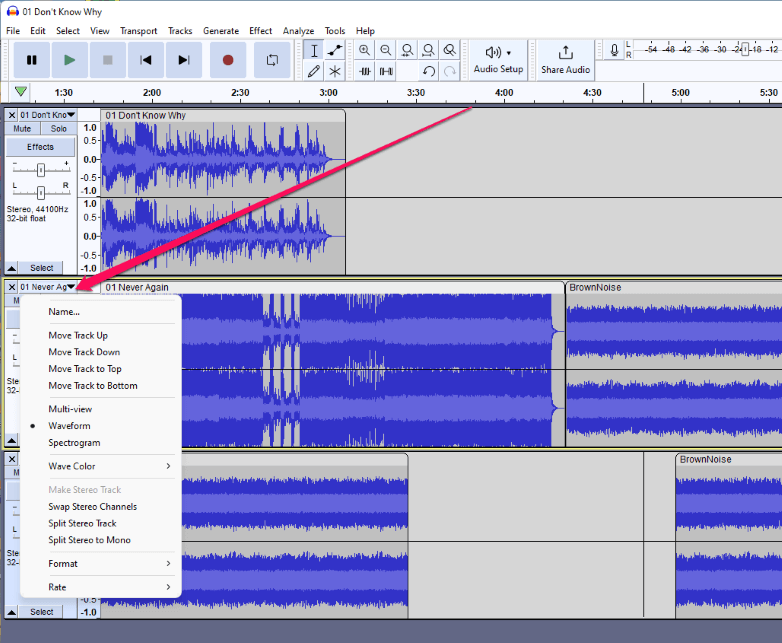
- Select one of the four options as desired:
- Move Track Up; moves the track up one level.
- Move Track Down; moves the track down one level.
- Move Track to Top; moves the track to the top of your project.
- Move Track to Bottom; moves the track to the bottom of your project.
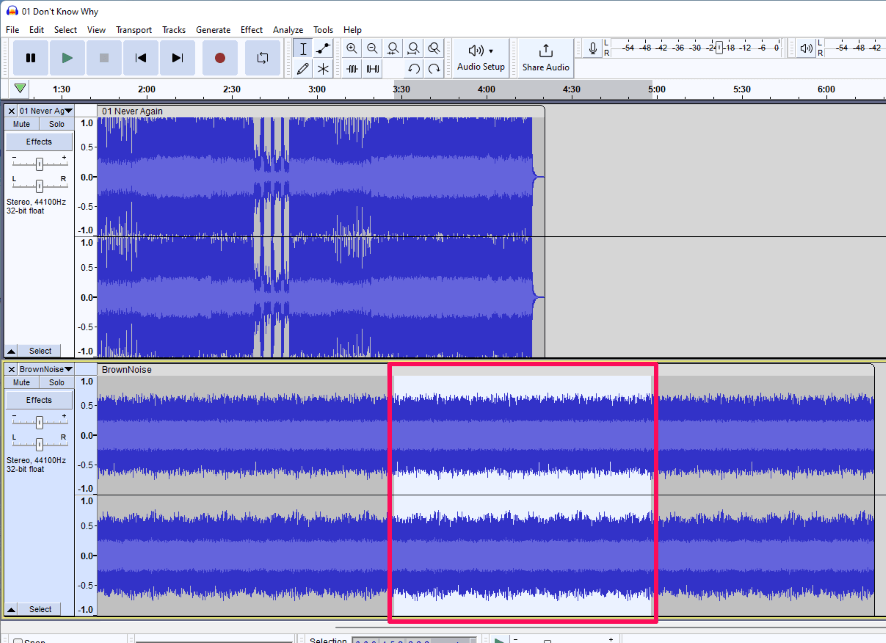
You can move clips to other tracks, but there must be space for the clip on the destination track.
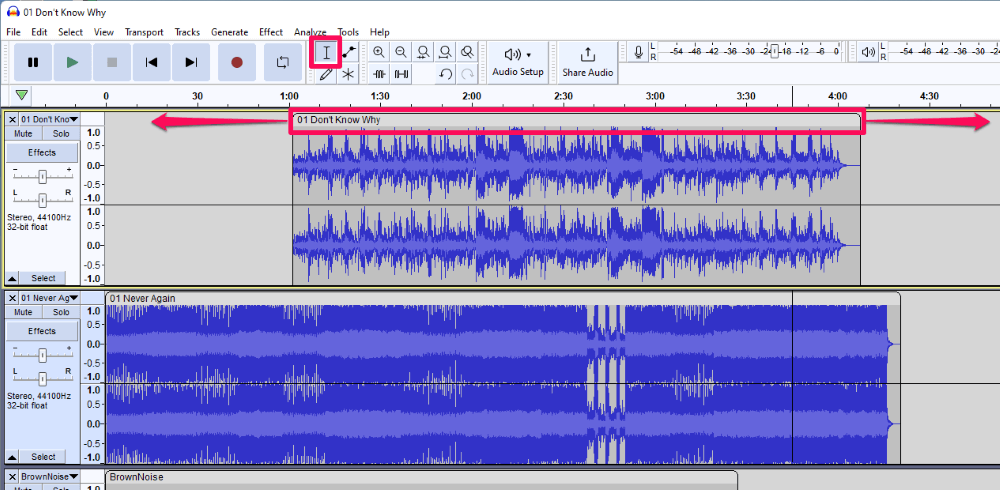
Simply position your cursor over the light gray clip title bar, known as the clip-handle drag bar. Your cursor should change from the capital i selection tool icon to a hand icon. Next, click and drag the clip up or down.
You can also cut and paste clips to new tracks.
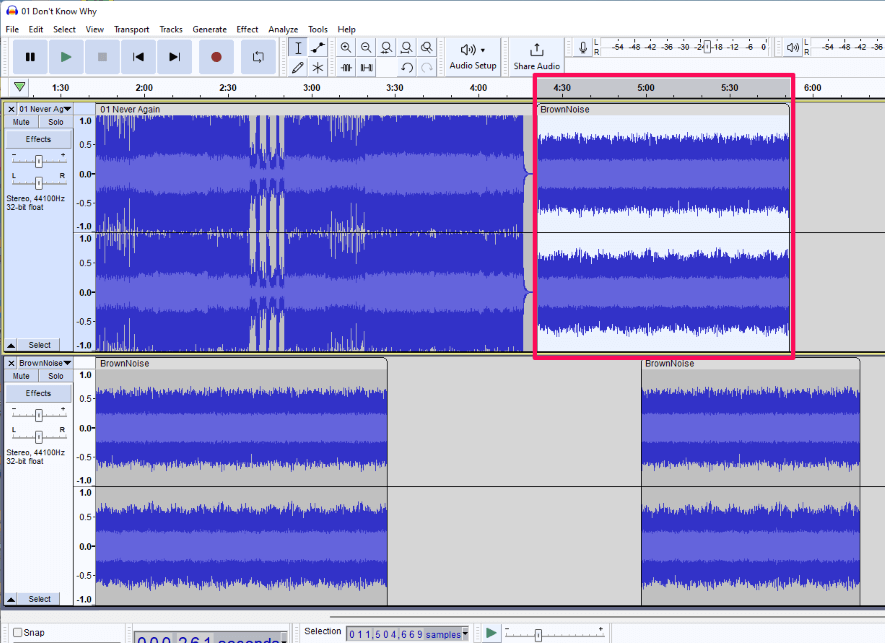
How to Move a Track Left or Right
Technically speaking, you cannot move tracks left or right on your Audacity’s project timeline. Instead, you move clips. But if your track only has one clip, the effect is the same.
Moving clips left or right is easy:
- Position your cursor on the clip-handle drag-bar.
- Click and drag the clip left or right.
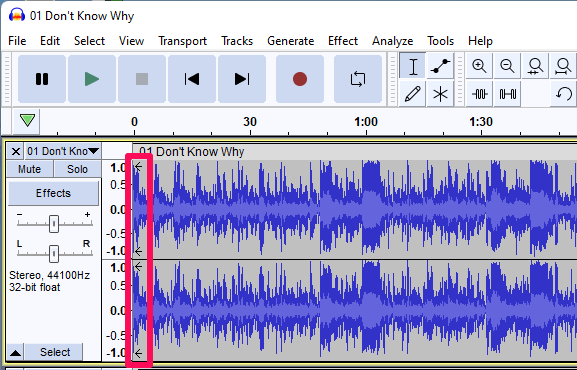
When moving clips to the left, you can slide audio before the start of the project. This area before zero is called negative space. Any portion of your clip in this space will not be audible. Audacity displays arrows at the start of the timeline on tracks containing audio in negative space.
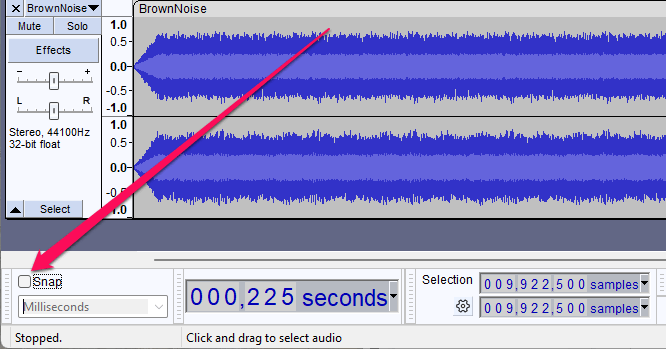
When Snap is enabled, Audacity will auto-position moved clips to the nearest unit of measurement specified. For example, snapping by Seconds will force clips to begin at the second closest to the one where you moved the clip.
Snap is off by default, but you can enable it by clicking the box next to Snap on the Snap toolbar.
How to Move Multiple Tracks in Audacity
To move multiple clips in Audacity, use the Select tool. If you want to move all clips on the same track, select one clip, then hold down the Shift key while clicking and dragging the clip-handle. As you drag, all clips on the track will move together.
If you want to move clips from multiple tracks at the same time, the clips and tracks must be adjacent to one another. With the Select tool, click and drag to select a rectangular area encompassing all of the clips and tracks you want to reposition.
Once selected, click and drag the clip-handle of one of the clips, and all selected clips will move.
How to move all tracks forward in Audacity
To move all tracks forward, click Select > All, then use the clip handle to drag all of your audio to the right.
FAQs
Here are some other questions about moving audio tracks in Audacity.
Why is the Audacity Time Shift tool missing?
Before version 3.1.0, you had to use Audacity’s Time Shift tool to move clips around in your project. Audacity 3.1.0 removed Time Shift and replaced it with the more intuitive clip-handles.
How do I organize audio in Audacity?
Audacity has several features to help you keep your audio organized. In addition to moving tracks and clips as described above, you can also rename them so you remember what each audio segment is for.
To rename tracks, click the dropdown arrow next to the track title and choose Name… Enter the new name for the track, then click OK. To rename individual clips, select the clip, right-click, and choose Rename Clip… Type the new name, then press the Enter key.
Another useful tool is the ability to use different waveform colors to help differentiate instruments or voices. To change the color of your waveform:
- Click the track’s dropdown arrow.
- Click Wave Color > and then choose one of the four Instrument options to select a color.
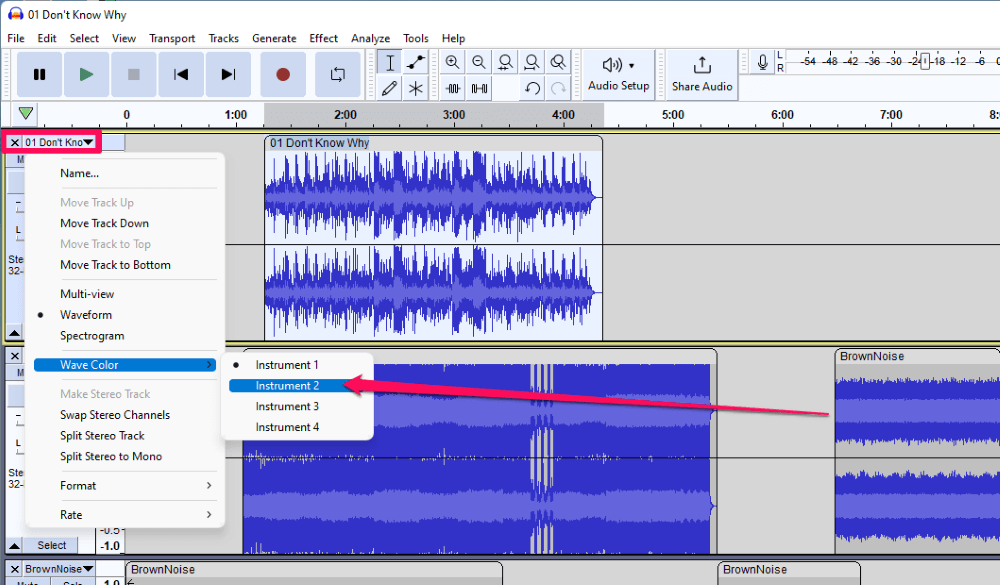
Audacity only provides four possible colors: blue, red, green, and black. Applying a color will change the entire track, but you can move clips to other tracks, and its color will remain.
How do you drag and move in Audacity?
To drag and move clips in Audacity, ensure the Select tool is active, then click and drag the clip by the clip-handle drag-bar. The clip-handle resides above each clip and contains the clip’s title.
Summary
To recap, Audacity removed the Time Shift tool starting with version 3.1.0 to make moving audio easier. To move audio tracks in Audacity, click the dropdown arrow next to the track’s title and click on one of the four move options.
To move clips in Audacity, click and drag the clip-handles above each clip and drag and drop them to the desired location.
Remember: track and clip are not synonymous since tracks can contain multiple clips. Nevertheless, moving each type is easy once you know the proper method.
I’ll turn it over to you now. Do you have any additional tips for moving audio in Audacity?