
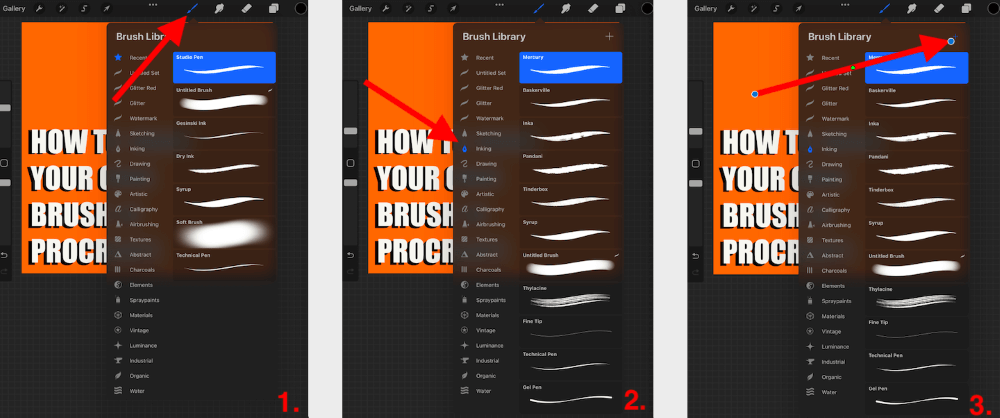
On your canvas, tap on your Brush tool (paintbrush icon). This will open your Brush Library. Select any brush menu that isn’t Recent. In the top right-hand corner, tap on the + symbol. You will now be able to create, edit and save your own Procreate brush.
I’m Carolyn and I’ve been using Procreate to run my own digital illustration business for over three years so I have created a brush or two in my day. Procreate comes with a huge selection of preloaded brushes as well as this awesome function to create your own.
This unique feature of the Procreate app allows its users to get in-depth, hands-on knowledge of all the Brush Library has to offer. You could spend weeks exploring the different options and creating different brushes so today I’m going to show you how.
Table of Contents
Key Takeaways
- Creating your own brush in Procreate is easy to do.
- Choosing from the hundreds of options for your new brush is time-consuming.
- You can create as many new brushes as you like and edit or delete any brush you make very easily.
- Creating a new brush set to store your new brushes is quick and easy.
How to Make Your Own Brush in Procreate – Step by Step
It’s easy to create your own brush but because of the limitless options Procreate has to offer, it’s best to have a clear idea of what style of brush you are trying to create before you start experimenting. Here’s how:
Step 1: In your canvas, open your Brush tool. This is a paintbrush icon located on the top banner of your canvas. This will open your Brush Library.
Step 2: Select any brush at all except for the Recent option.
Step 3: Tap on the + symbol in the top right-hand corner of your Brush Library.
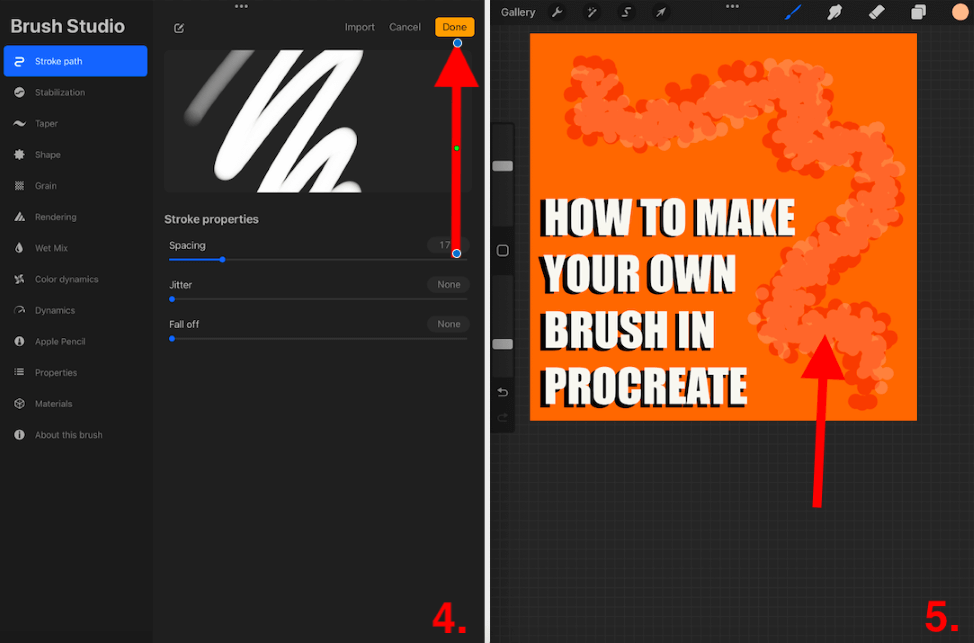
Step 4: This will open your Brush Studio. Here you will have the option to edit and change any aspect of a brush in order to manipulate it into the brush you want. Once you are happy with your selection, tap Done.
Step 5: Your new brush is now active and you can use it to draw on your canvas.
Procreate Brush Studio Options
You will be able to play around with every setting that creates a brush style. Below I have listed some of the main ones and briefly explained what they are and how they will affect your new brush.
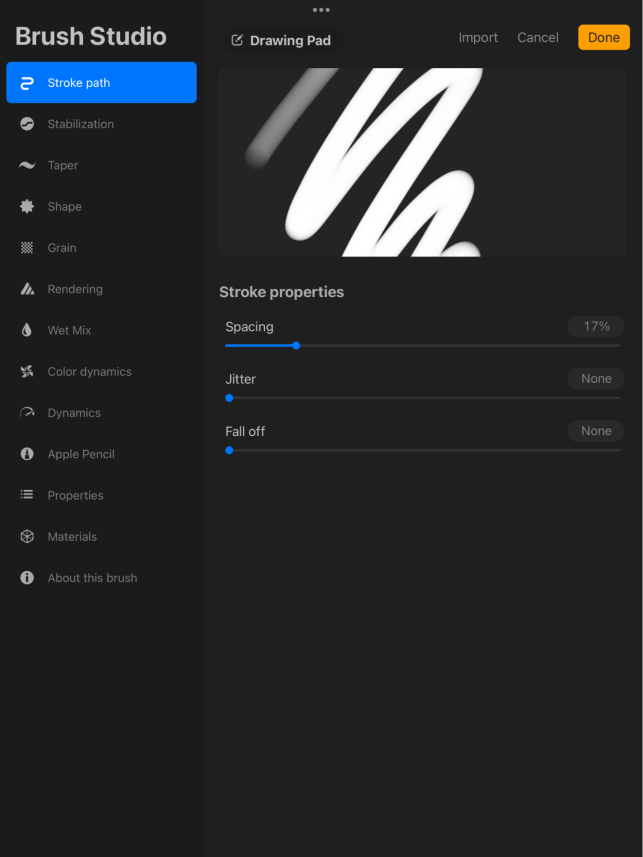
Stroke Path
Your Stroke Path determines the points at which your finger connects to the screen canvas to the pressure of your brush. You will be able to change the spacing, jitter, and fall-off of your Stroke Path.
Stabilization
I find this to be the most technical of the Brush Studio settings so I tend to avoid this one in the fear of ruining my brush. I find that the generic setting usually works best in most cases.
Taper
The taper of your brush will determine how the brush reacts at the start and end of a stroke. You can change a multitude of its options like the size of the taper to the amount of pressure it requires to function.
Grain
This is essentially the pattern of your brush. You will be able to change a very large selection of aspects of grain from the grain behavior to the depth to the movement of it.
Color Dynamics
This determines how your brush will perform using the color you have selected for it. You are able to change and manipulate the stroke color jitter, pressure, and color tilt.
Apple Pencil
This setting allows you to change how the Apple Pencil performs using your brush. You can adapt the opacity, bleed, flow, and many more different settings of your brush.
Shape
This is a really cool setting because you can literally change the shape of the stamp your brush leaves behind. You can do this by manually adjusting the pressure roundness, scatter and shape source of your brush.
How to Make Your Own Brush Set in Procreate
You may want to create an entirely new set of custom brushes, or you’re super organized and want to have your new brushes stored in a neatly labeled folder within the app. This is easy peasy and I’m going to show you how.
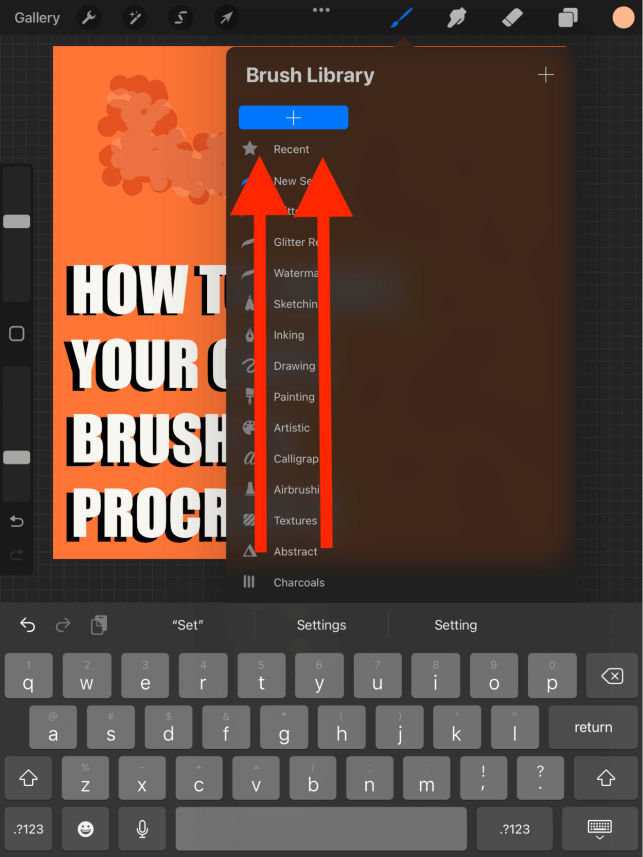
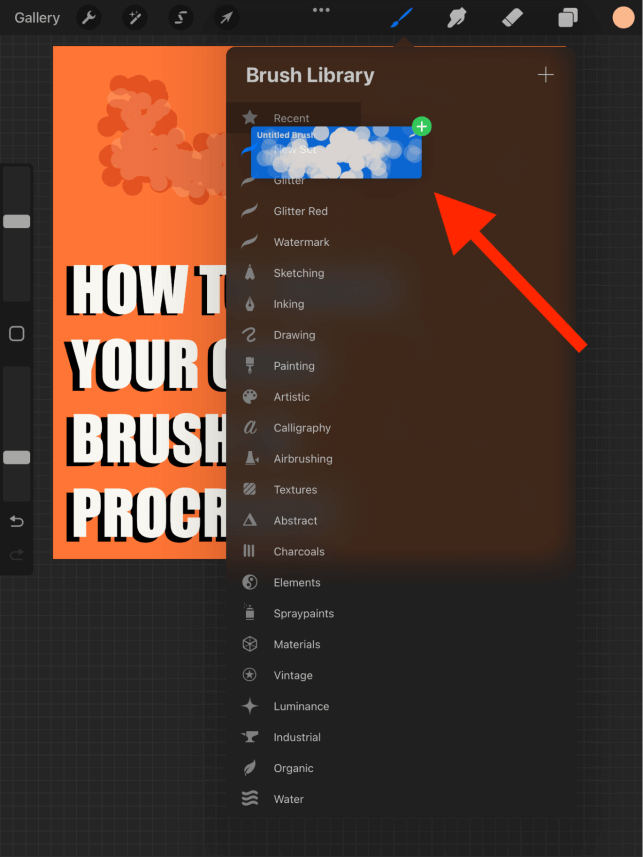
All you have to do is drag your Brush Library down using your finger or stylus. A blue box with a + symbol will appear on the top of your drop-down menu. Tap on this and it will create a new untitled folder that you can label and rename to store your brushes.
To move a brush into this new folder, simply hold down on your brush and hover it over the new folder until it blinks. Once it blinks and you see a green + symbol appear, release your hold and it will automatically be moved to its new destination.
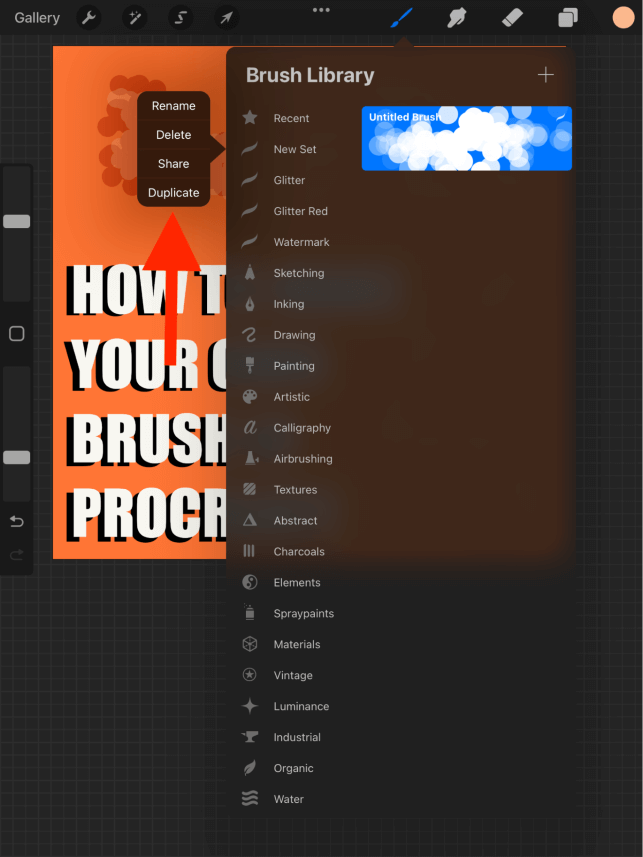
To delete a set, tap on its title and you will have the option to rename, delete, share or duplicate it.
How to Undo or Delete a Brush You Have Made
Like many other things in Procreate, you can easily undo, edit or delete the brush you create almost quicker than you created it.
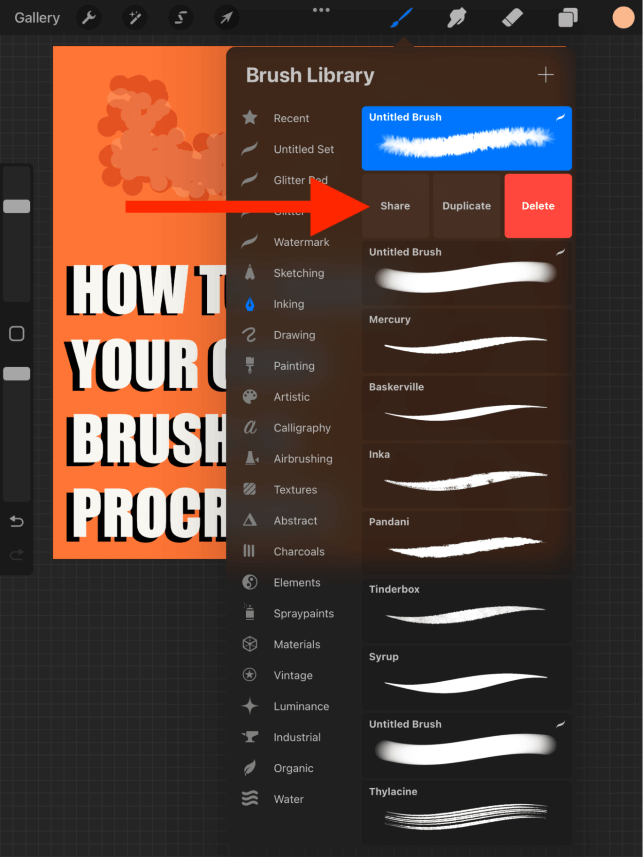
- By sliding left on your brush, you can Share, Duplicate or Delete your brush from your library.
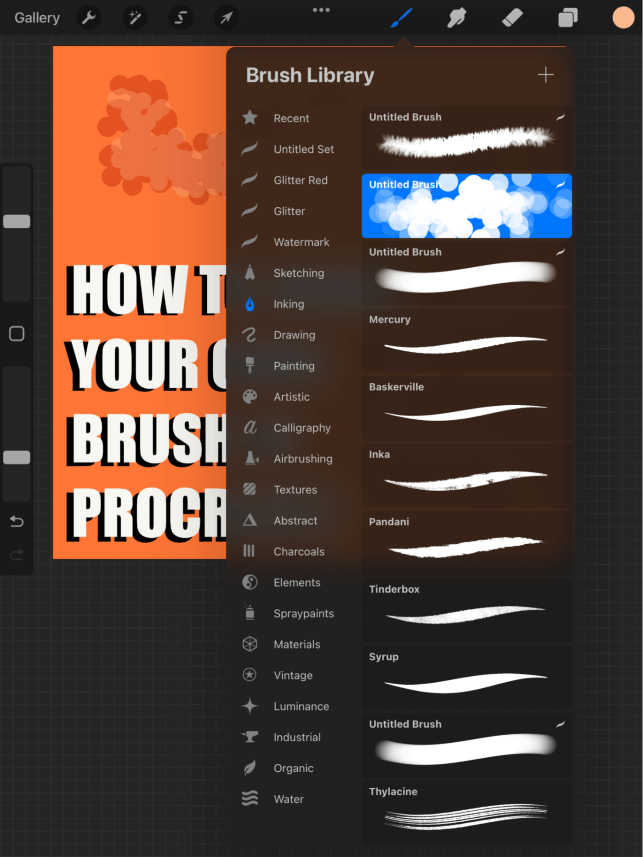
- By tapping on your brush, you can activate your Brush Studio and make any changes you like to your new brush.
If you don’t have any ideas about what brush to make, you can browse through the internet to get some ideas, here’s a selection of brushes that Procreate users have designed themselves and are now selling online.
FAQs
Below is a selection of frequently asked questions. I have briefly answered them for you:
How to make a brush in Procreate Pocket?
Yes, you can follow the same steps above to create a new brush in the Procreate Pocket app. However, instead of the + symbol, at the top of your Brush Library, you will see the option New Brush. You can tap on this to start creating your own brush.
How to make a pattern brush in Procreate?
You can create your own pattern brush in Procreate by adjusting the shape, grain, and dynamics of your new brush in your Brush Studio.
Conclusion
This is a really unique and awesome feature of the Procreate app that gives the user complete control in creating custom brushes within the app. That’s pretty incredible to me. But with great power comes great responsibility and this is by no means an easy thing to create.
I recommend dedicating a solid chunk of time to studying, researching, and experimenting with this feature to get the most out of it. I have personally invested hours into this feature and I find it quite enjoyable and satisfying to see all of the effects you can create on your own.
Do you create your own Procreate brushes? Share your wisdom in the comments below.