
To make rolling credits in Adobe Premiere Pro, first, type your credits into the “Sequence” timeline, navigate to the “Essential Graphics” panel, and check the roll box to activate the effect.
I’m David, a video editor. I have been editing for the past ten years using Adobe Premiere Pro. I fell in love with this software; it’s my hobby.
In this article, I will explain what a rolling credit is, how to create it in Adobe Premiere Pro, and how to slow it down.
Table of Contents
What is a Rolling Credit in Video Editing/Production?
Most of you stand up from a cinema immediately after a movie finishes. Why? At least wait and see the end credits, too; try and know the people who put-in effort into the movie’s success!
Rolling credits give kudos to all the people involved in the video production. So, Rolling credits are texts that scroll up or down the screen in a film or video production. It’s always at the end of a movie.
This ensures that everyone who worked hard to make the video possible is recognized for their efforts and can also be used to thank sponsors or supporters. It also allows viewers to learn more about the production team and the people who worked on the project.
How to Create a Rolling Credit in Adobe Premiere Pro
How do we create our rolling credit in Premiere Pro? The Essential Graphics panel is our best bet – It enables rolling credits, which helps us make the rolling credit. Go to Window > Essential Graphics to open a new panel on your screen if it isn’t already open.
Now navigate downward to create text.
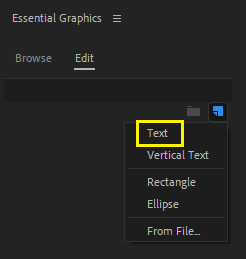
Write your credits, i.e., the names of those you want to credit. as many as you want. List them all.
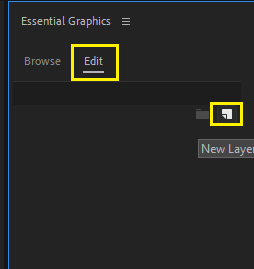
Click the Edit tab in the Essential Graphics panel to edit all that you want to edit, like font type, font size, font alignments (center, right, etc.), and change color if necessary.
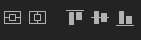
Note that rolling credits often align at the center of the playback screen. As a result, make sure your texts are centered.
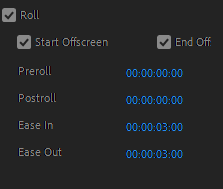
You will notice a section in the essential panel where all your texts are displayed. Now, click out of your text box into the empty space of the essential graphics panel. Then, in the essential graphics panel under the responsive design, scroll down and check the Roll box to enable rolling credits.
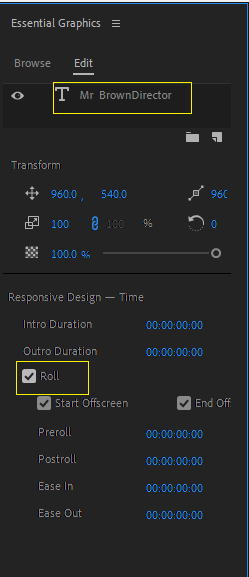
Then, check the start and end offscreen. Set the ease in and out to 3 seconds, and the rolling credits will slowly roll in. You can then play your video to see the rolling credits!
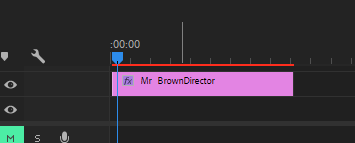
One thing about this rolling credit is that the shorter the rolling credit layer in the sequence timeline is, the faster the rolling credit will be, and the longer the layer is, the slower the rolling credit will be.
You can even export this as a motion graphics template for future use. To do this, just right-click on the text layer in the timeline and select export as a motion graphics template.
How to Slow Down the Speed of A Rolling Credit in Adobe Premiere
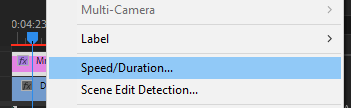
Select the graphics in your Premiere Pro timeline. Right-click on it and select Speed/Duration from the menu. Enter a new duration for the clip in the Duration field, and press OK. The speed of the rolling credits will now be slower.
Making the text layer long is another way to slow down rolling credit, which will make the roll slow down.
Conclusion
Creating a rolling credits sequence in Adobe Premiere Pro is a great way to give your video extra polish. With a few simple steps and creativity, you can create a professional-looking sequence that keeps your audience engaged until the end.
With the proper techniques, you can create a stunning credit sequence that will showcase your talents and provide the perfect finish to any video.
To do the rolling credit, type in your desired text or credits, navigate to the essential graphics panel and check the roll effect.
If you’re having trouble creating this rolling credit effectively, leave your message in the comment section.