
Do you feel like you’re the only person who still doesn’t know what a Clipping Mask is or how to use them? Not for long. Making clipping masks in Adobe Illustrator takes but seconds.
My name is Elianna. I have a Bachelor of Fine Arts in Illustration and I’m using Adobe Illustrator for over six years. One of the first things I learned how to do in Illustrator was use the Pen tool and how to make a Clipping Mask.
In this post, I will teach you what a clipping mask is, and how to make, edit, and release them in Adobe Illustrator for desktop and iPad. I will also teach you keyboard shortcuts so you can design more, and stress less.
Let’s get into it!
Table of Contents
Key Takeaways
- The keyboard shortcut to create a clipping mask is Ctrl/Command + 7
- The keyboard shortcut to release a clipping mask is Alt/Option + Ctrl/Command + 7
- Click on the Object icon in the Illustrator for iPad taskbar to Create and Release clipping masks.
What is a Clipping Mask in Adobe Illustrator
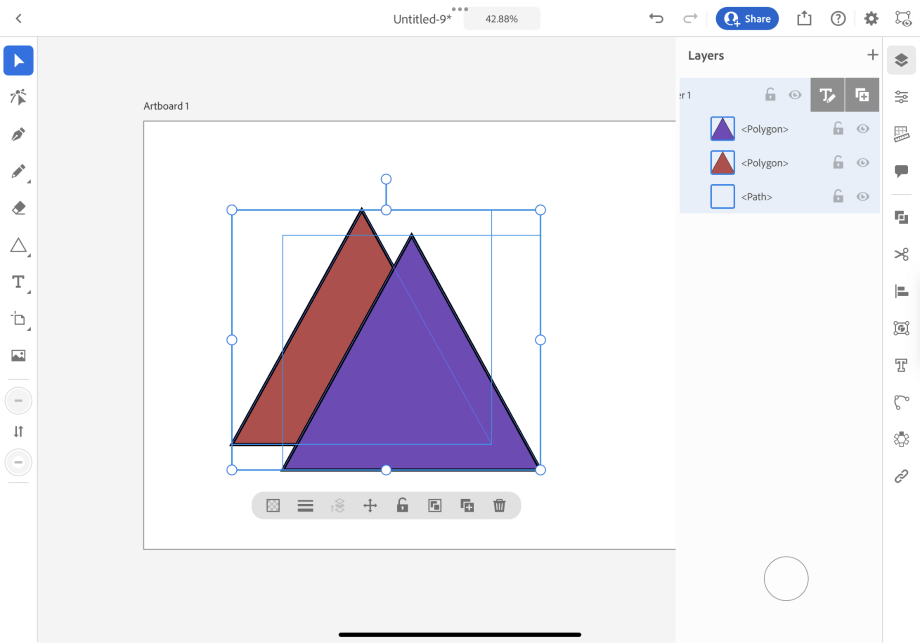
In a Clipping Mask, artwork(s), and objects are masked, or “clipped” to the shape/silhouette of another object/shape. The name for a clipping mask and the objects it contains is a Clipping Set. In the Layers panel, it is called a Clipping Group.
In Illustrator, only vector objects can create clipping masks, but any type of object/artwork can be masked. The vector object that creates a clipping mask is called a Clipping Path. Clipping Paths must be above other objects in the stacking order to work.
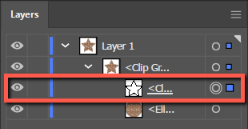
Clipping masks can also apply to groups, layers, or individual artworks and shapes. In the Layers Panel, clipping masks contain all objects as sublayers, or Paths, under the clipping group.
How to Create a Clipping Mask in Illustrator
Making a Clipping Mask in Illustrator is easy and takes less than 5 clicks. Here’s how to do it.
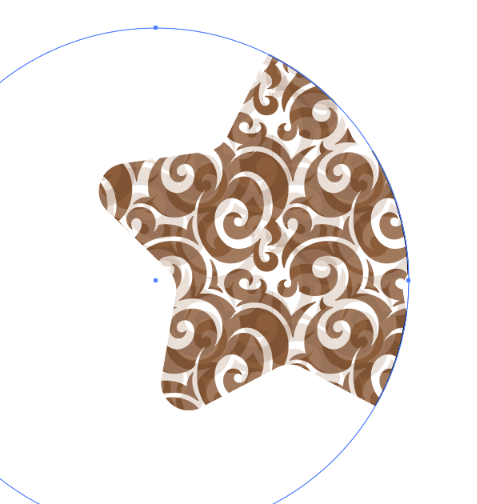
Step 1: Select, or create the vector object you would like to use as the Clipping Path. Position it on top of the objects that you would like to mask.
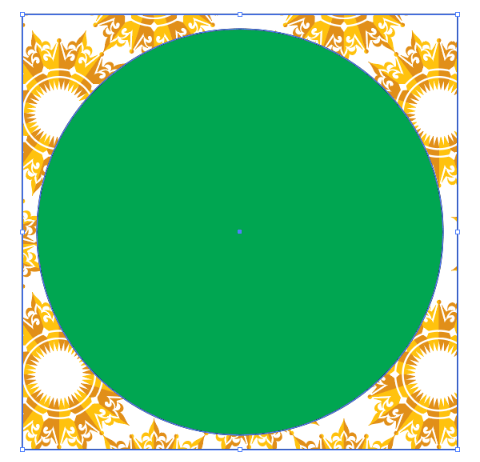
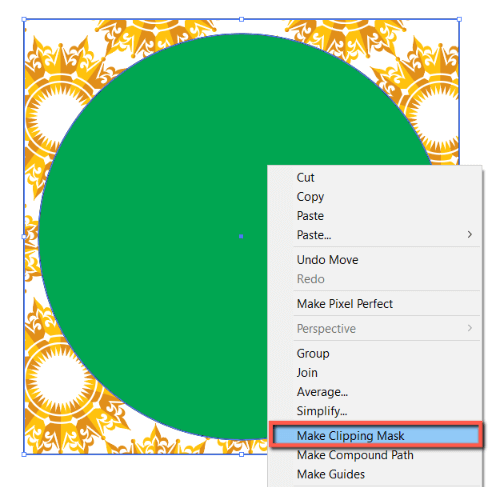
Step 2: Select both objects, right-click, and select Make Clipping Mask, or use the keyboard shortcut Ctrl/Command + 7.
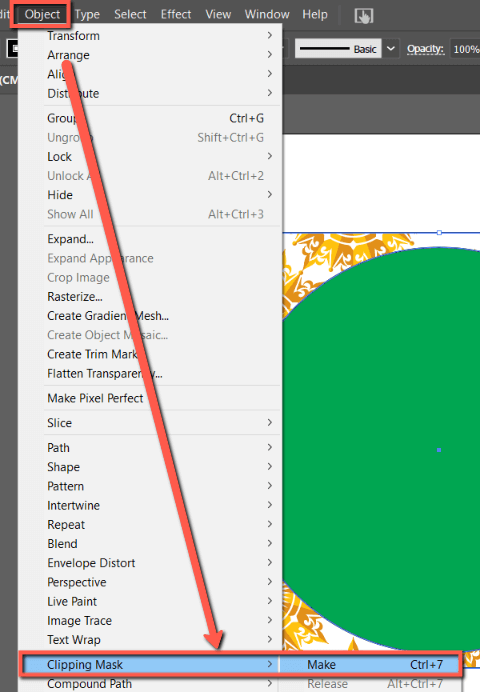
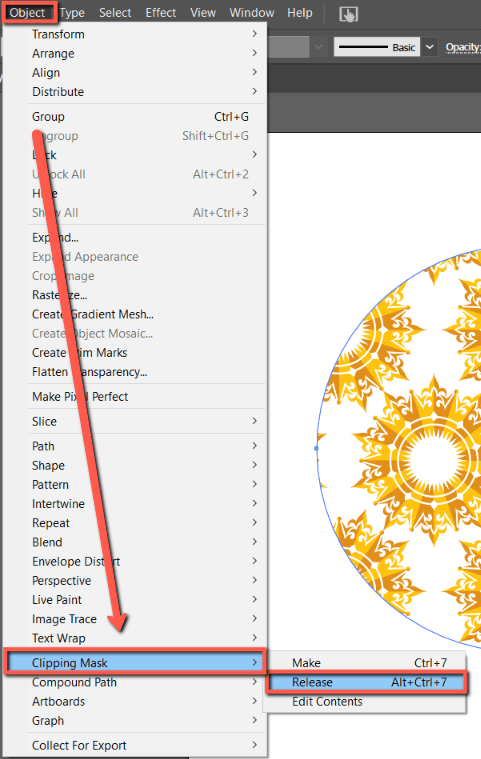
Alternatively, you can go to the overhead menu and choose Object > Clipping Mask > Make.
Your mask will appear immediately.

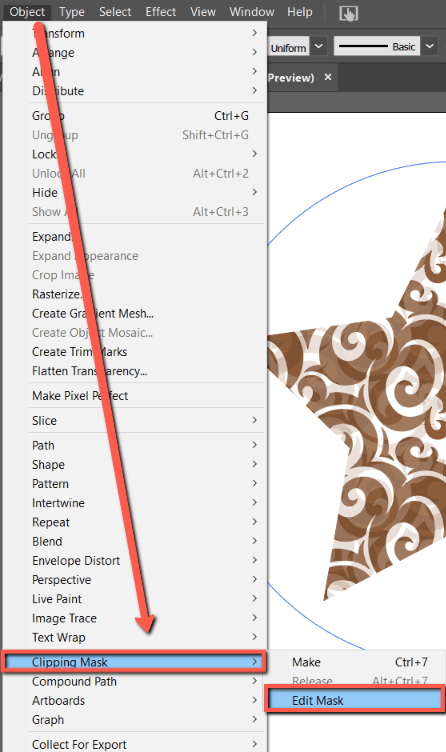
How to Edit a Clipping Mask in Illustrator
If you create a clipping mask and are unsatisfied with the result, or would like to edit it, you can do so easily within the Layers panel, or with Object > Clipping Mask > Edit Mask.
Select your clipping mask by selecting and targeting the clipping path in the Layers Panel.
Or go to the overhead menu Object > Clipping Mask > Edit Mask.
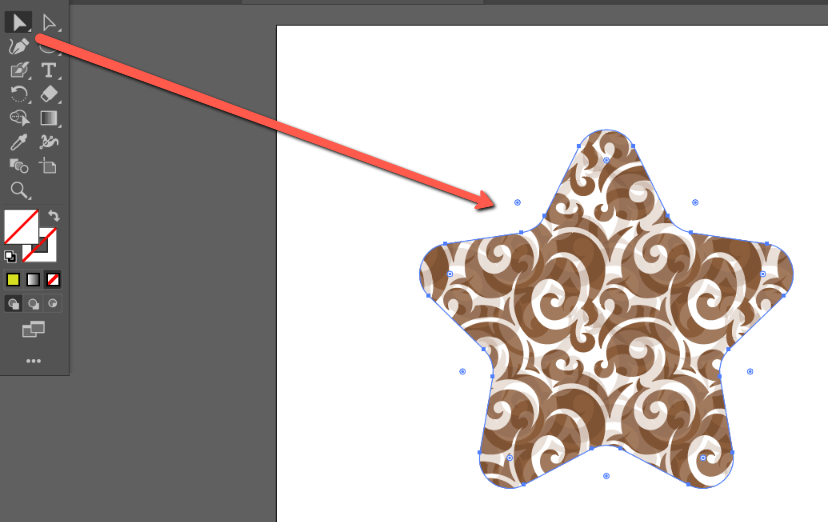
Another way to edit the shape of your clipping mask is to use the Direct Selection Tool.
How to Edit Paths Within a Clipping Set
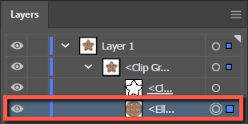
You can also edit the individual Paths, or objects, that exist within your clipping set/group. Here’s how to do it.
Step 1: In the Layers Panel, target the Path you would like to edit. If you do not see your Paths, click on the arrow in the layer that your clipping mask is in to reveal sublayers. You can target a path by clicking on the o (target) icon.
Alternatively, you can use the Direct Selection Tool to click on your path in the artboard.
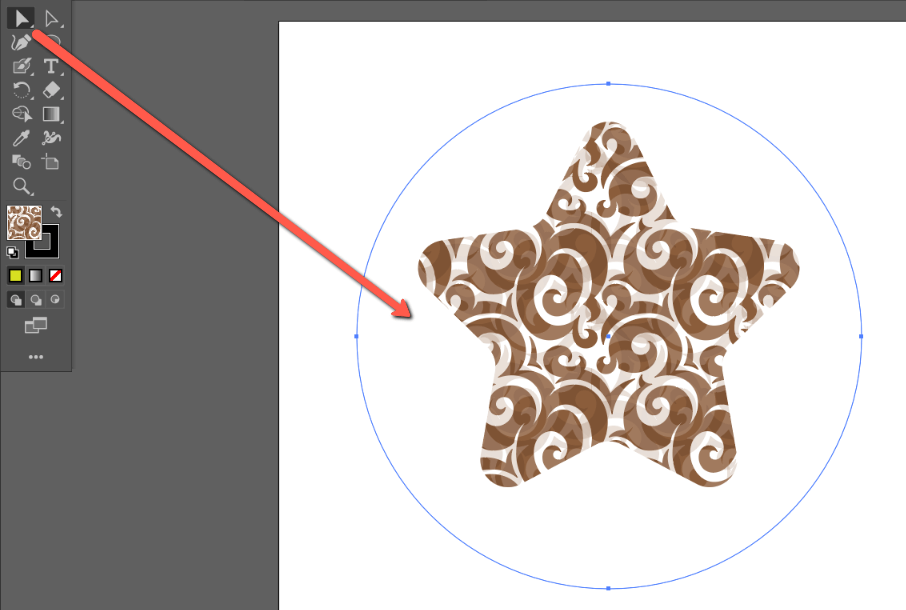
Step 2: Reposition, resize, and modify your path as desired.
How to Release Clipping Masks in Illustrator
Releasing clipping masks will free or reveal the artworks and objects that were masked under them. Here’s how to do it:
Right-click on your clipping group and select Release Mask.
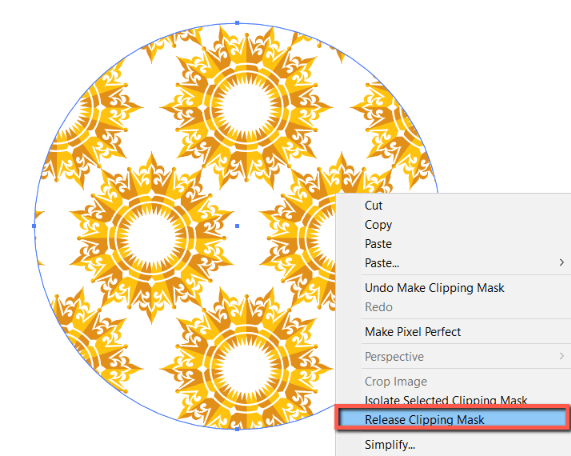
Or go to the overhead menu Object > Clipping Mask > Release.
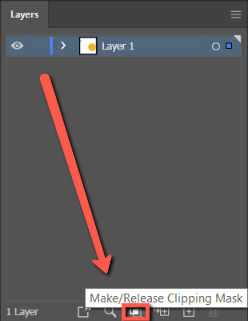
You can also click the Make/Release Clipping Mask icon in the Layers panel.
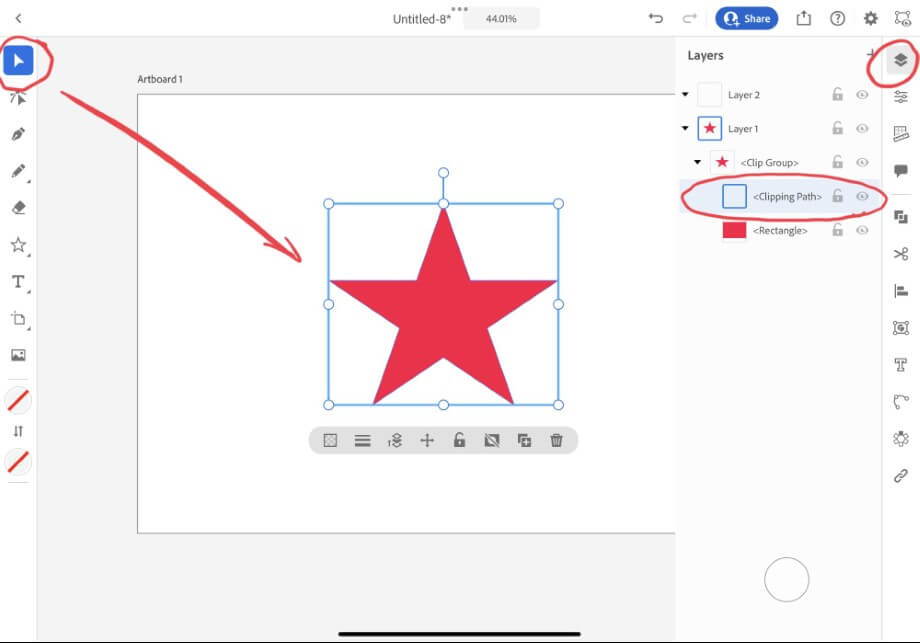
How to Create a Clipping Mask in Illustrator for iPad
You can also create clipping masks in the Illustrator app for iPad. Here’s how to do it:
Step 1: Select the objects you would like to mask.
Step 2: Click on the Object icon and select Make clipping mask.

How to Edit a Clipping Mask in Illustrator for iPad
Select your clipping path in the layers menu. Modify as desired with the Direct Selection Tool.
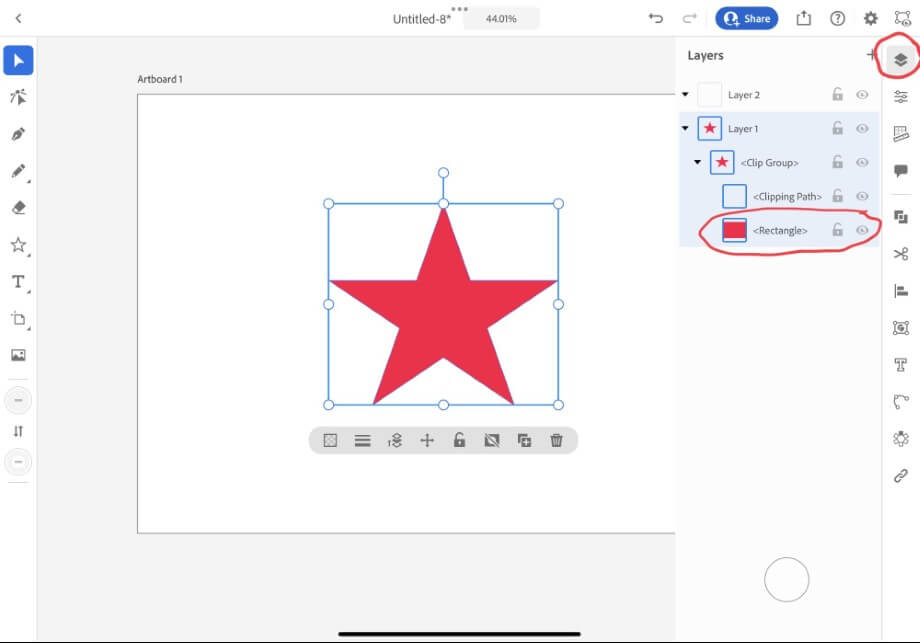
How to Edit Paths Within a Clipping Set in Illustrator for iPad
Select your path in the layers menu. Modify as desired.
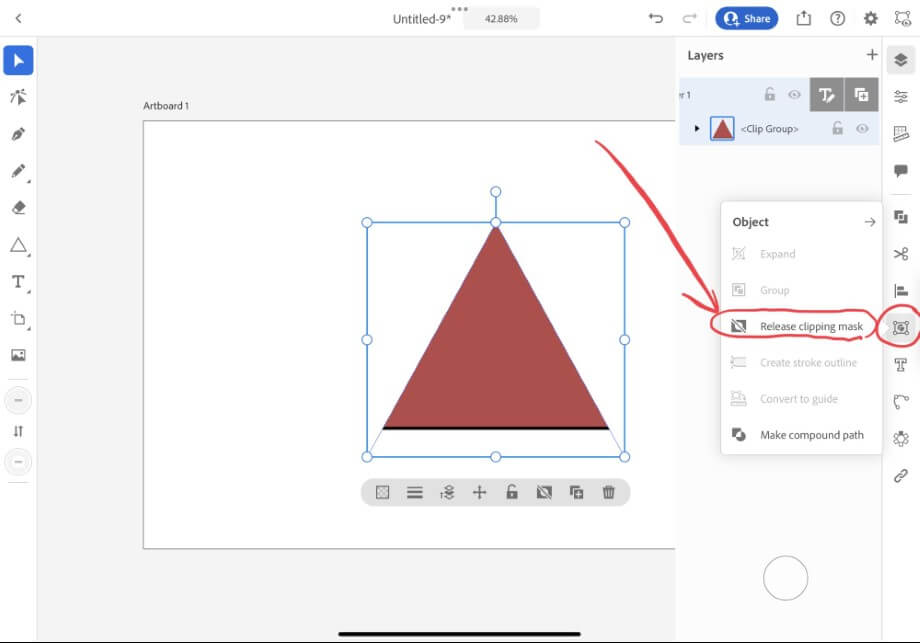
How to Release Clipping Masks in Illustrator for iPad
Step 1: Select the clipping group in the Layers Panel, or click on it with the Selection Tool.

Step 2: Click on the Object icon and select Release Clipping Mask.
FAQs
Here are answers to common questions related to clipping masks in Adobe Illustrator.
Why can’t I make a clipping mask in Adobe Illustrator?
You may not be able to make a clipping mask if the object you are using as the Clipping Path is not a vector object. Furthermore, if the objects you are trying to use for your clipping group are on locked layers, you will not be able to make a clipping mask.
What is the difference between clipping masks and crop in Illustrator?
Crop permanently deletes parts of your artboard/artwork, while clipping masks are a non-destructive edit that can be released later.
How many layers do you need to create a clipping mask?
You need at least 2 layers to create a clipping mask.
Final Thoughts
The ability to create clipping masks will help push your designs to the next level. With keyboard shortcuts and helpful icons such as Ctrl + 7 and Alt/Option + Ctrl/Command + 7, masking is a breeze. Just remember that you can only use vector objects as a Clipping Path and that you need more than two objects to mask.
How did your clipping mask turn out? Tell me in the comments below!