
Making your very own GIF in Photoshop is easier than you think! Animated GIFs are everywhere today, and it’s not a bad skill to pick up if you’ve got a few minutes. Creating your own GIF can be useful in marketing, design, social media… or just for making a great meme.
I’m Skyler, and I’ve been using Photoshop on a personal and professional level for well over a decade. I’ve primarily used GIF creation in testing frame-by-frame animations, or time-lapse photography. For this example, I’ll be taking a short expression trial for a character and showing you how to turn that into a GIF!
I’ll also include some tips for taking your GIF creation to the next level and link you to a tutorial that expands on the animation tool in Photoshop. Armed with these skills, you can easily start creating a great portfolio for graphic or web design, animation, and more!
Table of Contents
Quick Steps Explained
Step 1: Begin by opening your images in Photoshop through File > Scripts > Load Files into Stack.
Step 2: Once this is done, follow the same File > Scripts command to instead select Browse. Choose the Images you desire and click OK to load them into individual layers.
Alternatively, if you’re drawing your layers in Photoshop you can create each frame of the GIF by selecting Layer > New >Layer, repeating until you’ve got the desired number of frames.
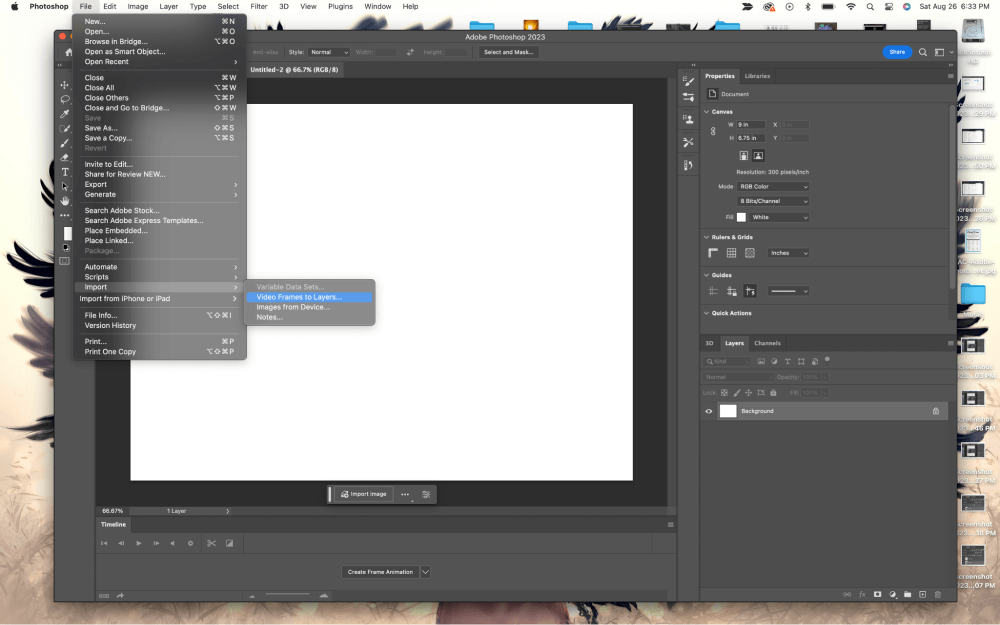
In addition, you can choose to animate a short video by selecting File > Import > Video Frames to Layers.
Step 3: Open up the Timeline panel by going to Windows > Timeline. Here you’ll see a dropdown menu in the center panel where you can switch to Frame by Frame Animation or Video Timeline creation.
Step 4: Next, we simply navigate to the upper right button in the timeline panel and select Make Frames From Layers. This converts all your layers into individual frames.
Once we’ve converted our frames we can preview using the Spacebar and set the animation to loop from the bottom left dropdown in the Timeline panel.
If interested, you can also adjust the individual frame rate by clicking the arrow directly below each frame and entering your desired length.
Step 5: To export your GIF find File > Export > Save for Web, and a window will pop up where you can name your file appropriately. After clicking through the prompts, your GIF is done!
Now that you get an idea of the basic steps, I’m going to explain in more detail.
Step 1: Uploading your Images into Photoshop
There are a few ways to do this, depending on your source files! We can make an animated GIF from a video, by uploading photos, or by creating new layers from scratch.
Option 1: Uploading from a Video
To create a GIF using a video file, you simply need to navigate to File > Import > Video Frames to Layers. Now keep in mind that Photoshop may not be able to upload your video file if it’s too long, so you may have to trim your video to a more appropriate length prior to uploading.
Option 2: Uploading from Photos
To create a GIF using images or photos, we’d instead go to File > Scripts > Load Files into Stack. Once this is done, follow the same File > Scripts command to instead select Browse. Choose the Images you desire and click OK to load them into individual layers.

Option 3: Uploading New Layers from Scratch
To create a GIF using new layers from scratch, you can create each frame and edit them however you desire. You can accomplish this by selecting Layer > New > Layer, repeating until you’ve got the desired number of frames.
Step 2: Open Up the Timeline Panel
The Timeline panel is where you’ll be doing most of your editing. You can find it by going to Windows and selecting Timeline. A panel will then pop up at the bottom of your screen with your source files.
You’ll also see a dropdown menu in the center where you can switch to Frame by Frame Animation or Video Timeline creation.
In our case, we’re going to go ahead and select Frame by Frame Animation from the dropdown before we begin to convert our layers!
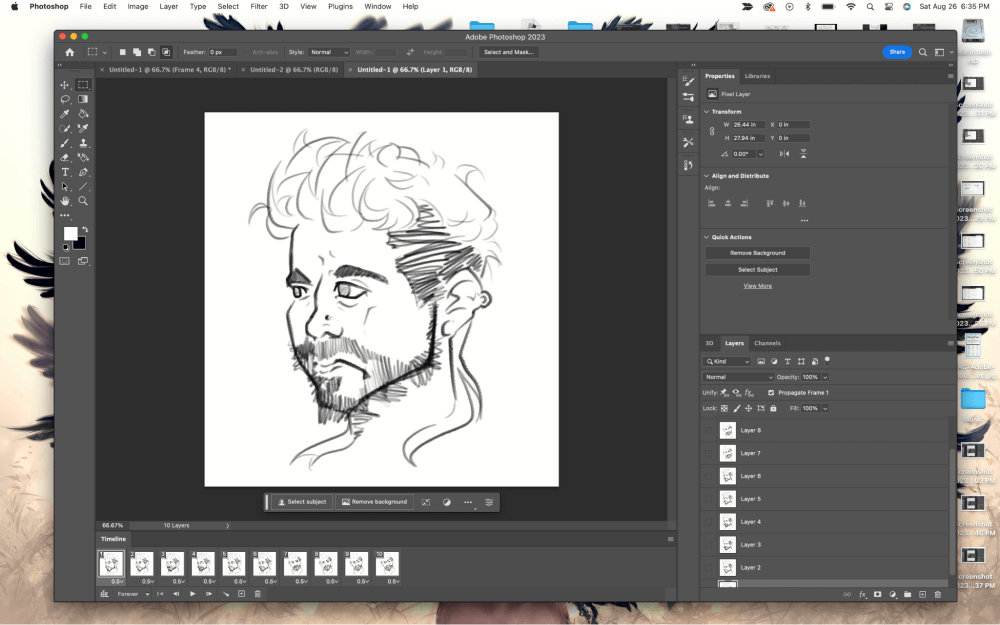
Step 3: Convert to Frame by Frame Layers
Next, we simply navigate to the upper right button in the timeline panel and select Make Frames From Layers. This will convert all your layers into individual frames.
Once we’ve converted our frames we can preview using the spacebar and set the animation to loop from the bottom left dropdown in the Timeline panel.
You can also adjust the individual frame rate by clicking the arrow directly below each frame and entering your desired length. When initially uploading Photoshop sets all frame lengths to 0, so if you want to slow it down or change the pace of certain frames this is where you’ll do that!
Step 4: Export your Animated GIF
Alright! We’re nearly done with your GIF. All we need to do now is export your GIF using File > Export > Save for Web.
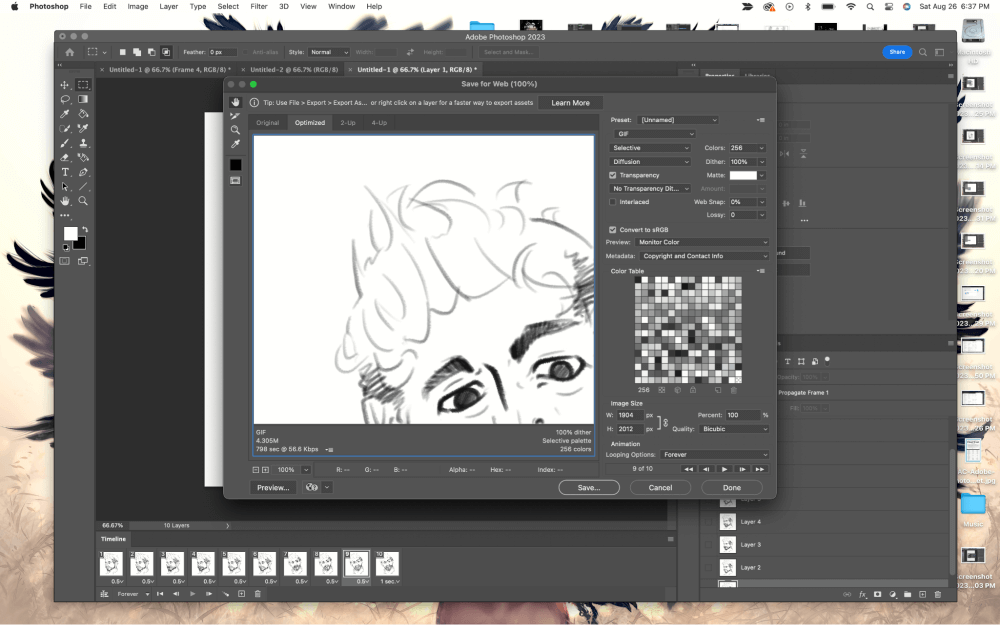
One final window will pop up where you can name your file appropriately. After clicking through the prompts, your GIF is done! Congratulations.

Pro Tip: Take It a Step Further!
Think you’re ready to take things a step further? The animation tool is a powerful skill and creating a GIF from video, photos, or scratch is a fantastic intro into how the tool works.
If this was something you enjoyed learning, and you’re eager to find out where or what you can do with this new skillset going forward – check out this tutorial! Don’t be afraid to mess around with the tool on your own now that you’ve got the basics.
Conclusion
Job well done! The animation tool is a favorite of mine, and the GIF creation we’ve done today can make the transition into animating in Photoshop much easier. These skills can greatly aid you in your creative career path – and I’m excited to talk more about animation and Photoshop with you in the future!